
Subscribe to Our Youtube Channel
Related Manuals for Xcruiser XDSR200HD


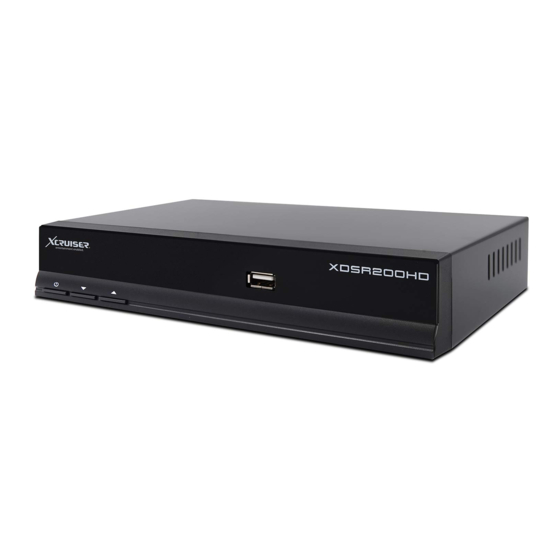
Summary of Contents for Xcruiser XDSR200HD
- Page 1 User’s Manual XDSR200HD Full HD Digital Satellite Receiver Please read this User’s Manual carefully before installing the receiver.
-
Page 3: Table Of Contents
XDSR200HD INDEX ................2 Guide of Menus ..............17 Channel Search and Setting ........17 Precautions ...............3 LNB Power ..............18 22KHz ..............18 Notice ................5 Copyright ..............5 DiSEqC1.0 or DiSEqC1.1 ........18 Disclaimer ..............5 1.1 Scan ...............19 Trademarks ...............5 1.2 OSD Language ............19 1.3 Restore Factory Default ........20 Features ................6... - Page 4 Use only with the cart, stand, heat registers, stoves, or other apparatus, the apparatus has been exposed to rain or moisture, does by Xcruiser®, or sold with the that produce heat. not operate normally, or has been apparatus. When a cart is used, ...
-
Page 5: Notice
HDMI Licensing LLC time of this manual’s production. be placed on the apparatus. Xcruiser® constantly updates it with 3. Copyright new functions and technology. This manual is protected by copyright laws. -
Page 6: Features
XDSR200HD Main Features Fully compliant with DVB-S2 standard Full HD output in 720p, 1080i, 1080p HDCP protection. Less than 1 Watt in standby Multi-lingual OSD and user-friendly UI Parental Control, Teletext, EPG supported ... -
Page 7: Accessories
XDSR200HD 6. Accessories User’s Manual Remote Controller RCA Cable AAA size batteries X2 AC/DC Adapter HDMI Cable USB WiFi Dongle NOTE: If any accessories listed above are missing, contact the sales representative where you purchased this unit. -
Page 8: Hardware Description
XDSR200HD 1. POWER Button: 3. Remote Sensor Press to switch between STANDBY and POWER ON Receives signal from remote controller. modes. 4. USB : 2. CH Up/Down Button Use it when connecting to external USB storage Press to change services in normal mode, to move device. - Page 9 XDSR200HD US B RS-232 LNB IN LOOP COAXIA L AUDI O DC 12V 1. RS-232 5. HDMI : Connects to the TV by using a HDMI cable for the transfer. best quality picture and audio. 2. LNB IN: Use to connect a satellite antenna.
-
Page 10: Remote Control Unit
XDSR200HD Remote Control Unit 1. POWER: To switch the status or various program receiver ON from information of current STANDBY or vice versa. service. 2. SUBTITLE: Press to display 11. OK: To select menu option to updated on entry. Subtitle. - Page 11 XDSR200HD 19. SF: To start Slow Forward 28. (ZOOM): Select zoom from x1 function to x16. 20. SLEEP: To bring the receiver to 29. NUMERIC KEYS: To select sleep mode. channels or enter programming parameters 21. RECALL: Return to the previous menu or status 30.
-
Page 12: Connecting Diagram
XDSR200HD 1. Receiver to A/C power Connect the A/C power cord between A/C power cord socket of receiver and A/C outlet. US B RS-232 LNB IN LOOP COAXIA L AUDI O DC 12V A/C POWER ADAPTER... -
Page 13: Receiver To Tv With Digital A/V Output
XDSR200HD 2. Receiver to TV with Digital A/V Output Connect the HDMI Cable to the HDMI Connector of the TV. HDMI CABLE US B RS-232 LNB IN LOOP COAXIA L AUDI O DC 12V NOTE: Depending on the A/V equipment you own, there are various ways you playback of HD content, we recommend that you connect your high can connect the STB. -
Page 14: Connecting To Antenna Cable
XDSR200HD 3. Connecting to Antenna Cable 4. Receiver to TV with Analog A/V Output Connect the VIDEO and AUDIO L, R to VIDEO IN and Using Single DISH: Connect the Satellite AUDIO L, R IN of TV. Antenna cable to LNB IN. - Page 15 XDSR200HD Using DiSEqC switch: Connect the cable of Using DiSEqC motor: Connect the cable of DiSEqC switch to LNB IN. DiSEqC motor to LNB IN. DISH #1 DISH #2 DISH #3 DISH #4 SATELLITE DISH WITH H-H MOTOR...
-
Page 16: Connecting To Personal Computer (Pc)
XDSR200HD 5. Connecting Receiver to Desktop Computer (PC) You can connect your satellite receiver to computer using RS-232 cable (not included) to update software. DESKTOP COMPUTER US B LNB IN RS-232 LOOP COAXIA L AUDI O DC 12V... -
Page 17: Guide Of Menus
XDSR200HD 1. Channel Search and Setting Figure 1 Figure 2 At this time, please choose Installation - Press [MENU] key when receiver starts up, Antenna Setting and press [OK] key into the it will appear main menu screen, such as antenna setting page, such as Figure 2. -
Page 18: A: Lnb Power
XDSR200HD Figure 3 Figure 4 A: LNB Power C: DiSEqC1.0 or DiSEqC1.1 You can set according to the requirement of open If you connect antenna to DiSEqC switch, you LNB power. need to specify the DiSEqC inputs to your selected... -
Page 19: Scan
XDSR200HD Figure 5 Figure 6 1.1 Scan 1.2 OSD language Then please choose the parameter that you want, There are many languages for users to set the OSD in the “Satellite List” by pressing the blue key, next, language, such as English, French, so please enter choose the type of search. -
Page 20: Restore Factory Default
XDSR200HD Figure 7 Figure 8 1.3 Restore Factory Default 1.4 Channel edit When necessary, you can choose “Factory Reset” to If you want to edit the channel, please switch to recover the original factory status. Such as Figure 7 this page, as shown in Figure 8. -
Page 21: Apps
XDSR200HD Figure 9 1.5 Apps When you enter “Apps” menu you can select Weather, YouTube and so on, as shown in Figure 9. -
Page 22: Troubleshooting
XDSR200HD Problem Solution Does not work any button on Check the main power cable and check that it is plugged into a suitable power the front panel. outlet. No Picture See ‘Does not display any message on the front panel’... - Page 23 XDSR200HD Front Panel DVB-S2 LNB Input/Demodulation POWER, CH+, CH- Input Frequency 950 MHz ~ 2150 MHz Indicator LED Indicator for Power ON/OFF Signal Input Level -65 dBm ~ -25dBm Remote Control Input Infra-red receiver Input Impedance 75Ω Connector 1 x USB2.0 interface...
- Page 24 All rights reserved. © Xcruiser® 2019.
Need help?
Do you have a question about the XDSR200HD and is the answer not in the manual?
Questions and answers
how to open remote