Harvia Legend 150 Instructions For Installation And Use Manual
Hide thumbs
Also See for Legend 150:
- Instructions for installation and use manual (100 pages) ,
- Instructions for installation and use manual (20 pages) ,
- Instructions for installation and use manual (21 pages)
Table of Contents
Advertisement
Advertisement
Table of Contents

Related Manuals for Harvia Legend 150


Summary of Contents for Harvia Legend 150
-
Page 1: Harvia Legend
150 SL, 240 SL, 240 Duo, 300 Duo Instructions for Installation and Use of Woodburning Stove Anleitung für Montage und Gebrauch des holzbeheizten Saunaofens Legend 150 Legend 240 Legend 300 Legend 150 SL Legend 240 SL Legend 240 Duo Legend 300 Duo 22092009... -
Page 3: Table Of Contents
Rauchfang ............14 Chimney ............. 16 4.2.3. Anschluss des Ofens an einen Harvia- 4.2.4. Legend 150 SL, 240 SL ......16 Stahlschornstein ..........16 4.2.5. Legend 240 Duo, 300 Duo ......17 4.2.4. Legend 150 SL, 240 SL ......16 4.3. -
Page 4: Harvia Legend
You can also Wenn Sie wünschen, kann Ihnen Ihr Händler oder visit our website www.harviasauna.com for further Vertreter des Herstellers bei der Auswahl des Ofens details. helfen. Weitere Informationen finden Sie auch auf unserer Website unter www.harvia.de. -
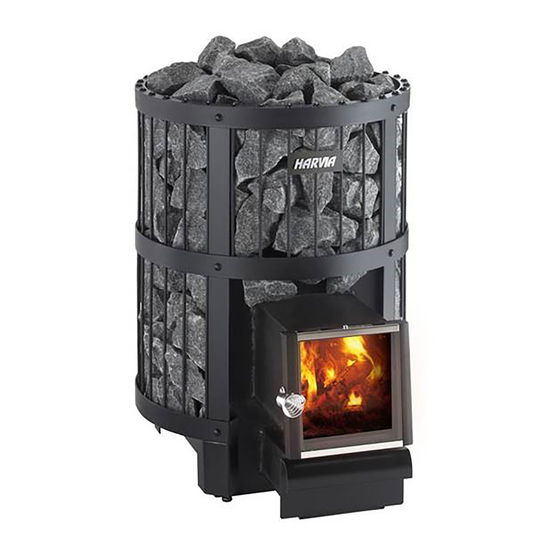
Page 5: Stove Parts (Figure 1)
1.2. Stove Parts (figure 1) 1.2. Ofenteile (Abbildung 1) Steel frame Stahlrahmen Stone grate (only Legend 300) Steinrost (nur Legend 300) Stove body Ofenkorpus Rear connection opening Hintere Anschlussöffnung Upper connection opening Obere Anschlussöffnung Soot opening Rußöffnung Stove door Ofentür Ash box Aschekasten Flange (only Legend 240 Duo/300 Duo) -
Page 6: Instructions For Use
2. INSTRUCTIONS FOR USE 2. BEDIENUNGSANLEITUNG Read the instructions carefully before using Lesen Sie die Anweisungen vor der Inbetrieb- the stove. nahme des Ofens aufmerksam durch. 2.1. Warnings 2.1. Warnungen Staying in the hot sauna for long periods of Ein langer Aufenthalt in einer heißen Sauna •... -
Page 7: Sauna Stones
Do not burn the following materials in the stove: Verbrennen Sie folgende Materialien nicht im Ofen: Burning materials that have a high thermal Brennmaterialien, die einen hohen Wärmewert • • value (such as chipboard, plastic, coal, haben (wie etwa Spanplatten, Plastik, Kohle, brickets, pellets) Briketts, Pellets usw.) Painted or impregnated wood... -
Page 8: Heating The Stove
2.5. Heating the Stove 2.5. Heizen des Ofens Before heating the stove make sure that there Sorgen Sie vor dem Heizen des Ofens dafür, are no unnecessary items in the sauna or dass sich keine unnötigen Gegenstände in der inside the stove's safety distances. Sauna oder innerhalb der Sicherheitsabstände des Ofens befinden. -
Page 9: Stove Maintenance
humus content <12 mg/litre Humusgehalt <12 mg/Liter • • iron content <0.2 mg/litre Eisengehalt <0,2 mg/Liter • • calcium content <100 mg/litre Kalziumgehalt <100 mg/Liter • • manganese content <0.05 mg/litre Mangangehalt <0,05 mg/Liter • • 2.7. Stove Maintenance 2.7. Wartung des Ofens The ash box should always be emptied before Der Aschekasten sollte vor jedem Heizen des •... -
Page 10: Sauna Room
3. SAUNA ROOM 3. SAUNAKABINE 3.1. Effects that Heating the Stove has on 3.1. Folgen des Aufheizens des Ofens in der the Sauna Room Saunakabine Light-coloured floor materials will become dirty from Helle Böden werden durch Asche, Steinpartikel und the ash, particles of stone and metal flakes that fall aus dem Ofen fallende Metallsplitter verunreinigt. -
Page 11: Instructions For Installation
4. INSTRUCTIONS FOR INSTALLATION 4. MONTAGEANLEITUNG 4.1. Before Installation 4.1. Vor der Montage Before installing the stove make sure that all Sorgen Sie vor der Montage des Ofens dafür, safety distance requirements are fulfilled. dass alle Anforderungen bezüglich der Sicher- There shall be no electrical devices, wires or heitsabstände eingehalten werden. -
Page 12: Safety Distances (Figure 8)
4.1.2. Safety Distances (figure 8) 4.1.2 Sicherheitsabstände (Abbildung 8) Incorrect stone placement can cause the Durch eine falsche Stapelung der Steine kön- surrounding structures to heat up to dangerous nen die umgebenden Strukturen sogar außer- temperatures even outside the safety distances. halb der Sicherheitsabstände auf gefährliche Tem- The defined safety distances are valid only when peraturen erhitzt werden. -
Page 13: Legend Protection Supplies
minimum thickness of 1 mm. Mindestdicke von 1 mm bestehen. A double protective cover (figure 9: 2x) can be Eine doppelte Schutzabdeckung (Abbildung 9: • • made of two of the plates mentioned above. 2x) lässt sich aus zwei der oben erwähnten Fixing points must be placed close enough to Platten herstellen. -
Page 14: Installing The Stove
Connecting the stove to a masonry flue via the zusätzliches Zubehör zur Verfügung ( 4.3.). rear connection opening (figure 10) Remove the removable bars (Legend 150: Anschluss des Ofens an einen gemauerten Rauchfang 3 pcs, Legend 240/300: 2 pcs). über die hintere Anschlussöffnung (Abbildung 10) - Page 15 Connecting the stove to a masonry flue via the Anschluss des Ofens an einen gemauerten Rauchfang upper connection opening (figure 11) über die obere Anschlussöffnung (Abbildung 11) You will need an angled smoke pipe (45° or 90°) Für den oberen Anschluss wird ein Winkelrauchrohr for the upper connection.
-
Page 16: Connecting The Stove To A Harvia Steel Chimney
4.2.3. Connecting the Stove to a Harvia Steel 4.2.3. Anschluss des Ofens an einen Harvia-Stahl- Chimney schornstein A CE-marked Harvia steel chimney can be used Zur Abführung der Verbrennungsgase kann ein CE- to remove combustion gases. Its smoke pipes are geprüfter Harvia-Stahlschornstein verwendet wer-... -
Page 17: Legend 240 Duo, 300 Duo
4.2.5. Legend 240 Duo, 300 Duo 4.2.5. Legend 240 Duo, 300 Duo The stove is installed in an opening in a concrete Der Saunaofen wird in einer Öffnung in einer Wand or brick wall. The minimum width of the opening is aus Beton oder Ziegelstein installiert. -
Page 18: Accessories (Figure 14)
4.3. Accessories (figure 14) 4.3. Zubehör (Abbildung 14) Harvia steel chimney WHP1500. 4.2.3. Harvia-Stahlschornstein WHP1500. 4.2.3. Water heater VL22l (pipe model). Installed Warmwasserbehälter VL22l (Schornsteinmo- on the top of the upper connection opening. dell). Montiert oben auf der oberen Anschlus- When a protective sheath or other protection söffnung. -
Page 19: Changing The Opening Direction Of The Stove Door
4.4. Changing the Opening Direction of the 4.4. Änderung der Öffnungsrichtung der Stove Door Ofentür The door to the fire chamber can be installed to open Der Ofentür kann so montiert werden, dass sie ent- either to the right or to the left. See figure 15. weder nach links oder nach rechts zu öffnen ist.
Need help?
Do you have a question about the Legend 150 and is the answer not in the manual?
Questions and answers