Table of Contents
Advertisement
Quick Links
Advertisement
Table of Contents

Related Manuals for StarTech.com Starview SV231USBANGB


Summary of Contents for StarTech.com Starview SV231USBANGB
- Page 1 USB KVM Switch with Audio & Ethernet Hub...
- Page 2 Where they occur these references are for illustrative purposes only and do not represent an endorsement of a product or service by StarTech.com, or an endorsement of the product(s) to which this manual applies by the third-party company in question. Regardless of any direct acknowledgement elsewhere in the body of this document, StarTech.com hereby acknowl-...
-
Page 3: Table Of Contents
Instruction Manual Instruction Manual Table of Contents Introduction ................... 1 Features ..................1 Package Contents ...............1 Hardware Requirements ..............2 Hardware Guide ................3 Installation ..................6 Cable Connection ................7 Port Numbering ................8 Powering Off and Restarting ............8 Hot Plugging ................8 Operation ..................9 Manual Port Switching ..............9 Hotkey Port Switching ..............9 Cycling Through the Ports ............9... - Page 4 Instruction Manual Disable Port Switching Keys ............15 Restore Default Settings ..............15 Invoke Firmware Upgrade Mode ..........16 HSM Summary Table ..............16 Keyboard Emulation ..............17 The Firmware Upgrade Utility ............19 Starting the Upgrade ..............20 Upgrade Succeeded ..............22 Upgrade Failed ................23 Specifications ................
-
Page 5: Introduction
Instruction Manual Introduction Thank you for purchasing a StarTech.com USB KVM Switch with Audio and Ethernet Hub. A unique multimedia switching solution, this multi- function switch integrates a USB 2.0 hub, Ethernet Hub, and audio while supporting high-resolution VGA video interfaces. -
Page 6: Hardware Requirements
Instruction Manual Hardware Requirements Console: • A VGA, SVGA, or Multisync monitor capable of the highest resolution that you will be using on any computer in the installation • A standard 101/104 key USB style keyboard • A standard 3-button USB style mouse Computers: The following equipment must be installed on each computer that is to be connected to the KVM Switch:... -
Page 7: Hardware Guide
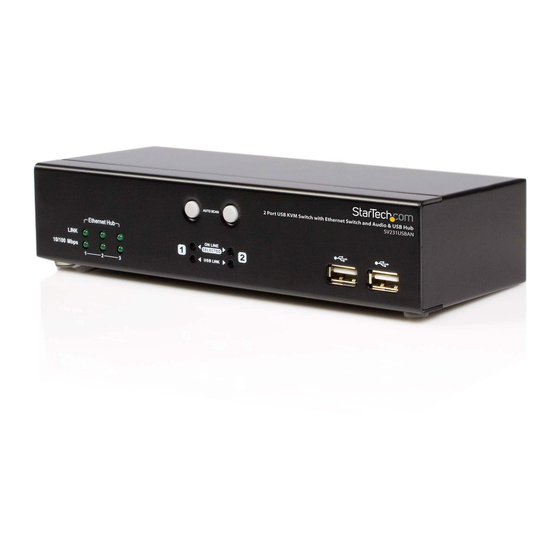
Instruction Manual Hardware Guide SV231USBAN Front Panel 1&2 SV431USBAN Front Panel SV231USBAN/SV431USBAN** Rear Panel Please note that the SV431USBAN rear panel is identical to that of SV231USBAN, with the exception of the number of the audio and slave connection ports. For an explanation of the functions corresponding to the numbered com- ponents listed above, please see the charts on the following pages. - Page 8 Instruction Manual Hardware Guide - Cont’d Component Description Port Pressing a switch brings the focus to the computer attached Selection to its corresponding port. Switches DIM ORANGE indicates the computer attached to its corresponding port is up and running (On Line).
- Page 9 Instruction Manual Hardware Guide - Cont’d Component Description The CAT5 LAN cable that connects to the Ethernet Port computer’s Ethernet port can plug into any Section available port. The cables from your microphone and speak- Console Audio ers plug in here. Each jack is color coded and Jacks marked with an appropriate icon to indicate itself.
-
Page 10: Installation
Instruction Manual Installation Warning! Make sure that power to all of the devices you will be con- necting to the KVM switch, has been turned off.” To set up your SV231USBAN/SV431USBAN KVM Switch, refer to the installation diagram on the following page, which corresponds with the following steps: Plug your keyboard, mouse and monitor into the Console Ports located on the unit’s rear panel. -
Page 11: Cable Connection
Instruction Manual Cable Connection... -
Page 12: Port Numbering
Instruction Manual Port Numbering Each CPU port on the SV231USBAN / SV431USBAN switch is assigned a port number (1 or 2 for the SV231USBAN; 1 to 4 for the SV431USBAN). The port numbers are marked on the rear panel of the switch. The Port ID of a computer is derived from the CPU port number to which it is connected. -
Page 13: Operation
Instruction Manual Operation There are two convenient methods to switch the KVM, USB hub, and audio focus among the ports: Manual - which involves pressing the pushbutton port selection switches located on the unit’s front panel; and Hotkey - which involves entering combinations from the keyboard. Manual Port Switching Press and release a switch (for less than three seconds) to bring only the KVM focus to the computer attached to its corresponding port. -
Page 14: Going Directly To A Port
Instruction Manual Cycling Through the Ports - Cont’d [Scroll Lock] [Scroll Lock] [K] Brings only the KVM focus from the port [Enter] that currently has it to the next port on the installation. The USB hub and audio focus remain where they are. [Scroll Lock] [Scroll Lock] [U] Brings only the USB hub focus from the [Enter]... -
Page 15: Auto Scanning
Instruction Manual Going Directly to a Port - Cont’d [Scroll Lock] [Scroll Lock] [n] Brings the KVM and USB hub focus to the computer attached to the specified [K] [U] [Enter] port. The audio focus remains where it is. [Scroll Lock] [Scroll Lock] [n] Brings the KVM and audio focus to the computer attached to the specified [K] [S] [Enter]... -
Page 16: Hotkey Setting Mode (Hsm)
Instruction Manual To exit Auto Scan Mode, press the Esc key, the Spacebar, or any Port Selection switch. Please Note: The n stands for the number of seconds that the SV231USBAN / SV431USBAN should dwell on a port before moving on to the next. Replace the n with a number between 1 and 99 when entering this hotkey combination. -
Page 17: Alternate Hsm Invocation Keys
Instruction Manual With some operations, you must exit manually. To do so, press the Esc key, or the Spacebar. Alternate HSM Invocation Keys An alternate set of HSM invocation keys is provided in case the default set conflicts with programs running on the computers. To switch to the alternate HSM invocation set, do the following: Invoke HSM (see p.12) Press and release the H key... -
Page 18: List Hotkey Settings
Instruction Manual can change a port’s keyboard operating platform configuration as follows: Bring the KVM focus to the port you want to set. Invoke HSM (see p. 12) Press and release the appropriate Function key (see table). After completing a setting, you automatically exit HSM. Function Key Operation Sets the Mac keyboard operating... -
Page 19: Usb Reset
Instruction Manual USB Reset If the Console USB keyboard and/or mouse loses focus and needs to be reset, do the following: Invoke HSM (see p.12). Press and release the F5 function key. Hotkey Beeper Control The Beeper can be hotkey toggled On and Off. To toggle the Beeper, do the following: Invoke HSM (see p.<xref>). -
Page 20: Invoke Firmware Upgrade Mode
Instruction Manual Invoke Firmware Upgrade Mode To set the SV231USBAN / SV431USBAN to Firmware Upgrade Mode, do the following: Invoke HSM (see p.12). Key in: upgrade Press [Enter]. The front panel port LEDs flash to indicate Firmware Upgrade Mode is in effect. -
Page 21: Keyboard Emulation
Instruction Manual Keyboard Emulation Mac Keyboard The PC compatible (101/104 key) keyboard can emulate the functions of the Mac keyboard. The emulation mappings are listed in the table below: PC Keyboard Mac Keyboard [Shift] Shift [Ctrl] Ctrl ÿ [Ctrl] [1] [Ctrl] [2] [Ctrl] [3] [Ctrl] [4]... - Page 22 Instruction Manual Sun Keyboard The PC compatible (101/104 key) keyboard can emulate the functions of the Sun keyboard when the Control key [Ctrl] is used in conjunction with other keys. The corresponding functions are shown in the table below: PC Keyboard Sun Keyboard [Ctrl] [T] Stop...
-
Page 23: The Firmware Upgrade Utility
From a computer that is not part of your KVM installation go to the product listing for the appropriate switch, on our website (http://www.startech.com), and click on Downloads. Download the most recent file, if newer than the software currently installed, and extract from the containing (compressed) folder. -
Page 24: Starting The Upgrade
Instruction Manual Starting the Upgrade Please Note: The screenshots in this section are for example purposes. The screens that appear during your firmware upgrade may vary slightly as to their wording and descriptions. To upgrade your firmware: Run the downloaded Firmware Upgrade Package file - either by doubleclicking the file icon, or by opening a command line and entering the full path to it. - Page 25 Instruction Manual Next to perform the After you have made your device selection(s), Click upgrade. • If you enabled Check Firmware Version, the Utility compares the device’s firmware level with that of the upgrade files. If it finds that the device’s version is equal to, or higher than the upgrade version, it brings up a dialog box informing you of the situation and gives you the option to Continue or Cancel.
-
Page 26: Upgrade Succeeded
Instruction Manual Upgrade Succeeded After the upgrade has completed, a screen appears to inform you that the procedure was successful: Click Finish to close the Firmware Upgrade Utility. After a successful completion, the switch exits Firmware Upgrade Mode and resets itself. Upgrade Failed If the Upgrade Succeeded screen doesn’t appear, it means that the up- grade failed to complete successfully, in which case you should repeat the... -
Page 27: Specifications
Instruction Manual Specifications Function SV231USBAN SV431USBAN Computer Connections KVM Port Selection Front Panel Switches; Hotkey USB/Audio Port Selection Hotkey Keyboard 1 x USB Type A female Mouse 1 x USB Type A female Console Video 1 x HDB -15 female Connectors Audio 1 x Speaker jack... -
Page 28: Power Consumption
Instruction Manual Specifications - cont’d Function SV231USBAN SV431USBAN KB/Mouse Emulation USB (PC, Mac, Sun) Video Up to 2048 x 1536; DDC2B Scan Interval 1 - 99 secs. (5 secs. default) DC5.3V; 4.5W; DC5.3V; 5W; Power Consumption 900mA 1000mA Power Adapter 1 x DC 5.3V;... -
Page 29: Technical Support
Limitation of Liability In no event shall the liability of StarTech.com Ltd. and StarTech.com USA LLP (or their officers, directors, employees or agents) for any damages (whether direct or indirect, special, punitive, incidental, consequential, or... - Page 30 StarTech.com has been making “hard-to-find easy” since 1985, providing high quality solutions to a diverse IT and A/V customer base that spans many channels, including government, education and industrial facilities to name just a few. We offer an unmatched selection of computer parts, cables, A/V products, KVM and Serv-...
Need help?
Do you have a question about the Starview SV231USBANGB and is the answer not in the manual?
Questions and answers