
Related Manuals for Keys Fitness CG1HR


Summary of Contents for Keys Fitness CG1HR
- Page 1 Owner’s Manual Customer Service (888) 340-0482 4009 Distribution Drive Suite 250 Garland, TX 75041 www.keysfitness.com SERIAL TAG IS LOCATED ON THE FRAME Model Name: CG1HR Date of Purchase: 315-00117 08/07 Rev A Serial Number:...
-
Page 2: Table Of Contents
Table of Contents Important Safety Information Assembly Console Instructions Adjustment Instructions Monitoring Your Heart Rate Warm-Up Exercises Troubleshooting Parts List Exploded Views Warranty Information... -
Page 3: Important Safety Information
Important Safety Information WARNING! Before using this unit or starting any exercise program, consult your physician. This is especially important for persons over the age of 35 and/or persons with pre-existing health problems. The manufacturer or distributor assumes no responsibility for personal injury or property damage sustained by or through the use of this product. - Page 4 Important Safety Information SAFETY PRECAUTIONS AND TIPS FOR CHEST STRAP 1. It is the owner's responsibility to ensure that all users of this unit have read the Owner's Manual and are familiar with warnings and safety precautions. 2. Do not place chest strap near devices that generate large magnetic fields. TV sets, elec- tric motors, radios, and high voltage power lines can affect the transmitter’s performance.
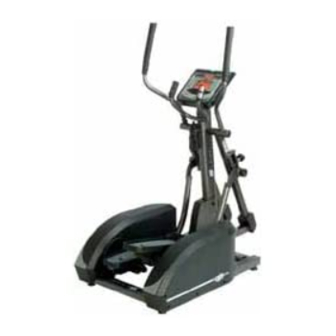
- Page 5 Important Safety Information Thank you for purchasing the Keys Fitness CG1HR Elliptical! The quality product you have chosen was designed to meet your needs for cardiovascular exercise. Before you start, please read the Owner’s Manual and become familiar with the operation of your new unit.
-
Page 6: Assembly
Assembly Getting Started - The Keys Fitness CG1HR Elliptical will require some assembly. Unpack the box in a clear area. Remove packing material. Do not dispose of packing material until assem- bly is complete and unit is working properly. Place the unit on a clean level surface for assem- bly. - Page 7 Assembly Figure 2 CONSOLE TUBE COVER Figure 2 Locate bag labeled Figure 2. Locate cover. Secure cover to main frame by using three M5*0.8-12 screws on the left side of unit. Repeat for the right side. M5*0.8-12 SCREW Figure 3 CONSOLE TUBE SPRING WASHER Figure 3...
- Page 8 Assembly Figure 4 Figure 4 Locate bag labeled Figure 4. Lift and place left linkage onto shaft sleeve and align holes. Secure linkage to unit using four M8*12 mm hex bolts. Repeat for right side. SLEEVE Note: The linkage is secured to the sleeve with three M8*12 hex bolts on the top of the linkage and one M8*12 hex bolt on the bottom of the linkage.
- Page 9 Assembly Figure 6 Figure 6 HANDRAIL ASSEMBLY M5*0.8-12 SCREW Locate bag labeled Figure 6. Locate bracket covers. Attach bracket cover to the handrail assembly by lining up hole, and securing using one screw, M5*0.8-12. Repeat for other side. Note: Do not overtighten screw, this will damage bracket cover.
- Page 10 Assembly Figure 8 Figure 8 Locate console. Connect upper console wire and pulse wires to the appropriate location on the back of the console. Secure console to console tube using four screws. Note: The four console screws will already be installed into the back of console when you remove it from the box.
- Page 11 Assembly Figure 10 Figure 10 Secure bottle holder to console tube using two M5*0.8-12 Screws. M5*0.8-12 SCREW CONGRATULATIONS! You have completed assembly of your CG1HR Elliptical.
-
Page 12: Console Instructions
Console Instructions Take a few moments to review the console layout. Below is an overview of the console keys and their different functions. OVERVIEW START - Press to enter Quick Start Mode. In Pause Mode, this button is used to resume exercise session. - Page 13 Console Instructions PAUSE/RESET - During exercise, this button is used to Pause workout. In Pause mode, this button is used to reset program time and workout data to zero. In Program mode, this button is used to reset values to the default. Caution: In User 1 and User 2 programs, the user profile data will be cleared also.
-
Page 14: Program Instructions
Console Instructions LAP DISPLAY - Shows your progress around a virtual track. This also shows the tension level in the first column. Every dot in the tension column represents an increment of two. Tension is adjustable from 1-20. One dot on the lap counter is equal to 15 revolutions. One revolution is equal to 2 steps. - Page 15 Console Instructions MANUAL MODE - This program allows the user complete control over their workout. The user must make all tension adjustments using the +/- buttons. Follow directions in PROGRAM MODE section to enter and set values in manual mode. PROGRAM MODE - There are six preset Programs.
- Page 16 INTERVAL PROGRAMS OVERVIEW - These programs give users the best of both worlds. Lower intensity levels can provide effective fat burning, while higher intensity levels can provide effective cardiovascular training. The CG1HR combines these benefits in three effective Interval programs.
- Page 17 Console Instructions It is suggested for the Chest Strap Transmitter that you position the rectangular transmitter as close to your heart as possible, against the skin, 1-2 inches below the pectoral muscles. For best results, moisten the back of the transmitter for better contact. If no Heart Rate signal is detected for 10 seconds, the message center will show “NO DETECTED HR”.
- Page 18 The message center will display “MOTOR ERROR” message whenever the brake motor was unable to move to its target position within 2 seconds. Each time the CG1HR is powered on, the console will check the brake motor status. If the brake motor does not reply, then the con- sole will display the error message “MOTOR ERROR”...
-
Page 19: Adjustment Instructions
Adjustment Instructions How to adjust the stride length The CG1HR is equipped with a manual stride length adjustment system. This system allows the user to select a stride length between 17" and 25". To change the stride length: Step 1: Loosen both knobs (A &... -
Page 20: Monitoring Your Heart Rate
Monitoring Your Heart Rate Monitoring Your Heart Rate To obtain the greatest cardiovascular benefits from your exercise workout, it is important to work within your target heart rate zone. The American Heart Association (AHA) defines this target as 60%-75% percent of your maximum heart rate. Your maximum heart rate may be roughly calculated by subtracting your age from 220. -
Page 21: Warm-Up Exercises
Warm Up Exercises EXERCISE GUIDELINES WARNING! Before beginning this or any exercise program, you should consult your physician. This is especially important for individuals over the age of 35 or individuals with pre-existing health problems. Flexibility is a key to fitness. Stretch all major muscle groups at least two to three times per week after a 5 to 10 minute warmup. -
Page 22: Warm Up Exercises
Warm Up Exercises WARNING! Before beginning this or any exercise program, you should consult your physician. This is especially important for individuals over the age of 35 or individuals with pre-existing health problems. Wrist Extensor Wrist Flexor Triceps Stretch Extend your right arm in front Extend your right arm in front Place your right hand behind of you with your palm up and... - Page 23 Warm Up Exercises WARNING! Before beginning this or any exercise program, you should consult your physician. This is especially important for individuals over the age of 35 or individuals with pre-existing health problems. Standing Quadriceps Stretch Achilles Stretch Calf Stretch Face a solid structure such as Steady yourself with one hand.
-
Page 24: Troubleshooting
CLEANING/MAINTENANCE - Your CG1HR Elliptical has been manufactured to withstand many hours of use with minimal maintenance. Periodically wipe down your machine with mild, soapy water or a diluted general purpose household cleaner. Machine should be wiped down to remove sweat after each use. -
Page 25: Parts List
Parts List CG1-HR Parts List Rev A Ref # Part # Description Ref # Part # Description 2CS3 306-00669 SHAFT SLEEVE, CENTER-G/ACHIEVER/CDT 0J3P 302-01444 ALLEN WRENCH, REXON 2CTC 306-00945 COLLAR, NYLON, CENTERG/ACHIEVER/CDT 2MX4 305-00223 COVER, BRACKET CG1-HR 2CU9 319-00223 COLLAR, POM, CENTERG 21B8 302-01282 HEX. -
Page 26: Exploded Views
Exploded View... -
Page 27: Warranty Information
Warranty Information Residential and Personal Use Limited Warranty PLEASE READ THESE WARRANTY TERMS AND CONDITIONS FULLY AND CAREFULLY BEFORE USING YOUR KEYS FITNESS EQUIPMENT. BY USING THE EQUIPMENT, YOU ARE CONSENTING TO BE BOUND BY THE FOLLOWING TERMS AND CONDITIONS. Frame: Lifetime Electronics and *Parts: 2 yrs Labor: 1 yr... - Page 28 Notes...
- Page 29 Notes...
- Page 30 Customer Service (888) 340-0482 Keys Fitness Products 4009 Distribution Drive Suite 250 Garland, TX 75041 www.keysfitness.com...
Need help?
Do you have a question about the CG1HR and is the answer not in the manual?
Questions and answers