DuraLabel 9000 Manual
Thermal transfer / direct thermal bar code printer
Hide thumbs
Also See for 9000:
- User manual (56 pages) ,
- Quick start manual (16 pages) ,
- Quick start manual (12 pages)
Table of Contents
Advertisement
Advertisement
Table of Contents

Related Manuals for DuraLabel 9000


Summary of Contents for DuraLabel 9000
- Page 1 DuraLabel 9000 THERMAL TRANSFER / DIRECT THERMAL BAR CODE PRINTER Printer Manual...
-
Page 2: Table Of Contents
Contents 1. Introduction....................1 1.1 Product Introduction ................1 1.2 Compliances ....................1 2. Operations Overview ................. 3 2.1 Unpacking and Inspection ..............3 2.2 Printer Overview ..................4 2.2.1 Front View ..................4 2.2.2 Interior View ...................5 2.2.3 Rear View..................6 2.3 Operator Controls ..................7 2.3.1 Front Panel Display ...............7 2.3.2 LED Indicators ................7 2.3.3 Front Panel Keys ................8... - Page 3 6. Troubleshooting..................46 6.1 Common Problems ................46 7. Maintenance ..................... 49...
-
Page 4: Introduction
Thank you for purchasing the DuraLabel 9000 Industrial Sign and Label Printer. The DuraLabel 9000 provides thermal transfer printing (TTP) on continuous and die-cut supplies. It produces quality signs and labels with 300 DPI resolution and prints at speeds up to 3 ips. - Page 5 Federal Communication Commission (FCC) Interference Statement This equipment has been tested and found to comply with the limits for a Class B digital device, pursuant to Part 15 of the FCC Rules. These limits are designed to provide reasonable protection against harmful interference in a residential installation. This equipment generates, uses and can radiate radio frequency energy and, if not installed and used in accordance with the instructions, may cause harmful interference to radio communications.
-
Page 6: Operations Overview
This printer has been specially packaged to withstand damage during shipping. Please carefully inspect the printer and its packaging upon receiving it. Please retain the packaging materials in case you need to return the printer. Check that all DuraLabel 9000 equipment and supplies are present and undamaged before proceeding. Equipment Checklist: •... -
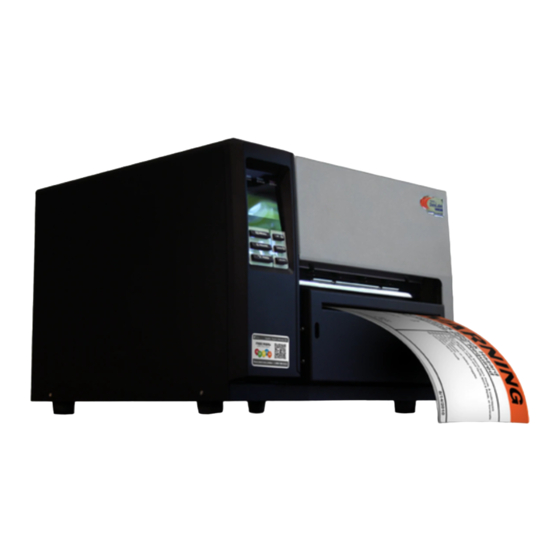
Page 7: Printer Overview
2.2 Printer Overview 2.2.1 Front View 1. LED indicators 2. LCD display 3. Front panel buttons 4. Printed label opening 5. Cutter mechanism 6. Printer cover... -
Page 8: Interior View
2.2.2 Interior View 1. Ribbon Guides 2. Media Sensor (green) 3. Ribbon Sensor (black) 4. Print Head 5. Print Head Release Lever (green) 6. Adjustable Media Guides (white) 7. Media Guide Bar 8. Print Head Mechanism 9. Ribbon Spindle (back spindle) 10. -
Page 9: Rear View
2.2.3 Rear View 1. Fan-fold paper entrance chute 2. Parallel Port (Centronics Interface) 3. USB Interface 4. Serial Port (RS-232C Interface) 5. Power Jack Socket 6. Power Switch 7. PS/2 Interface 8. Ethernet Interface *9. SD Card Slot * Recommended SD card specification. SD V 1.0, V 1.1 SD V 2.0 (SDHC) 128MB... -
Page 10: Operator Controls
2.3 Operator Controls 2.3.1 Front Panel Display LED indicators LCD display Front panel buttons 2.3.2 LED Indicators Status Indication Printer power off Printer power on Printer is ready Printer is paused Blinking Printer is downloading data Printer is ready Carriage open OR cutter error Blinking No paper, paper jam OR "no ribbon”... -
Page 11: Front Panel Keys
2.3.3 Front Panel Keys Keys Function 1. Enter the initial menu screen 2. Once in the menu system, returns user to previous menu. If at initial menu screen, exits the menu system Pauses or resumes printing Advance one label Scroll up the menu options Scroll down the menu options Select the currently highlighted option 2.4 Setting Up the Printer... -
Page 12: Loading Supply
2.5 Loading Supply 1. Lift printer cover open. 2. Push the print head release lever to open the print head mechanism. Print head release lever 3. Remove ONE supply guide. 4. Adjust the supply guide to completely cover the numbered box that corresponds with the media width (in inches). - Page 13 6. Pull the leading edge of the label forward under the media guide bar, under the media sensor, and place the leading edge onto the platen roller and through the printed label opening. Media guide bar Media sensor Platen roller Adjustable media guides 7.
- Page 14 Loading path for label supply...
-
Page 15: Loading Ribbon
2.6 Loading Ribbon 1. Lift printer cover open. 2. Push the print head release lever to pop-up the print head mechanism. Ribbon Guides Print Head Mechanism Print Head Release lever 3. Adjust ribbon guides to center ribbon on vinyl. - When using 8.66” ribbon, adjust ribbon guides against printer wall. - When using 4.33”... - Page 16 4. Install the ribbon and empty ribbon core onto the ribbon spindle and ribbon rewind spindle. 5. Thread the ribbon underneath the print head and above the ribbon sensor. Ribbon Ribbon sensor 6. Apply ribbon onto empty ribbon core, keeping the ribbon flat and wrinkle-free. 7.
- Page 17 8. Close the print head mechanism, making sure the latches are engaged properly. Loading path for ribbon...
-
Page 18: Menu Function
3. Menu Function Main Menu Overview Ma in Me nu Set up F ile M ana ger Diagno stics Lan guage Se rv ice Exit ↓ ↓ ↓ ↓ ↓ P rint er S etup File List P rint Co nfig. E nglish Initialization ↓... -
Page 19: Setup Menu Overview
3.1 Setup Menu Overview Setup Printer Setup Sensor Serial Comm. Ethernet Exit ↓ ↓ ↓ ↓ TSPL2 Status Baud Rate Status ↓ ↓ ↓ ↓ Z PL2 Calibration Parity Configure ↓ ↓ ↓ ↓ Exit Exit Data Bits Exit ↓ Stop Bit(s) ↓... -
Page 20: Printer Setup
3.1.1 Printer Setup Printer Setup TSPL2 Speed Density Direction Print Mode Offset Shift X Shift Y Reference X Reference Y Code Page Country Exit ↓ ↓ ↓ ↓ ↓ ↓ ↓ ↓ ↓ ↓ None +000~- +000~-000 +000~-000 000~999 000~999 Batch Mode Peeler Mode Cutter Mode... - Page 21 SETUP FOR PRINTING WHEN NOT CONNECTED TO A COMPUTER: 3.1.1.1 Speed: Print Setup 1/12 Speed > Speed Density Direction Use this option to set print speed. The available print speed is 2 or 3 ips. The default print speed is 2 ips. Press key to raise the print speed, and press key to decrease...
- Page 22 to enable the setting. Press to cancel. The following 2 figures are the printouts of DIRECTION 0 and 1 for your reference. DIRECTION 0 DIRECTION 1 Note: If printing from enclosed software/driver, the software/driver will send out the command, which overwrites the setting entered from the front panel.
- Page 23 3.1.1.5 Offset: Print Setup 5/12 Direction Offset Print Mode +000 > Offset This option is used to fine tune media stop location. Press to move the cursor from left digit to right digit, and press to set the value from “+” to “-” or “0”...
- Page 24 previous menu. The default value is 000. Note: If printing from enclosed software/driver, the software/driver will send out the REFERENCE command, which will overwrite the setting entered from the front panel. 3.1.1.7 Code Page: Code Page 11/41 Print Setup 10/12 >...
- Page 25 1251 Cyrillic 1255 Hebrew 1256 Arabic 1257 Baltic 1258 Vietnam ISO Code Page ISO Code Page International code page International code page name number Character Set Character Set 8859-1 Latin 1 8859-7 Greek 8859-2 Latin 2 8859-9 Turkish 8859-3 Latin 3 8859-10 Latin 6 8859-4...
-
Page 26: Sensor
3.1.2 Sensor 3.1.2.1 Status This function is available to check the printer’s sensor status. Paper Len. Gap Size Intensity Ref. Level 3.1.2.2 Calibration This option is used to set the media sensor type and calibrate the selected sensor. We recommend calibrating the sensor before printing when changing the supply type. From the Sensor menu, follow this tree:... - Page 27 A. Gap Mode Calibration Gap Mode > Gap Mode > Automatic Bline Mode Manual Cont. Mode Pre-Printed Press the to move the cursor to the media type and press to enter the sensor calibration mode. Note: If printing from enclosed software/driver, the software/driver will send out the GAP or BLINE command, which will overwrite the sensor type setting set from the front panel.
- Page 28 2. Press to move the cursor from left digit to right digit, and press to set the value from “0” to “9” Gap Size and the “dot/ mm/ inch”. Press 0024 dot to set the gap size into the printer. 3.
- Page 29 3. The printer will feed labels to calibrate Gap Mode the sensor sensitivity automatically. When calibration is completed, the Pre-Printed LCD screen will return to the previous menu.
- Page 30 B. Bline Mode (also known as Black-Mark Mode, or labels with marks) Calibration Bline Mode Gap Mode > Automatic > Bline Mode Manual Cont. Mode Pre-Printed Press to scroll the cursor to the sensor type. Press enter the black-mark sensor calibration mode. B-1 Automatic When you enter the [Automatic] option, you will see following message and the printer will feed the black-mark label to calibrate the sensor sensitivity...
- Page 31 3. Open the print head mechanism, put Bline Mode the black-mark under the media sensor. Press to set the Scan Mark value into the printer. Intensity Ref. Level 4. Then, put the label without black-mark Bline Mode under the media sensor. Press to set the value into the Scan Paper printer.
- Page 32 3. Printer will feed labels to calibrate the Bline Mode sensor sensitivity automatically. When calibration is completed, the LCD Pre-Printed screen will return to the previous menu.
- Page 33 C. Cont. Mode Calibration Cont. Mode Bline Mode > Automatic > Cont. Mode Manual Exit Exit Press to scroll the cursor to the sensor type. Press enter the black-mark sensor calibration mode. C-1 Automatic When entering the [Automatic] option, you will see following message and the printer will calibrate the sensor sensitivity automatically.
-
Page 34: Serial Comm
3. The sensor calibration is complete. Cont. Mode Press ; the LCD screen will return to the previous menu. Complete Intensity Ref. Level 3.1.3 Serial Comm. Seria l Comm. Baud Ra te Parity Data Bits Stop Bit(s) Exit ↓ ↓ ↓... - Page 35 3.1.3.1 Baud Rate Serial Comm. Baud Rate > Baud Rate > 9600 bps Parity 19200 bps Data Bits 38400 bps This option is used to set the RS-232 baud rate. The default setting is 9600 bps. Press to select the different baud rate and press set the value into the printer.
- Page 36 3.1.3.4 Stop Bit Serial Comm. Stop Bit(s) Parity > Data Bits > Stop Bit(s) Exit This option is used to set the RS-232 Stop Bits. The default setting is “1” stop bit. Press to select the different Stop Bits and press set the value into the printer.
-
Page 37: Ethernet
3.1.4 Ethernet Use this menu to configure internal Ethernet, check the printer’s Ethernet module status, and reset the Ethernet module. This function is available on the LCD display when an Ethernet card is installed. Press to select the different options and press to enter the option. - Page 38 The IP address information will be shown on the LCD display. Please press to return to the previous menu. 3.1.4.1.2 MAC Ethernet Status MAC Address > Status IP Address 001B82-FF0918 Configure > Exit Exit The MAC address information will be shown on the LCD display. Please press to return to the previous menu.
- Page 39 3.1.4.2.2 Static IP Use this menu to set the printer's IP address, subnet mask and gateway. Ethernet Configure Status DHCP > Configure > Static IP Exit Exit Press to select the different options and press enter the option. Press to cancel. IP Address Subnet Mask Gateway...
-
Page 40: File Manager
3.2 File Manager This feature is used to check the printer’s available memory and file list. File Mana ger File List Avail. Memory Del. All Files Exit ↓ ↓ DRAM DRAM ↓ ↓ FLASH FLASH ↓ ↓ CARD CARD ↓ ↓... -
Page 41: Avail. Memory
3.2.2 Avail. Memory Use this menu to show available memory space. File Manager Avail. Memory File List DRAM: 256 KB > Avail. Memory FALSH: 6656 KB Del. All Files CARD: 0 KB 3.2.3 Del. All Files Use this menu to delete all files. Press to delete all files in the device. -
Page 42: Diagnostics
3.3 Diagnostics Diagnostics Print Config. Dump Mod e Rotate Cutter Exit 3.3.1 Print Config. This feature is used to print the current printer configuration to the label supply. On the configuration printout, there is a print head test pattern, which is useful for checking if there is any dot damage on the print head heater element. -
Page 43: Dump Mode
3.3.2 Dump Mode Captures the data from the communications port and prints out the data received by the printer. In the dump mode, all characters will be printed in 2 columns as following. The left side characters are received from your system and right side data are the corresponding hexadecimal value of the characters. -
Page 44: Rotate Cutter
3.3.3 Rotate Cutter In case paper is jammed in the cutter, this feature can rotate the cutter blade forward or reverse direction, which is helpful to remove the jammed paper easily from the cutter. Diagnostics Fwd. Print Config. DOWN: Rev. Dump Mode >... -
Page 45: Service
3.5 Service Service Initialization Mileage Info. Exit This feature is used to restore printer settings to defaults and display printer mileage information. 3.5.1 Initialization Service Initialization Initializing ... > Initialization Mileage Info. SELECT Exit MENU The printer settings are restored to defaults as below once printer is initialized. Note : When printer initialization is done, please calibrate the gap or black-mark sensor before printing supplies with gap or black-mark sensor. -
Page 46: Printer Specifications
5. Printer Specifications Printer model DuraLabel 9000 Resolution 300 DPI Printing method Thermal Transfer & Direct Thermal Print speed Up to 3 ips Max. print width 215.9mm (8.5”), Center Bias Max. print length 1270 mm (50”) Enclosure Sheet metal structure with plastic cover... -
Page 47: Bar Code
Transmissive gap sensor, easy to access when label is loaded Reflective black mark sensor (position adjustable) Transmissive ribbon end sensor (Ribbon end must be Sensors transparent) Head open sensor Print head heater element diagnostic 8 alpha-numeric bitmap fonts Internal font ... - Page 48 Media width 101.6~223.5mm (4" ~ 9") Media thickness 0.025~0.254 mm (0.98mil~10 mil) Media core diameter 76.2 mm (3”) Label length 25.4~1270 mm (1.0”~50”) Label length (peel mode) Label length (cutter mode) 25.4~1270 mm (1.0”~50”) Gap height Min. 2 mm Black mark height Min.
-
Page 49: Troubleshooting
6.1 Common Problems The following guide lists the most common problems that may be encountered when operating the DuraLabel 9000. If the printer still does not function after all suggested solutions have been invoked, please contact Graphic Products Customer Service for assistance. - Page 50 · Re-connect cable to interface. · If using serial cable, - Please replace the cable with pin to pin connected. - Check the baud rate setting. The default baud rate setting of printer is 9600,n,8,1. · If using the Ethernet cable, - Check if the Ethernet RJ-45 connector green LED is lit on.
- Page 51 · Reload the supply. · Ribbon and media is loaded · Clean the print head. incorrectly · Clean the platen roller. · Dust or adhesive accumulation on the · Adjust the print density and print speed. print head. · Run printer self-test and check the print head ·...
- Page 52 7. Maintenance This session presents the clean tools and methods to maintain your printer. 1. Please use one of following materials to clean the printer. Cotton swab (Head cleaner pen) Lint-free cloth Vacuum / Blower brush Ethanol or a solution of IPA and water only 2.
Need help?
Do you have a question about the 9000 and is the answer not in the manual?
Questions and answers