Table of Contents
Advertisement
Advertisement
Table of Contents

Subscribe to Our Youtube Channel
Related Manuals for DuraLabel Pro


Summary of Contents for DuraLabel Pro
- Page 1 PRO/PRO 300 Quickstart Guide 800.788.5572 DuraLabel.com...
-
Page 2: Minimum System Requirements
Minimum System Requirements Operating System: Windows 2000 SP4, XP SP2, Vista, 7, 8 Memory: 128MB RAM Hard Drive: 100MB Additional Requirements: IT administrator privileges Graphic Products , DuraLabel , PathFinder , Toro and Lobo are Registered Trademarks of Graphic Products, Inc. ®... -
Page 3: Table Of Contents
LabelForge Labeling Software NOTE: This DuraLabel PRO/PRO 300 QuickStart Guide includes information for both the DuraLabel PRO and DuraLabel PRO 300 Printers. References in this Guide to “DuraLabel PRO” apply to both the DuraLabel PRO and DuraLabel PRO 300 Printers. Contents |... -
Page 4: Introduction
For further assistance and detailed information, please see the DuraLabel PRO/PRO 300 User Guide. Call us at 800.788.5572 if you have any questions about your new DuraLabel PRO/PRO 300 Printer. We’re here to help! | 1. -
Page 5: Equipment Checklist
2. Equipment Checklist The following items are included in your DuraLabel PRO/PRO 300 package: □ DuraLabel PRO or DuraLabel PRO 300 Printer □ DuraLabel PRO/PRO 300 User Guide □ DuraLabel PRO/PRO 300 QuickStart Guide □ DuraSuite QuickStart Guide □ LabelForge QuickStart Guide □... -
Page 6: Loading The Printer
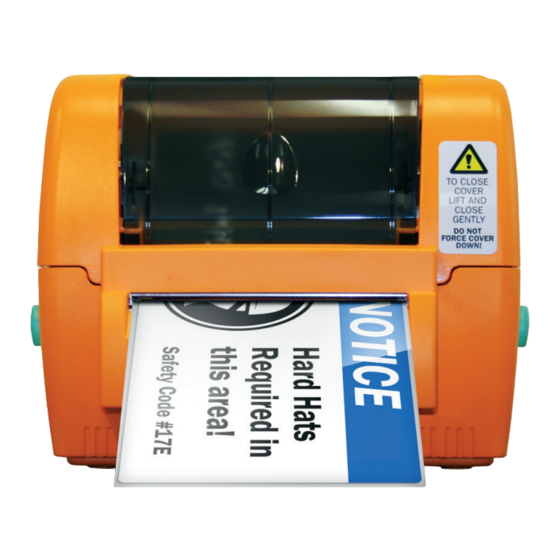
Always turn the power OFF when loading supplies. Always wait at least 5 seconds before turning power back ON. The following instructions refer to loading 4.3" ribbon. See “Loading 2.5” ribbon supply” in Section 2.3, Loading Ribbon, of the DuraLabel PRO/PRO 300 User Guide for instructions on loading 2.5" ribbon. FIguRE 1... - Page 7 Roll the ribbon rewind spindle (top side of spindle moving away from you) to secure the ribbon supply. Your ribbon supply should now be loaded. FIguRE 3 New Ribbon Supply used Ribbon Vinyl Supply Ribbon goes under- neath Print Head Front of Printer Back of Printer 3.1 Loading Ribbon | DuraLabel.com | 800.788.5572...
-
Page 8: Loading Vinyl Supply
Your printer is now loaded and ready to print. NOTE: Tape guides are required for ½" label supply and shrink tube sizes ½" and smaller. See Section 2.5, Installing Tape Guides, in the DuraLabel PRO/PRO 300 User Guide for details. | 3.2 Loading Vinyl Supply... -
Page 9: Connecting The Printer
4. Connecting the Printer Connect the power supply. Connect the DuraLabel PRO to your PC using a USB or parallel cable. Turn ON the DuraLabel PRO. If using a USB cable, follow instructions in Section 4.2, Using a USB Cable. -
Page 10: Using A Usb Cable
NOTE: Windows 8 users, check Install a driver for another printer, continue to the next screen and select Graphic Products DuraLabel Pro or DuraLabel Pro 300. At the next screen choose the appropriate port. Enter Printer Name and set it as the default printer by checking the adjoining box in the Specify Printer Name window that opens. -
Page 11: Using A Parallel Cable
Skip this step if using a USB cable. IMPORTANT! You may need IT administrator privileges to perform this installation. Insert the DuraLabel PRO or DuraLabel PRO 300 Installation CD in your computer’s disk drive. A DuraLabel PRO/PRO 300 startup screen appears. NOTE: If the CD does not run automatically, go to Start >... - Page 12 A Driver Wizard Completed Successfully window appears, confirming the printer driver installation was completed successfully. Click Close. The previous window closes and a Completing the DuraLabel Driver Setup Wizard window appears. Click Finish to complete the new driver installation. | 4.3 Using a Parallel Cable...
-
Page 13: Configuring Printer Drivers
NOTE: Your DuraLabel PRO print drivers are preset to several print values. Please be aware that changing a preset value is not fully supported by all software programs. For best results, make changes to preset values from the Devices and Printers window. -
Page 14: Die-Cut Label Printing Instructions
You can change your settings by following these steps: Select Labels With Marks from the Type drop-down menu. Set Mark Height to 0.12 inches and Mark Offset to 0 inches (default). Click Apply, then OK. | 5.2 Die-cut Label Printing Instructions DuraLabel.com | 800.788.5572... -
Page 15: Installing Label Software
DuraSuite Labeling Software lets you create professional-quality pipe markers and arc flash, NFPA Diamond, RTK, GHS and custom labels, quickly and easily. To install, from the DuraLabel PRO/PRO 300 startup screen, click on DuraSuite Label Software and follow the directions that appear. Refer to the DuraSuite Labeling Software User Guide for additional information. - Page 16 800.788.5572 | DuraLabel.com © 2007, 2015 Graphic Products, Inc. All Rights Reserved 02/17/15...
Need help?
Do you have a question about the Pro and is the answer not in the manual?
Questions and answers