DuraLabel PRO 300 User Manual
Hide thumbs
Also See for PRO 300:
- User manual (48 pages) ,
- Quick start manual (16 pages) ,
- User manual (41 pages)
Table of Contents
Advertisement
Advertisement
Table of Contents

Related Manuals for DuraLabel PRO 300


Summary of Contents for DuraLabel PRO 300
- Page 1 PRO/PRO 300 USER GUIDE 800.788.5572 DuraLabel.com...
-
Page 2: Minimum System Requirements
Use only DuraLabel supplies from Graphic Products with your DuraLabel PRO/PRO 300 printer. NOTE: The DuraLabel PRO/PRO 300 User Guide includes information for both the DuraLabel PRO and DuraLabel PRO 300 printers. Reference to “DuraLabel PRO” implies either the DuraLabel PRO or DuraLabel PRO 300 printer. - Page 3 You’ll be printing pipe markers, arc flash, NFPA Diamond, GHS, right-to-know, barcodes, and custom labels in no time with your new DuraLabel Printer. Call us at 800.788.5572 with any questions you may have about your DuraLabel PRO/ PRO 300 printer. We’re here to help with all your labeling needs! Introduction | DuraLabel.com | 800.788.5572...
-
Page 4: Table Of Contents
Contents 1. Warranties 5-Year DuraLabel Printer Warranty 1.1.1 Repairs 1.1.2 Batteries 1.1.3 Warranty Details 5-Year DuraLabel Premium Vinyl Warranty 2. Loading the Printer Printer Parts Printer Ribbon Parts Loading Ribbon 2.3.1 Loading 4.3" ribbon supply 2.3.2 Loading 2.5" ribbon supply... - Page 5 LED Blinks Amber and Red 9.10 Printer Cuts Labels Off-Center or into Next Label 10. Specifications 10.1 Printer 10.2 Indicators and Buttons 10.3 Communication Interface 10.4 Power Requirements 10.5 Environment 10.6 Label Supply 10.7 Ribbon Supply 10.8 Printer Body Contents | DuraLabel.com | 800.788.5572...
-
Page 6: Warranties
The optional battery packs for the DuraLabel Toro and Lobo portable systems are warrantied for three years from the date of purchase. The battery for the DuraLabel 2000 PLUS system is warrantied for one year from the date of purchase. -
Page 7: 5-Year Duralabel Premium Vinyl Warranty
(5) years. Within five years of purchase and after proper application, Graphic Products will replace labels made with DuraLabel Premium Vinyl which become unreadable or fail to maintain adhesion with the labeled surface. In such instance, Graphic Products, Inc. will provide a one-time replacement roll of the same supply. -
Page 8: Loading The Printer
DuraLabel Ribbon and Vinyl Supplies have been optimized for compatibility and print quality. Only authorized DuraLabel Supplies from Graphic Products will print correctly in the DuraLabel PRO/PRO 300 printer. An instructional video demonstrating how to load DuraLabel Ribbon and Supplies can be viewed at DuraLabel.com/duralabel-videos. Printer Parts... -
Page 9: Printer Ribbon Parts
Flange for Ribbon Rewind Spindle Ribbon Rewind Spindle (with paper core) NOTE: diagram under the ribbon supply. Ribbon Spindle Flange Figure 2 Ribbon Rewind Spindle with Paper Core Applied Ribbon Supply Spindle 2.2 Printer Ribbon Parts | DuraLabel.com | 800.788.5572... -
Page 10: Loading Ribbon
Apply the ribbon supply spindle to the rear hub, with the ribbon leader dropped down. Insert the left side of the spindle first, fitting it onto the left hub, then fitting the right (flanged) side onto the right hub. | 2.3 Loading Ribbon DuraLabel.com | 800.788.5572... - Page 11 Figure 9 Ribbon rewind spindle with paper core (4.3") being applied to the front spring-loaded hub Open the printer cover by pulling the release levers on the sides of the printer toward you. Figure 11 Printer release lever being pulled forward 2.3 Loading Ribbon | DuraLabel.com | 800.788.5572...
- Page 12 Figure 15 Ribbon supply (4.3") rolled tight NOTE: The ribbon-loading process is the same for all ribbon sizes in steps D – J. Figures 7, 8, 9, 12, 13, 14 and 15 illustrate 4.3" ribbon supply. | 2.3 Loading Ribbon DuraLabel.com | 800.788.5572...
-
Page 13: Loading 2.5" Ribbon Supply
Apply the paper core to the ribbon rewind spindle, centering it using the measurement marks. Figure 6 Paper core (2.5") centered on ribbon rewind spindle Now refer to Steps D – J under “Loading 4.3" ribbon supply.” 2.3 Loading Ribbon | DuraLabel.com | 800.788.5572... -
Page 14: Loading Vinyl Supply
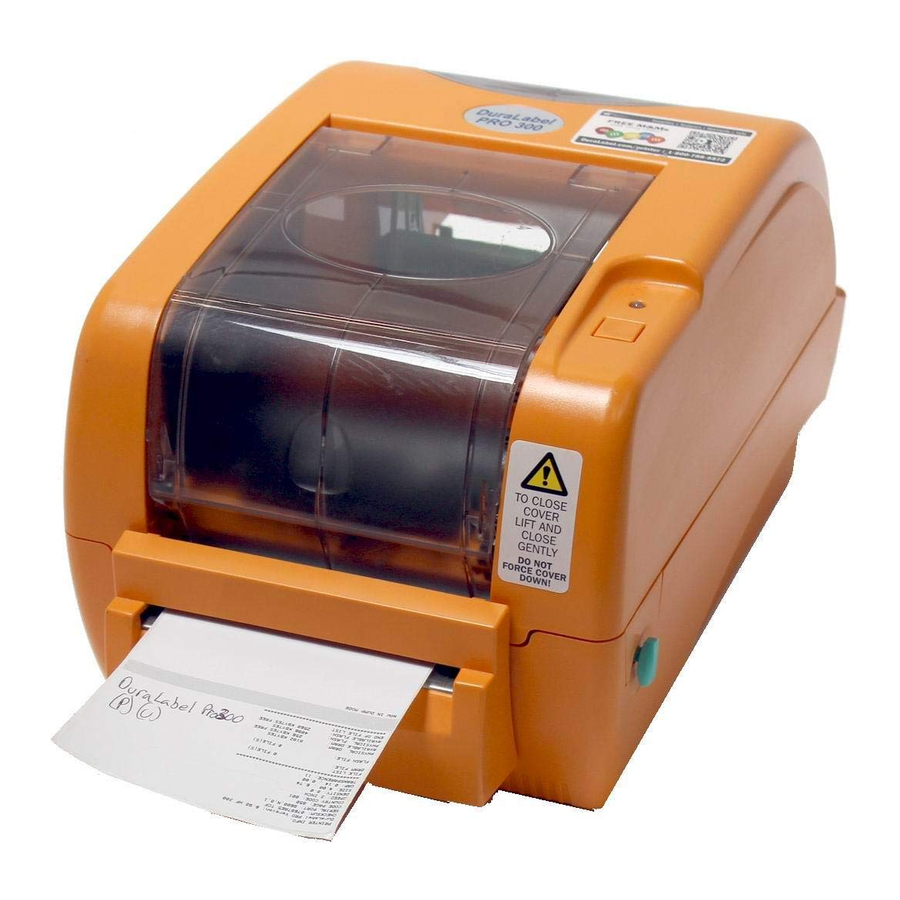
Move the adjustable label guides to hold the label supply in place. Figure 3 Label supply loaded correctly, with printable surface facing up and liner facing down Figure 4 Label supply held in place by adjustable label guides | 2.4 Loading Vinyl Supply DuraLabel.com | 800.788.5572... - Page 15 Close the ribbon mechanism cover by pressing down and in until it latches shut. Your printer is now loaded and ready to print. Figure 7 Press down and in to close. Figure 8 Loaded DuraLabel PRO 300 printer, ready to print 2.4 Loading Vinyl Supply | DuraLabel.com | 800.788.5572...
-
Page 16: Installing Tape Guides
Shrink Tube Figure 2 Cutout Opening Grooved Section Figure 3 Tape guide, with cutout opening facing Figure 4 Tape guide showing grooved section up, toward supply spindle (Tape guide is shown upside down.) | 2.5 Installing Tape Guides DuraLabel.com | 800.788.5572... - Page 17 Align the label supply under the tape guide, fitting it in the grooved section and then pressing the tape guide into place. Figure 7 Align supply in the grooved section for easy movement. grooved section. 2.5 Installing Tape Guides | DuraLabel.com | 800.788.5572...
- Page 18 The label supply should now be aligned over the media sensor. If it isn’t, slide the media sensor to center it beneath the supply. Figure 10 Supply aligned under tape guide and over media sensor Close the printer cover and you’re ready to print. | 2.5 Installing Tape Guides DuraLabel.com | 800.788.5572...
-
Page 19: Connecting The Printer
3. Connecting the Printer Connect the power supply from the DuraLabel PRO/PRO 300 printer to an electrical outlet. Next, connect the USB or parallel cable from the DuraLabel PRO to your PC, then power ON your printer. Inserting the Installation CD Before inserting the installation CD, please refer to the specific instructions for the type of cable you’re using. - Page 20 FIGURE 2 DuraLabel Driver Setup Wizard FIGURE 3 Windows Printer Driver FIGURE 4 Selecting a DuraLabel Driver License Agreement Select DuraLabel PRO or DuraLabel PRO 300 and click Next on the DuraLabel Driver Selection window that appears. Choose the install location and click Install on the Choose Install Location window that appears.
- Page 21 NOTE: Windows 8 users, do not select the listed printer. Instead, check Install a driver for another printer and click next. Select Graphic Products DuraLabel Pro or DuraLabel Pro 300 and click next. Select the appropriate port and click next. Enter Printer Name and set it as the default printer, if you choose, by checking the adjoining box in the Specify Printer Name window that opens.
-
Page 22: Using A Parallel Cable
Click I Agree on the Windows Printer Driver License Agreement window that appears. Select DuraLabel PRO or DuraLabel PRO 300 and click Next on the DuraLabel Driver Setup window that appears. Choose the install location and click Install on the Choose Install Location window that appears. - Page 23 Select Install printer drivers on the Driver Wizard window that appears and click Next. Select Graphic Products DuraLabel PRO or DuraLabel PRO 300 on the Specify Printer Model window that appears and click Next. Select the LPT1 port on the Specify Port window that appears and click Next.
-
Page 24: Upgrading A Driver
Next. Review the list provided, then click Finish. Click Restart. The new DuraLabel PRO printer driver may now be installed. NOTE: If upgrading from an older driver, you may need to restart your computer during installation of the new driver. -
Page 25: Configuring Printer Drivers
*NOTE: it in your Control Panel. Right-click the Graphic Products DuraLabel PRO/PRO 300 icon and select Printing preferences. A Printing Preferences dialog box appears. Click the Page Setup tab and select Landscape or Portrait, depending on your label’s orientation. -
Page 26: Die-Cut Label Printing Instructions
5 times, alternating red and amber 5 times and then turn solid green. Release the Feed button while the LED blinks red and amber. Follow directions in Section 4.2.2, Driver Settings. | 4.2 Die-Cut Label Printing Instructions DuraLabel.com | 800.788.5572... -
Page 27: Driver Settings
Set Mark Height to 0.12 inches and Mark Offset to 0 inches (default). Click Apply, then OK. FIGURE 5 Printing Preferences dialog box, with Type set to “Labels With Marks” 4.3 B Mark Label Printing Instructions | DuraLabel.com | 800.788.5572... -
Page 28: Cutting Labels In Intervals
When satisfied with all your settings, click Apply, then OK. Your driver is now set up and ready to create labels. NOTE: You may need to change print settings to optimize the DuraLabel PRO/PRO 300 for printing with some ribbons and specialty supply. Higher speeds generally require higher densities. -
Page 29: Installing Labeling Software
DuraSuite Labeling Software lets you create professional-quality pipe markers and arc flash, NFPA Diamond, RTK, GHS and custom labels, quickly and easily. To install, from the DuraLabel PRO/PRO 300 startup screen, click on DuraSuite Label Software and follow the directions that appear. Refer to the DuraSuite Labeling Software User Guide for additional information. -
Page 30: Label Creation
If you do not follow this step, you will need to create all labels from scratch. The DuraLabel PRO/PRO 300 provides a variety of templates you can install from the installation CD start-up screen. Click on Install Templates & Symbols and follow the instructions. -
Page 31: Setting Up A Microsoft Word Document
Either the Width or Height should match the width of supply loaded in your printer. FIGURE 1 Page Setup dialog box, with FIGURE 2 Page Setup dialog box, with Paper Margins tab selected tab selected 6.1 Label Creation with Your Word Processor | DuraLabel.com | 800.788.5572... -
Page 32: Label Design
FIGURE 3 Text boxes can be resized proportionately by holding down the Shift Key while dragging a corner box (handlebar). This text box is being enlarged by dragging a corner handlebar while pressing the Shift Key. | 7.1 Text Boxes DuraLabel.com | 800.788.5572... -
Page 33: Positioning Text Boxes
NOTE: If you choose not to use a text box for your text, you will still be able to print your label, although you will not be able to move your text or graphics freely. Consult your 7.1 Text Boxes | DuraLabel.com | 800.788.5572... -
Page 34: Graphics
DuraLabel PRO/PRO 300 CD. Run the CD, then Startup Screen. click on Install Templates & Symbols on the DuraLabel PRO/PRO 300 Startup Screen that opens. You can store the Templates and Symbols folder in any convenient location on your computer. HINT! When determining a symbol’s size, make it large enough to be recognized from a... -
Page 35: Merging Information, Sequencing Labels
(Fig. 5). This example reflects 10 labels, with a sequence of 1. Now enter the data for Column B, e.g., Descriptions, that relates to the data in corresponding rows of Column A (Fig. 6). 7.3 Merging Information, Sequencing Labels | DuraLabel.com | 800.788.5572... - Page 36 Highlight and click on the Excel Spreadsheet page where your data is located, e.g., Sheet 1, on the Select Table dialog box. The Select Table dialog box closes after making your selection. | 7.3 Merging Information, Sequencing Labels DuraLabel.com | 800.788.5572...
- Page 37 M. With the Go to Record set at 1 (Fig. 15), the first label in a sequence should now appear on the Word template. FIGURE 15 First label in the sequence, populated with content imported from an Excel spreadsheet. 7.3 Merging Information, Sequencing Labels | DuraLabel.com | 800.788.5572...
- Page 38 Merge to Printer window. printing sequenced labels. Now select a DuraLabel Printer from the Print dialog box that appears (Fig. 19). FIGURE 19 Select the DuraLabel Printer you want to print your sequenced labels with from the Print dialog box.
- Page 39 View your labels in sequence on the Word display that appears. If they are ready to print, go to File, then click Print. Your labels print as they appeared. FIGURE 22 Your labels are displayed in sequence prior to printing. 7.3 Merging Information, Sequencing Labels | DuraLabel.com | 800.788.5572...
-
Page 40: Cleaning And General Maintenance
Basic cleaning of print head, cutter and platen roller will prolong the printer’s life and help produce crisp, clear labels and signs. Refer to Section 2.1, Printer Parts, for additional cleaning and maintenance information. You can also view a DuraLabel PRO/PRO 300 cleaning video by visiting DuraLabel.com/duralabel-pro-300/dlp300-support.php. -
Page 41: Cutter
CLEANING AND GENERAL MAINTENANCE Cutter Figure 3 Cutter mechanism (detachable face in front) Open the DuraLabel PRO/PRO 300 cover. Rewind any loaded supply away from the cutting mechanism. Place a cleaning swab between your forefinger and thumb and squeeze until it snaps. - Page 42 Replace the cutting mechanism, inserting the tabs on the sides of the cutter, into the slots as shown below. NOTE: Replace wires through the open slot from where they’re connected, being careful not to pinch them. | 8.2 Cutter DuraLabel.com | 800.788.5572...
-
Page 43: Platen Roller
Let the platen roller dry for a few minutes, then reload ribbon and supply. Your DuraLabel PRO/PRO 300 is now ready to use. To maintain optimal performance, the DuraLabel PRO/PRO 300 printer should be cleaned after every two rolls of supply. The print head, cutter mechanism and platen roller should be cleaned with alcohol swabs to remove buildup of adhesive, dust and other substances. -
Page 44: Troubleshooting
LED Quickly Blinks Red Possible Cause: Power was cycled too quickly. Solution: Turn power OFF. Verify you are using the correct power supply. “Power supply for DuraLabel PRO/PRO 300 ONLY” should be marked on the brick. Wait 5 seconds. Turn power ON. -
Page 45: Printing Stops While Printing Die-Cut Labels And Led Blinks Red
Possible Cause: Printer is set to “Labels with Gaps,” while loaded supply is continuous feed. Solution: Open the Devices and Printers folder. Right-click on Graphic Products DuraLabel PRO/PRO 300. Select Printing Preferences. Select the Stock tab. Under Media Settings, change Type to Continuous. -
Page 46: Printing Is Streaked
Solution: Turn printer off, wait 5 seconds, then turn printer back on. Print several labels. If error persists, contact Tech Support at 800.788.5572. Possible Cause: Specialty supply may be loaded improperly or may be missing the clear media cartridge. Solution: Contact Graphic Products. | 9.8 Printing is Streaked DuraLabel.com | 800.788.5572... -
Page 47: Printer Cuts Labels Off-Center Or Into Next Label
Possible Cause: The print driver is set to print continuous feed supply, while the printer is loaded with “labels with gaps” supply. Solution: Open the Devices and Printers folder. Right-click on Graphic Products DuraLabel PRO/PRO 300. Select Printing Preferences. Select the Stock tab. Under Media Settings, change Type to Labels with Gaps. -
Page 48: Specifications
Operating Temperature: 41º F – 104º F (5º C – 40º C) Operation Humidity: 25% – 85% non-condensing Storage Temperature: -4º F – 122º F (-18º C – 50º C) Storage Humidity: 10% – 90% non-condensing Ventilation: Free air movement | 10.1 Printer DuraLabel.com | 800.788.5572... -
Page 49: Label Supply
Type: Continuous, B Mark and Die-Cut Width: 0.5" – 4" Gap Height: 0.12" B Mark Height: 0.12" 10.7 Ribbon Supply Type: Wax, Wax/Resin, Resin Capacity: 984' with 1" core 10.8 Printer Body Dimensions: 8.4"W x 12.4"D x 7.4"H 10.8 Printer Body | DuraLabel.com | 800.788.5572... - Page 50 THIS PAGE IS INTENTIONALLY LEFT BLANK...
- Page 51 THIS PAGE IS INTENTIONALLY LEFT BLANK...
- Page 52 800.788.5572 | DuraLabel.com © 2007, 2015 Graphic Products, Inc. All Rights Reserved 02/17/15...
Need help?
Do you have a question about the PRO 300 and is the answer not in the manual?
Questions and answers