Enterasys X-Pedition XSR-1850 Getting Started Manual
X-pedition security router
Hide thumbs
Also See for X-Pedition XSR-1850:
- Owner's manual (25 pages) ,
- Datasheet (6 pages) ,
- Installation manual (6 pages)
Table of Contents
Advertisement
Quick Links
Advertisement
Table of Contents

Related Manuals for Enterasys X-Pedition XSR-1850


Summary of Contents for Enterasys X-Pedition XSR-1850
- Page 1 X-Pedition™ Security Router XSR-1850 Getting Started Guide Version 7.5 9033838-07...
-
Page 3: Regulatory Compliance Information
Elektrischer Gefahrenhinweis: Installationen sollten nur durch ausgebildetes und qualifiziertes Personal vorgenommen werden. Notice Enterasys Networks reserves the right to make changes in specifications and other information contained in this document and its web site without prior notice. The reader should in all cases consult Enterasys Networks to determine whether any such changes have been made. The hardware, firmware, or software described in this document is subject to change without notice. IN NO EVENT SHALL ENTERASYS NETWORKS BE LIABLE FOR ANY INCIDENTAL, INDIRECT, SPECIAL, OR CONSEQUENTIAL DAMAGES WHATSOEVER (INCLUDING BUT NOT LIMITED TO LOST PROFITS) ARISING OUT OF OR RELATED TO THIS DOCUMENT, WEB SITE, OR THE INFORMATION CONTAINED IN THEM, EVEN IF ENTERASYS NETWORKS HAS BEEN ADVISED OF, KNEW OF, OR SHOULD HAVE KNOWN OF, THE POSSIBILITY OF SUCH DAMAGES. Enterasys Networks, Inc. 50 Minuteman Road Andover, MA 01810 © 2005 Enterasys Networks, Inc. All rights reserved. Part Number: 9033838‐07 July 2005 ENTERASYS, ENTERASYS NETWORKS, ENTERASYS XSR, and any logos associated therewith, are trademarks or registered trademarks of Enterasys Networks, Inc. in the United States and other countries. All other product names mentioned in this manual may be trademarks or registered trademarks of their respective owners. Documentation URL: http://www.enterasys.com/support/manuals Documentacion URL: http://www.enterasys.com/support/manuals Dokumentation http://www.enterasys.com/support/manuals Regulatory Compliance Information Federal Communications Commission (FCC) Notice The XSR complies with Title 47, Part 15, Class A of FCC rules. Operation is subject to the following two conditions:... - Page 4 04DU9.BN, 04DU9.DN, 6.0N NIM-DIRELAY-xx, NIM-TE1-xx, 04DU9.1KN, 04DU9.1SN NIM-CTE1-PRI-xx NIM-BRI-U-xx 02IS5 6.0N NIM-ADSL-AC-xx 02LS2 7.0Y If the XSR harms the telephone network, the telephone company will notify you in advance that it may need to temporarily discontinue service. But if advance notice is not practical, the telephone company will notify you as soon as possible. Also, you will be advised of your right to file a complaint with the FCC if you believe it is necessary. The telephone company may make changes in its facilities, equipment, operations, or procedures that could affect the operation of the XSR. If this happens, the telephone company will provide advance notice for you to make necessary modifications and maintain uninterrupted service. If you experience trouble with the XSR, for repair or warranty information, please contact Enterasys Networks, Inc., at 978‐684‐ 1000. If the XSR is causing harm to the telephone network, the telephone company may request that you disconnect the equipment until the problem is solved. The XSR is not intended to be repaired by the customer. Industry Canada Notices This digital apparatus does not exceed the class A limits for radio noise emissions from digital apparatus set out in the Radio Interference Regulations of the Canadian Department of Communications. Le présent appareil numérique n’émet pas de bruits radioélectriques dépassant les limites applicables aux appareils numériques de la class A prescrites dans le Règlement sur le brouillage radioélectrique édicté par le ministère des Communications du Canada. Equipment Attachments Limitations “NOTICE: The Industry Canada label identifies certified equipment. This certification means that the equipment meets telecommunications network protective, operational and safety requirements as prescribed in the appropriate Terminal Equipment Technical Requirements document(s). The department does not guarantee the equipment will operate to the userʹs satisfaction. Before installing this equipment, users should ensure that it is permissible to be connected to the facilities of the local telecommunications company. The equipment must also be installed using an acceptable method of connection. The customer should be aware that compliance with the above conditions may not prevent degradation of service in some situations.
-
Page 5: Product Safety
Seguridad del Producto El producto de Enterasys cumple con lo siguiente: UL 60950, CSA C22.2 No. 60950, 73/23/EEC, EN 60950, EN 60825, IEC 60950. Produktsicherheit Dieses Produkt entspricht den folgenden Richtlinien: UL 60950, CSA C22.2 No. 60950, 73/23/EEC, EN 60950, EN 60825, IEC 60950. Electromagnetic Compatibility (EMC) This product complies with the following: 47 CFR Parts 2 and 15, CSA C108.8, 89/336/EEC, EN 55022, EN 55024, EN 61000‐3‐2, EN 61000‐3‐3, AS/NZS CISPR 22, and VCCI V‐3. Compatibilidad Electromágnetica (EMC) Este producto de Enterasys cumple con lo siguiente: 47 CFR Partes 2 y 15, CSA C108.8, 89/336/EEC, EN 55022, EN 55024, EN 61000‐3‐2, EN 61000‐3‐3, AS/NZS CISPR 22, VCCI V‐3. Elektro- magnetische Kompatibilität ( EMC ) Dieses Produkt entspricht den folgenden Richtlinien: 47 CFR Parts 2 and 15, CSA C108.8, 89/336/EEC, EN 55022, EN 55024, EN 61000‐3‐2, EN 61000‐3‐3, AS/NZS CISPR 22, VCCI V‐3. ... - Page 6 European Waste Electrical and Electronic Equipment (WEEE) Notice In accordance with Directive 2002/96/EC of the European Parliament on waste electrical and electronic equipment (WEEE): The symbol above indicates that separate collection of electrical and electronic equipment is required and that this product was placed on the European market after August 13, 2005, the date of enforcement for Directive 2002/96/EC. When this product has reached the end of its serviceable life, it cannot be disposed of as unsorted municipal waste. It must be collected and treated separately. It has been determined by the European Parliament that there are potential negative effects on the environment and human health as a result of the presence of hazardous substances in electrical and electronic equipment. It is the users’ responsibility to utilize the available collection system to ensure WEEE is properly treated. For information about the available collection system, please go to http://www.enterasys.com/support/ or contact Enterasys Customer Support at 353 61 705586 (Ireland). VCCI Notice This is a class A product based on the standard of the Voluntary Control Council for Interference by Information Technology Equipment (VCCI) V‐3. If this equipment is used in a domestic environment, radio disturbance may arise. When such trouble occurs, the user may be required to take corrective actions. BSMI EMC Statement — Taiwan This is a class A product. In a domestic environment this product may cause radio interference in which case the user may be required to take adequate measures.
-
Page 7: Declaration Of Conformity
Declaration of Conformity Application of Council Directive(s): 89/336/EEC 73/23/EEC Manufacturer’s Name: Enterasys Networks, Inc. Manufacturer’s Address: 50 Minuteman Road Andover, MA 01810 European Representative Address: Enterasys Networks, Ltd. Nexus House, Newbury Business Park London Road, Newbury Berkshire RG14 2PZ, England Conformance to Directive(s)/Product Standards: EC Directive 89/336/EEC EN 55022 EN 55024 EC Directive 73/23/EEC EN 60950 EN 60825 Equipment Type/Environment: Networking Equipment, for use in a Commercial or Light Industrial Environment. Enterasys Networks, Inc. declares that the equipment packaged with this notice conforms to the above directives. Australian Telecom N826 WARNING: Do not install phone line connections during an electrical storm. WARNING: Do not connect phone line until the interface has been configured through local management. The service provider may shut off service if an un‐configured interface is connected to the phone lines. WARNING: The NIM‐BRI‐ST cannot be connected directly to outside lines. An approved channel service unit (CSU) must be used for connection to the ISDN network. In some areas this CSU is supplied by the network provider and in others it must be ... - Page 8 Independent Communications Authority of South Africa This product complies with the terms of the provisions of section 54(1) of the Telecommunications Act (Act 103 of 1996) and the Telecommunications Regulation prescribed under the Post Office Act (Act 44 of 1958). TE-2002/195 TE-2002/190 APPROVED APPROVED TE-2003/112 TE-2003/113 APPROVED APPROVED SS/366.01 APPROVED VPN Consortium Interoperability The VPN Consortium’s (VPNC) testing program is an important source for certification of conformance to IPSec standards. With rigorous interoperability testing, the VPNC logo program provides IPSec users even more assurance that the XSR will interoperate in typical business environments. VPNC is the only major IPSec testing organization that shows both proof of interoperability as well as the steps taken so that you can reproduce the tests.
- Page 9 Enterasys Networks, Inc. Firmware License Agreement BEFORE OPENING OR UTILIZING THE ENCLOSED PRODUCT, CAREFULLY READ THIS LICENSE AGREEMENT. This document is an agreement (“Agreement”) between the end user (“You”) and Enterasys Networks, Inc. on behalf of itself and its Affiliates (as hereinafter defined) (“Enterasys”) that sets forth Your rights and obligations with respect to the Enterasys software program/firmware installed on the Enterasys product (including any accompanying documentation, hardware or media) (“Program”) in the package and prevails over any additional, conflicting or inconsistent terms and conditions appearing on any purchase order or other document submitted by You. “Affiliate” means any person, partnership, corporation, limited liability company, or other form of enterprise that directly or indirectly through one or more intermediaries, controls, or is controlled by, or is under common control with the party specified. This Agreement constitutes the entire understanding between the parties, and supersedes all prior discussions, representations, understandings or agreements, whether oral or in writing, between the parties with respect to the subject matter of this Agreement. The Program may be contained in firmware, chips or other media. BY INSTALLING OR OTHERWISE USING THE PROGRAM, YOU REPRESENT THAT YOU ARE AUTHORIZED TO ACCEPT THESE TERMS ON BEHALF OF THE END USER (IF THE END USER IS AN ENTITY ON WHOSE BEHALF YOU ARE AUTHORIZED TO ACT, “YOU” AND “YOUR” SHALL BE DEEMED TO REFER TO SUCH ENTITY) AND THAT YOU AGREE THAT YOU ARE BOUND BY THE TERMS OF THIS AGREEMENT, WHICH INCLUDES, AMONG OTHER PROVISIONS, THE LICENSE, THE DISCLAIMER OF WARRANTY AND THE LIMITATION OF LIABILITY. IF YOU DO NOT AGREE TO THE TERMS OF THIS AGREEMENT OR ARE NOT AUTHORIZED TO ENTER INTO THIS AGREEMENT, ENTERASYS IS UNWILLING TO LICENSE THE PROGRAM TO YOU AND YOU AGREE TO RETURN THE UNOPENED PRODUCT TO ENTERASYS OR YOUR DEALER, IF ANY, WITHIN TEN (10) DAYS FOLLOWING THE DATE OF RECEIPT FOR A FULL REFUND. IF YOU HAVE ANY QUESTIONS ABOUT THIS AGREEMENT, CONTACT ENTERASYS NETWORKS, LEGAL DEPARTMENT AT (978) 684‐1000. You and Enterasys agree as follows: LICENSE. You have the non‐exclusive and non‐transferable right to use only the one (1) copy of the Program provided in this package subject to the terms and conditions of this Agreement. RESTRICTIONS. Except as otherwise authorized in writing by Enterasys, You may not, nor may You permit any third party to: (i) Reverse engineer, decompile, disassemble or modify the Program, in whole or in part, including for reasons of error ...
- Page 10 UNITED STATES GOVERNMENT RESTRICTED RIGHTS. The enclosed Program (i) was developed solely at private expense; (ii) contains “restricted computer software” submitted with restricted rights in accordance with section 52.227‐19 (a) through (d) of the Commercial Computer Software‐Restricted Rights Clause and its successors, and (iii) in all respects is proprietary data belonging to Enterasys and/or its suppliers. For Department of Defense units, the Program is considered commercial computer software in accordance with DFARS section 227.7202‐3 and its successors, and use, duplication, or disclosure by the Government is subject to restrictions set forth herein. DISCLAIMER OF WARRANTY. EXCEPT FOR THOSE WARRANTIES EXPRESSLY PROVIDED TO YOU IN WRITING BY Enterasys, Enterasys DISCLAIMS ALL WARRANTIES, EITHER EXPRESS OR IMPLIED, INCLUDING BUT NOT LIMITED TO IMPLIED WARRANTIES OF MERCHANTABILITY, SATISFACTORY QUALITY, FITNESS FOR A PARTICULAR PURPOSE, TITLE AND NON‐ INFRINGEMENT WITH RESPECT TO THE PROGRAM. IF IMPLIED WARRANTIES MAY NOT BE DISCLAIMED BY APPLICABLE LAW, THEN ANY IMPLIED WARRANTIES ARE LIMITED IN DURATION TO THIRTY (30) DAYS AFTER DELIVERY OF THE PROGRAM TO YOU. LIMITATION OF LIABILITY. IN NO EVENT SHALL ENTERASYS OR ITS SUPPLIERS BE LIABLE FOR ANY DAMAGES WHATSOEVER (INCLUDING, WITHOUT LIMITATION, DAMAGES FOR LOSS OF BUSINESS, PROFITS, BUSINESS INTERRUPTION, LOSS OF BUSINESS INFORMATION, SPECIAL, INCIDENTAL, CONSEQUENTIAL, OR RELIANCE DAMAGES, OR OTHER LOSS) ARISING OUT OF THE USE OR INABILITY TO USE THE PROGRAM, EVEN IF ENTERASYS HAS BEEN ADVISED OF THE POSSIBILITY OF SUCH DAMAGES. THIS FOREGOING LIMITATION SHALL APPLY REGARDLESS OF THE CAUSE OF ACTION UNDER WHICH DAMAGES ARE SOUGHT. THE CUMULATIVE LIABILITY OF ENTERASYS TO YOU FOR ALL CLAIMS RELATING TO THE PROGRAM, IN CONTRACT, TORT OR OTHERWISE, SHALL NOT EXCEED THE TOTAL AMOUNT OF FEES PAID TO ENTERASYS BY YOU FOR THE RIGHTS GRANTED HEREIN. AUDIT RIGHTS. You hereby acknowledge that the intellectual property rights associated with the Program are of critical value to Enterasys and, accordingly, You hereby agree to maintain complete books, records and accounts showing (i) license fees due and paid, and (ii) the use, copying and deployment of the Program. You also grant to Enterasys and its authorized representatives, upon reasonable notice, the right to audit and examine during Your normal business hours, Your books, records, accounts and hardware devices upon which the Program may be deployed to verify compliance with this Agreement, including the verification of the license fees due and paid Enterasys and the use, copying and deployment of the Program. Enterasys’ right of examination shall be exercised reasonably, in good faith and in a manner calculated to not unreasonably interfere with Your business. In the event such audit discovers non‐compliance with this Agreement, ...
- Page 11 11. ASSIGNMENT. You may not assign, transfer or sublicense this Agreement or any of Your rights or obligations under this Agreement, except that You may assign this Agreement to any person or entity which acquires substantially all of Your stock or assets. Enterasys may assign this Agreement in its sole discretion. This Agreement shall be binding upon and inure to the benefit of the parties, their legal representatives, permitted transferees, successors and assigns as permitted by this Agreement. Any attempted assignment, transfer or sublicense in violation of the terms of this Agreement shall be void and a breach of this Agreement. 12. WAIVER. A waiver by Enterasys of a breach of any of the terms and conditions of this Agreement must be in writing and will not be construed as a waiver of any subsequent breach of such term or condition. Enterasys’ failure to enforce a term upon Your breach of such term shall not be construed as a waiver of Your breach or prevent enforcement on any other occasion. 13. SEVERABILITY. In the event any provision of this Agreement is found to be invalid, illegal or unenforceable, the validity, legality and enforceability of any of the remaining provisions shall not in any way be affected or impaired thereby, and that provision shall be reformed, construed and enforced to the maximum extent permissible. Any such invalidity, illegality or unenforceability in any jurisdiction shall not invalidate or render illegal or unenforceable such provision in any other jurisdiction. 14. TERMINATION. Enterasys may terminate this Agreement immediately upon Your breach of any of the terms and conditions of this Agreement. Upon any such termination, You shall immediately cease all use of the Program and shall return to Enterasys the Program and all copies of the Program.
-
Page 13: Table Of Contents
Contents Preface Contents of the Guide ............................xv Conventions Used in This Guide (Convenciones Usadas en Esta Guía) ............xv Getting Help ..............................xvii Chapter 1: Overview System Description ............................1-1 Hardware Features ..........................1-2 Software Features ............................ 1-3 Industry-common CLI ......................... 1-3 IP Protocol ............................ - Page 14 PRI Configuration ............................. 3-8 BRI Configuration ............................. 3-9 BRI Leased Line ..........................3-9 BRI Leased Frame Relay ......................... 3-10 BRI Switched Line ..........................3-10 ADSL Configuration ..........................3-11 PPPoE .............................. 3-11 PPPoA .............................. 3-11 IPoA..............................3-12 Firewall Sample Configuration ........................3-12 Setting Up RIP Routing ..........................
- Page 15 Termination Shunt for the ISDN BRI-S/T NIM Card ................A-18 Installing Shunt/Terminal Strip......................A-18 1/2-Port BRI-U NIM Card Ports ......................A-19 1-Port ADSL NIM Card Port ........................A-20 T1/E1 Drop & Insert (D&I) NIM ......................A-21 XSR-1850 Redundant Power System ....................A-22 CompactFlash Memory Card .........................A-23 LED Behavior ............................A-23 Index xiii...
-
Page 17: Contents Of The Guide
This guide provides a general overview of the XSR-1850 hardware and software features and describes how to quickly install and configure the XSR. Refer to the XSR-1850 CLI Reference Guide and XSR-1850 User’s Guide for information not contained in this document. - Page 18 Electrical Hazard: Warns against an action that could result in personal injury or death due to an electrical hazard. Riesgo Electrico: Advierte contra una acción que pudiera resultar en lesión corporal o la muerte debido a un riesgo eléctrico. Elektrischer Gefahrenhinweis: Installationen sollten nur durch ausgebildetes und qualifiziertes. Personal vorgenommen werden.
-
Page 19: Getting Help
Getting Help For additional support related to the XSR, contact Enterasys Networks by one of these methods: World Wide Web http://www.enterasys.com Phone (978) 684-1000 1-800-872-8440 (toll-free in U.S. and Canada) For the Enterasys Networks Support toll-free number in your country: http://www.enterasys.com/support/gtac-all.html... - Page 20 xviii...
-
Page 21: Chapter 1: Overview
Overview This chapter introduces key features of the XSR-1850 and briefly describes hardware installation. System Description The XSR is a desktop networking device designed for enterprise branch offices that provides IP routing over FastEthernet LAN and T1/E1, Serial (RS232, X.21, V.35, RS422/530, RS449), Dial Services via POTS, ISDN (BRI, PRI), or Frame Relay WAN connections. -
Page 22: Hardware Features
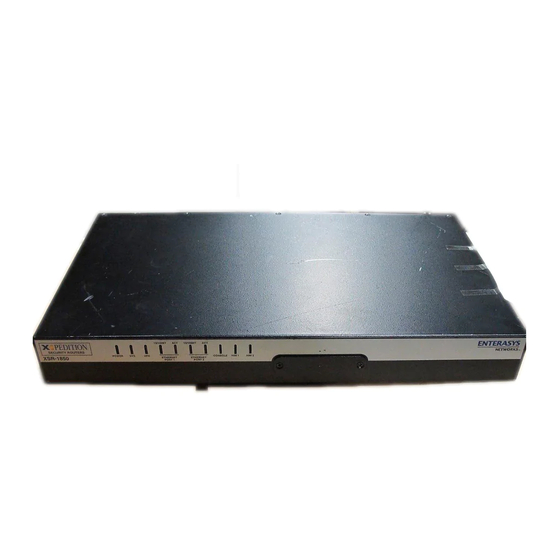
• IBM PowerPC 405GP embedded processor (440 MIPS) with integrated memory controller. Figure 1-2 XSR-1850 • Two Network Interface Module (NIM) slots for these optional cards: • 1, 2, or 4 full, fractional and channelized T1/E1 WAN NIM with integral CSU/DSU or Primary Rate Interface (PRI) ports (RJ-48C). -
Page 23: Software Features
System Description Note: The third NIM card slot is not used at this time. • Two 10/100BaseT FastEthernet LAN connectors. • Console interface including modem control signals for remote debugging, out-of-band configuration or dial backup. • 64 MBytes of SDRAM/DIMM memory upgradable to 128 MBytes, 8 MBytes of Onboard Flash, and 8, 16, 32, or 64 Mbyte optional, plug-in CompactFlash card. -
Page 24: Ip Routing
System Description • Telnet & TFTP for device management and configuration • Debugging tools Ping & TraceRoute • Secondary IP addressing • PPP and OSPF debugging • Internet Group Management Protocol (IGMP) • Remote Auto Install over Ethernet • Simple Network Time Protocol (SNTP) server •... -
Page 25: Security
System Description • Service Level Agreement (SLA) agents • SNMP-TFTP on-the-fly running configuration • Hostname in the Syslog message header • Multiple Syslog servers Security • Stateful inspection firewall engine • FTP, H.323, and RPC (SUN and Microsoft) ALG support •... -
Page 26: Dynamic Host Configuration Protocol (Dhcp)
System Description • Rate enforcement (CIR) with automatic rate fallback via traffic/adaptive shaping when the network is congested. Automatically restores normal rates when congestion removed • Congestion control: Backward and Forward Explicit Congestion Notification (BECN/FECN) • Standard LMIs: ILMI, ANSI Annex D, CCITT Annex A and: •... -
Page 27: Quality Of Service (Qos)
System Description • BRI: TEI auto-negotiated • Q.921/Q.931 (Layer 2/Layer 3) configuration is set automatically by selection of switch type • PRI supported switches: ETSI, NI, DMS100, NTT • PRI: Handling restart and maintenance modes automatically set • PRI: Fixed TEI to 0 •... - Page 28 System Description SecurID (third-party plug-in) Certificates (embedded/smart cards) – Microsoft only – PPTP protocol MS-ChapV2, EAP user authentication Local Database & RADIUS SecurID (third-party plug-in) Certificates (embedded/smart cards) – Microsoft only • Encryption • Advanced Encryption Standard (AES), Triple Data Encryption Standard (3DES), Data Encryption Standard (DES) •...
-
Page 29: Gre Over Ipsec
System Description GRE over IPSec • ToS bit preservation • IP helper on VPN interfaces • IETF/Microsoft-compatible NAT traversal for L2TP • QoS over VPN Asynchronous Digital Subscriber Line (ADSL) • POTS and ISDN circuit support • ATM Frame UNI (FUNI) data framing format •... -
Page 30: Dial Backup
Items included in the shipping box are shown in Chapter 2 of this manual. If you are missing any of these items, contact your authorized Enterasys Networks reseller or Enterasys Networks Customer Support as described in the Quick Start Guide. -
Page 31: Chapter 2: Hardware Installation
Hardware Installation Introduction This chapter provides a checklist to verify your shipment, suggestions for the installation site, and describes how to install the following XSR hardware: • NIM cards • Connecting cables • Optional - CompactFlash card • Optional - Redundant power supply(s), passive power chassis and harness Note: For instructions on installing a balun and grounding shunt/terminal strip on E1 NIM cards only, refer to Appendix A: Specifications on page A-1... -
Page 32: Installing Nim Cards And Rack Mounting
Installing NIM Cards and Rack Mounting • If installing the XSR chassis in an equipment rack, ensure that the rack can support and remain stable with the chassis installed. • Each XSR AC power supply requires a three-pronged power receptacle capable of delivering the current and voltage specified in Appendix A. - Page 33 Installing NIM Cards and Rack Mounting Unfasten the screws securing the NIM blank/grounding plates and remove them as shown in Figure 2-2. Figure 2-2 Removing Blank/Grounding Plates XSR Getting Started Guide 2-3...
- Page 34 Installing NIM Cards and Rack Mounting Fasten the NIM to the NIM brace and screws supplied in the shipping box, as shown in Figure 2-3. Figure 2-3 Installing NIM Brace 2-4 Hardware Installation...
- Page 35 Installing NIM Cards and Rack Mounting Position the NIM atop the open slot (NIM 2) pin holding assembly on the chassis and gently press into place. Fasten the back end of the NIM/brace to the chassis with the screws supplied, as shown in Figure 2-4.
- Page 36 Installing NIM Cards and Rack Mounting Figure 2-5 Fastening Rack Brackets Mount the bracketed XSR to your rack, as shown in Figure 2-6. Figure 2-6 Attaching XSR to the Rack 2-6 Hardware Installation...
-
Page 37: Connecting Xsr Cables
Connecting XSR Cables Connecting XSR Cables Perform the following steps to connect your cabling: Connect the serial Console cable provided in the packing box to your PC connector, as shown Figure 2-7. Figure 2-7 Connecting Serial Console Cable Connect your WAN cables to the T1/PRI or BRI port(s) to your WAN connectors, as shown in Figure 2-8. - Page 38 Connecting XSR Cables Figure 2-9 Connecting High Speed Serial Connector Optionally, you can connect WAN cables to a T3/E3 NIM, as shown in Figure 2-10, or an ADSL NIM, as shown in Figure 2-11, or a T1 Drop & Insert NIM, as shown in Figure 2-12.
- Page 39 Connecting XSR Cables Figure 2-12 Connecting T1 Drop & Insert Connector Connect the FastEthernet port(s) to your LAN connectors with a cable, as shown in Figure 2-13. Figure 2-13 Attaching FastEthernet Connectors Attach the power supply cord to the power connector at the rear of the router, as shown in Figure 2-14, and plug in the country-sprecific power cord to a wall socket.
-
Page 40: Installing A Compactflash Memory Card
Installing a CompactFlash Memory Card Figure 2-14 Connecting Internal Power Supply Cord You are now ready to configure the software and initialize the XSR. Continue with “Software Configuration” on page 3-1. Installing a CompactFlash Memory Card An optional CompactFlash (CF) memory card provides additional non-volatile storage capabilities in 8, 16, 32, or 64 Mbyte increments. -
Page 41: Compactflash Card Installation
Installing a CompactFlash Memory Card CompactFlash Card Installation Follow the steps below to install the CompactFlash card: If your CF is formatted, first remove the cover plate as shown in Figure 2-16. If it is not formatted, jump to “Formatting the CompactFlash Card” on page 2-12. -
Page 42: Formatting The Compactflash Card
XSR in normal mode. Installing the Redundant Power System The XSR-1850 provides an optional, external power supply, as illustrated in Figure 2-18, for use as a supplemental power source. This 50-watt, AC to DC Redundant Power System is a truly redundant unit which is operated in parallel with the standard internal power supply, with which it shares power buses. - Page 43 Installing the Redundant Power System Figure 2-18 Redundant Power System BUPS_06 Up to four power systems can be installed in the 1U Passive Power Chassis, as shown in Figure 2-19, which can be rack mounted. Two-foot long DC power harnesses are provided to attach XSRs and the chassis, as well as a standard, 2-meter shielded power cord for the chassis-to- wall outlet connection.
- Page 44 Installing the Redundant Power System Figure 2-20 Inserting Power System in Passive Power Chassis Mount the power chassis in a standard 19” rack, as shown in Figure 2-21. Figure 2-21 Rack Mounting the Power Chassis Insert one end of the DC cable harness into the power chassis connector, and the other end into the XSR external connector, as shown in Figure 2-22.
- Page 45 Installing the Redundant Power System Figure 2-22 Connecting DC Cable Harness When connecting cable harnesses, be careful to attach them with a minimum of stretching, as shown in Figure 2-23. XSR Getting Started Guide 2-15...
- Page 46 Connect one end of the power cord into the power chassis, as shown in Figure 2-24, and the other end into a wall outlet. Appropriate international power cords are provided by Enterasys. Figure 2-24 Connecting Passive Chassis Power Cord 2-16 Hardware Installation...
-
Page 47: Chapter 3: Software Configuration
Software Configuration This chapter describes how to initialize, quickly set up and verify your configuration for the XSR. Refer to the XSR CLI Reference Guide for a more thorough explanation of commands and parameter options. Also included are sample configuration scripts, detailed XSR rebooting characteristics, and Remote Auto Install (RAI) and Bootrom Monitor mode instructions. - Page 48 Powering On and Initializing XSR Software • ETH 10/100 LEDs turn ON and OFF a few times during initialization as the XSR proceeds from bootrom to power up diagnostics to software image, then they remain ON or OFF depending on the LAN type. •...
-
Page 49: Opening A Console Session
Opening a Console Session only the first error will be reported, along with a count of the sum of errors incurred. In the case of a single error, only the error line will be reported. Error messages will be logged as well. - Page 50 Optional: Configuring Remote Auto Install to IP addresses 133.133.1.2 and 133.133.1.3. If the DLCI will onnect to a remote XSR running RAI, then add the bootp parameter after the static IP address. This configuration supports two remote XSRs connected on DLCIs 16 and 18. Make sure with your Frame Relay provider that these DLCIs terminate at the location of the remote XSRs.
-
Page 51: Configuring Rai For Dhcp Over Lan
Optional: Configuring Remote Auto Install Phase 6 - getting hostname xsrnode-confg from tftp server into flash: startup- config rDNS has responded with the hostname which will be used in the TFTP transfer. RAI will try several file names xsrnode if this file is not available from the server. Phase 7 - preparing node to execute startup-config TFTP transfer succeeded in copying the hostname file to the file. - Page 52 Optional: Configuring Remote Auto Install The following is a CISCO configuration at the the central site: vpdn enable Enables a virtual private dial-up network configuration on the router. vpdn-group 1 Creates a VPDN session group and links it to a virtual template. accept-dialin protocol pppoe virtual-template 1...
-
Page 53: Configuring The Xsr Name And User Information
Configuring the XSR Name and User Information Phase 2 - ADSL - searching for pvc's ...vpi/vci (0/0) The XSR looks for PVC 0/0 and higher. Phase 2 - ADSL - searching for pvc's ...vpi/vci (0/38) The XSR looks for PVC 0/38 and higher. Phase 3 - ADSL - trying to connect on 0/35 with snap PPPoE PVC 0/35 is found, SNAP PPPoE encapsulation is applied and authentication tried if required. -
Page 54: Setting The Clock
Setting the Clock Setting the Clock XSR 1800 and 3000 Series routers have an on-board Real Time Clock (RTC) chip with which to keep accurate time across the network. As an alternative to accessing a public time server, you can utilize the RTC as a time reference and propagate it by configuring XSRs as Simple Network Time Protocol (SNTP) servers or clients. -
Page 55: Bri Configuration
Configuring the WAN Ports This command allows multiple logical WAN interfaces to be created on a single channelized T1/E1/ISDN-PRI port, ranging from 0 - 23 for T1 lines, and 0 - 31 for E1 lines. Also, from 1 - 24 T1 and 1 - 31 E1 timeslots can be set. -
Page 56: Bri Leased Frame Relay
Configuring the WAN Ports Enter to select PPP encoding. encapsulation ppp Enter to keep the BRI interface enabled. no shutdown BRI Leased Frame Relay Enter to acquire BRI Interface mode and select the BRI interface bri 0:<1 | 2>.<1-30> port and channel 1 or 2. Enter to select Frame Relay encoding. -
Page 57: Adsl Configuration
Configuring the WAN Ports ADSL Configuration ADSL can be configured using three different types of encapsulation: PPPoA, PPPoE, and IPoA. Continue configuration with the ADSL type of your choice. PPPoE The following commands configure a sample PPPoE topology. The first set configures the LAN interface with directed broadcasts prohibited. -
Page 58: Ipoa
Firewall Sample Configuration The commands below configure the ATM interface and sub-interface with a negotiated IP address, CHAP username and password, and bans keepalives. XSR(config)#interface ATM 0 XSR(config-if<ATM0/0>)#no shutdown XSR(config-if<ATM0/0.1>)#interface ATM 0.1 XSR(config-if<ATM0/0.1>)#no shutdown XSR(config-if<ATM0/0.1>)#encapsulation snap pppoa XSR(config-if<ATM0/0.1>)#ip address negotiated XSR(config-if<ATM0/0.1>)#ip mtu 1492 XSR(config-if<ATM0/0.1>)#ip tcp adjust-mss 1400 XSR(config-if<ATM0/0.1>)#ppp chap hostname red password sox... - Page 59 Firewall Sample Configuration Figure 3-1 XSR with Firewall Topology 220.150.2.32/28 XSR-1850 Frame Relay 220.150.2.35 Y RO 206.12.44.16/28 220.150.2.37 Internet 220.150.2.17 Internal 220.150.2.36 220.150.2.16/28 Web server Mail server (HTTP) (SMTP) 220.150.2.19 220.150.2.18 In this configuration, the firewall provides protected access from the private to dmz networks. That is, access is restricted to Web and mail traffic only.
-
Page 60: Setting Up Rip Routing
Setting Up RIP Routing Trial load the completed configuration into the firewall engine, and if successful, load the configuration: XSR(config)#ip firewall load trial XSR(config)#ip firewall load Complete LAN and WAN interface configuration: XSR(config)#interface fastethernet 1 XSR(config-if<F1>)#ip address 220.150.2.35 255.255.255.0 XSR(config-if<F1>)#no shutdown XSR(config)#interface fastethernet 2 XSR(config-if<F2>)#ip address 220.150.2.17 255.255.255.0 XSR(config-if<F2>)#no shutdown... -
Page 61: Configure Ospf Routing
Configure OSPF Routing 12. Enter network <xxx.xxx.xxx.xxx> (IP address) of the network to be advertised. Repeat the command to configure additional networks. 13. Enter passive-interface type num if you want to prevent RIP transmissions on the interface. 14. Enter no receive-interface if you want to disable reception of RIP updates on the interface. Remember to save your configuration after all edits. -
Page 62: Setting Up The Backup Line
Setting Up the Backup Line Enter map-class frame-relay <name> to designate this map-class and acquire Map-Class mode. Enter frame-relay cir out <bits> to set the outgoing CIR (the default is 56000 bps). Refer to the XSR User’s Guide for more details. Enter frame-relay bc out <bits>... -
Page 63: Setting Up Snmp Community String, Traps And V3 Values
Setting Up SNMP Community String, Traps and V3 Values 10. To set up the Console port as a dial-in port, perform the following: • Enter interface serial 0 to decouple the port from the CLI and acquire Interface mode. • Enter no shutdown to keep the interface enabled. 11. -
Page 64: Configuring Message Logging And Severity Level
Configuring Message Logging and Severity Level Optional. For SNMPv3, enter <username> <group name> snmp-server user [encrypted][auth {md5 | sha} [priv des56 priv-password]]} to add a user. auth-password Users can have different levels of encryption and passwords. Remember to save your configuration after all edits. Refer to the User’s Guide and CLI Reference Guide for more information. -
Page 65: Connecting Remotely Via The Web
Point your terminal’s Web browser at the XSR’s IP address. Enter http://<XSR IP address>. The initial Web access window appears as shown in Figure 3-2. Figure 3-2 Initial Web Access Window STATUS Product Version X-Pedition Products X-Pedition Security Router XSR © 2004 Enterasys Networks. All rights XSR Getting Started Guide 3-19... - Page 66 Figure 3-3. Figure 3-3 Web Product Version Window Product Version Copyright 2004 by Enterasys Networks, Inc. Hardware: Processor board ID: 9002854-02 REV0A Serial Number: (not displayed) Processor: IBM PowerPC 405GP Rev. D at 250MHz RAM installed: 64MB...
-
Page 67: Lan-Ppp Services Sample Configuration
Hostname: branch1 Hostname: mainsite Username: mainsite Username: branch1 Password: Toronto Password: Toronto 192.168.1.100/24 154.168.1.47/24 Central Site XSR-1850 PSTN Leased line Leased line XSR-1850 or E1/T1 fractional E1/T1 serial V.35/X.21 SSR-8600 Server Backup via serial (RS-232 dial) 1-800-555-1111 Username: branch2 Backup Site PSTN 154.168.1.1/24... -
Page 68: Frame Relay Wan Link With Ppp Backup Sample Configuration
Frame Relay WAN Link with PPP Backup Sample Configuration XSR(config-controller<T1-1/0>)#no shutdown Enables T1 controller XSR(config)#interface serial 1/0:0 Configures Serial interface 1, port 1 using channel group 0 and acquires Interface mode XSR(config-if<S1/0:0>)#encapsulation ppp Enables PPP encapsulation XSR(config-if<S1/0:0>)#ppp authentication chap Configures CHAP authentication on the interface XSR(config-if<S1/0:0>)#ip address 154.68.1.47 255.255.255.0 Enables IP address for serial interface 1/0 XSR(config-if<S1/0:0>)#backup interface dialer 5... -
Page 69: Configure Users And Passwords
Frame Relay WAN Link with PPP Backup Sample Configuration Configure Users and Passwords XSR>enable Acquires Privileged EXEC mode XSR#configure Acquires Global configuration mode XSR(config)#username bob password cleartext bobspassword Adds a user and unencrypted password Configure LAN Interface XSR(config)#interface fastethernet 1 Configures the local LAN port and acquires Interface mode XSR(config-if<F1>)#ip address 192.168.1.100 255.255.255.0 Enables the IP address for the FastEthernet port... -
Page 70: Configure Wan/Frame Relay Port
Frame Relay WAN Link with PPP Backup Sample Configuration XSR(config-pmap-c<priority-policy>)#set ip dscp ef Configures IP precedence to match packets with Expedited Forwarding XSR(config-pmap<priority-policy>)#class priority-server Adds another queue for this policy map and enters Class sub-mode XSR(config-pmap-c<priority-server>)#priority medium 20 6400 Gives medium priority queue a peak 20% bandwidth and burst size of 6400 bits per second XSR(config)#policy-map data_policy Adds a policy map and acquires Policy Map mode XSR(config-pmap<data_policy>)#class data_class... -
Page 71: Apply Qos
Frame Relay WAN Link with PPP Backup Sample Configuration XSR(config-if<S1/0.2-16>)#no shutdown Enables DLCI 16 interface Apply QoS XSR(config)#map-class frame-relay CLASS-FRP Adds a FR map class and acquires FR Map Class mode XSR(config-map-class<CLASS-FRP>)#frame-relay cir out 48000 Sets this map class’ CIR rate at 48000 bits per second XSR(config-map-class<CLASS-FRP>)#frame-relay bc out 4000 Sets this map class’... -
Page 72: Configure More Access Lists
Frame Relay WAN Link with PPP Backup Sample Configuration Configure More Access Lists The following ACLs deny any packets to or from network 192.168.1.15 as they enter or leave FastEthernet 1 interface, and permit traffic to or from subnet 192.168.2.xx while denying any other traffic. -
Page 73: Configure Snmp
XSR(config)#snmp-server community toConfigure1 rw 26 Adds another SNMP community with read-write privileges attached to ACL 26 XSR(config)#snmp-server enable traps Enables traps to be transmitted XSR(config)#snmp-server contact support@enterasys.com Specifies contact information for the management server XSR(config)#snmp location “HQ 2nd floor” Specifies the server locationr XSR(config)#snmp-server host 192.168.2.101 traps trapCommunity... -
Page 74: Generate Master Encryption Key
VPN Site-to-Site Sample Configuration Generate Master Encryption Key If you have not already generated a master encryption key, you should do so now to configure the VPN. A master key need only be generated once. Caution: The master encryption key is stored in hardware, not Flash, and you cannot read the key - only overwrite the old key by writing a new one. -
Page 75: Create A Transform Set
VPN Site-to-Site Sample Configuration Create a Transform Set The following transform-set specifies the specified encryption/data integrity choices, 768-bit Diffie-Hellman, and an SA lifetime expressed in kilobytes. The SA seconds lifetime value is disabled. Some commands are abbreviated. XSR(config)#cry ips transform-set esp-3des-sha esp-3des esp-sha-hmac XSR(cfg-crypto-tran)#set pfs group1 XSR(cfg-crypto-tran)#set security-association lifetime kilobytes 100000 XSR(cfg-crypto-tran)#no set security-association lifetime seconds... -
Page 76: Configuring Authentication (Aaa)
VPN Sample Configuration with Network Extension Mode XSR(config)#interface vpn 57 multi-point XSR(config-int-vpn)#ip address 192.168.2.1 255.255.255.0 XSR(config)#router rip XSR(config-router)#network 112.16.10.0 XSR(config-router)#passive-interface fastethernet 2 XSR(config-router)#no receive-interface fastethernet 2 XSR(config-router)#distribute-list 1 out vpn 1 XSR(config)#ip route 0.0.0.0 0.0.0.0 112.16.244.9 XSR(config)#ip route 112.16.72.0 255.255.255.0 112.16.244.9 XSR(config)#ip route 112.16.76.0 255.255.255.0 112.16.244.7 XSR(config)#ip route 112.16.80.0 255.255.255.0 112.16.244.5 Configuring Authentication (AAA) - Page 77 VPN Sample Configuration with Network Extension Mode Figure 3-6 VPN Topology with NEM, EZ-IPSec and Internet Access eth0: 10.11.11.1/24 FastEthernet 1: 172.16.10/24 eth1: 26.26.26.11/24 FastEthernet 2: 26.26.26.10/24 Virtual IP Pool: 172.16.10.0/24 URIT Y ROU TERS 10/10 10/10 ETHE ETHE SOLE Y RO 26.26.26.0/24 eth0: 10.12.12.1/24...
- Page 78 VPN Sample Configuration with Network Extension Mode Configure AAA authentication by assigning a virtual subnet to the DEFAULT AAA group, associate it with DNS and WINs servers, and add two AAA users with passwords. When a remote XSR tunnels into the local XSR, it will be assigned these DNS, WINS and PPTP values and be assigned dynamically to IP pool virtual_subnet.
-
Page 79: Xsr Rebooting Characteristics
CLI describes router initialization. Initialization Output The XSR displays the following output when it initializes (cold reboot): X-Pedition Security Router Bootrom Copyright 2002 Enterasys Networks Inc. HW Version: 9002854-02 REV0A Serial Number: 0001F4000102 CPU: IBM PowerPC 405GP Rev. D VxWorks version: 5.4 Bootrom version: 1.20... - Page 80 Testing ISDN PMC in Slot [2] .......<Not Installed> Testing ISDN PMC in Slot [3] .......<Not Installed> Exiting Diagnostics..X-Pedition Security Router Bootrom Copyright 2003 Enterasys Networks Inc. HW Version: 9002854-02 REV0A Serial Number: 0001F4000102 CPU: IBM PowerPC 405GP Rev. D VxWorks version: 5.4 Bootrom version: 1.20...
-
Page 81: Reboot Triggers
XSR Rebooting Characteristics Creation date: Oct 19 2002, 12:39:02 Cold Start : SystemReset from power up auto-booting... Unpacking flash:XSR1800.FLS file File chksum=0x0 SW image size=9543664 sum=0xb5b2 compressed_size=2916334 entry=0x10000 Diagnostics size=874252 sum=0x64b8 compressed_size=281490 entry=0x10000 Extracting System Image at offset=0x24 ... Inflating 2916334 bytes ... Verifying uncompressed chksum ... -
Page 82: Power-Up Reboot
Bootrom Monitor Mode Commands Power-Up Reboot If you power cycle the XSR by flipping the switch on the back panel, the XSR will cold reboot. The file stored in Flash becomes the running configuration. startup-config Reload Command from the CLI You can reboot the XSR firmware by issuing the command . - Page 83 Bootrom Monitor Mode Commands Status Time and Date For Development Only All the commands in each group can be listed by entering the command group letter. The main menu provides the following functions: • Reboot warm or cold • Update Bootrom •...
-
Page 84: Copy
Bootrom Monitor Mode Commands Updating bootrom with file, "cflash:bootrom1_18.fls". Proceed with erasing current Bootrom in flash and replace with cflash:bootrom2_02.fls? y ***************************************************** Do not interrupt or power down until complete! ***************************************************** Erasing 8 sectors at address=0xfff00000 Programming 130816(0x1ff00) bytes at address 0xfff00100 Programming 131072(0x20000) bytes at address 0xfff20000 Programming 131072(0x20000) bytes at address 0xfff40000 Programming 131072(0x20000) bytes at address 0xfff60000... -
Page 85: Del
Bootrom Monitor Mode Commands This command shows free disk space. Sample output is shown as follows: XSR-1800: df Free space on flash: is 3383296 bytes (0x33a000). This command removes a file from memory. flash: cflash: This command lists the contents of the current directory in long format. The command displays the following sample output: XSR-1800: dir size... -
Page 86: Ffc
Bootrom Monitor Mode Commands Formatting flashrom file system ............Done. Set working directory to flash: Using default Bootrom password. The system is not secure!!! Use “bp” to change password This command formats the CompactFlash card. This command retrieves a file over the network using a remote IP address/file path. This command modifies network parameters. -
Page 87: Remove
Bootrom Monitor Mode Commands remove This command removes a file using the syntax remove <source name> <destination name> rename This command renames a file using the syntax rename <source name> <destination name> This command displays boot values. Sample output is shown as follows: XSR-1800: sb Current boot file is xsr1800.fls Boot selector default is flashrom, compactFlash, network... - Page 88 Current FastEthernet 1 MAC address is: 00:01:f4:01:01:02 This command shows the bootrom version with sample output below: XSR-1800: sv X-Pedition Security Router Bootrom Copyright 2002 Enterasys Networks Inc. HW Version: 9002854-02 REV0A Serial Number: 0001F4000102 CPU: IBM PowerPC 405GP Rev. D VxWorks version: 5.4...
-
Page 89: Appendix A: Specifications
Specifications System Specifications This appendix details XSR data about hardware functionality including: • Processor, system memory, chassis, power supply, interfaces • Required cabling, CompactFlash and other accessories • Pinout assignments for WAN and LAN interfaces • LED behavior Refer to tables throughout this appendix for specific information. Table A-1 XSR Hardware Specifications Category... - Page 90 System Specifications Table A-1 XSR Hardware Specifications (continued) Category Parameters Redundant Dimensions Power System: 5” long by 4” wide by 1.4” high Power System Power Chassis: 1.72” high (1U) by 19” wide by 11” deep & Power Weight Power System: 1.75 lbs Chassis Power Chassis: 8.5 lbs AC Input Voltage/Freq.
-
Page 91: Cable, Compactflash And Accessory Specifications
Cable, CompactFlash and Accessory Specifications Refer to the following table for specifications of cables, CompactFlash and accessories for the XSR. This equipment can all be obtained separately from Enterasys Networks or through any computer supply retailer. Table A-2 XSR Cabling/Accessory Guide... - Page 92 Part Description Connector Part # Function Auxiliary Flash RAM: 1.4”L x 1.6” W Front panel slot N/A from Enterasys CompactFlash card for -8, 16, 32 MByte card greater software storage and flexibility 128 MByte DIMM memory card upgrade 100-pin, female...
-
Page 93: Console Port
Cable, CompactFlash and Accessory Specifications Console Port The XSR comes equipped with a serial port useful for initial configuration. Using a serial (null modem) cable, you can attach the router’s DB-9 Console port to a data terminal port and directly configure the XSR over the asynchronous connection. Then, open a Microsoft HyperTerminal or Telnet session to communicate with the router. -
Page 94: Ethernet Ports
Cable, CompactFlash and Accessory Specifications Ethernet Ports The XSR comes equipped with two Ethernet (LAN) 10/100Base-T ports that support full-duplex 10 or 100 Mbps transmission. Both ports conform to IEEE 802.3 standards with 8-pin modular RJ- 45 connectors. A cross-over cable is used to connect the XSR directly to a PC or uplink port while a straight-through cable is used to attach the router to a hub or switch. -
Page 95: Copper/Fiber-Optic Ethernet Nims
Cable, CompactFlash and Accessory Specifications Copper/Fiber-optic Ethernet NIMs The single-port Copper or Fiber-optic Ethernet NIMs, shown in Figure A-3 Figure A-4, provide interfaces for half and full-duplex 10/100Base-T or fiber-optic 100Base-F transmission over LAN or WAN networks, respectively. The Copper Ethernet NIM incorporates a standard 8- pin modular RJ-45 connector and the Fiber-optic Ethernet NIM has an MT-RJ multi-mode interface. -
Page 96: 2/4-Port Serial Nim Card Port
Cable, CompactFlash and Accessory Specifications 2/4-Port Serial NIM Card Port The High Speed Serial NIM card, as shown in Figure A-6, provides a WAN connection to four different types of DTEs: DB-15, 25, 37, and V.35. This interface can support dual and quad traffic up to 8 Mbps. - Page 97 Cable, CompactFlash and Accessory Specifications Figure A-8 EIA-232/530 DTE Pin Assignments DSR2+ DSR0+ - 68-pin male SCSI III type con ne cto DSR2- DSR0- J2...J5 - DB-25 type male connector RxD2+ RxD0+ RxD2- RxD0- TxD2 + TxD0+ TxD2- TxD0- RTS2+ RTS0+ Port 1 RTS0-...
- Page 98 Cable, CompactFlash and Accessory Specifications Figure A-9 EIA-449 DTE Pin Assignments ON2+ ON0+ - 68-pin male SCSI III type con ne ctor ON2- ON0- J2...J5 - DB-37 type ma le con nector RD2+ RD0+ RD2- RD0- SD2+ SD0+ SD2- SD0- RS2+ RS0+ RS2-...
- Page 99 Cable, CompactFlash and Accessory Specifications Figure A-10 Combined V.35/EIA-232/530 DTE Pin Assignments PORT 1 PORT 3 (EIA-232/530) (EIA-232/530) DSR1+ DSR3+ DSR1- DSR3- RxD1+ RxD3+ RxD1- RxD3- TxD1+ TxD3+ TxD1- TxD3- RTS1+ RTS3+ RTS1- RTS3- DTR1+ DTR3+ DTR1- DTR3- CTS1+ CTS3+ CTS1- CTS3- TxC1+...
- Page 100 Cable, CompactFlash and Accessory Specifications Figure A-11 V.35 DTE Pin Assignments DSR2 DSR0 - 68 -p in male SCSI III type conne cto RD2+ RD0+ J2...J5 - V.35 type ma le conne ctor RD2 - RD0 - SD2+ SD0+ SD2- SD0 - RTS2 RTS0...
-
Page 101: T1/E1/Isdn Pri Nim Card Ports
Cable, CompactFlash and Accessory Specifications T1/E1/ISDN PRI NIM Card Ports The T1/E1/ISDN PRI NIM, as shown in Figure A-12, comes equipped with either 1, 2 or 4 Ethernet (WAN) ports that support fractional T1/E1 transmission in full-channel, fractional or unchannelized format with 8-pin modular RJ-48C connectors and include a built-in DSU/CSU. Cables required for these ports must be 100-ohm, straight-through, twisted-pair for T1 lines and a 120-ohm version for E1 lines. -
Page 102: Balun For E1 Or Pri Nim Cards
Cable, CompactFlash and Accessory Specifications Balun for E1 or PRI NIM Cards Some overseas electrical systems require that you use a balun and grounding shunt when utilizing an E1 or PRI NIM card on the XSR. A balun is an adapter employed to connect a 75-ohm coaxial cable pair (2 BNC connectors) to a 120-ohm twisted pair cable (RJ-48C connector). -
Page 103: Grounding Shunt For E1 Nim Cards
Cable, CompactFlash and Accessory Specifications Grounding Shunt for E1 NIM Cards If you connect a balun to a 75-ohm line, you will also need to attach a grounding shunt (or terminal strip) to any NIM pins whose RJ-48C connectors utilize the balun. The XSR requires that you use a shunt (shown in Figure A-15), or terminal strip to ground pins 3 and 6 of the RJ-48C... -
Page 104: T3/E3 Nim Card
Cable, CompactFlash and Accessory Specifications T3/E3 NIM Card The T3/E3 full and sub-rate NIM, as shown in Figure A-17, is equipped with 1 Ethernet (WAN) port that supports fractional T3/E3 transmission in un-channelized or clear channel mode with BNC connectors. User data are encapsulated in HDLC packets before being sent to the line. Figure A-17 .1-Port T3/E3 NIM Card ALARM LOS... -
Page 105: 1/2-Port Isdn Bri-S/T Nim Card Ports
Cable, CompactFlash and Accessory Specifications 1/2-Port ISDN BRI-S/T NIM Card Ports The XSR offers a serial NIM card for 1 or 2 WAN interfaces over an ISDN BRI-S/T line, as shown Figure A-18. The Port 0 and 1 LEDs shine when the lines are active and ready to receive traffic. Figure A-19 for pinout assignments. -
Page 106: Termination Shunt For The Isdn Bri-S/T Nim Card
Cable, CompactFlash and Accessory Specifications Termination Shunt for the ISDN BRI-S/T NIM Card ISDN BRI-S/T terminal equipment devices may be connected at random points of the cable in point-to-point or point-to-multipoint configurations. Line termination resistors must be provided at both ends of the transmit/receive lines only. The XSR’s BRI NIM card provides an option to terminate receive as well as transmit lines using 100 Ohm resistors. -
Page 107: 1/2-Port Bri-U Nim Card Ports
Cable, CompactFlash and Accessory Specifications 1/2-Port BRI-U NIM Card Ports The XSR provides a serial NIM card for 1 or 2 WAN interfaces over an ISDN BRI-U line, as shown Figure A-21. The Port 0 and 1 LEDs shine when the lines are active and ready to receive traffic. . Figure A-21 ISDN BRI-U NIM Card (RJ-49C ports shown) Port 0 Activation LED... -
Page 108: 1-Port Adsl Nim Card Port
Cable, CompactFlash and Accessory Specifications 1-Port ADSL NIM Card Port The XSR’s Asymmetric Digital Subscriber Line (ADSL) NIM card, as shown in Figure A-23, provides 1 WAN port on an ADSL over POTS (Annex A/C) or ISDN (Annex B) line with a 6-pin RJ-11 connector. -
Page 109: T1/E1 Drop & Insert (D&I) Nim
Cable, CompactFlash and Accessory Specifications T1/E1 Drop & Insert (D&I) NIM The XSR’s 2-port T1/E1 D&I NIM card, as shown in Figure A-25, is designed as an intermediary between the Central Office T1/E1 line and a PBX. It de-couples Channel Associated Signaling (CAS) and Voice DS0 timeslots and redirects them to a PBX, and conversely, reintegrates Voice DS0 timeslots from the PBX with the T1/E1 data stream. -
Page 110: Xsr-1850 Redundant Power System
Cable, CompactFlash and Accessory Specifications XSR-1850 Redundant Power System The optional XSR-1850 Redundant Power System, as shown in Figure A-27, is an external, supplemental power source. This 50-watt, AC to DC power supply is a redundant unit which is operated in parallel with the standard internal power supply, with which it shares power buses. -
Page 111: Compactflash Memory Card
Cable, CompactFlash and Accessory Specifications Figure A-29 Passive Power Chassis DC Output Pinouts Signal DC Output +5.1V -12V Pin 1 Pin 7 +12V COMMON (+) 5.1V sense (-) 5.1V sense Pin 9 Pin 3 For instructions on installing the Redundant Power System, refer to the Hardware Installation chapter on page 2‐1. - Page 112 Cable, CompactFlash and Accessory Specifications Table A-3 LED Description State Function POWER 3.3V power is present SYS(tem Status) ON/OFF XSR is operational/malfunctioning due to hardware or bootrom problem Blinking Flash update is in progress (software image downloading), slowly warning you not to power down the XSR. Powering down now can leave the branch router without valid software.
-
Page 113: Index
IP routing 3-14 Grounding shunt specifications how to configure the console description A-15 powering on the XSR-1850 port specifications PowerPC 405GP processor how to configure the router name power-up diagnostics and user data power-up error conditions... - Page 114 3-33 sample configuration 3-21 SDRAM size software configuration overview software features system memory T1/E1 pinouts A-13 V.35 pinouts A-12 verifying your shipment X.21 pinouts how to set WAN ports XSR-1850 Expedition Security Router See X-Pedition Security Router Index-2...
Need help?
Do you have a question about the X-Pedition XSR-1850 and is the answer not in the manual?
Questions and answers