
Related Manuals for Advantech PCI-1680U


Summary of Contents for Advantech PCI-1680U
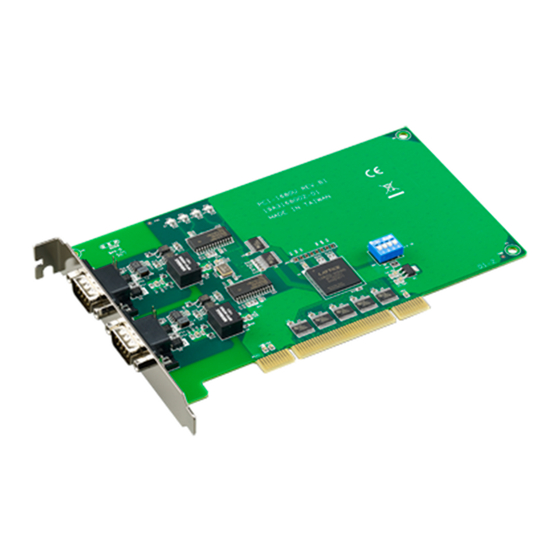
- Page 1 User Manual PCI-1680U 2-Port CAN Interface Universal PCI Communication Card w/ Isolation PCI-1682U 2-port CAN Interface Universal PCI Communication Card w/ CANopen...
- Page 2 No part of this manual may be reproduced, copied, translated or transmitted in any form or by any means without the prior written permission of Advantech Co., Ltd. Information provided in this manual is intended to be accurate and reliable. How- ever, Advantech Co., Ltd.
-
Page 3: Declaration Of Conformity
This product has passed the CE test for environmental specifications when shielded cables are used for external wiring. We recommend the use of shielded cables. This kind of cable is available from Advantech. Please contact your local supplier for ordering information. - Page 4 Don't touch any components on the CPU card or other cards while the PC is on. Disconnect power before making any configuration changes. The sudden rush of power as you connect a jumper or install a card may damage sensitive elec- tronic components. PCI-1680U/1682U User Manual...
-
Page 5: Table Of Contents
Description ....................2 Features ....................2 Specifications .................... 3 Ordering Information ................. 3 Chapter Install WDM driver .......5 Begin to use Advantech CAN device driver ..........6 2.1.1 PCI device setup................7 2.1.2 ISA device setup ................8 2.1.3 Port setup..................14 2.1.4... - Page 6 4.10.2 Introduction to Main Items in Menu Screen ........ 90 4.11 COTI.DLL for CANopen Conformance Test ........... 94 Chapter Pin Assignments and Wiring ... 95 Pin Assignments ..................96 Figure 5.1 PCI-1680U/1682U DB-9 pin assignment....96 Wiring...................... 96 Table 5.1: PCI-1680U/1682U Pin Wiring and Description..96 PCI-1680U/1682U User Manual...
-
Page 7: Chapter 1 Introduction
Chapter Introduction This chapter provides a general description of the PCI-1680U and PCI-1682U. Sections include: Description Features Specifications Ordering Information... -
Page 8: Description
This drastically reduces the chance of data loss and ensures system reliability. You can run both CAN controllers independently at the same time. The PCI-1680U/1682U operates at baud rates up to 1 Mbps and can be installed in a PC expansion slot. -
Page 9: Specifications
Operating Humidity: 5 ~ 95% Relative Humidity, non-condensing Storage Humidity: 0 ~ 95% Relative Humidity, non-condensing Ordering Information PCI-1680U: 2-port CAN-bus Universal PCI Communication Card with Isolation Pro- tection PCI-1682U: 2-port CAN-bus Universal PCI Communication Card with CANopen Sup- port... - Page 10 PCI-1680U/1682U User Manual...
-
Page 11: Chapter 2 Install Wdm Driver
Chapter Install WDM driver This chapter shows how to install WDM driver. Sections include: PCI device setup ISA device setup Port setup Device setup... -
Page 12: Begin To Use Advantech Can Device Driver
Begin to use Advantech CAN device driver The following chart shows procedures of developing applications with Advantech CAN Driver. There are different installation procedures for PCI device driver and ISA device driver, please respectively refer to: PCI device installation procedures... -
Page 13: Pci Device Setup
The following installation procedures are for PCI devices. Take PCI-1680 as example: First make sure hardware can be installed normally, then turn on the computer and enter operating system. You will see the following screen. Click "Next" as the following. PCI-1680U/1682U User Manual... -
Page 14: Isa Device Setup
The following installation procedures are for ISA devices. Take PCM-3680 as an example. Follow the instructions in the manual to install the device, then turn on the com- puter to enter operating system. Enter Control Panel, then select "Add Hardware". PCI-1680U/1682U User Manual... - Page 15 Click "Next" as the following. Click "Next" as the following. PCI-1680U/1682U User Manual...
- Page 16 Click "Next" as the following. Click "Next" as the following. PCI-1680U/1682U User Manual...
- Page 17 Click "Have Disk...". Suppose inf file is installed under C:\Program Files\Advantech\AdvCAN\inf, click "Next" as the following. PCI-1680U/1682U User Manual...
- Page 18 Click "Next" as the following. When the installation is complete, click "View or change resources for this hard ware (Advanced)" to configure resources of the device. Users can also directly click "Finish" and configure it in Device Manager. PCI-1680U/1682U User Manual...
- Page 19 Select "Set Configuration Manually". Configure according to your hardware. Restart the computer to finish the installation. PCI-1680U/1682U User Manual...
-
Page 20: Port Setup
When bus driver is installed, users can install port driver AdvCanPort.sys according to the instructions. The installation file is AdvCanPort.inf. When the installation is finished, users can find the device in Device Manager and set ports in properties page. PCI-1680U/1682U User Manual... -
Page 21: Device Setup
Right click icon of "My Computer" and click "Manage", then select "Device Manager". Click the eAutomation CAN port that you want to configure, and select "Proper- ties" to open properties page of the port. Users can set the device in PORT_INFO. PCI-1680U/1682U User Manual... - Page 22 PCI-1680U/1682U User Manual...
-
Page 23: Chapter 3 Hardware Installation
Chapter Hardware Installation This chapter covers inspection and installation of hardware and drivers. Sections include: Initial inspection Jumper locations & setting Card installation... -
Page 24: Initial Inspection
It should be free of marks and scratches and in perfect working order when received. As you unpack the PCI-1680U/1682U, check for signs of shipping damage (damaged box, scratches, dents, etc.). If it is damaged or it fails to meet specifications, notify our service department or your local sales representative immediately. -
Page 25: Figure 3.1 Pci-1680U Silk Screen
Jumper Locations & Setting Figure 3.1 PCI-1680U Silk Screen PCI-1680U/1682U User Manual... -
Page 26: Figure 3.2 Pci-1682U Silk Screen
Figure 3.2 PCI-1682U Silk Screen PCI-1680U/1682U User Manual... -
Page 27: How To Set Jumpers
Figure 3.3 How to Set Jumpers 3.2.2 Terminator Resistor Setup You can set the terminator resistor if necessary to match impedance. Each port has a separate resistor. Table 3.1: PCI-1680U/1682U Terminator Resistor Reference Status Value of Terminator Resistor Open mode Close mode... - Page 28 Replace the screw in the expansion slot's retaining bracket. Replace anti-vibration cardholder. Replace the PC's cover. Connect the cables you removed in step 3. Turn the computer power on. The board is now installed in the computer. See Chapter 5 for information on cabling. PCI-1680U/1682U User Manual...
-
Page 29: Chapter 4 Software Requirements
Chapter Software Requirements This chapter has information on the software of PCI-1680U/1682U. -
Page 30: Introduction
PeliCAN mode, are used to drive SJA1000 chip on Advantech CAN device.Bus drivers and ports drivers are compliant with PCI and ISA bus, and provide the users with coherent operation interfaces. - Page 31 CAN 2.0B are compatible with CAN 2.0A. SJA1000 SJA1000 supports BasicCAN mode and PeliCAN mode. BasicCAN mode supports CAN 2.0A, while PeliCAN mode supports 2.0B. Advantech CAN Windows WDM&CE Driver runs in PeliCAN mode, thus it can support both Standard frame and Extended frame.
-
Page 32: Table 4.1: Hardware Support
CANopen. pen) ADVANTECH GENERAL CAN 4 port Isolated PCI CAN bus Card and PORT (4 PORT, support CANo- support CANopen. pen) Users of Windows CE can refer to Guide for developing applications References "SJA1000 Standard-alone CAN controller" PCI-1680U/1682U User Manual... -
Page 33: Introduction To Api
Close the port by calling CloseHandle when operation is completed. Note! This driver does not support share open function, so the third parameter must be set to 0. Syntax HANDLE CreateFile( LPCTSTR lpFileName, DWORD dwDesiredAccess, DWORD dwShareMode, LPSECURITY_ATTRIBUTES lpSecurityAttributes, DWORD dwCreationDisposition, DWORD dwFlagsAndAttributes, HANDLE hTemplateFile PCI-1680U/1682U User Manual... - Page 34 Successful, return effective HANDLE. Unsuccessful, return INVALID_HANLDLE_VALUE. Example Synchronous open CAN1: HANDLE hDevice = CreateFile( "\\\\.\\CAN1", GENERIC_READ | GENERIC_WRITE, NULL, OPEN_EXISTING, FILE_ATTRIBUTE_NORMAL, NULL); Asynchronous open CAN1£½ HANDLE hDevice = CreateFile( "\\\\.\\CAN1", GENERIC_READ | GENERIC_WRITE, NULL, OPEN_EXISTING, FILE_ATTRIBUTE_NORMAL|FILE_FLAG_OVERLAPPED, NULL); PCI-1680U/1682U User Manual...
-
Page 35: Closehandle
Users can use this interface to send commands, configure ports, like stop device, start device, configure Baud Rate, etc. See Command_par, CanStatusPar_t for detailed configuration. Syntax BOOL DeviceIoControl( HANDLE hDevice, DWORD dwIoControlCode, LPVOID lpInBuffer, DWORD nInBufferSize, LPVOID lpOutBuffer, DWORD nOutBufferSize, LPDWORD lpBytesReturned, LPOVERLAPPED lpOverlapped PCI-1680U/1682U User Manual... - Page 36 ERROR_GEN_FAILURE. Example Set baud rate: DWORD dwReturned; Command_par_t cmd; Config_par_t config; cmd.cmd = CMD_STOP; BOOL bSuccess = DeviceIoControl ( hDevice, CAN_IOCTL_COMMAND, &cmd, sizeof(Command_par), NULL, &dwReturned, NULL if(!bSuccess) //error config.target = CONF_TIMING; config.val1 = 1000; //set 1000K PCI-1680U/1682U User Manual...
- Page 37 = DeviceIoControl ( hDevice, CAN_IOCTL_COMMAND, &cmd, sizeof(Command_par), NULL, &dwReturned, NULL if(!bSuccess) //error Set acceptance filter: DWORD dwReturned; Command_par_t cmd; Config_par_t config; cmd.cmd = CMD_STOP; BOOL bSuccess = DeviceIoControl ( hDevice, CAN_IOCTL_COMMAND, &cmd, sizeof(Command_par), NULL, &dwReturned, NULL if(!bSuccess) PCI-1680U/1682U User Manual...
- Page 38 //error config.target = CONF_ACC; config.val1 = 0xffffffff; config.val2 = 0xffffffff; bSuccess = DeviceIoControl ( hDevice, CAN_IOCTL_CONFIG, &config, sizeof(Command_par), NULL, &dwReturned, NULL if(!bSuccess) //error cmd.cmd = CMD_START; bSuccess = DeviceIoControl ( hDevice, CAN_IOCTL_COMMAND, &cmd, sizeof(Command_par), NULL, &dwReturned, NULL PCI-1680U/1682U User Manual...
- Page 39 &dwReturned, NULL if(!bSuccess) //error config.target = CONF_LISTEN_ONLY_MODE; config.val1 = 1; //1: ON; 0: OFF bSuccess = DeviceIoControl ( hDevice, CAN_IOCTL_CONFIG, &config, sizeof(Command_par), NULL, &dwReturned, NULL if(!bSuccess) //error cmd.cmd = CMD_START; bSuccess = DeviceIoControl ( hDevice, CAN_IOCTL_COMMAND, &cmd, PCI-1680U/1682U User Manual...
- Page 40 DWORD dwReturned; Command_par_t cmd; cmd.cmd = CMD_RESET; BOOL bSuccess = DeviceIoControl ( hDevice, CAN_IOCTL_COMMAND, &cmd, sizeof(Command_par), NULL, &dwReturned, NULL if(!bSuccess) //error cmd.cmd = CMD_START; bSuccess = DeviceIoControl ( hDevice, CAN_IOCTL_COMMAND, &cmd, sizeof(Command_par), NULL, &dwReturned, NULL if(!bSuccess) //error PCI-1680U/1682U User Manual...
- Page 41 BOOL bSuccess = DeviceIoControl ( hDevice, CAN_IOCTL_COMMAND, &cmd, sizeof(Command_par), NULL, &dwReturned, NULL if(!bSuccess) //error Get status of device: DWORD dwReturned; CanStatusPar_t status; BOOL bSuccess = DeviceIoControl ( hDevice, CAN_IOCTL_STATUS, NULL, &status, sizeof(CanStatusPar_t), &dwReturned, NULL See Also Command_par CanStatusPar_t PCI-1680U/1682U User Manual...
-
Page 42: Readfile
Users can use this interface to read data from CAN port which was opened. One or more frames can be selected each time. Note! The third and fourth parameters of ReadFile are defined as byte length in MSDN, but stand for the number of frames in Advantech CAN Win- dows WDM&CE Driver. Syntax BOOL ReadFile(... - Page 43 ReadBuffer; ZeroMemory(&ReadBuffer, sizeof(canmsg_t)); BOOL bSuccess = ReadFile(hDevice, &ReadBuffer, 1, &dwRead, if(bSuccess) if(dwRead == 1) //SUCCESS if(ReadBuffer.flags & MSG_EXT) //Extended frame else{ //Standard frame if(ReadBuffer.flags & MSG_RTR) //Remote frame if(ReadBuffer.flags & MSG_SELF) //self reception if(ReadBuffer.flags & MSG_BOVR) PCI-1680U/1682U User Manual...
- Page 44 & MSG_PASSIVE) //CAN controller in error passive else{ //Timeout else{ DWORD dwError = GetLastError(); if (dwError == ERROR_IO_PENDING) //pengding else if(dwError == ERROR_INVALID_PARAMETER) //parameter error else if(dwError == ERROR_OPERATION_ABORTED) //cancelled else if(dwError == ERROR_GEN_FAILURE) //bus off PCI-1680U/1682U User Manual...
-
Page 45: Writefile
If busoff of device is discovered before drivers send any frames, GetLastError will be called to return ERROR_GEN_FAILURE. If drivers cannot allocate resources according to the number defined by the third parameter frame, GetLastError will called return ERROR_INVALID_PARAMETER. PCI-1680U/1682U User Manual... - Page 46 BOOL bSuccess = WriteFile(hDevice, &WriteBuffer, 1, &dwWrite, if(bSuccess) if(dwWrite == 1) //SUCCESS else{ //Timeout else{ DWORD dwError = GetLastError(); if (dwError == ERROR_IO_PENDING) //pengding else if(dwError == ERROR_INVALID_PARAMETER) //parameter error else if(dwError == ERROR_OPERATION_ABORTED) //cancelled else if(dwError == ERROR_GEN_FAILURE) //bus off PCI-1680U/1682U User Manual...
-
Page 47: Setcommmask
Handle of the device which was opened. dwEvtMask Input Event type. Return Value Successful: return non-zero values. Unsuccessful: return zero value. Please call Get- LastError function. Example BOOL bSuccess = SetCommMask(hDevice, EV_ERR | EV_RXCHAR); See Also WaitCommEvent GetCommMask PCI-1680U/1682U User Manual... -
Page 48: Getcommmask
Handle of the device which was opened. lpEvtMask Output Event type. If CreateFile uses asynchronous open, asynchronous oper- ation must be supported here. Please refer to MSDN for lpOvelapped Output detailed instruction to asynchronous open. *Note In WINDOWS CE,set to NULL. PCI-1680U/1682U User Manual... - Page 49 BOOL bSuccess = SetCommMask(hDevice, EV_ERR | EV_RXCHAR); if(!bSuccess) //error DWORD dwMask = 0; bSuccess = WaitCommEvent(hDevice, &dwMask, NULL); if(bSuccess) if(dwMask & EV_ERR) //to do DWORD dwError; ClearCommError(hDevice, &dwError, NULL); if(dwMask & EV_RXCHAR) //to do See Also SetCommMask ClearCommError PCI-1680U/1682U User Manual...
-
Page 50: Clearcommerror
Empty. If users want to know specific information about error lpStat Output register, please call DeviceIoControl to get status of the device. Return Value Successful: return non-zero values. Unsuccessful: return zero value. Please call Get- LastError function. PCI-1680U/1682U User Manual... - Page 51 & EV_ERR) //to do DWORD dwError; bSuccess = ClearCommError(hDevice, &dwError, NULL); if(bSuccess) //to do if(dwError& CE_FRAME || dwError& CE_BREAK) CanStatusPar_t status; DWORD dwReturned; DeviceIoControl (hDevice, CAN_IOCTL_STATUS, NULL, &status, sizeof(CanStatusPar_t), &dwReturned, NULL See Also WaitCommEvent DeviceIoControl PCI-1680U/1682U User Manual...
-
Page 52: Getoverlappedresult
Example #include <windows.h> #include <stdio.h> void main( ) HANDLE hDevice; OVERLAPPED ov; BOOL bSuccess; DWORD dwEvtMask; DWORD dwLength; hDevice = CreateFile( "\\\\.\\CAN1", GENERIC_READ | GENERIC_WRITE, 0, // exclusive access NULL, // default security attributes OPEN_EXISTING, FILE_FLAG_OVERLAPPED, NULL PCI-1680U/1682U User Manual... - Page 53 // Intialize the rest of the OVERLAPPED structure to zero. ov.Internal = 0; ov.InternalHigh = 0; ov.Offset = 0; ov.OffsetHigh = 0; if (WaitCommEvent(hDevice, &dwEvtMask, &ov)) if (dwEvtMask & EV_ERR) // To do. if (dwEvtMask & EV_RXCHAR) // To do. PCI-1680U/1682U User Manual...
-
Page 54: Structure List
%d.\n", GetLastEr- ror()); See Also ReadFile WriteFile WaitCommEvent Structure List The table below is a list of structures needed by Advantech CAN WDM Driver. Methods: canmsg_t Received/Sent message structure. CanStatusPar_t Port status structure. Command_par Command/Configure operation structure. -
Page 55: Canmsg_T
Users can get the specific type from flags. If ID does not equal 0xFFFFFFFF, flags may be Remote frame, Extended frame, Standard frame, Self Reception or software overrun. PCI-1680U/1682U User Manual... -
Page 56: Canstatuspar_T
Return Value. 0, SUCCESS; 0xFFFFFFFF, FAIL. type CAN controller type. 1, SJA1000; 0 other device. acceptancecode Acceptance code. acceptancemask Acceptance mask. acceptancemode Acceptance Filter Mode: 1:Single 0:Dual. selfreception Self reception. ReadTimeout Read timeout. WriteTimeout Write timeout. PCI-1680U/1682U User Manual... -
Page 57: Command_Par
The CAN port's baud rate is determine by CAN clock, BTR0 and BTR1 . The Advantech CAN devices use 8MHZ clock and oscillator frequency is 16M, The internal clock is divided by two from the oscillator frequency. - Page 58 BaudRateValue = Btr0 * 256; BaudRateValue += Btr1; return acSetBaud(hDevice, BaudRateValue); can_receive.cpp Line:105 nRet = acSetBaudRegister( hDevice, byBtr0, byBtr1 ); //Set baud rate if ( nRet < 0 ) SetDlgItemText( hwnd, IDC_SHOW_RESULT, "Failed to set Baud Rate!" ); return FALSE; PCI-1680U/1682U User Manual...
- Page 59 Start chip and enter work CMD_START Reserved Reserved mode. Stop chip and enter reset CMD_STOP Reserved Reserved mode. Stop chip by canceling current CMD_RESET send/receive operation and Reserved Reserved enter reset mode. CMD_CLEARBUFF Clear receive buffer. Reserved Reserved PCI-1680U/1682U User Manual...
-
Page 60: How To Dispose Message
CAN 2.0B are compatible with CAN 2.0A. SJA1000 supports BasicCAN mode and PeliCAN mode. BasicCAN mode supports CAN 2.0A, while PeliCAN mode supports 2.0B. Advantech CAN Windows WDM&CE Driver runs in PeliCAN mode, thus it can support both Standard frame and Extended frame. -
Page 61: How To Send Extended Frame, Compatible With Can 2.0B
4.5.4How to dispose received messages. DWORD dwRead; canmsg_t ReadBuffer; ZeroMemory(&ReadBuffer, sizeof(canmsg_t)); BOOL bSuccess = ReadFile(hDevice, &ReadBuffer, 1, &dwRead, if(bSuccess) if(dwRead == 1) //SUCCESS if(ReadBuffer.flags & MSG_EXT) //Extended frame else{ //Standard frame if(ReadBuffer.flags & MSG_RTR) //Remote frame if(ReadBuffer.flags & MSG_SELF) PCI-1680U/1682U User Manual... - Page 62 //CAN controller in error passive else{ //Timeout else{ DWORD dwError = GetLastError(); if (dwError == ERROR_IO_PENDING) //pengding else if(dwError == ERROR_INVALID_PARAMETER) //parameter error else if(dwError == ERROR_OPERATION_ABORTED) //cancelled else if(dwError == ERROR_GEN_FAILURE) //bus off See Also canmsg_t WriteFile ReadFile PCI-1680U/1682U User Manual...
-
Page 63: Acceptance Filtering
0x7D7(11111010111), 0x610(11000010000), etc. Example of Extended frame: 10010100 1011000X 1100XXXX 00110XXX 00000000 00000001 00001111 00000111 accepted 10010100 1011000X 1100XXXX 00110XXX ID(ID.28``ID.0) In this example, RTR is not considered and the accepted IDs include: 0x12961806(10010100101100001100000000110), 0x129639E6(10010100101100011100111100110), etc. PCI-1680U/1682U User Manual... - Page 64 00000000 00000001 00000000 00000000 accepted ID(ID.28``ID.13) 00000000 00000001 In this example, the accepted IDs include: 0x2000(10000000000000), 0x3FFF(11111111111111), etc. Filter2: 00000000 00000001 00000000 00000000 accepted ID(ID.28``ID.13) 00000000 00000001 In this example, the accepted IDs include: 0x2000(10000000000000), 0x3FFF(11111111111111), etc. PCI-1680U/1682U User Manual...
-
Page 65: Advantech Can Windows Wdm&Ce Driver Application Development Guide
Visual C++ environment. 4.7.1.1 Create a new VC project Related header files must be used before using Advantech CAN Windows WDM&CE Driver interface function. Make sure the driver had been installed correctly. (Please refer to relevant books and documentations regarding detailed information about VC development.) - Page 66 4.7.1.2 Add necessary files Add Include header files (AdvCan.h) in Advantech CAN Windows WDM&CE Driver. In VC++ work area, right click "Header Files", then select "Add Files to Folder" to add header files to the project. 4.7.1.3 Write code “Select "Add to Project->New" from "Project"£¨ then select "C++ Source File".
- Page 67 "Self reception = %u\n" , CanStatus.selfreception ); printf( "Read time out = %u\n" , CanStatus.readtimeout ); printf( "Write time out = %u\n" , CanStatus.writetimeout ); //Close port handle flag =CloseHandle(hDevice); if ( !flag ) printf( "Close Error!"); return; PCI-1680U/1682U User Manual...
-
Page 68: Guide For Visual Basic Development
Visual Basic environment. 4.7.2.1 Create a new VB project Related header files must be used before using Advantech CAN Windows WDM&CE Driver interface function. Make sure the driver had been installed correctly. (Please refer to relevant books and documentations regarding detailed information about VB development.) - Page 69 4.7.2.2 Add files and design graphical interfaces Add Include header files (AdvCan.bas) in AdvCAN Windows WDM&CE Driver. Right click the project and select Add->Module Item,then select Existing Item to add AdvCan.bas.(Installation path\AdvCan\Include\AdvCan.bas) PCI-1680U/1682U User Manual...
- Page 70 If hDevice = &HFFFFFFFF Then MsgBox ("Open Error!") Exit Sub End If 'Get Can port status. result = DeviceIoControl(hDevice, CAN_IOCTL_STATUS, Noth- ing, 0&, Status, Len(Status), dwOutLen, 0&) If Not result Then MsgBox ("GetStauts Error!") Exit Sub PCI-1680U/1682U User Manual...
- Page 71 " CStr(Sta- tus.WriteTimeOut) result = CloseHandle(hDevice) 'Close the CAN port If Not result Then MsgBox ("Failed to close the CAN port!") End If End Sub 4.7.2.4 Test application Run the application, the following result will be displayed. PCI-1680U/1682U User Manual...
-
Page 72: Guide For Vc.net Development
VC.NET environment. 4.7.3.1 Create a new VC.NET project Related header files must be used before using Advantech CAN Windows WDM&CE Driver interface function. Make sure the driver had been installed correctly. (Please refer to relevant books and documentations regarding detailed information about VC.NET development.) - Page 73 Design graphical interfaces. Add one Button and six Text controls to Form1. PCI-1680U/1682U User Manual...
- Page 74 .ToString(); this->textBox5->Text = "Read TimeOut = " + CanStatus.readtime- out .ToString(); this->textBox6->Text = "Write TimeOut= " + CanStatus.writetim- eout .ToString(); result = CloseHandle( hDevice ); //Close the CAN port if (! result ) MessageBox::Show ("GetStauts Error!"); return; PCI-1680U/1682U User Manual...
-
Page 75: Guide For For Vb.net Development
VB.NET environment. 4.7.4.1 Create a new VB.NET project Related header files must be used before using Advantech CAN Windows WDM&CE Driver interface function. Make sure the driver had been installed correctly. (Please refer to relevant books and documentations regarding detailed information about VB.NET development.) - Page 76 A new VB.NET project is created. 4.7.4.2 Add files and design graphical interfaces Add Include header files (AdvCan.vb) in AdvCAN Windows WDM&CE Driver. Right click the project, then select Add->Add Existing Item to add AdvCan.vb. (Installation path\AdvCan\Include\AdvCan.vb) PCI-1680U/1682U User Manual...
- Page 77 MsgBox("Open Error!") Exit Sub End If 'Get Can port status. result = DeviceIoControl(hDevice, CAN_IOCTL_STATUS, Noth- ing, 0, status, Len(status), dwOutLen, ov) If Not result Then MsgBox("GetStauts Error!") Exit Sub End If TextBox1.Text = "Baud rate= " & status.baud PCI-1680U/1682U User Manual...
- Page 78 TextBox6.Text = "Write TimeOut: = " & status.writetimeout result = CloseHandle(hDevice) 'Close the CAN port If Not result Then MsgBox("Failed to close the CAN port!") End If End Sub 4.7.4.4 Test application Run the application, the following result will be displayed. PCI-1680U/1682U User Manual...
-
Page 79: Guide For C# Development
C# environment. 4.7.5.1 Create a new C# project Related header files must be used before using Advantech CAN Windows WDM&CE Driver interface function. Make sure the driver had been installed correctly. (Please refer to relevant books and documentations regarding detailed information about C# development.) - Page 80 4.7.5.2 Add files and design graphical interfaces Add Include header files (AdvCan.cs) in Advantech CAN Windows WDM&CE Driver. Right click the project, then select Add->Add Existing Item to add AdvCan.cs. (Installation path\AdvCan\Include\AdvCan.cs) PCI-1680U/1682U User Manual...
- Page 81 Design graphical interfaces. Add one Button and six TextBox controls to Form1. PCI-1680U/1682U User Manual...
- Page 82 = "Self recevie = " + CanStatus.selfreception .ToString(); textBox5.Text = "Read TimeOut = " + CanStatus.readtimeout .ToString(); textBox6.Text = "Write TimeOut= " + CanStatus.writetimeout .ToString(); result = AdvCan.CloseHandle( hDevice ); //Close the CAN port if (! result ) MessageBox.Show ("GetStauts Error!"); return; PCI-1680U/1682U User Manual...
-
Page 83: Examples
4.7.5.4 Test application Run the application, the following result will be displayed. Examples Advantech CAN Windows WDM&CE Driver package contains examples of VC, VB, VB.NET, C#.NET, VC.NET, eVC. Users can refer to these examples to develop appli- cations. WDM: Example Name Description VB.NET C#.NET VC.NET... -
Page 84: Interface
Users can click "Stop" button to stop sending frames during the process, then the name of the button will return to "Start" for the next send operation. PCI-1680U/1682U User Manual... - Page 85 PCI-1680U/1682U User Manual...
- Page 86 Users can click "Stop" button to stop receiving frames during the process, then the name of the button will return to "Start" for the next receive operation. PCI-1680U/1682U User Manual...
- Page 87 If the configuration fail, prompting message will be dispalyed. Note! This is only used to change configuration of the application which is cur- rently running. Once "Configure" item is closed, all changes made in it will not be retained. PCI-1680U/1682U User Manual...
- Page 88 The two ports are using duplex communication. Users can click "Stop" button to stop sending/ receiving frames during the process, then the name of the button will return to "Start" for the next send/receive operation. PCI-1680U/1682U User Manual...
-
Page 89: Flow Chart
4.8.2 Flow Chart 4.8.2.1 Send flow chart PCI-1680U/1682U User Manual... - Page 90 4.8.2.2 Receive flow chart PCI-1680U/1682U User Manual...
- Page 91 4.8.2.3 Configure flow chart PCI-1680U/1682U User Manual...
- Page 92 4.8.2.4 Event flow chart Either flow chart of the two sub threads is as below: PCI-1680U/1682U User Manual...
-
Page 93: Use Utility To Test Hardware
Use Utility to test hardware An Utility is provided for users to test whether hardware is working normally. It's installed under C:\Program Files\Advantech\AdvCAN\Utility directory by default. This Utility can be divided into four parts: In Part 1, users can select which port to open in the choice box at top.Set "Baud Rate", "acceptance filter mode", "acceptance code", "acceptance Mask", and choose... -
Page 94: Canmonitor
CANMonitor can show messages in the formats of CAN and CANopen. System Requirements Windows 2000, 32-bit Windows XP, 32-bit Windows Vista, 32-bit Windows 7, 64-bit Windows XP, 64-bit Windows Vista, 64-bit Windows 7. PCI-1680U/1682U User Manual... -
Page 95: Function Introduction
Detects all the possible CANopen nodes, from 1 to 127. CANopen CAN Message Filter Configures CAN message filter modes. CANopen Message Fil- Configures CANopen message filter modes. CAN Message View Shows CAN format message. CANopen Message Shows CANopen format message. View PCI-1680U/1682U User Manual... -
Page 96: Introduction To Main Items In Menu Screen
View has the following functions: Name Function Toolbar Whether to show the toolbar Status Bar Whether to show the status bar Auto Scroll Whether to scroll automatically Clear Clear all the messages Goto Go to the specified line PCI-1680U/1682U User Manual... - Page 97 Function has the following functions: Name Function Start communication Stop Stop communication Show Show the message Hide Hide the message Listen Only Whether to open Listen Only mode CAN has a submenu: Name Function Send CAN Message Send CAN Message PCI-1680U/1682U User Manual...
- Page 98 List all CANopen nodes Change Node State Change CANopen node state Read Object Read CANopen node data Write Object Write CANopen node data Node Guard All Get all CANopen nodes Filter Filter has CAN Filter setting and CANopen Filter setting. PCI-1680U/1682U User Manual...
- Page 99 Show the number of the messages sent Show the number of the messages received Show the number of Overrun Show the number of lines of the data; the maximum number will not exceed the number configured when the device is open PCI-1680U/1682U User Manual...
-
Page 100: Coti.dll For Canopen Conformance Test
COTI.DLL for CANopen Conformance Test The COTI DLL allows users to use the CANopen Conformance Test Tool of CiA(CAN in Automation) with Advantech CAN WDM Driver.This file has to be copied into the directory of the CANopen Conformance Test.More detailed presentation about CAN- open Conformance Test Tool, please refer to: http://www.can-cia.org/index.php?id=141. -
Page 101: Pin Assignments And Wiring
Chapter Pin Assignments and Wiring This chapter covers the pin assignment for the CAN connec- tor, and the wiring of the two transmission wires. Sections include: Pin Assignments Wiring... -
Page 102: Pin Assignments
Figure 5.1 PCI-1680U/1682U DB-9 pin assignment Wiring The CAN standard supports half-duplex communication. This means that just two wires are used to transmit and receive data. Table 5.1: PCI-1680U/1682U Pin Wiring and Description PCI-1680U/1682U DTE (male DB-9) Terminal DTE Signal... - Page 103 PCI-1680U/1682U User Manual...
- Page 104 No part of this publication may be reproduced in any form or by any means, electronic, photocopying, recording or otherwise, without prior written permis- sion of the publisher. All brand and product names are trademarks or registered trademarks of their respective companies. © Advantech Co., Ltd. 2010...
Need help?
Do you have a question about the PCI-1680U and is the answer not in the manual?
Questions and answers