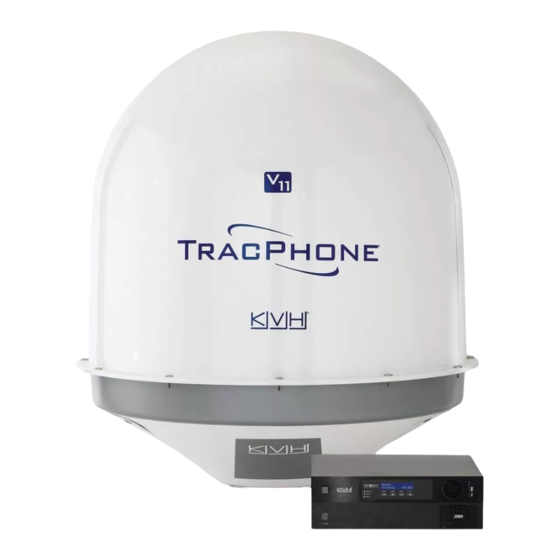
KVH Industries TracPhone V11 Installation Manual
Hide thumbs
Also See for TracPhone V11:
- Installation checklist (2 pages) ,
- Conversion instructions (13 pages) ,
- Quick start manual (2 pages)
Table of Contents
Advertisement
Quick Links
Advertisement
Table of Contents

Related Manuals for KVH Industries TracPhone V11


Summary of Contents for KVH Industries TracPhone V11
- Page 1 TracPhone ® Installation Guide...
-
Page 2: Table Of Contents
KVH, TracPhone, CommBox, and the unique light-colored dome with dark contrasting baseplate are trademarks of KVH Industries, Inc. mini-VSAT Broadband is a service mark of KVH Industries, Inc. All other trademarks are property of their respective companies. The information in this document is subject to change without notice. No company shall be liable for errors contained herein. -
Page 3: Ce Declaration Of Conformity
The part number is followed by two alphanumeric characters which designate non-performance- affecting customer-specific branding. Equipment Applicability The TracPhone V11 system provides broadband Internet connectivity between a ship and any destination in the world. The equipment is not intended for SOLAS applications. Declaration and Certification The TracPhone V11 system complies with the following harmonized standards under the R&TTE Directive 1999/5/EC:... -
Page 4: Inspect Parts And Get Tools
• Ruler or tape measure • Two 75RF coax cables, “F” connectors, • Voltmeter and termination tools (see page 11) • Laptop PC with the latest TracPhone V11 • Power cable (see page 13) CommBox-ACU/antenna software (.kvh) and modem configuration files (.sscf/.sed) •... -
Page 5: Plan The Antenna Installation
Plan the Antenna Installation Before you begin, consider the following antenna Figure 2: Antenna Dimensions installation guidelines. Choose a Suitable Mounting Surface Side View • Make sure the mounting surface is wide enough to accommodate the antenna’s base (see Figure 2). 57.28"... - Page 6 Continued Plan the Antenna Installation Minimize Satellite Blockage Figure 3: Blockage from Obstruction The antenna requires a clear view of the sky to Blocked! transmit and receive satellite signals (see Figure 3). The fewer obstructions, the better the -24° to 119° Look Angle system will perform.
-
Page 7: Plan The Belowdecks Installation
Plan the Belowdecks Installation Before you begin, consider the following Figure 5: CommBox-ACU or Modem Dimensions (Identical) installation guidelines for the belowdecks units. • Select a mounting location in a dry, well- Strain-Relief Bracket 16.31" ventilated area belowdecks away from any (Modem Only) (41.43 cm) heat sources or salt spray. -
Page 8: Prepare The Belowdecks Units
Prepare the Belowdecks Units Case Mount If you plan to use the optional case, follow these Figure 7: Assembling the Case steps to assemble the case. Top Cover M4 x 12 mm Screw (x4) a. Remove the four M4 screws securing the rear cover to the case. - Page 9 Prepare the Belowdecks Units Rack Mount If you plan to use an existing equipment rack, follow these steps to secure the equipment in the Figure 10: Attaching the Strain-Relief Bracket rack. CommBox-ACU a. Remove the four #6-32 screws and washers securing the two retaining straps to the sides of the modem.
- Page 10 Prepare the Belowdecks Units Horizontal Surface Mount If you plan to mount the CommBox-ACU and modem to a horizontal surface, without using the Figure 12: Attaching the Strain-Relief Bracket optional case or an equipment rack, follow these steps to attach the strain-relief bracket and “L” CommBox-ACU mounting brackets.
-
Page 11: Prepare The Antenna Site
Prepare the Antenna Site Once you have identified a suitable antenna Figure 14: Antenna Mounting Holes Layout mounting site, follow these steps to prepare the Face Vessel Bow site for installation. Drill the Mounting Holes a. Unfold the antenna mounting template Ø3.75"... -
Page 12: Prepare The Antenna Cables
Prepare the Antenna Cables Follow these steps to prepare and route the RF, Figure 16: RF Cable Requirements power, and data cables to the antenna location. 25 -100 ft (8-30 m) Cable Run Prepare the Customer’s RF Cables Cable LMR-400-75 You need to connect two 75... - Page 13 Continued Prepare the Antenna Cables Connect the Customer’s RF Cables to the Figure 17: Connecting the Pigtail Cables to the RF Cables Supplied Pigtail Cables IMPORTANT! Use of the supplied pigtail cables is mandatory. Do not connect the customer’s RF cables directly to the antenna.
- Page 14 Continued Prepare the Antenna Cables Prepare the Customer’s Power Cable Figure 18: Power Cable Recommendations You will need to connect a power cable from the Cable Length Suggested Gauge antenna to the vessel’s 100-240 VAC power supply. The cable must be a marine-grade, Up to 100 ft (30 m) 14 AWG 3-conductor, stranded (flexible, bend radius of at...
-
Page 15: Rig And Hoist The Antenna
Rig and Hoist the Antenna Follow these steps to detach the antenna from the Figure 21: Service Hatches pallet and safely rig the antenna for crane hoisting. IMPORTANT! Take protective measures to avoid gouging or scratching the radome during the rigging operation. -
Page 16: Wire The Antenna
Wire the Antenna Follow these steps to connect the antenna cables. Figure 24: Foam Seal and Connectors on Base of Antenna Attach the Second Foam Seal, If Needed Power Data If you routed the cables belowdecks through a hole directly underneath the antenna location MTX MRX (see “Cut Out the Cable Access Hole, If Needed”... - Page 17 Continued Wire the Antenna Connect the Data Cable Figure 26: Connector Module Cover Connect the data cable to the “Data” jack on the base of the antenna (see Figure 24 on page 15). Hand-tighten until the connector locks in place; do not use excessive force.
- Page 18 Continued Wire the Antenna Protect the Cables Figure 28: Cable Cover a. Position the cable cover (supplied in the kitpack) over the antenna’s cable connectors Power/Data 18V/22KHz 13V/22KHz and secure in place with the six #6-32 captive #6-32 Captive Cable screws and washers (see Figure 28).
-
Page 19: Mount The Antenna
Mount the Antenna Follow these steps to mount the antenna to the Figure 30: Forward Arrow in Antenna Baseplate mounting surface. a. Position the antenna over the holes drilled in the mounting surface and make sure the forward arrow inside the baseplate points toward the bow and is parallel to the vessel’s Forward Arrow centerline (see Figure 30). - Page 20 Continued Mount the Antenna g. Disconnect the crane rigging. Figure 32: Removing the Lift Brackets h. Remove the eight screws, flat washers, and lock nuts securing the four lift brackets to the antenna (see Figure 32). Use a 5/32" hex key to keep the screws from turning, and use a 1/4"-20 x 1.5"...
-
Page 21: Prepare The Data Cable
Prepare the Data Cable Follow these steps to attach the supplied Figure 34: Removing the Cable Jacket grounding sleeve to the antenna’s data cable. a. At the CommBox-ACU location, cut the end of the antenna’s data cable to the desired length, being sure to maintain an 8"... - Page 22 Continued Prepare the Data Cable e. Thread the data cable through the supplied Figure 37: Aligning the Grounding Sleeve grounding sleeve. Position the grounding sleeve by aligning the end of its attached ground wire with the ends of the other wires in the data cable (see Figure 37).
-
Page 23: Wire The Belowdecks Equipment
, 2.5A of KVH Industries, Inc.; mini-VSAT Broadband RISK OF ELECTRIC SHOCK Fuse 3A, 250V ~ Fast Acting is a service mark of KVH Industries, Inc. DO NOT OPEN supplied 16-position terminal strip connector as shown in Figure 41. IMPORTANT! - Page 24 KVH Industries, Inc.; mini-VSAT Broadband RISK OF ELECTRIC SHOCK Fuse 3A, 250V ~ Fast Acting is a service mark of KVH Industries, Inc. Manufactured in USA. DO NOT OPEN Connect the CommBox-ACU to the...
-
Page 25: Connect Power
Connect Power Before you begin, be sure that you understand Figure 45: AC Power Options the following important requirements: TracPhone Equipment AC Power Requirements The TracPhone system is designed to run on 3-wire single-phase AC power (hot, neutral, and Ground Shipboard ground). - Page 26 RISK OF ELECTRIC SHOCK Fuse 3A, 250V ~ Fast Acting Manufactured in USA. is a service mark of KVH Industries, Inc. DO NOT OPEN Failure to ground the TracPhone system properly to ship's ground will cause an...
-
Page 27: Turn On The System
Ethernet User Ethernet Ports AC Input Maintenance To Modem 100-240V; 1.6-0.8A 50/60 Hz RS232 RS422 Verify that the TracPhone V11 web interface WiFi WiFi Wire Color/Stripe Color To Antenna To Modem 1000 Tested to comply appears in your browser. If the web interface... -
Page 28: Update The System Software
Follow these steps to ensure the latest software is installed in the TracPhone system. Figure 50: Updates Page on Web Interface Check the Current Software Version a. Go to the TracPhone V11 web interface and click the Updates tab. Note the displayed CommBox-ACU/Antenna software version (see Figure 50). -
Page 29: Customize The Web Interface
Follow these steps to change the administrator password to something unique. a. At the TracPhone V11 web interface, click the Settings tab. Then click Account. b. In Security, click Edit. c. For the current password, enter the default password: “password”... -
Page 30: Set Up No-Transmit Zones
Set Up No-Transmit Zones Optional To prevent exposure to RF energy (see the hazard Figure 55: Example of No-Transmit Zone Azimuth Range area illustration on page 1), you can configure up to two no-transmit zones for areas where crew and/or passengers frequent (see Figure 55). The Azimuth system will disable the transmitter whenever the Range... - Page 31 Continued Set Up No-Transmit Zones c. At the TracPhone V11 web interface, click the Figure 58: No-Transmit Zones Page of Web Interface Settings tab. Then click No-Transmit Zones. d. Click Edit. e. Make sure Enforce Zones is selected (see Figure 58).
-
Page 32: Test The System
KVH Industries, Inc.; mini-VSAT Broadband RISK OF ELECTRIC SHOCK Fuse 3A, 250V ~ Fast Acting Manufactured in USA. is a service mark of KVH Industries, Inc. DO NOT OPEN Submission of the Installation Checklist is required to certify the quality of your... -
Page 33: Connect Vessel Computers
WAP and advanced networking expertise. a. Make sure the computers are configured for DHCP addressing (see page 40). b. At the TracPhone V11 web interface, click the Settings tab. Then click Network Settings. c. In Wireless Settings, click Edit. - Page 34 KVH and TracPhone are registered trademarks f. At the confirmation message, click Save. of KVH Industries, Inc.; mini-VSAT Broadband RISK OF ELECTRIC SHOCK is a service mark of KVH Industries, Inc. LAN 1: 192.168.5.1 LAN 0: 192.168.72.1 DO NOT OPEN...
-
Page 35: Connect Vessel Phones & Options
KVH Industries, Inc.; mini-VSAT Broadband RISK OF ELECTRIC SHOCK Fuse 3A, 250V ~ Fast Acting Manufactured in USA. is a service mark of KVH Industries, Inc. DO NOT OPEN machine, and/or PABX to the desired “Voice Line” jack(s) on the CommBox-ACU (see Figure 67). -
Page 36: Educate The Customer
Educate the Customer Give the Welcome Kit to the customer, make sure Figure 69: Customer Welcome Kit they know the administrator password, and show them how to use the system. Be sure they understand the following: • The antenna transmits RF energy that is potentially harmful. - Page 37 Terminating LMR-400-75 Cable Appendix These instructions explain how to terminate an Figure 72: Cutting the Cable LMR-400-75 RF cable with an EZ-400-FMH-75 “F” connector using the tools from the TK-400EZ-75 tool kit. For more detailed instructions, refer to the Times Microwave website (www.timesmicrowave.com).
- Page 38 Continued Terminating LMR-400-75 Cable 5. Using a utility knife, carefully remove any Figure 76: Removing Plastic Residue residual plastic from the center conductor, if necessary (see Figure 76). 6. Insert the end of the cable into the #2 end of the ST-400EZ stripping tool (see Figure 77).
- Page 39 Continued Terminating LMR-400-75 Cable 8. Gently flare the braid with your fingers (see Figure 80: Flaring the Braid Figure 80). 9. Insert the end of the cable into the connector body until the dielectric is firmly seated inside the connector (see Figure 81). Be sure all braid wires remain on the outside of the connector.
- Page 40 Continued Terminating LMR-400-75 Cable 12. Using an appropriate crimp tool (either the Figure 84: Crimping the Ferrule onto the Cable CT-400/300 or the HX-4 with Y1719 dies), crimp the ferrule in place (see Figure 84). Crimp as close to the connector body as possible.
- Page 41 Configuring Computers for DHCP Appendix Follow these steps to configure your computer for DHCP to allow it to receive an IP address Figure 87: Windows 7 - Local Area Connection Properties from the CommBox-ACU. The location of this configuration setting varies slightly by operating system.
- Page 42 Continued Configuring Computers for DHCP Windows XP Figure 89: Windows XP - Local Area Connection Properties 1. Turn on the computer. 2. At the Windows Control Panel, double-click Network Connections. You can find the control panel either through the Start menu or “My Computer.”...
- Page 43 Continued Configuring Computers for DHCP Macintosh OS X Figure 91: Macintosh OS X - Network Preferences 1. Turn on the computer. 2. In System Preferences, click Network. 3. In the Network dialog box, select Ethernet then set the following: • Location: Automatic •...
-
Page 44: Wiring Diagram
KVH Industries, Inc.; mini-VSAT Broadband RISK OF ELECTRIC SHOCK Fuse 3A, 250V ~ Fast Acting Manufactured in USA. is a service mark of KVH Industries, Inc. DO NOT OPEN Line 1 Ethernet 1 AC Power Vessel PC... - Page 45 KVH Industries A/S KVH Industries, Inc. KVH Industries Pte Ltd. EMEA Headquarters World Headquarters Asia-Pacific Headquarters Kokkedal, Denmark Middletown, RI U.S.A. Singapore Tel: +45 45 160 180 Fax: +45 45 160 181 Tel: +1 401 847 3327 Fax: +1 401 849 0045 Tel: +65 6513 0290 Fax: +65 6472 3469 E-mail: info@emea.kvh.com...
Need help?
Do you have a question about the TracPhone V11 and is the answer not in the manual?
Questions and answers