Morso 2110 Instructions For Installation And Use Manual
Hide thumbs
Also See for 2110:
- Installation and operation manual (24 pages) ,
- Installation and operating instructions manual (20 pages) ,
- Installation instructions (4 pages)
Table of Contents
Advertisement
Instructions for Installation and Use
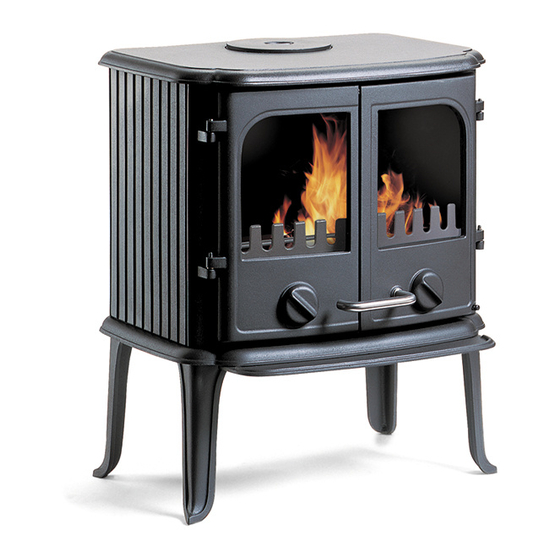
2110
UK/EN 13240 · (72% Efficiency)
Distributed by: Morsø UK · Valley Drive · Swift Valley · Rugby, Warks CV21 1TW · England
MORSØ JERNSTØBERI A/S . DK-7900 NYKØBING MORS
MORSØ JERNSTØBERI A/S . DK-7900 NYKØBING MORS
E-Mail: stoves@morsoe.com · Website: www.morsoe.com
E-Mail: stoves@morsoe.com · Website: www.morsoe.com
Advertisement
Table of Contents

Subscribe to Our Youtube Channel
Related Manuals for Morso 2110


Summary of Contents for Morso 2110
- Page 1 Instructions for Installation and Use 2110 UK/EN 13240 · (72% Efficiency) Distributed by: Morsø UK · Valley Drive · Swift Valley · Rugby, Warks CV21 1TW · England MORSØ JERNSTØBERI A/S . DK-7900 NYKØBING MORS MORSØ JERNSTØBERI A/S . DK-7900 NYKØBING MORS E-Mail: stoves@morsoe.com ·...
-
Page 2: Table Of Contents
Enjoy your new Morsø stove! Morsø, the largest stove manufacturer in Denmark, has been making cast-iron stoves of the highest quality since 1853. By carefully following the in- structions below, we are certain that you will enjoy many years of comfortable warmth from your new Morsø... -
Page 3: Installing Your Morsø Stove Page
1.0 Installing your Morsø stove 1.1 Unpacking the stove 2110: After removing the outer packaging, unbolt the combustion chamber from the wooden pallet and place it gently on its back. The cardboard packaging can be placed underneath to prevent marring. Remove the leg pack from the stove and bolt each leg/panel securely to the underside of the base on the combustion chamber, using the bolts provided (found inside the stove). -
Page 4: The Chimney
In situations where the stove is to be fitted into a brick or non-combustible recess, we recom- mend that the stove is installed with at least 10 cm clearance to the wall, this will allow room air to circulate around the stove; also the maintenance of the outside stove is easier. When applied to masonry, a layer of wallpaper is normally classified as a non-combustible surface. -
Page 5: Pipe Connections
1.6 Fluepipe connections The stove comes standard with a flue collar (1) at the top and a cast-iron cover mounted on the cast-iron back panel behind the convection back panels. If you want to install the stove with a rear flue exit remove the knock out section of the convection back panel with steady hammer taps to the small bridge which holds the knock out in place. -
Page 6: Connecting To A Masonry Chimney
1.7 Connecting the stove to a masonry chimney A wall sleeve should be bricked securely into the wall of the chimney at the appropriate height and the stovepipe inserted centrally. The pipe must not extend into the actual chimney open- ing, but rather must reach only to the inside of the chimney aperture. -
Page 7: Draft Conditions
1.9 Draft conditions If smoke spillage occurs when the fire door is opened, it is probably due to poor chimney draft. This type of stove requires at least 12 pa of chimney draft to achieve satisfactory combustion and smoke spillage prevention. However, in cases where the stove door is opened too vigorously you could expect that slight smoke spillage may occur. -
Page 8: Firing The Stove
2.0 FIRING THE STOVE/USING YOUR STOVE For wood firing, the shaking grate and the door valves should always be closed. Primary air is only used for alternative fuel firing. Pre-heated secondary air is added to the combustion process over the glass, and controlled using the handle underneath the hot ash box. -
Page 9: Lighting Instructions And Fuelling Intervals
2.1 Lighting and refuelling intervals A lot of air is needed when first lighting the stove. When starting with a totally cold stove, it may be helpful to leave the doors ajar (2-3 cm) during the first few minutes; the secondary air intake should be fully open - handle underneath the ash lip. - Page 10 5. Refuelling of your stove should be done while there are still glowing embers in the bed. Spread the em- bers across the bottom, but concentrated mostly to- wards the front of the stove. 6. Place three pieces of fuel weighing roughly 0.6 kg and measuring about 25 cm in length across the embers in one layer, with spacing of roughly 1 cm between the pieces of wood.
- Page 11 The stove door should normally be opened gently the first 2 - 3 centimetres, then you should wait until the pressure has equalised before opening the door all the way. This technique will prevent smoke from getting out, particularly when there is a poor draught. The stove door should never be opened when the stove is being fired vigorously.
-
Page 12: Routine Stove Maintenance
3.0 ROUTINE STOVE MAINTENANCE 3.1 External maintenance The surface of the stove is painted with heat-resistant Senotherm paint. If the stove is used too vigorously, the painted surface may take-on a greyish tinge. It is easily maintained by sim- ply vacuuming the surface with a soft brush attachment and applying two light layers of paint. Morsø... -
Page 13: Cleaning The Stove
When emptying the ash pan always dump the waste ash into a metal container (dustbin) where it can fully cool before being taken away by your refuse collector. Ash from a wood- Maintenance parts for 2110 Description Product Code... -
Page 14: Alternative Fuel Types
4.0 Alternative fuel types Your new Morsø stove is EN-approved for burning wood. However, the stove is capable of burning other solid fuels as manufactured smokeless coal or good quality anthracite (stove nuts). If you fire your stove with any fuel other than wood, it may help to use coal insert/fuel economisers (available for most models), which simply fit into the left and right sides of the firebox. - Page 15 In order to maintain the combustion process, the entire grate area must remain covered by glowing coals. If the coal layer is too shallow you will have less heat and it would not be nec- essary to supply air via the top vent. You must empty the ash pan whenever it becomes full.
- Page 16 Morsø Jernstøberi A/S - 21.09.2006 - 72183500 MORSØ JERNSTØBERI A/S . DK-7900 NYKØBING MORS E-Mail: stoves@morsoe.com · Website: www.morsoe.com...
Need help?
Do you have a question about the 2110 and is the answer not in the manual?
Questions and answers