Table of Contents
Advertisement
Instructions for installation and use
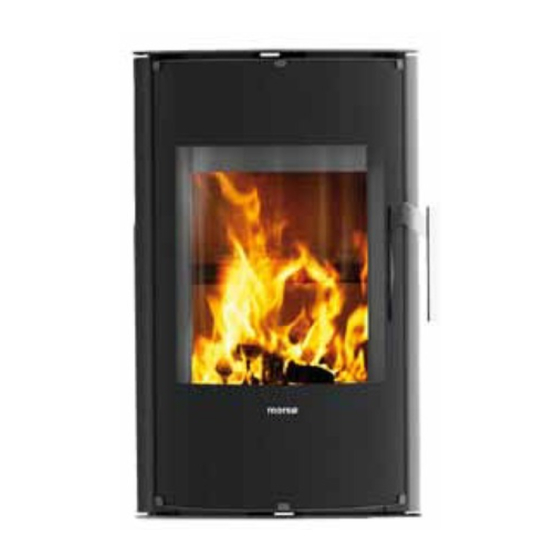
S10-70
AS/NZS 4012/4013 (1999)
Read this entire manual before you install and use your new room heater. If this room heater is not properly
installed, a house fire may result. To reduce the risk of fire, follow the installation instructions. Failure to follow
instructions may result in property damage, bodily injury, or even death.
Contact local building officials about restrictions and installation inspection-equirements in your area.
Save these instructions
Distributed by: Castworks · 8 Roosevelt St.
North Coburg ·VIC 3058 · Australia
1
www.morsoe.com
Advertisement
Table of Contents

Related Manuals for Morso S10-70


Summary of Contents for Morso S10-70
- Page 1 Instructions for installation and use S10-70 AS/NZS 4012/4013 (1999) Read this entire manual before you install and use your new room heater. If this room heater is not properly installed, a house fire may result. To reduce the risk of fire, follow the installation instructions. Failure to follow instructions may result in property damage, bodily injury, or even death.
-
Page 2: Table Of Contents
Enjoy your new Morsø stove! Morsø, the biggest stove company in the Danish market, has been making wood-burning stoves of the highest quality since 1853. Just follow the instructions below, and we are certain that you will be able to use and enjoy your new stove for many years. -
Page 3: Installing Your Morsø Stove
1.0 Installing your Morsø stove 1.1 Unpacking the stove The Morsø S10-70 weigh 102 kg. In order to avoid damage when unpacking and assembling the stove, we recommend that this job be undertaken by 2 people. 1.2 Installing the stove The stove is from the factory fitted with a top flue exit. -
Page 4: The Chimney
We recommend that the stove be installed at least 10-15 cm from masonry in order to allow heat to circulate and to facilitate the cleaning of the inside and outside of the stove. A layer of wallpaper on a brick wall is normally regarded as non-flammable material. The floor If the stove is installed on a flammable floor, national and local regulations must be observed with regard to the size of the non-flammable underlying surface that must cover the floor... -
Page 5: Pipe Connections
The chimney and the flue pipe must be fitted with cleaning doors, which must be at least the same size as the chimney’s aperture area. The chimney must be accessible for external inspection, and it must be possible to access the cleaning doors and the chimney if it is to be cleaned from the top (e.g. -
Page 6: Connecting To A Brick Chimney
Connecting to a brick chimney Brick a flue bushing securely into the wall, and insert the flue pipe into it. The pipe must not extend into the actual chimney opening, but only to the inside of the chimney aperture. The joints between the stove/pipe and pipe/wall bushing must be sealed with the glass tape provided. -
Page 7: Draught
Fresh air supply A wood-burning stove requires air for combustion. As a result, firing a wood-burning st- ove will help create a healthy climate in your house. If the house is very tightly sealed, and particularly if there is a cooker hood or ventilation system in the house, it may be necessary to install an air grate in the room in which the wood-burning stove is instal- led. -
Page 8: Firing/Using The Stove
2.0 Firing/using the stove Your stove is constructed with air inlets in two places. Pre-heated, fast-moving combustion air is added to the fire above the glass window, and is regulated using the handle above the door. The combustion air is let in when the handle is pushed to the right, and shut off when the handle is pushed to the left. -
Page 9: Lighting Instructions And Fuelling Intervals
2.1 Lighting instructions and fuelling intervals A lot of air is needed when lighting the stove. If you are starting with a cold stove, the door should be left ajar for the first few minutes and the combustion air supply opened to maximum. - Page 10 5. Re-stoking should normally be carried out while embers still remain. Distribute the embers in the bottom, ensuring that most of them are at the front of the stove. 6. Place 2 pieces of wood of 0.5-0.7 kg each and approx. 25-30 cm long over the embers in a single layer, with a distance of approx.
- Page 11 The stove door should normally be opened gently the first 2-3 cm, then you should wait un- til the pressure has equalised before opening the door all the way. This technique will prevent smoke from getting out, particularly when there is a poor draugt. The stove door should never be opened when the stove is being fired vigorously.
-
Page 12: Routine Stove Maintenance
3.0 Routine stove maintenance 3.1 External maintenance The cast surface of the stove is painted with heat-resistant Senotherm paint. It is best maintained by simply vacuuming it with a soft brush attachment or wiping it down with a dry, dust-free cloth. If the stove is used too vigorously, the painted surface may assume a greyish tinge over time, but the stove can easily be freshened up with Morsø... -
Page 13: Cleaning The Stove
Please note that no unauthorised alterations of the design may be undertaken, and that any parts that are replaced must be replaced with original Morsø parts. Gaskets The gaskets in the doors will wear out over time and should be replaced as required in order to prevent runaway combustion. - Page 14 2. With one hand, lift the bottom baffle plate. With the other hand, lift the brick panel up a few centimetres. This is best done with a slotted screwdriver or similar. Once the brick has been lifted, tip the diaphragm back into place, so the brick panel is now released and can be lifted out.
- Page 15 7. Lift the top baffle plate free of the brackets and down and back from the brackets to release it. 8. Re-installing vermiculite parts: as removal but in rever- se order. Spare parts for the S10-70 Description Product no. Door packing cord...
- Page 18 Morsø Jernstøberi A/S - 13.11.2012 - 72106000 www.morsoe.com...
Need help?
Do you have a question about the S10-70 and is the answer not in the manual?
Questions and answers