Table of Contents
Advertisement
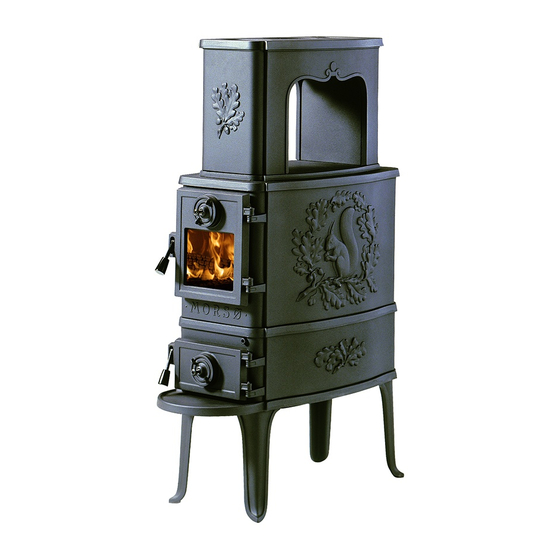
Installation and Operating Instructions
2B Classic
For use in North America
Read this entire manual before you install and use your new room heater. If this room heater is
not properly installed, a house fire may result. To reduce the risk of fire, follow the installation
instructions. Failure to follow instructions may result in property damage, bodily injury, or
even death.
Contact local building officials about restrictions and installation/inspection-requirements
in your area.
Save these instructions
MORSØ JERNSTØBERI A/S . DK-7900 NYKØBING MORS
E-Mail: stoves@morsoe.com · Website: www.morsoe.com
1
A French version of the manual can be downloaded at www.morsona.com
Advertisement
Table of Contents

Related Manuals for Morso 2B Classic


Summary of Contents for Morso 2B Classic
- Page 1 Installation and Operating Instructions 2B Classic For use in North America Read this entire manual before you install and use your new room heater. If this room heater is not properly installed, a house fire may result. To reduce the risk of fire, follow the installation instructions.
-
Page 2: Table Of Contents
July 1, 1990 Before you start firing Lighting and loading intervals The Morsø 2B Classic have been tested by OMNI-Test Laboratories, Inc. The test standards are ANSI/UL-1482 for the United States and ULC S627 for Canada. Maintenance... -
Page 3: Installation Of Your Morsø Stove
1.1 Unpacking the stove 1.0 Installation of your Morsø stove 2B Classic: After removing the outer packaging, flatten it and lay onto the floor close to the stove; this can then act as protective work surface during the assembly process. - Page 4 How to fit the Smoke Cover How to fit the Vertical Baffle Place the smoke cover by the smoke vent in front of the stove. This is easily done by leading the Lead the vertical baffle through the door as shown below (picture 1 & 2). Place the baffle into the smoke cover down through the flue collar before fitting the pipe.
-
Page 5: The Chimney / Flue System
1.3 The chimney / flue system 1.4 Flue Connection Note that the flue system must be independently secured and must not rely on the stove for A flue collar is placed in the firebox area. support. Use a 24 MSG black or blue chimney connector or listed double wall chimney connector. Refer to local codes and the chimney manufacturer’s instructions for precautions required for passing The stove must not be connected to a chimney flue serving any other appliance. -
Page 6: Positioning The Stove
1.6 Positioning the stove Distance to walls and lintel When the stove is positioned near combustible materials, observe all current local and national building regulations with regards to clearances. Whatever regulations apply to your area, do not in any case install the stove within 8 inches of combustible materials around the sides or 16 inches above the top of the stove (fireplace installations require greater clearances above the stove - see below in the clearance chart). -
Page 7: Operation
2.0 Operation 2.1 Before you start firing For Use with Solid Wood Fuel Only. Do Not Overfire, If Heater or Chimney Connector Glows You Are Overfiring. Inspect and Clean Chimney Frequently. Under Certain Conditions of use creosote buildup may occur rapidly. Because of risk of smoke and flame spillage, operate only with door fully closed. -
Page 8: Lighting And Loading Intervals
The maximum recommended weight of wood fuel per load is 2.5 kg/h/5.5Ibs (approx 3 split logs). In principle Your stove is fitted with Primary and Secondary air inlets. Under normal firing, the average flue temperature in the stove pipe, measured 20 cm above the Primary Air is controlled using the spinner on the door. -
Page 9: Maintenance
1. Lift the door off the hinges and place it face down on a sheet of cardboard or other nonabrasive 3.0 Maintenance fabric. 2. Unscrew the 4 bolts that secure the glass. (In the event that a bolt sheers off when being When perfoming maintenance on your stove, always protect yourself, using safety goggles unscrewed, remove the remaining body of the bolt by drilling down its centre with 1/8 inch high and gloves... -
Page 10: Cleaning The Stove And The Flue
Gasket Chimney sweeping The gasket around the perimeter of the door may harden over a period of time. It should be Inspect the system regularly during the heating season as part of a regular maintenance schedule. replaced if it becomes difficult to close the doors or if air starts to leak in around the perimeter To inspect the chimney, let the stove cool completely. -
Page 11: Parts Diagram
3.5 Parts diagram for model Morsø 2B Classic 3.6 Parts list for model Morsø 2B Classic Pos.No. Parts Squirrel side panel 54200321 Rear plate 44203821 Smoke valve 44200800 Horizontal baffle 44203600 Vertical baffle 44203800 Front 44201521 Side panel for upper part... - Page 12 3.6 Parts list for model Morsø 2B Classic Pos.No. Parts Inside top - upper part 44211621 Top - upper part 44211721 Cover - upper part 44211800 Access door upper part 44211921 Bolt Washer Brick - bace 79209200 Baffle - standless steel...
- Page 13 Morsø Jernstøberi A/S - 19.08.2013 - 72207100...
Need help?
Do you have a question about the 2B Classic and is the answer not in the manual?
Questions and answers