Table of Contents
Advertisement
Quick Links
ALI-DVR1004E Series 960H Digital Video Recorder Quick Setup Guide
This quick setup guide provides instructions to initially setup and use your new digital video recorder. For additional information on the
extensive capabilities of your DVR, refer to the ALI-DVR1004E Series 960H Digital Video Recorder User Manual provided on CD with
your system.
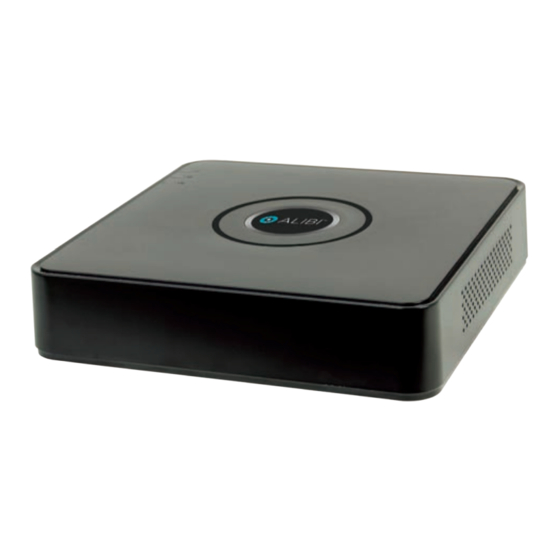
DVR Top Panel
Power LED
HDD activity
Network
activity
ALI-DVR1004E series DVR top panel
LED
Description
Power
Indicator lights red when DVR is powered on.
HDD activity
Indicator lights in red when data is being read from or written to the HDD.
Network activity
Indicator blinks blue when the network connection is functioning properly.
1
Mouse Control
A standard 3-button (left/right/scroll-wheel) USB mouse can also be used with this DVR. To use a USB mouse:
1.
Plug USB mouse into the either the front panel or backpanel USB connector of the DVR.
2.
The mouse will be automatically detected. If the mouse is not detected, the mouse may not be compatible with the DVR. Please refer
to the recommended device list from your provider.
The operation of the mouse:
Action
Effect
Live view: Show menu.
Right click
Menu: Exit current menu to upper level menu.
Single click: Live view: Select channel and show the quick set menu.
Menu: Select and enter.
Double click: Live view: Switch between single-screen and multi-screen.
Left click
Tamper-proof, privacy mask and motion detection: Select target area.
Digital zoom-in: Drag and select target area.
Live view: Drag channel/time bar
Scroll up: Live view: Previous screen.
Menu: Previous item.
Scroll wheel
Scroll down: Live view: Next screen.
Menu: Next item.
Soft keyboard
One of two on-screen keyboards appears when you click in a field that accepts a entry, such as a password or name or a numerical value.
The QWERTY keyboard, for alphanumeric entries, is shown in the following picture. Some control keys toggle their function when they are
clicked. A numerical keyboard, shown beneath, appears for numerical entries such as an IP address.
Symbols /
Numbers
Uppercase /
Lowercase
Soft keyboard - alphanumeric
Backspace
Escape / Exit
ALI-DVRR1004E_SQ
8/20/14
Advertisement
Table of Contents

Related Manuals for ALIBI ALI-DVR1004E Series


Summary of Contents for ALIBI ALI-DVR1004E Series
- Page 1 This quick setup guide provides instructions to initially setup and use your new digital video recorder. For additional information on the extensive capabilities of your DVR, refer to the ALI-DVR1004E Series 960H Digital Video Recorder User Manual provided on CD with A standard 3-button (left/right/scroll-wheel) USB mouse can also be used with this DVR.
- Page 2 For the following steps, refer to the back panel photo above for the location of connectors. After the initial Alibi loading window (see above), a monitor resolution selection screen may appear. The DVR will offer the optimal Place the DVR in a location that is secure, well ventilated and clean. The DVR should be positioned such that the back panel connectors resolution for your monitor, but you can select another resolution if you prefer.
- Page 3 Click the Next button to open the date and time settings window. Enter the admin password in the appropriate field. To do that, click inside the Admin Password field to open the virtual keyboard. Click the appropriate buttons to enter the password, then click the Enter icon. The default admin password is 1111. In the date and time setup window, click the field you want to change, then use the drop-down list or setup aid to select the appropriate values.
- Page 4 Generally, it is preferable to setup the DVR with a fixed network settings, if possible, to assure the DVR has an unchanging IP address In the camera setup wizard, you can initially select the recording mode for each camera attached to the camera input BNC connectors. for remote logins.
-
Page 5: Specifications
If ID Authentication is not disabled (see the General Settings), a login window will open. In the Login window, select a User Name with administrative privileges, enter its password, then click OK. NOTE: A window of Menu icons will open. The default user “admin” has the default password of “1111”. - Page 6 Section Item Specification 1-ch, resolution: 1080p: 1920 × 1080/60 Hz, SXGA: 1280 × 1024/60 Hz, HDMI/VGA output 720p: 1280 × 720/60 Hz, XGA: 1024 × 768/60 Hz CVBS output 1-ch, BNC (1.0 Vp-p, 75 Ω), resolution: 704 × 480 Encoding resolution 960H / 4CIF / 2CIF / CIF / QCIF Frame rate 960H @ 10 fps, 4CIF / 2CIF @ 12 fps, CIF / QCIF @ 30 fps...
Need help?
Do you have a question about the ALI-DVR1004E Series and is the answer not in the manual?
Questions and answers