Table of Contents
Advertisement
Quick Links
Advertisement
Table of Contents

Related Manuals for INTERSPIRO 90USA


Summary of Contents for INTERSPIRO 90USA
- Page 1 30249a01 user manual 9 0 U S A And 9 0U S A- S...
- Page 2 (12) months after date of purchase. Within that period, InTERSPIRO will, at its option, repair or replace the product or refund your purchase price if InTERSPIRO determines the product does not conform to InTERSPIRO´s specifications or is defective in material or workmanship.
- Page 3 90usa anD 90usa-s CAUTIONS AND LIMITATIONS D. Air-line respirators can be used only when the respirators are supplied with respirable air meeting the requirements of CGA G-7.1 Grade d or higher quality. e. Use only the pressure ranges and hose lengths specified in the user’s instructions.
-
Page 5: Table Of Contents
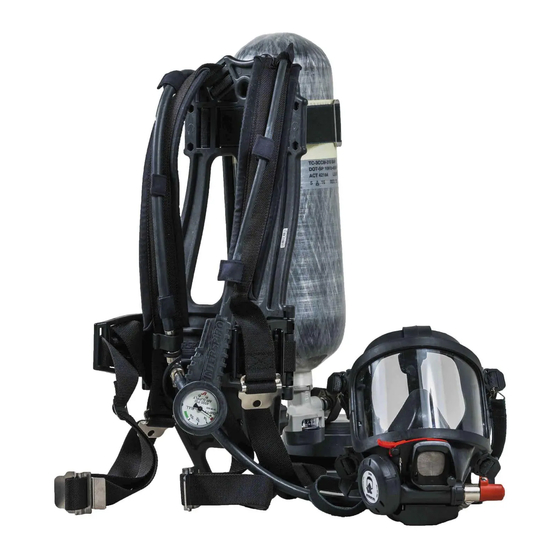
3. POSITIVE PrESSurE ....................8 4. CONNECTINg ANd dISCONNECTINg ThE FACE mASk ........9 5. APPArATuS PrE-uSE ChECk ................11 6. dONNINg ......................12 7. ChECk bEFOrE uSE ..................... 13 8. rEmOVE ThE APPArATuS ..................14 9. ClEAN ANd dISINFECT ..................14 10. STOrAgE ......................18 11. ExTrA AIr CONNECTION ..................19 12. SErVICE ANd TESTINg SChEdulE ............... 20 90USA-S Configuration 90USA Configuration Fig. 1... -
Page 6: Safety Notice
90USA and 90USA-S 1 safeTY nOTIce The product must only be used together with other approved InTERSPIRO products. The product must only be used by personnel in good health and trained in the use of respiratory protective equipment. Individuals with beards or large sideburns may not obtain an adequate seal. -
Page 7: Cylinder Mounting
cYlInDer mOunTIng TexTILe CyLINDer STrAp Slide the cylinder through the cylinder strap. Check the connection O-ring and screw the cylinder valve hand tight to the cylinder connection of the manifold block [Fig. 2]. Fig. 2 Tighten the cylinder strap by pulling the free end – do not over tighten [Fig. -
Page 8: Positive Pressure
POsITIVe Pressure 90USA-S Positive pressure is activated by closing the ambient air hatch by pushing the exhalation valve cover against the face mask. To shut off positive pressure and breathe ambient air, simultaneously press down the indicator arm and push the exhalation valve cover away from the face mask. -
Page 9: Connecting And Disconnecting The Face Mask
THE InTERnAL SPEECH dIAPHRAGM SInCE THIS CAn dAMAGE IT. Connect the breathing valve to the breathing hose [Fig. 12]. nOTE! Some 90USA-S breathing valves with 90° by-pass may be equipped with a quick connection at the by-pass and breathing hose. - Page 10 90USA - CONNeCTINg The fACe MASk Connect the breathing valve to the mask by pushing the valve into the connection piece and turning it counter clockwise until the bayonet coupling is locked. [Fig. 13] Fig. 13 aTTenTIOn! WHEn PUSHInG THE BREATHInG VALVE In PLACE, THE FInGERS SHALL nOT BE POSITIOnEd On THE InTERnAL SPEECH dIAPHRAGM SInCE THIS CAn dAMAGE IT.
-
Page 11: Apparatus Pre-Use Check
With the cylinder closed, open the by-pass valve slightly in order to allow the air to slowly evacuate. Read the pressure gauge when the audible alarm starts to sound. The pressure gauge should read ¼ full. For the 90USA or 90USA-S 4500 psi cylinder pressure versions, the alarm should sound at approximately 1090 psi. -
Page 12: Donning
DOnnIng Loosen the shoulder straps and the waist belt and don the apparatus. Initially adjust the shoulder straps so as to position the pack on the lower back. Place the neck strap over the head. Fasten waist belt buckle and tighten. [Fig. 15 and Fig. 16] Fig. -
Page 13: Check Before Use
Tighten the straps on the head harness, starting with the two at the bottom [Fig. 19]. Pull the straps at an approximate angle of 45 degrees to the rear. do not overtighten the head harness. Fig. 19 90USA-S: Activate the positive pressure, see section 3. 90USA: The positive pressure activates automatically. -
Page 14: Remove The Apparatus
remOVe The aPParaTus Switch off the positive pressure, see section 3. Open the buckles to release the head harness, loosen strap and remove the face mask. [Fig. 21]. Fig. 21 Close the cylinder valve. Unfasten the waist belt buckle and loosen the shoulder straps. Remove the apparatus and activate the positive pressure to purge air from the system. - Page 15 90USA-S aTTenTIOn! OBSERVE THAT THE EQUIPMEnT MAY BECOME COnTAMInATEd BY InFECTEd BOdY FLUIdS. ALWAYS FOLLOW THE POLICY PRESCRIBEd BY YOUR ORGAnISATIOn. InTERSPIRO RECOMMEndS THAT THE FACE MASk IS CLEAnEd And dISInFECTEd BY FOLLOWInG THE PROCEdURE dESCRIBEd BELOW. IF THE FACE MASk IS SHAREd BETWEEn dIFFEREnT IndIVIdUALS IT IS AdVISABLE TO FOLLOW THIS PROCEdURE AFTER EACH USE.
- Page 16 90USA aTTenTIOn! OBSERVE THAT THE EQUIPMEnT MAY BECOME COnTAMInATEd BY InFECTEd BOdY FLUIdS. ALWAYS FOLLOW THE POLICY PRESCRIBEd BY YOUR ORGAnISATIOn. InTERSPIRO RECOMMEndS THAT THE FACE MASk IS CLEAnEd And dISInFECTEd BY FOLLOWInG THE PROCEdURE dESCRIBEd BELOW. IF THE FACE MASk IS SHAREd BETWEEn dIFFEREnT IndIVIdUALS IT IS AdVISABLE TO FOLLOW THIS PROCEdURE AFTER EACH USE.
- Page 17 Carefully remove the diaphragm unit from the cover by squeezing the thread of the cover. [Fig 26] Fig. 26 Remove the guide disc with positive pressure spring. [Fig 27] Fig. 27 Remove the sealing disc from the diaphragm unit. [Fig 28] Fig.
-
Page 18: Storage
Place the diaphragm unit onto the positive pressure spring and press straight down until it snaps into the cover [Fig 26]. do not twist the spring. Push gently on the guide pin to check that the diaphragm moves easily. Make sure the O-ring is correctly seated in the groove on the diaphragm unit, lubricate if necessary. -
Page 19: Extra Air Connection
11 exTra aIr cOnnecTIOn The 90USA-S and 90USA can be equipped with an extra-air manifold fitted with a “IS”-type quick connection for extra air. The connection can be used to: • Feed the apparatus with medium pressure air from an external air source. -
Page 20: Service And Testing Schedule
“Service and Testing Schedule” with publication number 97307. Local requirements may differ due to regulations and environmental conditions. In case of doubt consult your local InTERSPIRO representative. The “Service and Testing Schedule” is available on the InTERSPIRO website www.interspiro.com . - Page 22 E-MAIL SCANDINAVIA, ASIA/PACIFIC & MIDDLE EAST SWITZERLAND SWEDEN INTERSPIRO AG www.interspiro.de NORDIC & EXPORT SALES DIVISION www.interspiro.com Güterstraße 47 CH-4133 PRATTELN SWITZERLAND Box 10060 S-181 10 LIDINGÖ SWEDEN +41 61 827 99 77 +41 61 827 99 70 info@interspiro.ch...
Need help?
Do you have a question about the 90USA and is the answer not in the manual?
Questions and answers