DMP Electronics XR500 User Manual
Hide thumbs
Also See for XR500:
- Programming manual (85 pages) ,
- User manual (80 pages) ,
- Programming options (11 pages)
Table of Contents
Advertisement
Advertisement
Table of Contents

Related Manuals for DMP Electronics XR500


Summary of Contents for DMP Electronics XR500
-
Page 2: Silencing An Alarm
Abort or Cancel message to the Central Station and the security system will be disarmed. © 2012 Digital Monitoring Products, Inc. Information furnished by DMP is believed to be accurate and reliable. This information is subject to change without notice. -
Page 3: Table Of Contents
XR500/XR100 Series Command Processor™ Panels Table of Contents Section Page Section Page XR500 and XR100 Security Command™ Systems ......1 7/0 Panic Function ..............5 About Your Security System ............1 Thinline™ and Aqualite™ Keypads: ........5 Parts of the System ...............1 Common Keys on All Keypads.............5 LCD Keypad ................1... - Page 4 Guest System ..............21 Using the Zone Monitor Function .......... 27 Disarming During an Alarm ..........21 Browser Feature ..............28 Extending Schedules .............. 21 System Status ................28 Keypad Shortcut Keys .............. 22 Using the System Status Function ........28 XR500/XR100 User’s Guide...
- Page 5 Setting the Date and Time ............41 Keypad Display ..............52 Setting the System’s Date and Time ........41 About Door Access .............. 52 Display Events ...............42 System Monitor Event Displays ..........52 Service Request ..............42 Keypad Display ..............52 XR500/XR100 User’s Guide...
- Page 6 Appendix C ............... 60 Frequently Asked Questions ............. 67 User Disarm and Entry ............. 60 Common Keypad Displays ............68 Entering User Names .............. 60 Appendix D ............... 61 DMP Wireless Description ............61 LED Status Operation ............61 XR500/XR100 User’s Guide...
-
Page 7: Xr500 And Xr100 Security Command™ Systems
A Note About False Alarms One of the most important concerns facing the security industry This Guide covers operation of the XR500 Series and the XR100 today is false alarms. The accidental dispatching of police and Series Security Command™ system. -
Page 8: Emergency Evacuation Plans
Never enter a building to look for someone. Practice Your Escape Plans Devising an escape plan is only the beginning. For the plan to be effective everyone should practice escape routes from each room. XR500/XR100 User’s Guide Introduction... -
Page 9: Dmp Keypads
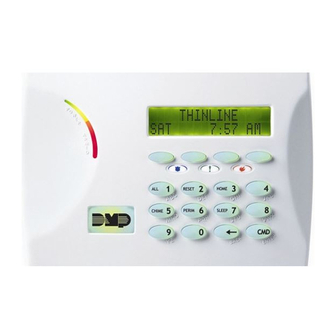
Three Panic Icons Back Arrow Key COMMAND Key Thinline™/Aqualite™ Keypad Clear Touch™ Keypad 32-Character Display SMITH RESIDENCE 12:51 PM Select Keys Backlit Logo COMMAND Key and Proximity Antenna Back Arrow Key Data Entry Digit keys Thinline™ Wireless Keypad Introduction XR500/XR100 User’s Guide... -
Page 10: The Select Keys
The Power LED indicates the panel Power status. It is recommended Red/Green Alternate Panel Armed AC Power OK, Battery Fault you contact the service department when the Power LED is off or Red Blinking Panel Armed AC Power Fault, Battery OK blinks. XR500/XR100 User’s Guide Introduction... -
Page 11: Panic Functions
You can press the Back Arrow key to back up through the list of functions in the User Menu or to erase the last character you entered. Police Emergency Fire Clear Touch™ Keypad Panic Icons Introduction XR500/XR100 User’s Guide... -
Page 12: Using The Keypad
Remember to press the COMMAND key to display the change an option that requires a NO or YES response, press the top rest of the area numbers on XR500 systems. row Select key for the response not selected. For example, if the Note: XR100 Systems support 8 areas. -
Page 13: Keypad User Options
Select key to make the tone lower. Use Burglary Alarm tone: A constant siren tone that continues until the right Select key to make the tone higher. the alarm is silenced. From LCD keypads only. Introduction XR500/XR100 User’s Guide... -
Page 14: What To Do When The Trouble Tone Sounds
Key press tone: A short beep each time you press a key on the keypad and it is acknowledged by the system. Your system may have DMP wireless devices including key fob(s). There are three types of DMP wireless key fobs available:... -
Page 15: Special Wireless Displays
Check the user code or PIN or present the card to There is a problem with a protection device or system component. the reader again. This display is accompanied by a description of the problem. Introduction XR500/XR100 User’s Guide... -
Page 16: Email/Cell Phone Messages
An area is made up of burglary zones that can be armed or disarmed together. One area might consist of the office doors and windows. TEST IN PROGRESS When you arm the office, these zones arm together and sound an The system is currently being tested by an installation or service alarm if opened. technician. XR500/XR100 User’s Guide Introduction... -
Page 17: Instant Zone
Often, similar devices in the same general location share the same zone. For example, the windows on the east side of the premises can all be grouped together in a zone named E. WINDOWS. Introduction XR500/XR100 User’s Guide... -
Page 18: Status List
Note: The XR100 system allows one guest house system while the the display shows: 1 2 3 4 5 6 7 8. When you arm areas 1, 3, 5, and XR500 allows two guest house systems. 7 the keypad displays: 1 3 5 7. -
Page 19: Arming And Disarming
(XR100 has 1 guest during the entire armed period. A zone remains bypassed until the house system while XR500 offers 2). Each house is separate and system is disarmed. works just like the Home/Sleep/Away system previously mentioned. -
Page 20: Key Fob Arming
This restart can occur only one time. When the exit delay time ex pires, all disarmed zones are armed. XR500/XR100 User’s Guide Arming and Disarming... -
Page 21: Key Fob Disarming
A zone that is force armed is restored into the system if it later returns to normal. A zone that is bypassed remains bypassed until the system is disarmed. See steps 7a through 7d. Arming and Disarming XR500/XR100 User’s Guide... -
Page 22: Quick Arming
INVALID TIME. This lets users know that they are attempting to disarm outside of their authorized time. XR500/XR100 User’s Guide Arming and Disarming... -
Page 23: Disarming The Area System From The Keypad
To quickly disarm a desired area, enter the area number followed All/Perimeter Shortcut Key Arming by the COMMAND key when the ALL? NO YES option displays. Arm Perimeter — Press 6 for 2 seconds. Arm All — Press 1 for 2 seconds. Arming and Disarming XR500/XR100 User’s Guide... -
Page 24: Arming An All/Perimeter System
The keypad displays INSTANT. When you select INSTANT, any entry/exit zone that trips immediately activates an alarm and the exit delay countdown immediately stops. XR500/XR100 User’s Guide Arming and Disarming... -
Page 25: Disarming An All/Perimeter System
Arm Home — Press 3 for 2 seconds to arm the perimeter. Arm Sleep — Press 7 for 2 seconds to arm the perimeter and interior areas and leave the bedroom area off. Arm Away — Press 1 for 2 seconds. Arming and Disarming XR500/XR100 User’s Guide... -
Page 26: Arming A Home/Sleep/Away Or A Home/Sleep/Away With Guest System
8. The keypad next displays EXIT: ## INSTNT and begins to count down the number of seconds remaining for you to exit. When the delay expires, the exit zones are armed. XR500/XR100 User’s Guide Arming and Disarming... -
Page 27: Disarming A Home/Sleep/Away Or A Home/Sleep/Away With Guest System
If a valid alarm has not occurred, select CANCEL to disarm Menu portion of this guide. the system and cancel the alarm. The keypad next displays ALL SYSTEM OFF to confirm the system is disarmed. If the alarm is valid, select VERIFY to send a verify message to the Central Station. Arming and Disarming XR500/XR100 User’s Guide... -
Page 28: Keypad Shortcut Keys
Guest, or All/Perimeter. Home/Sleep/Away, Home/Sleep/Away with Guest, or All/Perimeter You can use the Arming shortcut keys, 1, 3, 6, and 7 when the system. system is disarmed. You may be prompted to enter your user code. XR500/XR100 User’s Guide Arming and Disarming... -
Page 29: User Menu
2. Press the COMMAND key until MENU? NO YES displays. all XR500 Series and XR100 Series panels. 3. Select YES. The keypad displays ENTER CODE: –. Enter XR500N or XR500E panels allow additional your user code and press COMMAND. -
Page 30: Alarm Silence
Make sure all smoke is cleared from around the area of the smoke momentarily. detectors before performing a Sensor Reset to prevent the alarm 4. The keypad returns to the Status List display. from occurring again. XR500/XR100 User’s Guide User Menu... -
Page 31: Armed Areas Display
Your system may be programmed to require that your user code how to use the built-in Outputs ON/OFF browser. profile have access to areas assigned to the keypad. INVALID AREA displays when your user code does not have access to the keypad’s areas and the output does not turn on. User Menu XR500/XR100 User’s Guide... -
Page 32: Zone Status
Refer back to step 3. 9. After displaying the zone status, ZONE: - returns for you to 5. To Reset a zone, enter the zone number and select RST. enter another zone number. XR500/XR100 User’s Guide User Menu... -
Page 33: Browser Feature
The keypad also displays the name of each zone as its 8. The zone number automatically disappears. You can then device is opened. enter a new zone number and repeat step 7a or 7b. User Menu XR500/XR100 User’s Guide... -
Page 34: Browser Feature
If TRBL displays, call the service department for assistance. * The transmit test does not occur on local systems. 4. The system then displays its firmware version, the panel mode, and then exits the User Menu. For example: VER_118_1/20/07 MODEL XR500 XR500/XR100 User’s Guide User Menu... -
Page 35: Using The Panic Zone Test (Xr500N/E Only)
Note: During the Panic Zone Test, any zones that fail are not 99 is ALL areas assigned. Profile 99 is predefined in the system by sent to the receiver unless pre-programmed at installation the factory. In an XR500 Series system you can assign areas 1 to to be sent. 32. In an XR100 Series panel you can assign areas 1 to 8. -
Page 36: Adding User Profiles
11. When you complete Selecting all User Profile menu 9. When you have completed selecting all User Profile menu assignments, the keypad displays the PROFILE CHNGD assignments, the keypad displays the PROFILE ## ADDED message for 4 seconds, indicating the profile is changed. message for 4 seconds. XR500/XR100 User’s Guide User Menu... -
Page 37: Browser Feature
The ALL NO YES? option does not display when this option language to display when the Easy Arm/Disarm option is enabled is enabled. and the user presents their credential or enters their user code at the Status List. User Menu XR500/XR100 User’s Guide... -
Page 38: User Profiles Chart
Anti-Passback EASY ARM/DISARM Arm/Disarm 1234 ANYTIME ___ ANYTIME Shift Time Access 1234 1234 ANYTIME ANYTIME ANYTIME ANYTIME ANYTIME ANYTIME ANYTIME ANYTIME ANYTIME ANYTIME RE ARM DLY 0 – 250 Re-Arm Delay SEC LANGUAGE Preferred Language XR500/XR100 User’s Guide User Menu... -
Page 39: User Codes
You may enter up to 32 characters for the name. As needed, system, default profiles 12-19 for the Guest 1 house system, refer to Appendix C for Entering User Names information. and default profiles 22-29 for the Guest 2 house system. User Profile - The user is also assigned a Profile (1 to 99) by the person administrating the system. The profile number determines the areas and functions the user can access. User Menu XR500/XR100 User’s Guide... -
Page 40: Browser Feature
Select key and enter the new user code. Press COMMAND. a user code, you must have a user code with a profile that has user code authority. 7. The display then shows the current user name. Press any top row key to clear. See Entering Names in Appendix C to enter a new name. XR500/XR100 User’s Guide User Menu... -
Page 41: Browser Feature
000 at the USER NUMBER:- option. 4. The keypad displays USER XXXX FORGVN to confirm, then returns to step 3 for the next user. Press the Back Arrow key to exit this menu. User Menu XR500/XR100 User’s Guide... -
Page 42: Ambush Code
This option sounds the keypad buzzer and displays CLOSING TIME! or AREA LATE! when a schedule expires. This reminds users still on the premises to arm the system or extend the schedule to a later time. XR500/XR100 User’s Guide User Menu... -
Page 43: Setting Shift (S1 S2 S3 S4) Schedules
Opening and Closing times previously set for that day. This feature allows you to review programmed schedules at any time. A schedule entered in HOL (holiday) activates and overrides TUE etc. schedules anytime a holiday date occurs. User Menu XR500/XR100 User’s Guide... -
Page 44: Setting Output (Out) And Door (Door) Schedules
7. Select the day you want to program. If you select HOL go to Note: Your system may be programmed to limit the Panic Setting Holiday ABC Schedules for more information. Zone Test to only be performed during the Area 32, Shift 4 schedule. XR500/XR100 User’s Guide User Menu... -
Page 45: Setting Holiday Abc Schedules For S1, S2, S3, S4, Out, And Door Schedules
Output or Door schedule. To exit the 3. The keypad displays HOL: A B C . Select A to set the first of user menu or to go back to the S1 S2 S3 S4 display, press three holiday schedules. the Back Arrow key. 4. The keypad displays A - : AM PM. User Menu XR500/XR100 User’s Guide... -
Page 46: Setting Holiday Dates (Hol)
Note: The Holiday Dates entered indicate the days of the year when HOL schedules are used. For information on setting holiday schedules for Shift, Output, and Door, see Setting Holiday ABC Schedules. XR500/XR100 User’s Guide User Menu... -
Page 47: Extending Schedules (Ext)
Late to Close report is sent to the central station. If the schedule The display returns to the TIME DAY DATE display. is extended, a Schedule Change report is sent to the central Press the Back Arrow key to exit the User Menu. station. User Menu XR500/XR100 User’s Guide... -
Page 48: Display Events
Ending a Fire Drill test 1. Enter your code at the keypad and press COMMAND to end the Fire Drill. 2. The Fire Drill test automatically ends with ALARM SILENCE or the programmed Bell Cutoff time. XR500/XR100 User’s Guide User Menu... -
Page 49: System Setup
System Setup System Setup Record Keypad Record Note: XR500 systems support 16 keypad devices. XR100 systems This System Setup section allows you to track the current and future status of the programmable options on your system. support 8 keypad devices. -
Page 50: Key Fob Button Programming
Which keypads provide Door Access reports? 1 2 3 4 5 6 7 8 9 10 11 12 13 14 15 16 N/A XR500/XR100 User’s Guide System Setup... -
Page 51: Area Names And Numbers Record
Area Names and Numbers Record XR500 systems may be divided into 32 separate areas. XR100 systems may be divided into 8 separate areas. All/Perimeter systems are divided into two separate areas. Home/Sleep/Away and Home/Sleep/Away with Guest systems are divided into two or three separate areas. -
Page 52: User Profiles Record
1 2 3 4 A 1 2 3 4 A 1 2 3 4 A 1 2 3 4 A 1 2 3 4 A 1 2 3 4 A 1 2 3 4 A XR500/XR100 User’s Guide System Setup... -
Page 53: User Codes Record
As you add new users or change current user codes, you can keep track of their profile number in the system. Use the following table to track custom user codes in your system. Only 4-digit user codes can be assigned to All/Perimeter, Home/Sleep/Away, or Home/Sleep/ Away with Guest system users. Profile Profile User # User Name User # User Name System Setup XR500/XR100 User’s Guide... -
Page 54: Schedules Record
: _M : _M : _M : _M : _M : _M Output # Close : _M : _M : _M : _M : _M : _M : _M : _M : _M : _M XR500/XR100 User’s Guide System Setup... -
Page 55: Holiday Date Record
A or B or C Use the Output number in the User Menu when setting Output Schedules or using the Outputs ON OFF option to manually toggle _____/_____ A or B or C the relays. System Setup XR500/XR100 User’s Guide... -
Page 56: Appendix A
FRST DATE: 8/21. Press any Select key and enter a 4-digit Display Events or press SRT to define a new sort. beginning date for the sort. Press COMMAND. 5. The keypad displays LAST DATE: 10/17. Press any Select key and enter a 4-digit ending date for the sort. Press COMMAND. XR500/XR100 User’s Guide Appendix A... -
Page 57: Arming And Disarming Event Displays
Note: You may sometimes see the user as SWG. This is short for LOW - Low battery MIS - Missing wireless transmitter Swinger Bypass which is an automatic function that allows the Note: LOW and MIS are for wireless systems only. system to automatically bypass a zone. Appendix A XR500/XR100 User’s Guide... -
Page 58: Door Access Event Displays
The Display Events feature logs the user number and name of the person granted access, the date and time, and from which keypad they entered their code. XR500/XR100 User’s Guide Appendix A... -
Page 59: Schedule Change Event Displays
This displays events when the wireless receiver was not communicating with the panel. Keypad Display Description A DMP wireless device trouble 11:41A 10/17 occurred on October 17 at 11:41 WIRELESS Wireless Trouble Event Types - There are two event types:... -
Page 60: Appendix B
-BYPAS = the zone is bypassed to enter another -BAD O = the zone is open -BAD O = the zone is open zone number. -BAD S = the zone is shorted -BAD S = the zone is shorted XR500/XR100 User’s Guide Appendix B... -
Page 61: Bypass Zones Browser
BYP to Bypass the zone. The display returns to Selecting RMV the ZONE: prompt Selecting ADD places removes the zone ZONE: - RST BYP allowing you to enter the zone in monitor mode. from monitor mode. another zone number. Appendix B XR500/XR100 User’s Guide... -
Page 62: Add User Codes Browser
KATIE SMITH data entry keys to enter a new user name. The default user name appears. USER 012 Press any SELECT key/area to clear this name. See the Entering User Names diagram in Appendix B. XR500/XR100 User’s Guide Appendix B... -
Page 63: Delete User Codes Browser
COMMAND when finished. If this is the user you want to delete, press any SELECT key/area. USER NUMBER: 013 PROFILE 012 ADDED Verify the user number. Press COMMAND. USER 13 DELETED Appendix B XR500/XR100 User’s Guide... -
Page 64: Change User Profiles Browser
Verify the profile number. Follow the prompts to complete the profile Press COMMAND. Press the COMMAND change. key to delete the profile. PROFILE 12 DELTD When you complete changes PROFILE 12 CHNGD to the profile, press COMMAND. XR500/XR100 User’s Guide Appendix B... -
Page 65: Output Groups Browser
The next output group name displays. WINDOWS . . . OUTPUT: 127 ON OFF The display shows the door or output number. DOOR: 128 ON OFF Press any Select key/area and the output group FRONT OFFICE number displays. Appendix B XR500/XR100 User’s Guide... -
Page 66: Appendix C
Pressing the 9 key provides you Pressing the 0 (zero) key provides with Y, Z, and a space to use you with a – (dash), . (period), between names. For example: * (asterisk), and a # (pound sign). BOB SMITH. XR500/XR100 User’s Guide Appendix C... -
Page 67: Appendix D
LED Status Operation Depending on the programmed action of a key fob button, the If your system uses DMP Wireless devices and includes key fob(s), Status LED lights to acknowledge a button press or to indicate the refer to the following information. -
Page 68: Easy Entry™ User's Guide
Select NO to arm or disarm individual areas. Select YES, or simply wait, and the keypad automatically arms or disarms all areas for which you are authorized. XR500/XR100 User’s Guide Appendix E... -
Page 69: Arming And Disarming An All/Perimeter System
Using the Access Reader for User Menu Access You can also use a card reader to access the User Menu. When MENU? NO YES displays, select YES and enter a code when requested. Appendix E XR500/XR100 User’s Guide... -
Page 70: Appendix F
Examples of email messages For alarm messages sent to a cell phone number, you have the option to reply with “cancel” to cancel the existing alarm. XR500/XR100 User’s Guide Appendix F... -
Page 71: In Touch™ Text Messaging Commands
Names and numbers can be mixed. A system comma should separate the areas. If only DISARM is sent, all areas will be disarmed. If the system is already disarmed, you will receive a message saying the system is already disarmed. Appendix F XR500/XR100 User’s Guide... -
Page 72: Cancelling An Alarm With Text Messaging
If in alarm or trouble, the system will send ALARM ON or TROUBLE ON followed by up to 3 zone names that are in alarm or trouble. To receive the Armed Status, text: STATUS. XR500/XR100 User’s Guide Appendix F... -
Page 73: Frequently Asked Questions
Press COMMAND. Press the Back Arrow key to exit the User Menu. This sets the opening time to 8:00 AM Monday and the closing time to 5:00 PM Friday. You can substitute any other day or time in this example. Appendix F XR500/XR100 User’s Guide... -
Page 74: Common Keypad Displays
The user must exit the area through the proper door. If FAILED TO EXIT to re-enter an area from which they did not exit not possible, your system administrator should select properly. the Forgive option in the User Codes menu. XR500/XR100 User’s Guide Appendix F... - Page 75 Arming 15 Zone 51 Disarming 16 Zone Bypass 51 Armed Areas Cancel Alarm b, 19, 21, 66 DMP Wireless 8, 61 Checking 16 Card Plus PIN (XR500E) 43 Door Access 10, 24, 52 Display 25 Central Station Monitoring 11 Disarming 16 Armed Status 12 Clear Touch™...
- Page 76 LEDs 4 Exit Zone 11 Multi-lingual Display 6, 23 Pager Direct™ 64 Extending Schedules 21, 41 Record 43 Panic Zone Test (XR500 Series) 29 Select Keys 4 PIN (XR500E) 33 Shortcut Keys 22 Failure to Exit 35 Power LED 4, 5...
- Page 77 Status List 12 Zone Status 26 System Setup Record 43 User Options 7 System Status 28 User Profiles 29, 33 System Test 1, 28 Adding 30, 57 Changing 30, 58 Chart 32 Deleting 31, 58 Record 46 Index XR500/XR100 User’s Guide...
- Page 78 This page intentionally left blank.
- Page 79 This page intentionally left blank. XR500/XR100 User’s Guide...
- Page 80 LT-0683 1.04 © 2012 Digital Monitoring Products, Inc. 12135...
Need help?
Do you have a question about the XR500 and is the answer not in the manual?
Questions and answers