Table of Contents
Advertisement
Quick Links
Advertisement
Table of Contents

Related Manuals for Lawmate PV-500EVO


Summary of Contents for Lawmate PV-500EVO
-
Page 2: Table Of Contents
TABLE OF CONTENT CHAPTER 01 OVERVIEW FUNCTION MODES BASIC OPERATION INTRODUCTION OF ALL SETTING FUNCTIONS VIDEO PLAYBACK VIDEO EDITING PHOTO BROWSING PHOTO EDITING MODE SUPPORTED IMAGE FILE FORMAT RECORD REMOTE CONTROLLER SUPPORTED VIDEO FILE FORMAT SPECIFICATIONS IMPORTANT NOTE PV-500EVO User Manual... -
Page 3: Overview
Overview PV-500EVO Main Device PV-500EVO User Manual... - Page 4 Overview Remote PV-500EVO User Manual...
- Page 5 CHARGE ONLY WITH SPECIFIED CHARGER. BA-NP120 Battery PI-PV800 Controller CHG-0520 Charger Manual S-ER/PV800 earphone PT-1000 Pouch S-1R3R/PV-800 AV Cable S-PJ2R AV Cable S-USB/PV-500EVO USB Optional PI-VTR10 Controller PI-WL10 Controller PI-WD10 Controller RX-PV800 Dock VQ-PV806 Dock JK-10 Dock PV-500EVO User Manual...
-
Page 6: Function Modes
Function Modes Video file playback Browse images and picture External video source recording Functions setting PV-500EVO User Manual... -
Page 7: Basic Operation
Turn on/ off of PV-500 EVO player Do this Press the Power On/ Off button about 1 sec. Turn On on PV-500EVO, to turn on the power and the greeting screen will appear. Press the Power On/Off button about 1sec. Turn Off button on PV-500EVO or press the Power button on the remote control to turn off PV-500EVO。... - Page 8 Basic operation Record button Start Recording: Push the REC button on the PV-500EVO or the one ● on the remote controller to start recording. Stop Recording: Press STOP button or the one on the remote controller ● to stop recording, and the screen will return to stand-by mode of Preview to prepare for recording.
- Page 9 2. An indication for “USB Mode” appears on the screen for 5 seconds after the link is properly installed. Precaution: Check “Setup” Menu, the setting of “Display” must be set from “LCD” into “TV” enable image output. Connect to wire controller: ● PV-500EVO User Manual...
- Page 10 The LED light will be turned off after finishing charging; to keep long life-span of the battery, the power supply should be unplugged after finishing charging; Please charge the battery last for 12 hours before 1st time to use PV-500EVO User Manual...
-
Page 11: Introduction Of All Setting Functions
Audio (Enable/Disable) ● Frame Counter Stamp (On/Off) ● Timestamp (On/Off) ● Device ID Stamp (On/Off) ● Display (LCD/TV/Both) ● Microphone sensitivity ● Over-write ● Notice: For TV output, it is needed to select Display to TV or PV-500EVO User Manual... - Page 12 Frame Rate ( 1 / 5/ 15 /20/25) ● Audio (Enable/ Unable) ● Frame Counter Stamp (On/Off) ● Timestamp (On/Off) ● Device ID Stamp (ON/Off) ● Display (LCD/TV/BOTH) ● Pre-Record Time (30 sec,15 sec) ● Microphone sensitivity ● Over-write (Disable/Enable) ● PV-500EVO User Manual...
- Page 13 Frame Counter Stamp (On/Off) ● Timestamp (On/Off) ● Device ID Stamp (ON/Off) ● Display (LCD/TV/BOTH) ● Motion detection level (LOW/Medium/High) ● Motion Detect Record time (30sec/1min/3min/5min/10min) ● Motion Detect Zone ● Microphone sensitivity ● Over-write (Disable/Enable) ● PV-500EVO User Manual...
- Page 14 Tap Pre set recording mode on the page2 of setting functions then select the one you wish 08. Resume to pre-set duration > Tap Resume to Pre-set Duration on the page2 of setting functions to select. PV-500EVO User Manual...
- Page 15 “ ON” to book the reserved recording successfully; the reservation will be executed only when the device is in Power on state. 10. Indicator > Setting to turn off the indicator. 11. Vibration > Setting to turn on /off Vibration during turn on/off device or recording. PV-500EVO User Manual...
- Page 16 12. Back light out duration > Setting to turn off the backlight during the device is not used. 13. Digital Cam Low Lux > Setting if force to recording with 30fps. 14. Digital Cam NTSC/PAL > 15. Digital Cam Calibration > PV-500EVO User Manual...
- Page 17 SD card needs to be inserted to slot then will be displayed in the left-bottom side of screen. ● Tape to the last page. ● 19. Format memory > allow to format SD PV-500EVO User Manual...
- Page 18 Introduction to all Setting Functions 20. TV-out setting > 21. TV-output adjustment > 22. Display > Output TV Display setting 23. Video playback > 24. Video thumbnail > Setting if enable to preview image when reading video files. PV-500EVO User Manual...
- Page 19 25. Image thumbnail > setting if enable to preview when reading photo files 26. Continuous Shot No. > 27. Start slideshow > setting if enable slideshow 28. Slideshow duration > setting the section time during slideshow playing PV-500EVO User Manual...
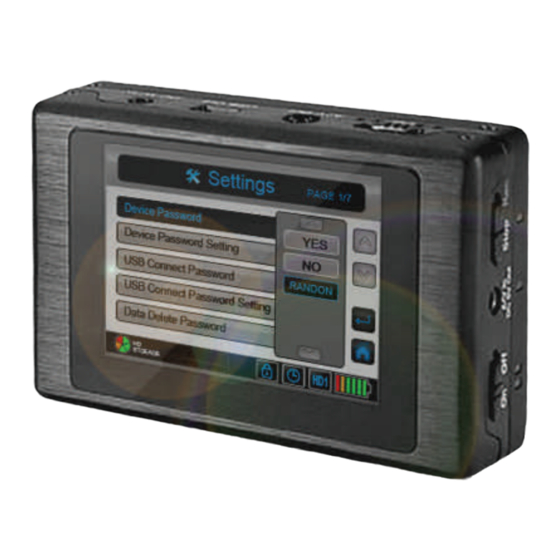
- Page 20 30. Restore factory setting > choose if you would restore factory setting, Tap ok/Cancel. 31. Power on password > lock or not to lock when turning on PV-500EVO; if set” On”, it requires password to enter main menu of PV-500EVO player. PV-500EVO User Manual...
- Page 21 Tap your chosen six-character on the screen and then confirm these characters once more, after setting tap Enter to complete the setting. 35. Touch Panel Calibration > to calibrate touch panel by point the cross until “Success” appeared on the panel. PV-500EVO User Manual...
- Page 22 37. View log > view all log record for power on/off, USB plug-in/out and record and playback. 38. Save all log file > Tape it to save all logs 39. Device information > show information about PV-500EVO PV-500EVO User Manual...
-
Page 23: Video Playback
8 times Speed Playback: three times during normal playback, the video file will be played ● with a speed eight times quicker; Tap to return to the normal playback speed. PV-500EVO User Manual... - Page 24 Tap return to the normal playback speed. three times during normal Eight times reverse playback: ● playing, the video file will be played with a speed eight times quicker; to return to the normal playback speed. PV-500EVO User Manual...
- Page 25 Video snapshot Tap icon on the screen to snapshot while recording. The snapshot - picture will be stored in the image file. Notice: It is unable to capture an image by using remote control. PV-500EVO User Manual...
-
Page 26: Video Editing
Video Thumbnail (on/off) ● Delete (One/All) ● Deletion Lock ( On/Off) ● File Information ● In the upper-file > button, the setting items will appear : Video Playback (All/Single/No) ● Video Thumbnail (on/off) ● Delete Directory ● PV-500EVO User Manual... -
Page 27: Photo Browsing
In File list Mode or Image Browsing Mode, tap icon to show the setting items, select “Start Slideshow” to start the Slide Show; ● to tap to choose slideshow Time and tap slideshow period to adjust period time. Tap touch screen to stop Slide Show. ● PV-500EVO User Manual... -
Page 28: Photo Editing Mode
Start Slideshow ● Playback Slideshow (All/No) ● Slideshow Duration (3 sec/ 5 sec/ 7 sec/10 sec) ● Display (LCD/TV/BOTH) ● File Information( Tap it to read file information) ● Press STOP to return to the upper level. PV-500EVO User Manual... - Page 29 Start Slideshow ● Image Thumbanil ( On/Off) ● Playback Slideshow (No/All) ● Slideshow Duration (3 sec/ 5 sec/ 7 sec/10 sec) ● Delete Directory (Tap it to delete all image photos under this file) ● PV-500EVO User Manual...
-
Page 30: Supported Image File Format
Supported Image File Format Supported Image File Format Baseline Lower than 4032 * 4032 PV-500EVO User Manual... -
Page 31: Record
Resolution (352*288 /640*480/720*56/1024*768/1280*720/1280*960) ● Quality(Good/Normal/Low) ● Frame Rate( 1 / 5/ 15 /20/30) ● Audio (Enable/Disable) ● Frame Counter Stamp (On/Off) ● Timestamp (On/Off) ● Device ID Stamp (On/Off) ● Display (LCD/TV/Both) ● Microphone Sensitivity ● Overwrite ● PV-500EVO User Manual... - Page 32 Device ID Stamp (ON/Off) ● Display (LCD/TV/BOTH) ● Pre-event Duration (30 sec,15 sec) ● Microphone Sensitivity ● Over-write ● Notice: Under this Pre-Event mode, the video image will be automatically recorded to Video file without pressing REC button. PV-500EVO User Manual...
- Page 33 ● Motion Detect Level ( High/Medium/Low) ● Motion Detect Duration (30 sec/1min/3 min/ 5 min/ 10min) ● Motion Detect Zone >Press |u to select the area for target of motion detect. ● Microphone Sensitivity ● Overwrite ● PV-500EVO User Manual...
- Page 34 The captured pictures will be stored in the image file. Video Snapshot > Snapshot Image while in preview mode but not recording mode. button on the left side of screen for a captured picture. The captured pictures will be stored in the image file. PV-500EVO User Manual...
-
Page 35: Remote Controller
Press Off button to power off the device. Power On Press On to power on the device. Press REC button to start recording. Record Snapshot Press button in the top of device to snapshot during recording. SNAPSHOT PV-500EVO User Manual... -
Page 36: Supported Video File Format
VOB (DVD file format Without copy protection MJPEG ( AVI) a-law, u-law ● :can be played in PV-500EVO. Notice: X : can not be played and the file format can not be converted. Resolution setting: (352*288 /640*480/720*56/1024*768/1280*720/1280*960) PV-500EVO User Manual... -
Page 37: Specifications
120g (battery included) Operating system: Window: Window2000, Window XP CPU: Intel Pentium III 800 MHz and beyond System Requirements Relevant hardware accessories: USB port, Mouse, CD-ROM Window- compatible display with a required resolution of 1024 * 768 PV-500EVO User Manual... -
Page 38: Important
Please do avoid heavy vibration while recording, which might damage the hard disc or other components inside the unit. ● Please do not apply heavy pressure on your PV-500EVO; the player may be damaged because of heavy pressure. ● While plug the SD card if the card can not slide smoothly to the end, do not enforce to push it, which might damage the ●... - Page 39 If the device is moved from a cold place to a warm one, the LCD screen will fog up; if this situation takes place, please turn ● off your PV-500EVO and wait for about one hour before use. Do not store or operate the PV-500EVO under such environment below: High humidity.
- Page 40 ● Programs Subsidiary Application Programs System tools fragment tool. Step 03: Select the hard disc device from the PV-500EVO which been linked well & detected by PC to be the target ● to start the fragment task to. Step 04: Once under the fragment, an analysis will come first, after then will start to do the fragment accordingly.
-
Page 41: Note
NOTES PV-500EVO User Manual...
Need help?
Do you have a question about the PV-500EVO and is the answer not in the manual?
Questions and answers