
Related Manuals for golmar TSzena ML


Summary of Contents for golmar TSzena ML
- Page 1 Video door entry system Monitor digital installation SZENA Instructions manual TSZENA ML Rev.0209...
-
Page 2: Table Of Contents
INTRODUCTION First of all we would like to thank and congratulate you for the purchase of this product manufactured by Golmar The commitment to reach the satisfaction of our customers is stated through the ISO-9001 certification and for the manufacturing of products like this one... -
Page 3: System Characteristics
SYSTEM CHARACTERISTICS Handsfree monitor 3.5” TFT colour screen onitor with simple installation (bus without call wires common wires and coaxial cable installation common wires and twisted pair installation onfiguration of the monitor through screen menus using monitor front push buttons User menu rightness, contrast and image color Call reception audio level... -
Page 4: Description Of The Szena Monitor
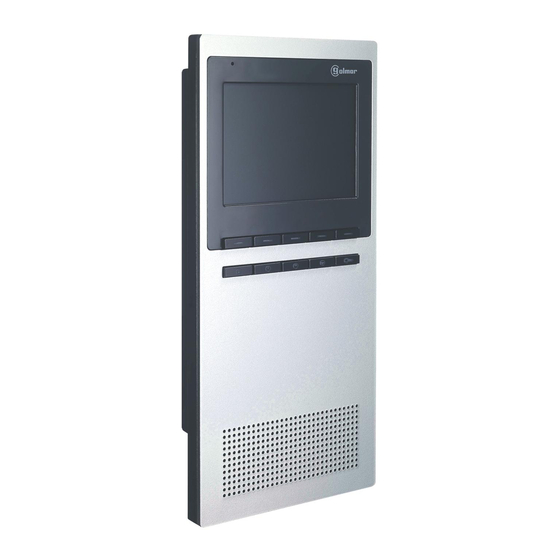
MONITOR DESCRIPTION escription of the Szena monitor: icrophone 3,5” TFT colo r screen Menu push buttons Function push buttons Interchangeable front film Louds peaker Attachment holes Identification label End of line jumper and video module Connecting points Wall or embedding box attachment holes... - Page 5 MONITOR DESCRIPTION unction push buttons. During a call process, press the button to establish communication with the door panel, to end a call press the button again With the monitor at rest A short press activates the function mode of the monitor A long press "3 seconds"...
-
Page 6: Monitor Cleaning
MONITOR DESCRIPTION escription of the identification label For an easiest repair, replacement or increasement of the existing monitors, fill the identifying label information MASTER: m aster monitor SLAVE: slave monitor. INTER: slave monitor with i ntercom no function STAIR: no function onitor cleaning. - Page 7 MONITOR CONNECTOR DESCRIPTION escription of the RC-Szena monitor connector Monitor attachment hooks (x2). Wall attachment holes Terminal connection label Attachment clip Identification label Wiring input hole Installation terminals 1. Positiv . Ground 3 Vin, video signal coaxial input / Mp, twisted pair video signal. 4.
-
Page 8: Monitor Installation
MONITOR INSTALLATION onitor installation. The Szena monitor can be assembled in surface connection block or embedding box The details of assembly modes are the following Szena assembled on surface connection block Avoid placing the monitor near sources of heat, in dusty locations or smoky environments ix the monitor connection block to the wall To install the monitor directly over the wall, drill two holes of Ø6mm and use the supplied screws... - Page 9 MONITOR INSTALLATION Securing the monitor. Place the monitor at right angles to the connection block and align the attaching holes of the monitor with the holes of the connection block, as it is shown on the drawing . Lock out the monitor pressing its lower side till the attachment clip locks the monitor firmly . To disassemble the monitor from the connector, use a plain screwdriver to release the attachment clip Pull the monitor towards you to remove it from the connection block taking special care that it does not fall...
-
Page 10: Embedding Box Positioning
MONITOR INSTALLATION Szena monitor assembled on embedding box Avoid placing the monitor near sources of heat, in dusty locations or smoky environments. Embedding box positioning. The upper part of the door panel should be placed at 1.60m. height roughly The minimum distance between the monitor embedding box and the closest object must be 5 cm. -
Page 11: Place The Embedding Box
MONITOR INSTALLATION Place the embedding box. ass the wiring through the hole made in the embedding box Level and flush the embedding box Once the embedding box is placed, remove the protective labels from the monitor fastening holes Securing the monitor. Place the monitor at right angles to the connection block and align the attaching holes of the monitor with the holes of the connection block, as it is shown on the drawing . -
Page 12: Monitor Adjustments
Function push buttons ”. Press any of the menu push buttons and the main menu will display on the screen . golmar To select the brightness option ress the push button of the menu as indicated, then adjust to the desired... -
Page 13: Monitor Programming
MONITOR PROGRAMMING nstaller's menu The installer's menu of the monitor allows changing the following options Column, Monitor, Master, Slave and Intercom -Slave. To change the selected option To change, Save, Exit without save To select an option of the menu, press the push button below the desired option To access the menu, the door panel has to be in programming mode See document of the installed door panel Switch off the monitor to be programmed... -
Page 14: Troubleshooting Hints
MONITOR PROGRAMMING uick programming monitors guide. First put the door panel in programming mode, (see document of the installed door panel). Switch off the monitor to be programmed Once the monitor is off, press the door release push button Setup 000106 M With the door release push button pressed switch on the monitor...
Need help?
Do you have a question about the TSzena ML and is the answer not in the manual?
Questions and answers