
Related Manuals for Hoggi Rehab


Summary of Contents for Hoggi Rehab
-
Page 1: User Manual
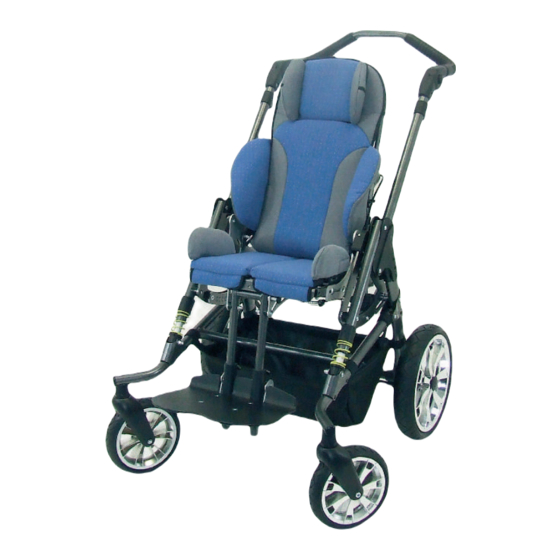
BINGO Evolution Rehab pushchair User manual Partnering together to mobilise kids... -
Page 2: Table Of Contents
Headrest speakers, for headrest pads ________________________________________________________ 33 Transport ___________________________________________________________________________________ 34 In the Trunk of a car ______________________________________________________________________ 34 Using BINGO Evolution rehab pushchair for bus transport ______________________________________ 34 Maintenance / Service and Repairs _____________________________________________________________ 35 Technical data _______________________________________________________________________________ 36 Your notes __________________________________________________________________________________ 37... -
Page 3: Common Information
The manufacturer is not responsible for damages caused by components and spare parts not approved by the manufacturer. 1.5 Service and Repairs Service and repairs on the BINGO Evolution should only be carried out by authorized HOGGI dealers. ® Should any problems arise, please contact the dealer who supplied your BINGO Evolution. -
Page 4: Safety Instructions
If they are not available, then the pushchair should be carried over the obstacle by two persons. Do not stand on the footplate when getting into or out of the rehab-buggy. - Page 5 Pay particular attention when on slopes and inclines to prevent: - the child from falling out of the pushchair - the pushchair from tipping over - the pushchair from rolling away Only lift the pushchair by parts that are solidly attached: - front frame tube above the front wheels - front axle - push handle...
- Page 6 Your BINGO Evolution Rehab Pushchair was successfully tested in accordance with ANSI/RESNA WC/19 and ISO 7176/19 (Crash Test). It is, however, possible to use your BINGO Evolution Rehab Pushchair as a seat in a motor vehicle, if our “Tie down Kit” (article 3231-7300) as well as appropriate restraint systems are used.
-
Page 7: Delivery And Preparing For Use
3 Delivery and Preparing for Use The original package contains the following components: • mobility base, folded • seat unit and backrest folded • seat-, backrest-, hip- and lateral upholstery • instructions for use • accessories as ordered Please remove the transport safety items and packaging material carefully. - Page 8 • Turn the toggle lever on the backrest (6) and let engage the backrest in the first position. • Pull the seat unit on the backrest to the back (7) until the mechanism of the tilt function engages hearable in the first position.
- Page 9 • Cut the transport safety (cable connector) carefully. If your BINGO Evolution is equipped with an angle adjustable footrest hanger the footrest could be in a hinged position for the transport. • Swing the footrest hanger with the footrest in the desired position and clamp it firmly with the clamping lever.
- Page 10 The hip supports can be detached for the transport to achieve a compact folding size. • Plug the hip supports on the brackets as shown (16). • Pull the hip support upholstery from the top onto the bracket, so that the cushioned side points to the inner side and fix it with the Velcro fasteners.
- Page 11 • Pull the lateral support upholstery onto the bracket, so that the cushioned side points to the inner side and fix it with the Velcro fasteners. The illustration (22) shows a BINGO Evolution with inserted lateral support. • Pull the backrest upholstery with the cap onto the backrest. •...
-
Page 12: Adjusting And Adaptation Possibilities
To fold the BINGO Evolution proceed as follows: • Ensure the BINGO Evolution with the attendant brake. We suggest to achieve the most compact folding package: • to bring the seat angle into the 0° position (see 4.17) • to fold or to detach the lateral supports (see 4.6) •... -
Page 13: Seat Depth And Seat Width
4.3 Seat depth and seat width After loosening and removing of the marked screw connections (on both sides) it is possible to slide the seat plate. For a high stability the screw connections should have a wide distance to each other. Whenever you change any settings on the BINGO Evolution, make sure that you firmly tighten any screws that have been loosened. -
Page 14: Thigh Supports
4.6 Lateral support • The lateral supports can be detached for the transport. 4.7 Thigh supports After loosening the wing nuts under the seat (32) it is possible to adjust the thigh supports concerning the depth and the width continuously variable (see 4.3). 4.8 Back height •... -
Page 15: Footrest Hanger, Angle Adjustable
4.10 Footrest hanger, angle adjustable • Activate the wheel lock and position in front of the seat. Secure footrest and knee angle assembly with one hand before you loosen the toggle lever with the other hand. Swing the footrest to the desired position and tighten the toggle lever fi... -
Page 16: Footrest Flip Up Lock
4.14 Foot rest lock (optional) By pulling the release ring, the foot rest can be folded upwards. When the foot rest is folded down, it will automatically lock into position. Whenever you change any settings on the BINGO Evolution, make sure that you firmly tighten any screws that have been loosened. -
Page 17: Tilt
4.17 Tilt in space The BINGO Evolution seat unit can be tilted up to 45°. • Put on the wheel lock and stand beside the pushchair. • Secure the seat unit with one hand holding onto the back rest. • Pull the active handle until the locking bolts enable the tilt in space function and postion the seat unit into the desired position. -
Page 18: Pneumatic Tyres
4.20 Pneumatic tyres All wheels are equipped with pneumatic tyres. Maintain proper pressure at all times. Notice the air pressure indicated on the tyre. 5 Accessories All accessories not installed by the manufacturer must be installed by trained technicians. The following notes on installation are for your information but should be performed by trained technicians. Straps on accessories are usually extra long to accommodate every option. - Page 19 The bag is attached with Velcro fasteners to fix it on the frame. • Fix the Velcro fasteners on the front frame as shown. • Proceed in the same way on the other side. • Fix the Velcro fasteners on the rear frame as shown. •...
-
Page 20: Large Accessory Bag (In Progress)
5.4 Headrest pads The headrest pads are mounted with carriage bolts and knurled nuts on the back insert. • For an easy mounting and for adjustments open the zipper of the upholstery cap on the rear of the back and turn the rear head upholstery back. -
Page 21: Headrest Pads
• For a rough adjustment of the headrest width the self adhesive foam pads are glued to the left and/or the right of the headrest brackets. • Put on the cover. • After loosening the knurled nuts the headrest pads can be moved in or out for a fine width adjustment. -
Page 22: Headrest Bracket „Universal
• Close the zip as shown. Illustration 76 shows the mounted headrest pads (low version) inklusive upholstery. 5.6 Universal headrest bracket (in connection with backrest until shoulder height only) The universal headrest bracket gets mounted on the backrest plate. After loosening the adjusting lever it is possible to adjust a inserted headrest in the height. -
Page 23: Pelvic Stirrup
The triangular pad guiding gets plugged from the back side The stamping in the pad guiding must be positioned into the long hole. At least 2 washer get plugged and the wing nut gets firmly tightened. After loosening the wing nut it is possible to adjust the trunk pad steplessly concerning the height. -
Page 24: 4-Point Lap Belt
5.10 4-point lap belt The assembly should be performed by trained technicians. By pressing the plug ends the lap belt opens. At the belt buckle the lap belt can be readjusted by adducting the lap ends (fine tuning). First the seat upholstery have to be removed. Then guide the triglides for the tension belts as shown through the long holes of the thigh supports (86). - Page 25 • Lead the shoulder straps together with the pad straps through the designated long holes in the back insert. Fix the shoulder straps to the slots in the back base as described in 5.9 lap belt. • Tie the pad straps together. The shoulder straps should be adjusted in a way that the housing of the length adjusters rest on the shoulder padding.
-
Page 26: Foot Straps
5.12 Foot straps Thread the foot straps crosswise through the D-rings over the shoe/ foot of your child. The heel should be placed against the heel plate of the footrest. Place the buckle always outward. Pull the free strap end to tighten the foot straps. Press the key on the buckle to open the buckle. -
Page 27: Fixation Jacket
Thread the attachment straps of the groin strap between seat and back padding, wrap them around the back of the seat edge and attach with rectangle-rings, the screws and the washers under the seat plate. The assembly should be performed by trained technicians. To put on the groin strap proceed as follows: •... -
Page 28: Chest-Shoulder Harness
Closing the fixation jacket: • Place your child into the seat. • Close the zipper. • Readjust the buckles if necessary. 5.16 Chest-shoulder harness To attach the chest-shoulder harness, rivet (from inside to outside) the four cam-lock buckles to the outside of the back plate. Guide the shoulder straps for the chest-shoulder harness backwards through the designated slots. -
Page 29: Abduction Block
Make sure that the chest and shoulder pad is positioned symmetrically on the pelvis and close the buckles on the lower straps. • Set the upper body of your child upright against the back. • Finally, tighten the upper straps behind the seat and close the buckles on the upper straps. -
Page 30: Therapy Tray
To remove the grab rail please position edgewise to the wheelchair: Take off the grab rail by pressing the snap buttons and pull the rail upwards. The cover is easy to remove by opening the zipper. 5.19 Therapy tray Insert the tray with the vertical round tubes into the retainer for accessories on the seat unit. -
Page 31: Sheep Skin Insert
Upper straps to the frame of the back insert. Lower straps to the lower area of the back base. 5.22 Sheep skin insert After removing the upper side of the winter warmer the sheep skin insert gets inserted into the winter warmer. 5.23 Rain cape With the zip-fastener open pull the rain cape over the child’s head, then unfold the upper end over the backrest and the lower end... -
Page 32: Attendant Brake
Insert the male pins of the canopy into the canopy adapters on both sides. Adjustable ratchet joints are used to set the angle of the canopy. Spread the canopy and wrap over the backrest of the seat. Canopy with rain cover: Take the rain cover out of the bag attached to the wrap, unfold the rain cover, pull it over the unfolded canopy and put it over the footrest assembly. -
Page 33: Drum Brake
After loosening the counternut the initial tension can be adjusted by screwing the guide of the bowden cable. Whenever you change any settings on the BINGO rehab pushchair, make sure that you firmly tighten any screws that have been loosened. -
Page 34: Sunshade
Buggy- and kiddy board are applicable for children at the age of 2 years and resilient up to 20 kg. 5.28 Sunshade BINGO Evolution can be supplied with a sunshade. For this purpose the adapter gets screwed above the folding mechanism optional on the left or the right side. -
Page 35: Transport
ANSI/RESNA WC/19 and ISO 7176/19 (Crash Test). It is, however, possible to use your BINGO Rehab Pushchair as a seat in a motor vehicle, if our “Tie down Kit” (article 3231-7300) as well as appropriate restraint systems are used. -
Page 36: Maintenance / Service And Repairs
7 Maintenance Your BINGO Evolution rehab pushchair is CE approved. The manufacturer herewith guarantees that this medical product as a whole conforms to the requirements of the 93/42/EEC Guideline. The rehab pushchair should be checked for correct function before every use. -
Page 37: Technical Data
8 Technical Data Dimensions (cm) and weights (kg) size 1 size 2 Mobility base 3231-1000 rigid 3233-1000 rigid 3232-1000 swivel 3234-1000 swivel Push handle height 75 -110 75 - 110 Overall width Overall length mobility base rigid front wheels Overall length mobility base swivel front wheels 92 Wheel diameter front (rigid / swivel) 25 / 19 25 / 19...
Need help?
Do you have a question about the Rehab and is the answer not in the manual?
Questions and answers