Table of Contents

Related Manuals for RADWAG MYA.3Y


Summary of Contents for RADWAG MYA.3Y
- Page 1 • Microbalances – MYA.3Y B A L A N C E S A N D S C A L E S RADWAG 26 – 600 Radom, Bracka 28, POLAND Phone: +48 (0-48) 38 48 800, fax. +48 (0-48) 385 00 10 export@radwag.com...
- Page 2 APRIL 2013 - 2 -...
-
Page 3: Table Of Contents
TABLE OF CONTENTS 1. BASIC INFORMATION ..................... 6 1.1. Intended use ........................6 1.2. Precaution measures ..................... 6 1.3. Warranty ........................6 1.4. Supervision over balance metrological parameters ............6 1.5. Manual significance ...................... 6 1.6. Balance user training ..................... 6 2. - Page 4 11. DISPLAY CALIBRATION ..................32 12. BALANCE USER SELECTION ................32 13. PERIPHERALS ..................... 33 14. ABOUT ........................33 15. COMMUNICATION ....................34 16. UPDATE ........................ 34 17. LEVELING ......................34 18. BALANCE ADAPTATION – USER SETTINGS ............ 35 18.1. Adding a new operator ....................36 18.2.
- Page 5 18.16. Mass Comparison ....................95 18.16.1. Select method for comparing mass ..................... 96 18.16.2. Mass comparison - measurements ..................... 97 18.16.3. Mass comparison – report from a measuring series ..............98 18.17. Differential weighing ....................100 18.17.1. Defining a series ........................103 18.17.2.
-
Page 6: Basic Information
1. BASIC INFORMATION 1.1. Intended use Balances 3Y series are intended to precise mass measurement of weighed loads conducted in laboratory conditions. It is designed only for non-automatic weighing processes, thus the material to be weighed needs to be placed on the center of balance’s weighing pan with required carefulness. -
Page 7: Transport And Storage
2. TRANSPORT AND STORAGE 2.1. Packaging Retain all elements of balance packaging in case they are needed for future balance transporting. Only an original balance packaging can be used for transporting a balance. Before packaging, disconnect all cables and conductors from the balance and remove any moveable parts from the weighing chamber (weighing pan, shields, inserts). - Page 8 Working temperature: 10-40 °C Relative air humidity: 45% - 65% Because of the structure of the objects to be weighed, it may be necessary to store them in glass containers for eliminating the phenomenon of humidity absorption. As the value of repeatability error increases along with the weighing pan diameter, the balance also features an additional regular weighing pan intended to determine mass of standard materials, and testing the balance with exclusion of any ambient conditions impact on the weighed...
-
Page 9: Unpacking
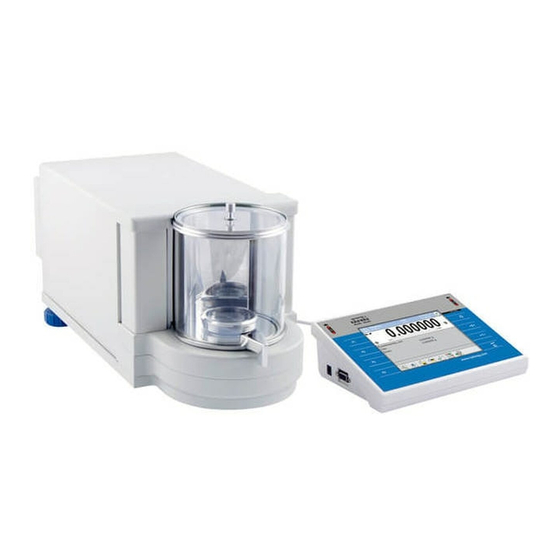
3.2. Unpacking Carefully remove the balance from its packaging, remove the plastic and foil transport protective elements. Gently place the balance in its intended place of use. Install the weighing pan, and other elements according to below scheme. Microbalance MYA 3Y series After installing the balance in its intended place of use assemble its components following above scheme and in relation to balance type. -
Page 10: Balance Cleaning
After the elements setting, connect any additional devices and only then plug the balance to power source. Power socket is located on back side of balance terminal containing the display. Balance for pipette calibration: After balance start up change the standard weighing pan into the one for placing a glass vessel (5) and on stabilization of mass indication press TARE button. -
Page 11: Getting Started
4. GETTING STARTED Switching on the balance: Press «On/Off» button on terminal overlay. The balance carries out an internal testing procedure, and after its completing it is ready for use. Caution: If the balance is incorrectly leveled, then on switching on it displays a alert ordering leveling the balance. -
Page 12: Level Control System - Automatic Operation - "Alert" Mode
5.1. Level control system – automatic operation – “ALERT” mode If the level sensor detects any level change, then the colour of the level pictogram on the display changes into red (colour of the smallest dot in level pictogram), and an alert message is displayed. -
Page 13: Manual Leveling
5.2. Manual leveling If the electronic level control function is disabled in balance menu, then in case of level change a balance user has to manually enable the leveling procedure. Press pictogram of the level status. The display changes into a control panel of the leveling function with a top view of current level status visible on its right side, and balance elevation on the left. -
Page 14: Menu Structure
6. MENU STRUCTURE 6.1. Working mode selection Each balance operator can set their individual working mode enabled as DEFAULT on activating their profile. As a result, the balance starts operation with a working mode specific for an enabled user profile, i.e. in parts counting mode or percent setup. The working mode can be easily changed to another in an optional moment during balance operation: PROCEDURE: o in an optional moment press working mode... -
Page 15: Moving In User Menu
6.2. Moving in user menu A balance 3Y series features a colourful touch screen display making balance software operation very simple and intuitive. Enter main menu Quick scrolling menu to the top Scroll menu upwards Scroll menu downwards, Quick scrolling menu to the bottom Accept changes Leave a function unchanged (without saving changes) Add item to a database (e.g. -
Page 16: Quick Return To Weighing Mode
6.3. Quick return to weighing mode The software enables quick returning from an optional menu section with or without saving made changes. Return to menu WITHOUT saving changes. Press and hold button for app. 2 sec. located in the upper right corner of the display. - Page 17 User menu structure comprises 8 main groups accessed by pressing SETUP button on terminal overlay or pictogram on the touch screen display. Adjustment About Internal adjustment Balance ID External adjustment Balance type User adjustment Software rev.
- Page 18 − User parameters user password language administrator print settings copy settings − Menu look colour screen brightness additional display brightness beep sound − Readout filter value release refreshment ...
-
Page 19: Weighing
7. WEIGHING Simple weighing process is carried out using only the buttons located on the right hand side of the balance terminal. The balance features separate buttons for zeroing, tarring and generating a printout. 7.1. Zeroing process Pressing the zeroing button causes determining a new zero point for a balance. -
Page 20: Use Of Constant Tare In Weighing
7.3. Use of constant tare in weighing If a weighing process applies a set of the same packages with determined mass then the balance enables determining a constant tare. On weighing process the constant tare value is recalled by pressing a dedicated QUICK ACCESS KEY. The value of indicated measurement result is net, i.e. - Page 21 o Press ADD pictogram to add a new tare item o Enter name and value of a tare o Changing tare value is carried out by pressing field with displayed tare value which opens an on-screen numeric keyboard o Enter the tare value and accept it by pressing OK.
-
Page 22: Applying Automatic Tare In Weighing
7.4. Applying automatic tare in weighing Means of operation: Each first measurement is tarred immediately after stabilization, that is signaled by NET pictogram appearing on the display. The balance indicates net mass of weighed load. PROCEDURE o In an optional working mode press grey coloured workspace area o The display opens a window with an internal menu... -
Page 23: Basics On Terminal And Software Oepration
8. BASICS ON TERMINAL AND SOFTWARE OEPRATION This chapter covers details on terminal display and means of terminal operation. The presented descriptions refer to all balance featuring this type of terminal independently on their metrological parameters. TERMINAL DESCRIPTION 1. Infrared proximity sensors The terminal features two proximity sensors. - Page 24 4. «F3» button Pressing the F3 button triggers automatic internal adjustment function. 5. «SETUP» button Pressing the SETUP button enables determining main software settings referring to all applications operated by a user. 6. «On/OFF» button The ON/OFF button enables turning on and off balance display, thus switching to the stand-by mode.
- Page 25 3. date / time Indicates current date and time. Pressing this display field opens a menu for changing date and time settings. 4. level status A level pictogram informing on current level status of the balance. Pressing this display field opens a leveling assistant. Description of the leveling process is provided further in this user manual.
-
Page 26: Basics On Balance Operation
8.1. Basics on balance operation 1. Each balance user can adapt the balance settings to the individual needs, including functions, printouts, colours, measuring units, etc. 2. Each working mode features its DEFAULT settings related to the QUICK ACCESS keys 3. Each working mode features individual settings of the workspace area for displaying data on a weighing process. -
Page 27: Balance Software
9. BALANCE SOFTWARE The software of a balance 3Y series features the following components: User profiles System settings Working modes 9.1. Operators / User profiles Balance 3Y series features user profiles for adapting the balance functions and applications to individual user needs and specific tasks. A user profile is a set of customized settings that are saved in balance memory and recalled by a user by pressing a single button. -
Page 28: Working Modes
9.3. Working modes Working modes are software modules designed to carrying out a determined task related to weighing process. A balance 3Y series comprises a set of versatile application designed by the manufacturer (e.g. regular weighing, calculating statistics, formula making process, percent setup, parts counting or density determining process). -
Page 29: Balance Adjustment
10. BALANCE ADJUSTMENT Ensuring the highest measuring accuracy of a balance requires periodical entering to balance memory a coefficient correcting balance indications in relation to a mass standard. The described process is known as balance adjustment. Adjustment types Automatic internal adjustment ο... - Page 30 1 Internal adjustment Pressing this pictogram initiates internal adjustment process. The process is carried out fully automatically, without operator intervention. If the weighing pan of a balance is loaded, then the software displays a command to take the load off the weighing pan.
-
Page 31: Adjustment Report Settings
10.1. Adjustment report settings A report from balance adjustment is a procedure for objective determining that a balance is functioning correctly, and thus a carried out measuring series demonstrates actual mass of a tested object. Depending on a means of documenting the procedures by an organization, a balance user can define adjustment report content using the following data and signs: ... -
Page 32: Display Calibration
11. DISPLAY CALIBRATION A balance 3Y series comprises a terminal featuring a touch screen display. The display operates my means of reactions for resistance changes, which is a reaction to touching a specific display field. As some software functions and settings require precise touching of a specific display field, the balance menu contains an option enabling calibrating the display. -
Page 33: Peripherals
13. PERIPHERALS Menu “Peripherals“ enables determining types of devices to be connected to a balance and configuring ports settings for connecting any peripheral devices. A selected printer and a communication port must comply with actual status of the connected devices. The available USB ports operate as standard configured IT devices and do not require any modifications of balance parameters. -
Page 34: Communication
15. COMMUNICATION Menu “Communication” contains balance settings referring to cases where the balance is one of IT network components. A user should set means of balance addressing (i.e. balance address), IP address, subnet mask and gate address. The above data should comply with the settings of IT network to which the balance is connected. -
Page 35: Balance Adaptation - User Settings
18. BALANCE ADAPTATION – USER SETTINGS This chapter covers the means on determining INDIVIDUAL settings for each of balance users. This functions enables optimum adapting the balance to user needs and specific tasks. The settings are saved and stored in an active user profile and they refer to operation of all working modes covered by the modified user profile. -
Page 36: Adding A New Operator
18.1. Adding a new operator Press pictogram “PLUS” located in the top bar of the display which opens a window for entering name of an operator. After entering the name, accept it by pressing OK button. The name of a newly created user is displayed in the panel with balance users. -
Page 37: User Details
Each balance user has assigned the following functions: User details Look Readout Operation of buttons Printouts Units Working modes Access level Caution: Each balance user may have some limitations in balance operation. The range of limitation is determined by the balance administrator –... -
Page 38: Look
Print settings This function refers only to an active user and it has the following format ------------ User details ----------- User Default Language Engligh Administrator 18.4.2. Look This menu contains data related to the LOOK and functionality of balance’s display, such as: ... -
Page 39: Readout
18.4.3. Readout Menu readout contains data related to WEIGHING PROCESS, such as: Filter Each measuring signal is subject to electronic processing before it is displayed. The filtering is carried out to achieving correct measurement parameters, specific to a stable signal, i.e. -
Page 40: Operation Of Buttons
/option available in a balance MYA.3Y series/ o close door /option available in a balance MYA.3Y series/ o change door /option available in a balance MYA.3Y series/ o units - 40 -... -
Page 41: Date / Time
/option available in a balance MYA.3Y series/ o close door /option available in a balance MYA.3Y series/ o change door /option available in a balance MYA.3Y series/ o units Sensor sensitivity... -
Page 42: Printouts - Standard Printout Template
Time /set time / Press active display field to set time in format visible in the top bar of the display. After setting time, accept it by pressing OK button. For instance 11:23:32 >> requires entering time as: 11.23.32 and pressing <OK>... - Page 43 PROCEDURE: 1. Press field with name of a template to be edited (Header – Line – Footer) and select variables to be printed 2. If a printout is a non-standard one, create it. o HEADER − Working mode name − Date −...
- Page 44 BASIC PRINCIPLES OF USING PRINTOUTS 1. Press PRINT key on balance’s overlay to print variables that are contained in section LINE of the standard printout template, and if they are attributed = YES (see above list of variables in printouts). 2.
-
Page 45: Quick Enabling Print Header And Print Footer Buttons
Pictogram A – Print data contained in the header Pictogram B – Print data contained in the footer CAUTION: Each balance user can have their individual set of QUICK ACCESS KEYS enabled. 18.4.6.1. Quick enabling Print Header and Print Footer buttons PROCEDURE: o In an optional moment press grey coloured workspace area... -
Page 46: Printouts - Non-Standard Printout
18.4.7. Printouts – Non-standard printout Non-standard printout A non-standard printout comprises of two sections: TEXTS and VARIABLES First design an optional number of texts, and then form a non-standard printut template using the designed texts. PROCEDURE: 1. Press field named TEXTS 2. - Page 47 An entered and accepted name of a text is displayed in the main window of printout settings. This means of operation facilitates printout designing process. A user works on an actual template containing a set of texts. Principles for working with texts 1.
- Page 48 Entering content of texts - Press name/number of a text to which a content should be added - press pictogram “ADD” and select a position of a text line: NEW, ADD AFTER, ADD BEFORE. Select an appropriate option. An option add BEFORE or add AFTER requires determining a corresponding line for carrying out the process.
- Page 49 - enter a text /max 40 alphanumeric characters/ using the on-screen keyboard, and press ENTER button after completing the process. Caution: A button for enabling national characters is a multifunctional one – see below diagram. Deleting texts and lines deleting process is carried out on: texts (causes deleting all lines forming a text) ο...
-
Page 50: Units
Creating a non-standard printout Balance 3Y series enables creating up to 5 non-standard printouts. Creating a printout template is carried out by adding individual texts to a printout template. PROCEDURE - press “PRINTOUTS” field - press “ADD” pictogram - the display opens a window with a printout number - enter a custom printout name /number and accept it - a printout template is created. -
Page 51: Working Modes - General Information
18.4.9. Working Modes – general information Function “Working modes” contains a list of all working modes available in a balance. On displaying a window with a list of working modes, a user can: Select a default working mode − Determine conditions for using a working −... -
Page 52: Quick Access To Determining Working Modes Parameters
18.5. Quick access to determining working modes parameters Determining parameters for a working mode is carried out by means of two methods: o In a user profile User/Default/Working Modes /Weighing/ – this is a longer path requiring multiple activities By pressing the workspace area which is much quicker and RECOMENDED method PROCEDURE: o In an optional moment press grey coloured workspace area of the display... -
Page 53: Parameter Of Working Mode Weighing - Quick Access Keys
18.6. Parameter of working mode WEIGHING – quick access keys Buttons to be determined in working mode WEIGHING. If a button attribute is set to YES then it is automatically displayed in the bottom bar of display below the section indicating the weighing result. -
Page 54: Parameter Of Working Mode Weighing - Information
Caution: Maximum number of quick access keys to be added in the bottom bar is 5. If more than five quick access keys are enabled then only the first 5 are displayed. 18.7. Parameter of working mode WEIGHING – information Information items are displayed in the grey coloured workspace area. - Page 55 Weighing mode provides settings a set of additional options Automatic printout Enabled: YES / NO ο Minimum mass ο It is a mass threshold required for repeated enabling the automatic printout option. The mass indication has to drop below the minimum mass threshold to repeatedly enable the automatic printout function.
- Page 56 Print button Enables determining operating mode of «PRINT» button. Available settings: “Stable“ ο Pressing the « PRINT » button causes printing of mass indication only after it is stabilized. “Always“ ο Pressing the « PRINT » button causes immediate printing of mass indication, independently on the stability status.
-
Page 57: Parts Counting
18.8. Parts Counting Parts counting mode is carried out in two stages. First, a user should determine /or acquire from balance memory/ the mass of a single part, and secondly use the mass of a single part to determine a number of counted parts placed on balance’s weighing pan. - Page 58 Below description contains only those quick access buttons that are not present in working mode: WEIGHING. On enabling the “Parts Counting mode” the display indicates default set of pictograms for immediate initiating work, i.e.: − Set tare − Enable tare −...
- Page 59 Give standard quantity for standard procedure Select standard quantity from a displayed message box or enter other value. The order for carrying out the processes is indicated on the display by corresponding messages. A user can select among the following options: −...
- Page 60 o Which opens a window for entering name of a part to be saved Accept entered name by pressing ENTER button – a part is automatically added to the DATABASE of STANDARDS. Mass of the saved part is previewed next to the name of a saved standard.
-
Page 61: Creating Database Of Standards
18.8.2. Creating database of standards Use of the quick access key “Database of Standards” located in the bottom bar enables only adding standards to the database. It is not possible to delete any records from the database. Full access to the Database is possible from the internal menu of the balance and it is dependent on authorization level of a user. -
Page 62: Acai Function - Automatic Accuracy Correction
18.8.3. ACAI function – Automatic Accuracy Correction The ACAI function is to automatically correct mass of a single part during parts counting process. it is aimed to increase the accuracy of counting process – mass of a single part is calculated from a higher quantity of samples, ensuring higher accuracy. -
Page 63: Parameters Of Parts Counting Mode - Information
18.8.4. Parameters of parts counting mode – information Information items related to weighing are displayed in the grey coloured workspace area. The workspace enables containing up to 6 pieces of information. If more than six parameters are enabled, then only first 6 are displayed. Bargraph A bargraph refers to operation of the filling and checkweighing modes in the parts counting mode.. - Page 64 Non-standard data Option YES – information is indicated in the workspace area, Option NO – information is not present in the workspace area. Non-standard data project Defining a non-standard information item requires creating an optional text to be displayed in the grey coloured workspace area.
-
Page 65: Graphic Interpretation Of Dosing And Checkweighing Modes
18.8.5. Graphic interpretation of Dosing and Checkweighing modes CHECKWEIGHING A criterion for enabling a bargraph is setting: − A quick access key for “Checkweighing” mode − Information item “Bargraph” in the workspace area to YES. On enabling the above two parameters, a bargraph is added to the display and it is located below the measurement result. - Page 66 DOSING A criterion for enabling a bargraph is setting: − A quick access key for “Dosing” mode − Information item “Bargraph” in the workspace area to YES. On enabling the above two parameters, a bargraph is added to the display and it is located below the measurement result.
-
Page 67: Checkweighing
18.9. Checkweighing Checkweighing is a process for controlling mass of a load. The load has low and high thresholds determined, these are the checkweighing thresholds, marked as LO and HI. Quick access keys displayed in the bottom bar relating to the checkweighing mode. Set their attribute to Yes (present in the bottom bar) or No (absent). -
Page 68: Creating Database Of Checkweighing Thresholds
18.9.1. Creating database of checkweighing thresholds The database of checkweighing thresholds contains numeric values for the thresholds and their optional names. The database enables adding or deleting the records if they are not used. Full access to the Database is possible from the internal menu of the balance and it is dependent on authorization level of a user. -
Page 69: Use Of Checkweighing Thresholds
18.9.2. Use of checkweighing thresholds When in weighing mode, it is possible to use the checkweighing thresholds saved in the Database of Thresholds or define custom thresholds. In case of using the Database of Thresholds, it is possible to: − acquire thresholds to be used −... - Page 70 PROCEDURE: o press Quick access key o to open a screen with data saved in the Database of Checkweighing Thresholds o search and select a required threshold and press field with its name, o the values of the checkweighing threshold are automatically enabled for use in the checkweighing mode.
-
Page 71: Bargraph In Checkweighing Mode
18.9.3. Bargraph in checkweighing mode. A bargraph is one of the elements of the workspace area. A criterion for enabling a bargraph is setting its parameter to YES when declaring information items for the checkweighing mode. The acceptance field on the bargraph depends on the current settings of the low and high checkweighing thresholds. -
Page 72: Creating Database Of Target Values
Other quick access keys function in accordance with the description provided in chapter 18.7. Parameter of working mode WEIGHING – information. Information items related to dosing: o bargraph o supplementary unit o tare o gross o counter o target value o statistics /difference, amount, total sum, standard deviation, etc./ o ID codes o non-standard data... -
Page 73: Use Of Target Values
o If the database does not contain any records press “Add” pictogram o the display opens a window with on-screen numeric keyboard for entering VALUE of TARGET MASS. Accept the entered value by pressing OK button. o After specifying the VALUE the records gets a default name to be changed by a user. - Page 74 Temporary custom target mass values PROCEDURE: o press Quick access key o which opens a screen with a field for entering the value of target mass o press field with the value of target mass and using a numeric keyboard enter the its value. Caution: The values are rounded to the value of balance reading interval.
-
Page 75: Bargraph In Dosing Mode
Use of Database of Target Mass Values PROCEDURE: o press Quick access key o to open a screen with data saved in the Database of Target Mass Values. o search and select a required target mass record press field with its name, o the value of the target mass is automatically enabled for use in... -
Page 76: Percent Setup
18.11. Percent setup Percent setup is a mode intended to compare weighed load with a pre-determined reference mass. The process is expressed in [%]. When declaring the mass to be compared, a user should specify mass value, e.g. 50.0g, to be recognized by the balance as e.g. 100%. - Page 77 o low threshold o high threshold o target mass o statistics /difference, amount, total sum, standard deviation, etc./ o ID codes o non-standard data o non-standard data project Each information item features option YES or NO determining its displaying criterion. CAUTION: Defining non-standard information items is described in chapter 18.8.4.
- Page 78 In practice, it is a tolerance for the mass to be weighed, i.e. the acceptance field in which the dosed mass is recognized as correct. The tolerance thresholds may be asymmetric, e.g. − high threshold: +5% − low threshold: - 2% the values of the checkweighing thresholds will be displayed in the workspace area.
-
Page 79: Creating Database Of Reference Mass (Standards)
Database of reference mass The database contains list of reference mass values (standard) with determined: mass values in grams that are the reference standards 100% names for database entries In the main window of the percent setup mode, a user can: o acquire reference standards o add reference mass (standards) to be database ACQUIRING REFERENCE MASS FROM THE DATABASE:... - Page 80 Full access to the Database is possible from the internal menu of the balance and it is dependent on authorization level of a user. PROCEDURE: o When in the percent setup [%] mode, in an optional moment press grey coloured workspace area o Which opens a screen on balance internal menu...
-
Page 81: Use Of Reference Mass (Standard) In Weighing
18.11.2. Use of reference mass (standard) in weighing. When carrying out a weighing process, it is possible to use the reference mass records saved in the Database of Reference Mass (Standards) or define temporary custom reference mass values. In case of using the Database of Reference Mass Values it is possible to: −... -
Page 82: Use Of Reference Mass Values In Weighing
18.11.3. Use of reference mass values in weighing A bargraph is one of the elements of the workspace area. There are two criteria for enabling the bargraph: setting “bargraph” parameter to YES when declaring information items for the percent setup mode enabling at least one additional mode ... -
Page 83: Animal Weighing
5. Mass of weighed load was increased to 53,2g that is 106,4% of the reference mass value. The display status for this mass value is mass excess (bargraph colour is red). 6. – above the high threshold value. Caution; the tolerance of the high threshold is + 5% to the reference mass and the display indicates + 6,6% thus the indication IS OUT OF the acceptance field. -
Page 84: Internal Settings Of The Animal Weighing Mode
Information items related to animal weighing mode: o bargraph o supplementary unit o tare o gross o counter o filter o threshold o statistics /difference, amount, total sum, standard deviation, etc./ o ID codes o non-standard data o non-standard data project Each information item features option YES or NO determining its displaying criterion. -
Page 85: Animal Weighing Mode - Manual Mode Of Operation
The following measurements are started automatically on placing a load on balance weighing pan. The following criterion has to be met: after taking the load off the weighing pan, the indication has to fall below the set threshold value. When selecting the threshold value the user determines the accuracy required for... -
Page 86: Density Of Solids, Liquid And Air
18.13. Density of solids, liquid and air The Quick access keys displayed in the bottom bar relating to the density mode. Set their attribute to Yes (present in the bottom bar) or No (absent). Adjustment ID definition Set tare Solids Enable tare Print header Liquids... -
Page 87: Setting A Default Function Of The Density Determining Mode
o non-standard data o non-standard data project Each information item features option YES or NO determining its displaying criterion. CAUTION: Defining non-standard information items is described in chapter 18.8.4. Principles for using other buttons related to the DENSITY mode are provided further in this user manual. -
Page 88: Density Of Air
o the selected density mode is automatically enabled on returning to weighing. Caution: after changing the working mode the default working mode is automatically changed /automatic change of the Density field → value: e.g. liquids solids/ 18.13.4. Density of air Density of air is one of parameters required for calculating a correction value for a measuring result related to air BUOYANCY. -
Page 89: Formulations
18.14. Formulations The formulation mode enables designing up to 10 mixtures, each containing maximum 20 ingredients. Each formulation ingredient has its specific name and value that is entered to a formulation description. First a user needs to create a formulation and then activate it to use. Creating formulations is carried out from the internal menu of the formulation mode. -
Page 90: Designing A Formulation
18.14.1. Designing a formulation Database of formulations comprises names of formulations and names of ingredients forming the formulations. When designing a formulation, first specify its name and then add ingredients to a created formulation record. As each ingredient record requires specifying its name and mass, the operator should know the complete content of the formulation. -
Page 91: Use Of Database Of Formulations In Weighing
o Mass of each ingredient is rounded up or down depending on the reading interval of a balance. o A designed formulation is ready to use on returning to main window of the Formulations mode o Return to weighing – press “RETURN”... - Page 92 A example of formula making process PROCEDURE: o press Quick access key o which opens a screen with a list of saved mixtures o select a mixture to be prepared on a balance Caution: Mixture content can be previewed by pressing field with its name o selecting a formulation causes automatic returning to weighing...
-
Page 93: Statistics
WORKSPACE AREA shows a message: Weighing finished. Continue o The display shows total mass of prepared formulation. o Preparing the same formulation can be repeated by pressing OK button. o Preparing another formulation requires entering the database by pressing Quick access key DATABASE OF FORMULATIONS o Use list of saved mixtures and... -
Page 94: Internal Menu Of Statistics Mode
Information items related to statistics: o supplementary unit o tare o gross o counter o statistics /difference, amount, total sum, standard deviation, etc./ o ID codes o non-standard data o non-standard data project Each information item features option YES or NO determining its displaying criterion. CAUTION: Defining non-standard information items is described in chapter 18.8.4. -
Page 95: Mass Comparison
18.16. Mass Comparison Mass comparison mode enables comparing mass of a standard with mass of a tested object. The mode applies two testing methods: − ABA [standard – test object – standard] − ABBA [standard – test object – test object – standard] Each method requires carrying out a measuring series. -
Page 96: Select Method For Comparing Mass
18.16.1. Select method for comparing mass The mode enables selecting between two testing methods: ABA and ABBA. Select name of a required testing procedure. PROCEDURE: o in an optional moement press grey coloured workspace area o to open a screen with internal menu of the MASS COMPARISON mode o scroll down to Measuring Series field o press Measuring Series field o Select a comparing method to be used... -
Page 97: Mass Comparison - Measurements
18.16.2. Mass comparison - measurements When carrying out mass comparison process follow commands displayed in the COMMAND BAR of the workspace area. The mass comparison mode enables determining standard deviation that is calculated on basis of measuring series ABBA or ABA, where A –... -
Page 98: Mass Comparison - Report From A Measuring Series
18.16.3. Mass comparison – report from a measuring series Individual measurements in a series and a report from a measuring series is not printed in an automatic manner. The criterion for printing of the information is set in a STADNARD printout – FOOTER. PROCEDURE: o Press field with name of a user. - Page 99 Printout example: No. of measurements 1 from 6 500.001 g 500.045 g 500.001 g Difference 0.044 g Average difference 0.044 g No. of measurements 2 from 6 500.001 g 500.046 g 500.001 g Difference 0.045 g Average difference 0.045 g No.
-
Page 100: Differential Weighing
18.17. Differential weighing Differential weighing mode enables analyzing changes of mass in a single sample or multiple samples. The process is carried out by determining sample’s initial mass, and then the sample is subject to different processes, which outcome is separating or adding of some of sample’s ingredients to its initial status. - Page 101 The Quick access keys displayed in the bottom bar relating to the differential weighing mode. Set their attribute to Yes (present in the bottom bar) or No (absent). Adjustment Continuous transmission Set tare Clear weighments sum Enable tare Formulation mass Print header Weighment A Print footer...
- Page 102 o non-standard data project Each information item features option YES or NO determining its displaying criterion. CAUTION: Defining non-standard information items is described in chapter 18.8.4. Principles for using other buttons related to the DIFFERENTIAL WEIGHING mode are provided further in this user manual. Below list provides the functions of only those quick access keys, that are absent in working mode “Weighing”: Weighing A...
-
Page 103: Defining A Series
18.17.1. Defining a series Each series comprises of a name and samples. Data on each of the sample contain complete parameters on a sample, such as its current status, and already carried out process parts. The samples are added during the differential weighing process, and before starting the weighing process <A>, <T>... - Page 104 o Use available options to select item <Show> o An opened window contains a list of saved series o If the database does not contain any records press “+” pictogram o To open a screen with keyboard for entering name of a new series.
-
Page 105: An Example Of Carrying Out A Differential Weighing Process
18.17.2. An example of carrying out a differential weighing process On activating DIFFERENTIAL WEIGHING mode: • Select information items to be displayed in the grey coloured workspace area • Select appropriate quick access keys • Add a to balance’s memory (a name identifies a series •... - Page 106 Weighing A On selecting an option, the balance moves to the first sample on the list, for which weighing <A> is still to be carried out. If there are no such samples in a series, then the balance orders entering a name of a new sample. Enter the name and accept it by pressing <Enter>...
- Page 107 Weighing T Selecting this option opens a screen with keyboard for entering name of a sample. Enter the name and accept it by pressing <Enter> button that is followed by displaying windows for entering the values of ambient conditions (humidity and temperature). Caution: If the <Ambient conditions>...
- Page 108 Weighing T+ A Selecting this option opens a screen with keyboard for entering name of a sample. Enter the name and accept it by pressing <Enter> button that is followed by displaying windows for entering the values of ambient conditions (humidity and temperature). Caution: If the <Ambient conditions>...
- Page 109 In case of a single series, and while weighing the following samples, the measurements can be carried out according to the following outline: weighing A, weighing T or weighing T+A. Each of samples saved in a series shall have a description on its data, i.e.
- Page 110 In case a given series includes samples for which weighing of initial mass (Weighing A) is already completed, it is possible to carry out final weighing (weighing B) for these samples. In such case follow below procedure: Select option: After selecting the option, the balance displays the main window, and the workspace area provides new data on an initiated process.
- Page 111 > pictogram On completing measurements of final mass for the samples in a a user can check the results in the database of s. To check the results, enter the database of s and select a . Select a sample to be previewed. The opened window provides the following information: displayed next to weighing data <B>...
-
Page 112: Copy Tare
18.17.3. Copy tare The function enables copying a selected tare value of a sample in a series to all samples that do not have a tare assigned and for which the differential weighing process (status other than Weighing B) is not completed. Means of operation: Press button To open window with a list of samples for... -
Page 113: Deleting A Value
18.17.5. Deleting a value The function, enables deleting last weighment added to the database, in case an error occurred. It applies to all processes in the working mode. The software enables deleting only the last saved mass measuring record (sample or tare), and if On accidental saving a weighment the process is accidentally accepted (i.e. -
Page 114: Access To Balance Parameters
19. ACCESS TO BALANCE PARAMETERS Balance 3Y series enables determining access level for each of user PROFILES. The user profiles are accessed by: Pressing a field with user name Pressing F1 button on balance overlay Pressing SETUP pictogram or SETUP ... -
Page 115: Assigning Password To An Administrator
19.1.1. Assigning password to an administrator PROCEDURE: o Press field with name of a user, or press F1 button o Press field named ADMINISTRATOR o To open a window with list of available settings on a user o Press USER field o The screen displays options on: −... -
Page 116: Technical Data
20. TECHNICAL DATA 20.1. Balance MYA .3Y series Adjustment internal Display 5, 7” colourful touch screen display Interface 2 x USB, 2 x RS 232, Ethernet Working temp. + 10 C - + 40 Power supply feeder 100V-240V , 50-60 Hz / 13,5-16V DC ... -
Page 117: Appendix A - Cooperation With Epson Printer
APPENDIX A – cooperation with EPSON printer An EPSON printer is a device subordinate to a balance, thus any data is sent from balance level. Correct cooperation between a balance and a printer requires setting the baud rate to 9600bit/sec. as standard the baud rate of a balance is set to 4800 bit/sec. -
Page 118: Appendix B - Cooperation With Kafka Printer
Cable: balance – printer (CITIZEN, EPSON) Caution: It is recommended to use peripheral equipment supplied by the manufacturer. APPENDIX B – cooperation with KAFKA printer An KAFKA printer is a device subordinate to a balance, thus any data is sent from balance level. -
Page 119: Appendix C - Cooperation With Label Printer Citizen
Cable connecting a balance and a printer In case of using the USB port use a standard cable for connecting the devices. When using the RS 232 interface, use cable DB 9/F – DB 25/M. Cable cross-section: Cable: balance – printer KAFKA Caution: - It is recommended to use peripheral equipment supplied by the manufacturer. - Page 120 o Set width and height of a label and distance between the labels. o The port settings have no relevance as the printing process is carried out on a connection between a balance and a printer. o Check printer settings regarding paper type and print intensity.
-
Page 121: Phase Ii - Transferring A Label To A Balance
o The look of a label and quantity of fields are determined by a user o A barcode is added by pressing pictogram. After adding fill in numeric value of the code. o Other objects or images are added by pressing pictograms. - Page 122 o Pressing “PLUS” pictogram enables adding constant texts to custom printout templates – if a printout is a label, then select option ADD FROM USB. o In an opened message box enter name for the text to include data on a label , e.g.
-
Page 123: Phase Iii - Printing A Label
o Now the non-standard printout contains all parameters required for printing a label. Caution: the balance enables storing multiple label templates for printing, however, each template must have an individual name. Phase III – printing a label o Balance menu requires determining the type of printout, i.e. label printout (give name of the non-standard printout template). -
Page 124: Appendix D - Databases
APPENDIX D – databases Databases of a balance enable a user to create a list of data on products, clients, product flow process, etc. The databases provide quick and easy access to data from an optional working mode, and keep records of weighments and controls with complete set of data on a carried out process and weighed product. - Page 125 Functions available in each of the databases: Database of products: Sort Select Preview Print Export Import Database of operators: List of saved operators Database of weighments: Select Date from Date to ...
- Page 126 Export Import Database of labels: Standard printout Non-standard printout Code page Printout cut Database of ID codes: Sort Select Preview Print Export Import Database of formulations: Sort ...
- Page 127 On an opened on-screen alphanumeric keyboard enter first letter or letters of searched product name and press <Enter> button. The software automatically displays only those products that names start with the entered letter(s). Press field with name of the searched product. The software returns to the function with automatic selecting a record of the searched product.
- Page 128 EDITING DATA IN A DATABASE Caution: 1. Database editing is enabled after logging in to a balance as an Administrator, 2. Adding entries to a database does not refer to the database of weighments. Depending on the database type, the software allows for using different options, i.e. functions of the database of products are different than the functions of the database of warehouses.
- Page 129 Each product entry in the database of products features the following parameters: Name Price CPG mode (Control of Prepackaged Description Goods) Code Series EAN code Unit Mass Density Shelf life time Date Tolerance Tare Label DATABASE OF WEIGHMENTS A separate type of database is the database of weighments. It is used for on-going saving and storing all measurement results carried out on a balance.
- Page 130 Previewing data on an individual weighment is carried out by pressing field with its name. the software opens a window with complete details on a selected weighment. Printing a weighment data is carried out as in case of other databases. Determine selection criteria of data to be printed and press <Print>...
- Page 131 DATABASE OF WAREHOUSES Each warehouse in the database of warehouses features the following parameters: Name Code Description User manual no.: LMI-61-05/04/13/ENG - 131 -...
- Page 132 O F E L E C T R O N I C W E I G H I N G I N S T R U M E N T S RADWAG WAGI ELEKTRONICZNE POLAND, 26 – 600 Radom, Bracka 28 Phone.
Need help?
Do you have a question about the MYA.3Y and is the answer not in the manual?
Questions and answers