Table of Contents
Advertisement
Quick Links
IMMB-01-03-04-22-EN-PL
Start Up Guide
Szybki start
Ultra-Microbalances
and Microbalances
Ultra-mikrowagi i mikrowagi
Ultra-Microbalances:
Ultra-mikrowagi:
• UYA 4Y PLUS
• UYA 4Y
• UYA 4Y.F.A PLUS
• UYA 4Y.F.A
Microbalances:
Mikrowagi:
• MYA 4Y PLUS
• MYA 4Y
• MYA 4Y.P PLUS
• MYA 4Y.P
• MYA 4Y.F.A PLUS
• MYA 4Y.F1 PLUS
• MYA 4Y.F.A
• MYA 4Y.F1
Advertisement
Table of Contents

Related Manuals for RADWAG UYA 4Y PLUS


Summary of Contents for RADWAG UYA 4Y PLUS
- Page 1 IMMB-01-03-04-22-EN-PL Start Up Guide Szybki start Ultra-Microbalances and Microbalances Ultra-mikrowagi i mikrowagi Ultra-Microbalances: Ultra-mikrowagi: • UYA 4Y PLUS • UYA 4Y • UYA 4Y.F.A PLUS • UYA 4Y.F.A Microbalances: Mikrowagi: • MYA 4Y PLUS • MYA 4Y • MYA 4Y.P PLUS •...
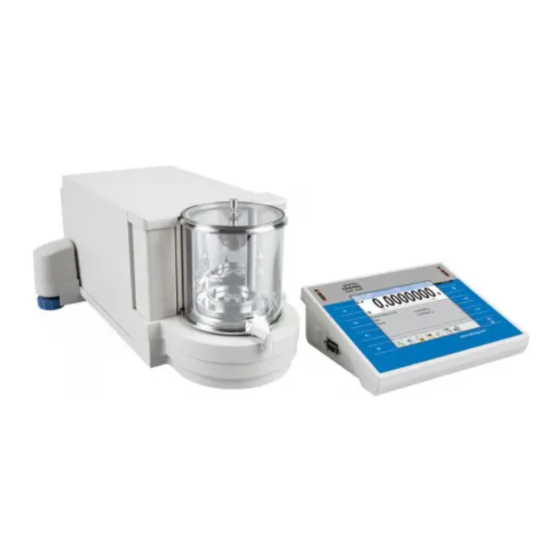
- Page 2 To view a complete User Manual go to the website or scan QR code: Aby wyświetlić pełną instrukcję obsługi, przejdź do strony internetowej lub zeskanuj kod QR: radwag.com/en/manuals/3615 1. CONTENT ZAWARTOŚĆ UYA 4Y PLUS Glass weighing Ultra-microbalance Terminal Weighing pan...
- Page 3 MYA 4Y PLUS Glass weighing Microbalance Terminal Weighing pan Weighing pan shield chamber lid Szklane wieczko Mikrowaga Terminal Szalka Osłona szalki komory ważenia ×1 ×1 ×1 ×1 Power supply* Tweezers Brush Fabric dust cover RS232 cable Zasilacz sieciowy* Pęseta Pędzelek Pokrowiec Przewód RS232 ×1...
- Page 4 MYA 4Y Glass weighing Microbalance Terminal Weighing pan Weighing pan shield chamber lid Szklane wieczko Mikrowaga Terminal Szalka Osłona szalki komory ważenia ×1 ×1 ×1 ×1 Power supply* Tweezers Brush Fabric dust cover RS232 cable Zasilacz sieciowy* Pęseta Pędzelek Pokrowiec Przewód RS232 ×1 ×1...
- Page 5 MYA 4Y.P Weighing pan Evaporation Glass lid with Microbalance Terminal Weighing pan Glass vessel shield ring opening Naczynie Pierścień kur- Szklane wiecz- Mikrowaga Terminal Szalka Osłona szalki szklane tyny parowej ko z otworem ×1 ×1 ×1 ×1 ×1 Glass weigh- Additional ing chamber Power supply*...
- Page 6 MYA 4Y.F.A PLUS Filter weighing Microbalance Terminal Weighing pan Centring ring Glass lid Pierścień cen- Mikrowaga Terminal Szalka do fi ltrów Szalka Szklane wieczko trujący ×1 ×1 ×1 ×1 ×1 ×1 Power supply* Tweezers Brush Fabric dust cover RS232 cable Zasilacz sieciowy* Pęseta Pędzelek...
- Page 7 MYA 4Y.F.A Filter weighing Microbalance Terminal Weighing pan Centring ring Glass lid Pierścień cen- Mikrowaga Terminal Szalka do fi ltrów Szalka Szklane wieczko trujący ×1 ×1 ×1 ×1 ×1 ×1 Power supply* Tweezers Brush Fabric dust cover RS232 cable Zasilacz sieciowy* Pęseta Pędzelek Pokrowiec...
- Page 8 MYA 4Y.F1 Filter weighing Microbalance Terminal Weighing pan Centring ring Power supply* Pierścień cen- Mikrowaga Terminal Szalka do fi ltrów Szalka Zasilacz sieciowy* trujący ×1 ×1 ×1 ×1 ×1 ×1 Tweezers Brush Fabric dust cover RS232 cable Pęseta Pędzelek Pokrowiec Przewód RS232 ×1 ×1...
-
Page 9: Recommendations And Warnings
3. RECOMMENDATIONS AND WARNINGS ZALECENIA I OSTRZEŻENIA Operate the device in a room where the temperature ranges between 10 – 40 °C (50–104 °F) and where the relative humidity is below 80%. Tem- +104 perature must change slowly and gradually. Using the anti-vibration table is recommended in order to enable the most stable and repeatable measurement. -
Page 10: Components Assembly
Przed montażem wagi usuń blokady transportowe. 5. COMPONENTS ASSEMBLY MONTAŻ ELEMENTÓW WAGI 5.1. Weighing chamber components assembly Montaż elementów komory ważenia UYA 4Y PLUS | MYA 4Y PLUS | UYA 4Y | MYA 4Y MYA 4Y.P PLUS | MYA 4Y.P... -
Page 11: Connecting The Terminal
UYA 4Y.F PLUS | MYA 4Y.F PLUS | UYA 4Y.F | MYA 4Y.F 5.2. Connecting the terminal Podłączenie terminala Connect the terminal to MAIN DISPLAY connector. Podłącz terminal do gniazda MAIN DISPLAY z tyłu wagi. 6. PREPARING FOR WORK PRZYGOTOWANIE WAGI DO PRACY Place the device at the workstation, wait until it reaches room temperature. -
Page 12: Switching The Balance On
6.2. Switching the balance on Włączenie wagi A u toma tic a d j u stment Automatic adjustment To switch the device on, press ON / OFF key. Confi rm or cancel the start of the auto- matic adjustment process. Aby włączyć... - Page 13 L ev el ing Balance has been levelled. To close the levelling window press button. Waga została wypoziomowana. Aby zamknąć okno wciśnij przycisk 6.3.2. Balance levelling (for models with semi-automatic levelling only) Poziomowanie wagi (tylko dla modeli z półautomatycznym systemem poziomowania) W eighing L ev el ing L og in...
-
Page 14: Panel Keys
7. PANEL AND SCREEN KLAWIATURA I EKRAN 7.1. Panel keys Klawiatura Proximity sensor Proximity sensor Czujnik zbliżeniowy Czujnik zbliżeniowy Selecting working mode Switching on / off (programmable button) Włączenie / Wybór trybu pracy wyłączenie wagi (przycisk programowalny) W eig h in g L og in H ome 0.000000... -
Page 15: Basic Operations
8. BASIC OPERATIONS OPERACJE PODSTAWOWE 8.1. Adjustment Adiustacja Weighing Log in 0.000000 H ome 1 0 0 % A u toma tic a d j u stment Sup p lementary unit T are 0 . 0 0 0 0 0 0 g C omp leted G ross 0 . -
Page 16: Working Modes Settings
8.4. Working modes / units selection Tryby pracy / Wybór jednostek Press the icon of the current working mode, to display the list of working modes. Naciśnij ikonę aktualnego trybu pracy, aby wyświetlić listę trybów pracy. Weighing Ważenie Gram [g] Chinese tael [tlc] Dosing Dozowanie... -
Page 17: User Settings
9. SETTINGS USTAWIENIA Some settings are accessible for Administrator exclusively. Prior to balance parameters setup, log in as the Administrator. Niektóre ustawienia wagi są dostępne wyłącznie dla Administratora. Przed ustawieniem parametrów wagi zaloguj się jako Administrator. 9.1. Administrator’s logging in Logowanie administratora Log in Log in... - Page 18 E d it r ec or d O p er a t or s N ame N ame A d min C od e Passw ord * * * * * * * N ame ad Surname A c c es lev el U ser A c c ount ac tiv e Y es...
- Page 19 9.3. Proximity sensors setup Konfiguracja czujników zbliżeni owych Prior to proximity sensors setup, log in as Administrator (point 9.1.). Przed konfiguracją czujników zbliżeniowych zaloguj się jako Administrator (patrz krok 9.1.). You can assign the proximity sensors with different functions for each working mode (the sensors will trigger different operation for each working mode).
- Page 20 10. PERIPHERAL DEVICES CONNECTORS PODŁĄCZENIE URZĄDZEŃ PERYFERYJNYCH Barcode Computer Computer Printer PLC controller Stack-light scanner Komputer Komputer Drukarka Kontroler PLC Kolumna Skaner kodów świetlna kreskowych DB15 RFID transponder Barcode card reader scanner Czytnik kart Skaner kodów RFID transponder Barcode Computer Printer RFID kreskowych...
-
Page 21: Device Cleaning
11. DEVICE CLEANING CZYSZCZENIE I KONSERWACJA 11.1. Guidelines and precautions Zalecenia i ostrzeżenia Prior to cleaning it is necessary Use soft cloth made of either natural Apply the cleanser onto the cloth. to disconnect the device from the or synthetic fi ber exclusively. Avoid us- Mind not to apply the cleanser mains! Remove the plug from the ing cloth made of stiff... - Page 22 W przypadku konieczności demontażu elementów komory ważenia, postępuj zgodnie z opisem w sekcji 11.3. • SZYBY I ELEMENTY SZKLANE możesz wyczyścić, używając płynu do mycia szyb. • SZALKĘ ORAZ ELEMENTY ZE STALI NIERDZEWNEJ I ALUMINIUM możesz wyczyścić ściereczką lekko zwilżoną łagodnym roztworem wody i delikatnego środka czyszczącego (np. mydła lub płynu do mycia naczyń). •...
- Page 23 Use your fi nger to press the base of the ring assembly in order to tilt the top Install and tighten the protec- edge. Grab the top edge and remove the ring assembly through the upper tive ring using the handle. hole of the weighing chamber.
- Page 24 www.radwag.com...
Need help?
Do you have a question about the UYA 4Y PLUS and is the answer not in the manual?
Questions and answers