Table of Contents
Advertisement
Advertisement
Table of Contents

Related Manuals for Pace 921VNX


Summary of Contents for Pace 921VNX
- Page 1 P a g e...
-
Page 2: Table Of Contents
Table of contents Front LEDs ................... 2 Rear Ports ..................3 BASIC INSTALLATION ..............4 Connecting Your Router .................... 5 Network Configuration ....................6 Gateway Configuration ............. 11 Accessing your gateway ..................11 Displaying the activated services ................12 Configuring your broadband Internet access ............12 Configuring your local network ................ -
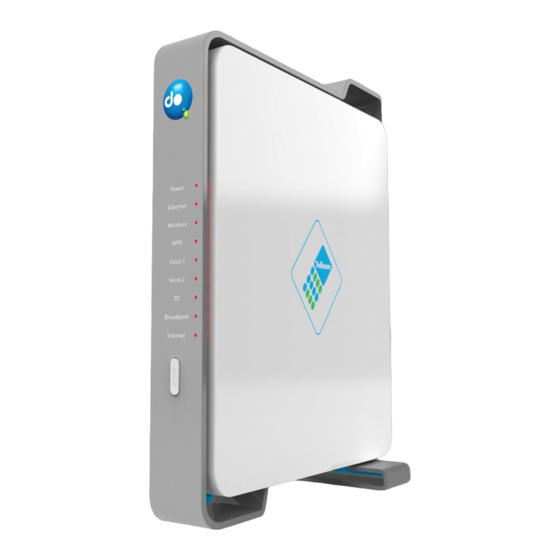
Page 3: Front Leds
RONT OLOUR ESCRIPTION Power Off (Power supply not plugged or I/0 switch off on the rear panel) OWER Firmware update is on-going. AMBER CPE boot failure. Failure due to internal sequence or state that will prevent the device from connecting to the access network or passing customer data. The device is powered on (power supplied and I/0 switched on the rear panel). -
Page 4: Rear Ports
ORTS Item Meaning Connect this port to the DSL/telephone network with the RJ-11 cable (telephone) provided. Connect a 3G USB modem or Mass Storage device Connect a UTP Ethernet cable (Cat-5 or Cat-5e) to one LAN 1X — 4X of the LAN ports when connecting to a PC or an (RJ-45 connector) office/home network of 100Mbps or 1Gbps Connect an Ethernet Modem via RJ-45 Cable... -
Page 5: Basic Installation
BASIC INSTALLATION The router can be configured through your web browser. A web browser is included as a standard application in the following operating systems: Linux, Mac OS, Windows 98/NT/2000/XP/Me/Vista/7, etc. The product provides an easy and user-friendly interface for configuration. -
Page 6: Connecting Your Router
Connecting Your Router 1. Connect the power adapter as illustrated below and power on the device, make sure that the Power LED is lit steadily. 2. Connect your network or computer to the router using the LAN (Local Area Network) cable. 3. -
Page 7: Network Configuration
Network Configuration Configuring PC in Windows Vista/ 7 1. Go to Start. Click on Network. 2. Then click on Network and Sharing Center at the top bar. 3. When t h e Network and Sharing Center Window pops up, select and click on Manage Network connections on the left window column. - Page 8 Configuring PC in Windows XP 1. Go to Start / Control Panel (in Classic View). In the Control Panel, double-click Network Connections. 2. Double-click Local Area Connection. 3. In the LAN Area Connection Status window, click Properties. 4. Select Internet Protocol (TCP/IP) and click Properties. 5.
- Page 9 Configuring PC in Windows 2000 Go to Start / Settings / Control Panel. In the Control Panel, double-click Network and Dial-up Connections. Double-click Local Area Connection (“LAN”) In the Local Area Connection status window, click Properties. Select Internet Protocol (TCP/IP) and click Properties. Select the Obtain an IP address automatically and Obtain DNS server address automatically radio buttons.
- Page 10 Configuring PC in Windows 95/98/Me 1. Go to Start / Settings / Control Panel. In the Control Panel, double-click Network and choose the Configuration tab. 2. Select TCP / IP -> NE2000 Compatible, or the name of any Network Interface Card (NIC) in your PC. 3.
- Page 11 Configuring PC in Windows NT4.0 Go to Start / Settings / Control Panel. In the Control Panel, double-click Network and choose the Protocols Select TCP/IP Protocol and click Properties. Select the Obtain an IP address from a DHCP server radio button and click OK.
-
Page 12: Gateway Configuration
ATEWAY ONFIGURATION Accessing your gateway Connect a computer to your gateway using an Ethernet cable or Wi-Fi. Open an Internet browser and enter the http://ibox web address or http://10.0.0.2 to access your gateway web browser. In order to access the Web Browser you will need to enter username and password. The default username and password are “admin”... -
Page 13: Displaying The Activated Services
Ethernet. This can be done by either having the Pace dial-out through another WAN connection device, by assigning a static IP in the same range as the primary WAN connection device or by having the Pace obtain an IP from the WAN connection device to which the Ethernet WAN port is connected. - Page 14 13 | P a g e...
-
Page 15: Configuring Your Local Network
Configuring your local network The default local IP address of your gateway is 10.0.0.2. Your connected hardware items will have an IP address in the range 10.0.0.3 to 10.0.0.253. If you want to change your local network’s addressing plan, select the "LAN" menu under the "Router"... -
Page 16: Authorizing Programs To Access The Internet
Authorizing programs to access the Internet Your gateway contains a firewall that blocks any communication initiated from outside network. This function may affect some applications behaviour: Online games Communication tools (email, video conferencing, etc.) Server applications (FTP, SMTP) To allow some of your applications to pass through the firewall: ... -
Page 17: Setting Up Dynamic Dns
To configure a NAT rule: Indicate an application name Select the protocol type: TCP or UDP Enter the port that has to be forwarded to the internal service Indicate the address of the hardware on the local network, followed by the destination port. The request will be forwarded to this private address Setting up Dynamic DNS The Dynamic DNS function allows you to alias a dynamic IP address to a static hostname,... -
Page 18: Defining A Dmz
Dynamic DNS: Disabled: Check to disable the Dynamic DNS function. Enabled: Check to enable the Dynamic DNS function. The following fields will be activated and required. Dynamic DNS Server: Select the DDNS service you have established an account with. Domain Name, Username and Password: Enter your registered domain name and your username and password for this service. -
Page 19: Activating Upnp
Activating UPnP The UPnP IGD feature allows some applications to configure the NAT automatically. Configuring Telephony features Click the account you want to edit and then select the "SIP" voice protocol. 18 | P a g e... - Page 20 Define the order of the G729, G711A, G711µ codecs. Enter the SIP parameters: URI : enter your telephone number Username / Password: The username and password are used to register your Voice account on the SIP server. Enter the exact values given by your Internet provider ...
-
Page 21: Configuring Your Wireless Network
Proxy Server: enter the SIP Proxy IP address Proxy Port: leave the default value, if your VoIP provider has not supplied a port number User Agent Domain: This is usually the same as your Registrar Server, check with you VoIP provider. -
Page 22: Saving And Restoring Settings
By default, your gateway automatically selects the best Wi-Fi channel. However, you can select a channel manually. Your gateway is configured with one active Wi-Fi network. The default encryption type is WPA2, but you can choose another. Saving and restoring settings To save your settings, click "Back up your Parameters". - Page 23 22 | P a g e...
-
Page 24: Home Network Configuration
ETWORK ONFIGURATION Displaying the devices connected to your gateway Using the "Connected Equipment" function under the “Home Network” heading, you can: Display the devices detected by your gateway: computers connected via Ethernet or Wi-Fi, USB accessories (webcam, 3G dongle, hard disk, etc.) ... - Page 25 The “Printer” function under the “Home Network” heading allows you to share a printer between all the computers connected to your gateway. This service is compliant with printers that have a USB connector. Scanners and multifunction printers are not supported. Only one printer may be connected at a time. 24 | P a g e...
- Page 26 25 | P a g e...
-
Page 27: Sharing Your Home Center
Sharing your home center In order to access in the content of sharing devices, an authentication is required with the credentials admin/admin by default. When access is granted, a web page of home center appears and user can access to 4 menus: My Files My Music My Pictures... - Page 28 The same operations are available also for “My Music” menu as for “My Files” menu, and user can launch the music playlist, by clicking on the “Play” button: About pictures, all pictures can be shown like a slideshow, just by using left and right scroll arrows, after clicking on one picture.
- Page 29 28 | P a g e...
-
Page 30: Management
ANAGEMENT Diagnosing the DSL line status The "DSL Statistics" function under the "Troubleshooting" heading lets you display technical information about your DSL line. If the current status is "Idle": Check that your gateway is properly connected to the telephone socket, ... -
Page 31: Restoring The Factory Settings
Restoring the factory settings Using the “Reset” function under the "Management" heading, you can force your gateway to return to its original factory settings. Your gateway settings will then be lost. Updating your gateway If you want to update your gateway with a version supplied by your Internet service provider: ... -
Page 32: Changing The Username And Password
Click OK to restart your gateway Changing the Username and Password In order to prevent unauthorized access to your router’s configuration interface, it requires that all users login to the GUI with a password. You can Edit the existing user account and amend the username and password. -
Page 33: Box Diagnostics
Box Diagnostics The "Box Diagnostics" function under the "Troubleshooting" heading lets your display your gateway’s characteristics, the status of the internet connection and the interfaces. 32 | P a g e... -
Page 34: Nat Status
NAT Status This section lists all the current NAT sessions between external (WAN) and internal (LAN) interface Logread This page displays all the event Log entries of the router such as when the DSL gets disconnected and during Firewall triggered events like Intrusion or Blocking Logging. 33 | P a g e... -
Page 35: Troubleshooting
ROUBLESHOOTING If the router is not functioning properly, first check this chapter for simple troubleshooting before contacting the Help desk . Problems with the router Problem Suggested Action None of the LEDs are lit Check the connection between the router and the adapter. If when the router is the problem persists, most likely it is due to the malfunction of turned on. -
Page 36: Contact Telkom Support
Most problems can be solved by referring to the Troubleshooting section in the User’s Manual. If you cannot resolve the problem with the Troubleshooting chapter, please contact Modem Support. Contact Telkom Support Telephone: 10210 Operating Hours: 06:00 – 21:00 Mon to Fri 09:00 –...
Need help?
Do you have a question about the 921VNX and is the answer not in the manual?
Questions and answers
Can I replace a landline phone to a mobile phone
The Pace 921VNX supports VoIP for landline phone functionality. It also has a USB port for a 3G USB key, which provides a mobile internet connection but does not indicate support for mobile phone functionality as a direct replacement for a landline phone. Therefore, a mobile phone cannot directly replace a landline phone connected to the Pace 921VNX.
This answer is automatically generated