
Related Manuals for GeoVision IGV8550-A


Summary of Contents for GeoVision IGV8550-A
- Page 1 Installation Guide V8.5.5.0 Before attempting to connect or operate this product, IGV8550-A please read these instructions carefully and save this manual for future use.
- Page 2 GeoVision. Every effort has been made to ensure that the information in this manual is accurate. GeoVision, Inc. makes no expressed or implied warranty of any kind and assumes no responsibility for errors or omissions. No liability is assumed for incidental or consequential damages arising from the use of the information or products contained herein.
-
Page 3: Table Of Contents
Contents Important Notice..................1 Important Notice before Using GV-Video Capture Card .....3 Chapter 1 Video Capture Cards............6 1.1 GV-SDI-204 ......................7 1.2 GV-5016 .........................14 1.3 GV-4008 .........................23 1.4 GV-4008A.......................32 1.5 GV-3008 .........................38 1.6 GV-1120A, 1240A, 1480A ..................45 1.7 GV-1120B, GV-1240B, GV-1480B .................55 1.8 GV-1008 .........................62 1.9 GV-900A.........................69 1.10 GV-650A, GV-800A ....................75... - Page 4 2.12 Accessing GV-I/O Box over Networks..............167 2.13 Installing USB Driver ..................178 Chapter 3 Software Installation ............179 3.1 Before You Start ....................180 3.2 Installing the System ....................181 3.3 Program List ......................183 Chapter 4 Screen Overview ............185 4.1 Main System......................186 4.2 ViewLog........................188 4.3 SingleView Viewer....................191 4.4 MultiView Viewer ....................192 4.5 Center V2 ......................194...
-
Page 5: Important Notice
Important Notice GPU Decoding Specifications In V8.5 or later, support for GPU (Graphics Processing Unit) decoding is added to lower the CPU loading and to increase the total frame rate supported by a GV-System. GPU decoding only supports the following software and hardware specifications: Software Specifications Supported Not Supported... -
Page 6: Important Notice Before Using Gv-Video Capture Card
Multi-Channel Playback Specifications In V8.5 or later, multi-channel playback in ViewLog has been enhanced to improve the smoothness of the video by producing higher frame rate. However, playing back multiple channels at high resolution can increase the CPU loading especially if the GV-System is processing other tasks simultaneously. - Page 7 Frame rate limit in a single hard disk when connecting to analog cameras Software Compression NTSC Video Resolution (MPEG4) 960 FPS 800 FPS VGA/D1 480 FPS 400 FPS Turbo VGA 416 FPS 400 FPS Turbo D1 352 FPS 320 FPS Note: The above data was determined using the default codec MPEG4 and hard disks with average R/W speed above 110 MB/s.
- Page 8 Frame rate limit in a single hard disk when connecting to SDI cameras Hardware Compression H.264 Video Resolution NTSC 1080p 360 FPS 300 FPS 360 FPS 300 FPS 1080i 720 FPS 600 FPS 720p Note: The above data was determined using the default codec H.264, default quality level Q3 and hard disks with average R/W speed above 110 MB/s.
- Page 9 6. GV-600A, GV-650A and GV-800A: • Starting from V8.3.2, GV-600 (V4), GV-650 (V4) and GV-800 (V4) are renamed to GV- 600A, GV-650A and GV-800A. These V4 Cards and A Cards are the same video capture cards. 7. End of Support: •...
-
Page 10: Chapter 1 Video Capture Cards
Chapter 1 Video Capture Cards This chapter includes the following information: • Minimum system requirements • Packing list • Connection diagrams • Specifications • Driver installation • Comparison chart... -
Page 11: Gv-Sdi-204
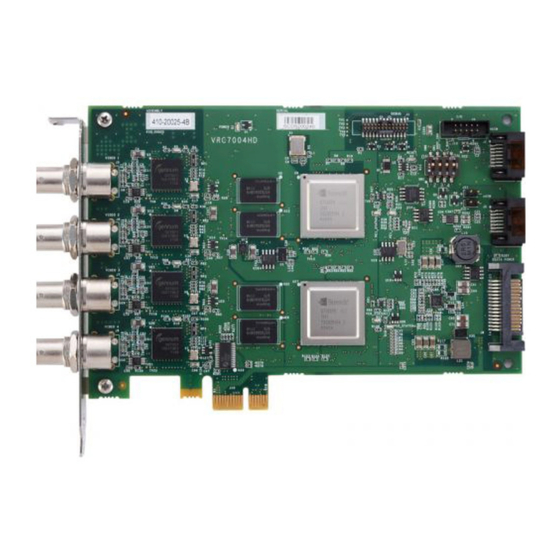
Video Capture Cards 1.1 GV-SDI-204 The GV-SDI-204 Card provides up to 4 video channels of HD-SDI cameras, recording up to 120 / 100 fps (NTSC / PAL) in total at 1080p with H.264 hardware compression. You can install up to four GV-SDI-204 Cards for a total of 16 channels. The new technology of resolution is employed to enhance the live image without DSP Overlay. - Page 12 Connecting the GV-SDI-204 Cards Up to four GV-SDI-204 Cards can be connected. GV-SDI-204 Cards can also be installed with other types of GV-Video Capture Cards including GV-900A, GV-800B, GV-650B, GV- 600B, and GV-1480A / 1240A / 1120A Combo Cards, but the total number of channels cannot exceed 32 channels.
-
Page 13: Connecting Hardware Watchdog
Video Capture Cards Connecting Hardware Watchdog Insert the Hardware Watchdog Jumper Wire to the 2-pin connectors on the Card. The (+) pin on the Card must connect to the Reset (+) pin on the motherboard, and the (-) pin on the Card to the Ground (-) pin on the motherboard. -
Page 14: Installing Drivers
After installing the GV-SDI-204 Card in the computer, insert the software DVD to install GV- Series drivers. The DVD will run automatically and an installation window will pop up. Select Install or Remove GeoVision GV-Series Driver, and select the following two options to install card and USB dongle drivers. - Page 15 Video Capture Cards Adjusting the Video Settings in the Main System One distinct feature of GV-SDI-204 Cards is their ability of hardware compression, providing you with higher system performance and DVD recording quality. To take full advantage of GV-SDI-204 Cards, you can adjust the video settings, including the recording quality and frame rate, before running the GV-System.
- Page 16 5. The Enable hardware-compressed data FIFO option is disabled by default. When the option is enabled, the hardware-compressed data from the video IP device, such as IP camera, video server and compact DVR, will be transmitted directly to remote servers instead of being compressed again on the DVR.
-
Page 17: Specifications
Video Capture Cards Specifications GV-SDI-204 Interface PCI-E (x1) Input Type Video Input 4 Cams Audio Input NTSC 120 fps 1080p 100 fps Recording Rate NTSC 240 fps and Display 720p 200 fps Rate NTSC 120 fps 1080i 100 fps 1080p 1920 x 1080 720p 1280 x 720 1080i... -
Page 18: Gv-5016
1.2 GV-5016 The GV-5016 Card provides up to 16 video and 16 audio channels, recording up to 480 / 400 fps (NTSC / PAL) in total with H.264 hardware compression. The new technology of resolution is employed to enhance the live image without DSP Overlay. Even in multi views, the image on the largest division view can remain at high-quality resolution without DSP Overlay. - Page 19 Video Capture Cards Connecting One GV-5016 Card • Connect the video and audio cables to the GV-5016 Card. • Connect the supplied Hardware Watchdog Jump Wire (Figure 1-11). • After you turn on the computer, the Power LED (D19) and Status LED (D17) should be lit in green to indicate the card is ready for use.
- Page 20 Connecting Two GV-5016 Cards You can install two GV-5016 Cards for a total of 32 channels. Master Card is the card with 1- 16 channels and Slave Card is that with 17-32 channels. Normally, the card attached to the lower PCI-E slot number will act as Master, and the card attached to the higher PCI-E slot number will act as Slave.
- Page 21 Video Capture Cards Connecting Hardware Watchdog Insert the Hardware Watchdog Jumper Wire to the 2-pin connectors on the Card. The (+) pin on the Card must connect to the Reset (+) pin on the motherboard, and the (-) pin on the Card to the Ground (-) pin on the motherboard.
- Page 22 After installing the GV-5016 Card in the computer, insert the software DVD to install GV- Series drivers. The DVD will run automatically and an installation window will pop up. Select Install or Remove GeoVision GV-Series Driver, and select the following two options to install card and USB dongle drivers.
- Page 23 Video Capture Cards Adjusting the Video Settings in the Main System One distinct feature of GV-5016 Cards is their ability of hardware compression, providing you with higher system performance and DVD recording quality. To take full advantage of GV-5016 Cards, you can adjust the video settings, including the recording quality and frame rate, before running the GV-System.
- Page 24 3. In the Select Hardware-compressed Camera section, select one camera to be configured. 4. Select the recording quality. 5. The Enable hardware-compressed data FIFO option is disabled by default. When the option is enabled, the hardware-compressed data from the video IP device, such as IP camera, video server and compact DVR, will be transmitted directly to remote servers instead of being compressed again on the DVR.
- Page 25 Video Capture Cards 10. Set the maximum frame rate for motion and non-motion periods so as to save as much disk space as possible. 11. To adjust image quality, in the Video Attributes section, move the sliders to the desired values or click Default to apply default values.
- Page 26 Specifications GV-5016 GV-5016 x 2 Interface PCI-E (x1) PCI-E (x1) x 2 Input Type Video Input 16 Cams 32 Cams Audio Input 16 Channels 32 Channels NTSC 480 fps 960 fps Recording Rate (D1) 400 fps 800 fps NTSC 480 fps 960 fps Display Rate 400 fps...
-
Page 27: Gv-4008
Video Capture Cards 1.3 GV-4008 The GV-4008 Card provides up to 8 video and 8 audio channels, recording up to 240 / 200 fps (NTSC / PAL) in total with H.264 hardware compression. The new technology of resolution is employed to enhance the live image of D1 without DSP Overlay. Even in screen divisions, the largest division can remain at the high-quality D1 resolution. - Page 28 Connecting One GV-4008 Card • Connect the video and audio cables to the GV-4008 Card. • Using the supplied SATA Power Converter Cable, connect the GV-4008 Card to power supply. The Power LED in the top right corner should be lit in green and the 4 status LEDs (D3, D9, D14, D18) in the left corner should be lit in green to indicate the normal functionality.
- Page 29 Video Capture Cards Connecting Two GV-4008 Cards You can install two GV-4008 Cards for a total of 16 channels. Master Card is the card with 1- 8 channels and Slave Card is that with 9-16 channels. Normally, the card attached to the lower PCI slot number will act as Master, and the card attached to the higher PCI slot number will act as Slave.
- Page 30 Connecting Hardware Watchdog Insert the Hardware Watchdog Jumper Wire to the 2-pin connectors on the Card. The (+) pin on the Card must connect to the Reset (+) pin on the motherboard, and the (-) pin on the Card to the Ground (-) pin on the motherboard. Ensure the connection is correct; otherwise the hardware watchdog will be damaged.
- Page 31 After installing the GV-4008 Card in the computer, insert the software DVD to install GV- Series drivers. The DVD will run automatically and an installation window will pop up. Select Install or Remove GeoVision GV-Series Driver, and select the following two options to install card and USB dongle drivers.
- Page 32 Troubleshooting Power Supply Issues When the Reset LED on the top of the Card is flashing red color or the four Status LEDs are not all on, it indicates that the GV-4008 Card is short of power supply. Make sure your power supply is of 400 watts at least.
- Page 33 Video Capture Cards 2. Select the cameras you want to set up, and click the Configure button. This dialog box appears. Figure 1-21 3. In the Select Hardware-compressed Camera section, select one camera to be configured. 4. Select the recording quality. 5.
- Page 34 8. To access the frame rate settings, on the Main System, click the Configure button, select System Configure, and select Camera Configure. This dialog box appears. Figure 1-22 9. In the Rec Control section, click the Arrow button. The Hardware Rec. Frame Rate Setting dialog box appears.
- Page 35 Video Capture Cards Specifications GV-4008 GV-4008 x 2 Interface PCI-E (x1) PCI-E (x1) x 2 Input Type Video Input 8 Cams 16 Cams Audio Input 8 Channels 16 Channels NTSC 240 fps 480 fps Recording Rate (D1) 200 fps 400 fps NTSC 240 fps 480 fps...
-
Page 36: Gv-4008A
1.4 GV-4008A The GV-4008A Card provides up to 8 video and 8 audio channels, recording up to 240 / 200 fps (NTSC / PAL) in total with H.264 hardware compression. The new technology of resolution is employed to enhance the live image without DSP Overlay. Even in multi views, the image on the largest division view can remain at the high-quality resolution without DSP Overlay. - Page 37 Video Capture Cards Connecting One GV-4008A Card • Connect the video and audio cables to the GV-4008A Card. • Connect the supplied Hardware Watchdog Jump Wire (Figure 1-16). • Connect the computer’s internal power supply to the GV-4008A Card. The LEDs (D17, D19, D21, D23) should be lit in green to indicate the card is ready for use.
- Page 38 Connecting Two GV-4008A Cards You can install two GV-4008A Cards for a total of 16 channels. Master Card is the card with 1-8 channels and Slave Card is that with 9-16 channels. Normally, the card attached to the lower PCI-E slot number will act as Master, and the card attached to the higher PCI-E slot number will act as Slave.
- Page 39 Video Capture Cards Connecting Hardware Watchdog Insert the Hardware Watchdog Jumper Wire to the 2-pin connectors on the Card. The (+) pin on the Card must connect to the Reset (+) pin on the motherboard, and the (-) pin on the Card to the Ground (-) pin on the motherboard.
- Page 40 After installing the GV-4008A Card in the computer, insert the software DVD to install GV- Series drivers. The DVD will run automatically and an installation window will pop up. Select Install or Remove GeoVision GV-Series Driver, and select the following two options to install card and USB dongle drivers.
- Page 41 Video Capture Cards Specifications GV-4008A GV-4008A x 2 Interface PCI-E (x1) PCI-E (x1) x 2 Input Type Video Input 8 Cams 16 Cams Audio Input 8 Channels 16 Channels NTSC 240 fps 480 fps Recording Rate (D1) 200 fps 400 fps NTSC 240 fps 480 fps...
-
Page 42: Gv-3008
1.5 GV-3008 The GV-3008 Card provides up to 8 video and 8 audio channels, recording up to 240 / 200 fps (NTSC / PAL) in total with H.264 hardware compression. The GV-3008 Card provides the high-resolution live image with DSP Overlay. Even in multi views, the image on the largest division view can remain at the high-quality resolution. - Page 43 Video Capture Cards Connecting One GV-3008 Card • Connect the D-Type video and audio cables to the GV-3008 Card. • Connect the supplied Hardware Watchdog Jump Wire (Figure 1-28). • Connect the computer’s internal power supply to the GV-3008 Card. The Power LED should be lit in green to indicate the card is ready for use.
- Page 44 Connecting Two GV-3008 Cards You can install two GV-3008 Cards for a total of 16 channels. Master Card is the card with 1- 8 channels and Slave Card is that with 9-16 channels. The Master and Slave cards can be distinguished by the labels on cards, as shown below: Master Card: Slave Card:...
- Page 45 Video Capture Cards GV-Loop Through Card / GV-Multi Quad Card Video 5 ~ 8 Video 1 ~ 4 Video/Audio 1~4 GV-NET/IO Card 3008 - 8 Hardware Watchdog Jumper Wire 3008 GV-3008 Card (Master) Internal Power Y Cable Video/Audio 5~8 Video/Audio 9~12 Video Video 9 ~ 12...
- Page 46 Connecting Hardware Watchdog To restart the computer automatically by the hardware watchdog on the GV-Video Capture Card, a connection needs to be made from the card to the motherboard. 1. Using the supplied jumper wire, connect the reset jumper pins on the card and on the motherboard.
- Page 47 After installing the GV-3008 Card in the computer, insert the software DVD to install GV- Series drivers. The DVD will run automatically and an installation window will pop up. Select Install or Remove GeoVision GV-Series Driver, and select Install or Remove GeoVision GV-Series Card Drivers to install card drivers.
- Page 48 Specifications GV-3008 GV-3008 x 2 Interface PCI-E (x1) PCI-E (x1) x 2 Input Type D-Type Video Input 8 Cams 16 Cams Audio Input 8 Channels 16 Channels NTSC 240 fps 480 fps Recording Rate (D1) 200 fps 400 fps NTSC 240 fps 480 fps Display Rate...
-
Page 49: Gv-1120A, 1240A, 1480A
Video Capture Cards 1.6 GV-1120A, 1240A, 1480A GV-Combo A Card (GV-1120A, GV-1240A and GV-1480A) are the three-in-one combo cards, providing one single card solution for 16 video / audio recording, real-time display and TV-out display. Minimum System Requirements Windows XP / Windows Vista / Windows 7 / Windows Server 2008 32-bit Windows 7 / Windows Server 2008 R2 64-bit... - Page 50 Packing List (D-Type) 1. GV-Combo A Card x 1 6. 9-16 D-Type Audio Cable x 1 2. Audio Extension Card x 1 7. Internal Power Y Cable x 1 3. 1-8 D-Type Video Cable x 1 8. Hardware Watchdog Jumper Wire x 1 4.
- Page 51 Video Capture Cards Connecting One GV-Combo A Card (D-Type) • Plug the Audio Extension Card in the assigned connectors on the GV-Combo A Card. • Connect D-Type video and audio cables to the GV-Combo A Card and Audio Extension Card respectively. •...
- Page 52 Connecting One GV-Combo A Card (DVI-Type) • Connect the DVI video and audio cables to the GV-Combo A Card. • Connect the supplied Hardware Watchdog Jump Wire (Figure 1-33). • Connect the PC’s internal power supply to the GV-Combo A Card. •...
- Page 53 Video Capture Cards Connecting GV-NET/IO Card to GV-Combo A Card Connect the GV-NET/IO Card to the 20-pin GV-NET/IO port on the GV-Combo A Card. Some GV-Combo A Cards are built in two 20-pin ports. Ensure to connect the GV-NET/IO Card to the correct port as illustrated below. GV-NET/IO Card 20-Pin Ribbon Cable Debug Port...
- Page 54 Connecting Two GV-Combo A Cards You can install two GV-Combo A Cards of the same model for up to 32 channels. Master Card is the card with 1-16 channels and Slave Card is that with 17-32 channels. Normally, the card attached to the lower PCI-E slot number will act as Master, and the card attached to the higher PCI-E slot number will act as Slave.
- Page 55 Video Capture Cards Connecting Hardware Watchdog Insert the Hardware Watchdog Jumper Wire to the 2-pin connectors on the Card and on the motherboard as illustrated below. Ensure the connection is correct; otherwise the hardware watchdog will not work. PC Reset Switch PWSW GV-Combo A Card Hardware...
- Page 56 After installing the GV-Combo A Card in the computer, insert the software DVD. The DVD will run automatically and an installation window will pop up. Select Install or Remove GeoVision GV-Series Driver, and select Install or Remove GeoVision GV-Series Card Drivers to install card drivers.
- Page 57 Video Capture Cards Specifications GV-1120A GV-1240A GV-1480A PCI-E (x1) Interface Type Input Type D-Type, DVI 8, 12, 16 Cams 8, 16 Cams 16 Cams Video Input 8, 12, 16 Channels 8, 16 Channels 16 Channels Audio Input D-Type: RCA Connector TV Output DVI: BNC Connector NTSC...
- Page 58 GV-1120A x 2 GV-1240A x 2 GV-1480A x 2 PCI-E (x1) x 2 Interface Type D-Type, DVI Input Type 16, 20, 24, 28, 32 16, 24, 32 Cams 32 Cams Video Input Cams 16, 20, 24, 28, 32 16, 24, 32 32 Channels Audio Input Channels...
-
Page 59: Gv-1120B, Gv-1240B, Gv-1480B
Video Capture Cards 1.7 GV-1120B, GV-1240B, GV-1480B GV-Combo B Card (GV-1120B, GV-1240B and GV-1480B) are of GV-Comb Card series, providing one single card solution for 16 video / audio recording and real-time display. Minimum System Requirements Windows XP / Windows Vista / Windows 7 / Windows Server 2008 32-bit Windows 7 / Windows Server 2008 R2 64-bit... - Page 60 Packing List (DVI-Type) 1. GV- Combo B Card x 1 4. Hardware Watchdog Jumper Wire x 1 2. 1-16 DVI-Type Video Cable x 1 5. Software DVD x 1 3. 1-16 DVI-Type Audio Cable x 1 Surveillance System Quick Start Guide x 1 Connecting One GV-Combo B Card (DVI-Type) •...
- Page 61 Video Capture Cards Connecting Two GV-Combo B Cards You can install two GV-Combo B Cards of the same model for up to 32 channels. Master Card is the card with 1-16 channels and Slave Card is that with 17-32 channels. Normally, the card attached to the lower PCI-E slot number will act as Master, and the card attached to the higher PCI-E slot number will act as Slave.
- Page 62 Connecting Hardware Watchdog Insert the Hardware Watchdog Jumper Wire to the 2-pin connectors on the Card and on the motherboard as illustrated below. Ensure the connection is correct; otherwise the hardware watchdog will not work. PC Reset Switch Hardware PWSW Watchdog GV-Combo B Card Motherboard...
- Page 63 After installing the GV-Combo B Card in the computer, insert the software DVD. The DVD will run automatically and an installation window will pop up. Select Install or Remove GeoVision GV-Series Driver, and select Install or Remove GeoVision GV-Series Card Drivers to install card drivers.
- Page 64 Specifications GV-1120B GV-1240B GV-1480B PCI-E (x4) Interface Type Input Type Video Input 16 Cams 16 Cams 16 Cams Audio Input 16 Channels 16 Channels 16 Channels 120 fps 240 fps 480 fps NTSC 100 fps 200 fps 400 fps Recording Rate NTSC 120 fps...
- Page 65 Video Capture Cards GV-1120B x 2 GV-1240B x 2 GV-1480B x 2 PCI-E (x4) x 2 Interface Type Input Type 32 Cams 32 Cams 32 Cams Video Input 32 Channels 32 Channels 32 Channels Audio Input 240 fps 480 fps 960 fps NTSC 200 fps...
-
Page 66: Gv-1008
1.8 GV-1008 The GV-1008, as a three-in-one combo card, provides one single card solution for 8 video / audio recording, real-time display and TV-out display. The Card can record each channel at D1 in real time or 30 fps. When the two Cards are installed in the system, it can be utilized to provide a single TV-out display of 16 cameras and maintain a high recording rate of 480 fps at D1 resolution. - Page 67 Video Capture Cards Connecting One GV-1008 Card • Plug the Audio Extension Card in the assigned connectors on the GV-1008 Card. • Connect D-Type video cable and audio cable to the GV-1008 Card and Audio Extension Card respectively. • Connect the supplied Hardware Watchdog Jump Wire (Figure 1-40). •...
- Page 68 Connecting Two GV-1008 Cards You can install the Master and Slave of GV-1008 Cards for a total of 16 channels. The Master and Slave are distinguished by the labels on cards, as shown below: Master Card: Slave Card: Use the supplied 40-pin cable to connect the Master and Slave Cards together. IMPORTANT: The Slave Cards cannot work alone.
- Page 69 Video Capture Cards GV-NET I/O Card TV Monitor GV-1008 Card (Master) Hardware Watchdog GV-1008 Card (Slave) Audio Extension Card 9-16 D-Type Audio Cable 1-8 D-Type 9-16 D-Type Video Cable Video Cable 1-8 D-Type Audio Cable Video 1~8 Video 9~16 Figure 1-39...
- Page 70 Connecting Hardware Watchdog Insert the Hardware Watchdog Jumper Wire to the 2-pin connectors on the Card. The (+) pin on the Card must connect to the Reset (+) pin on the motherboard, and the (-) pin on the Card to the Ground (-) pin on the motherboard. Ensure the connection is correct; otherwise the hardware watchdog will not work.
- Page 71 After installing the GV-1008 Card in the computer, insert the software DVD. The DVD will run automatically and an installation window will pop up. Select Install or Remove GeoVision GV-Series Driver, and select Install or Remove GeoVision GV-Series Card Drivers to install card drivers.
- Page 72 Specifications GV-1008 GV-1008 x 2 Interface PCI-E (x1) PCI-E (x1) x 2 Input Type D-Type, DVI Video Input 8 Cams 16 Cams D-Type: RCA Connector TV Output DVI: BNC Connector Audio Input 8 Channels 16 Channels NTSC 240 fps 480 fps 200 fps 400 fps Recording Rate...
-
Page 73: Gv-900A
Video Capture Cards 1.9 GV-900A One GV-900A Card provides up to 32 video channels and 8 audio channels, recording up to 240 / 200 fps (NTSC / PAL) in total with H.264 software compression. Minimum System Requirements 32-bit Windows XP / Windows Vista / Windows 7 / Windows Server 2008 64-bit Windows 7 / Windows Server 2008 R2 GV-900A... - Page 74 Connecting One GV-900A Card Here we use the GV-900A Card of 8 channels to illustrate the connection. • Connect the video / audio cables into the DVI ports of the GV-900A Card. • Connect the supplied Hardware Watchdog Jump Wire (Figure 1-43). Video 1 ~ 4 (Black) GV-NET I/O Card Hardware...
- Page 75 Video Capture Cards Connecting Two GV-900A Cards You can install two GV-900A Cards for up to 32 channels. Normally, the card attached to the lower PCI-E slot number will act as Master, and the card attached to the higher PCI-E slot number will act as Slave.
- Page 76 Connecting Hardware Watchdog Insert the Hardware Watchdog Jumper Wire to the 2-pin connectors on the Card. The (+) pin on the Card must connect to the Reset (+) pin on the motherboard, and the (-) pin on the Card to the Ground (-) pin on the motherboard. Ensure the connection is correct; otherwise the hardware watchdog will not work.
- Page 77 After installing the GV-900A Card in the computer, insert the software DVD. The DVD will run automatically and an installation window will pop up. Select Install or Remove GeoVision GV-Series Driver, and select Install or Remove GeoVision GV-Series Card Drivers to install card drivers.
- Page 78 Specifications GV-900A GV-900A x 2 Interface PCI-E (x1) PCI-E (x1) x 2 Input Type Video Input 8, 16, 32 Cams 16, 24, 32 Cams Audio Input 8 Channels 16 Channels 8-port: 240 fps 8+8 port: 480 fps NTSC 32-port: 240 fps 16+16 port: 480 fps 8-port: 200 fps 8+8 port: 400 fps...
-
Page 79: Gv-650A, Gv-800A
Video Capture Cards 1.10 GV-650A, GV-800A The GV-650A and GV-800A Cards have similar appearances, system requirements and packing list so that we introduce both together in this section. However, you may choose between the two according to your need for recording rate and audio channels. Minimum System Requirements 32-bit Windows XP / Windows Vista / Windows 7 / Windows Server 2008... - Page 80 Connecting One GV-650A / GV-800A Card The GV-650A Card is designed with a D-Type connector while the GV-800A Card is designed with two types of connectors: BNC and D-Type. BNC type only provides four video channels; audio extension card is required for extension. D-Type can provide up to 16 video channels and four audio channels together.
- Page 81 Video Capture Cards For the BNC-type video capture card, plug the Audio Extension Card into the connector on the GV-804A Card, as illustrated below. Audio Extension Card GV-NET/IO Card GV-804A Card Figure 1-45 BNC-type GV-804A Card...
- Page 82 Connecting Two GV-650A / GV-800A Cards You can install two GV-650A / GV-800A of the same model for up to 32 channels. Master Card is the card with 1-16 channels and Slave Card is that with 17-32 channels. Normally, the card attached to the lower PCI slot number will act as Master, and the card attached to the higher PCI slot number will act as Slave.
- Page 83 Video Capture Cards Connecting Hardware Watchdog Insert the Hardware Watchdog Jumper Wire to the 2-pin connectors on the Card. The (+) pin on the Card must connect to the Reset (+) pin on the motherboard, and the (-) pin on the Card to the Ground (-) pin on the motherboard.
- Page 84 After installing the GV-650A / GV-800A Card in the computer, insert the software DVD. The DVD will run automatically and an installation window will pop up. Select Install or Remove GeoVision GV-Series Driver, and select Install or Remove GeoVision GV-Series Card Drivers to install card drivers.
- Page 85 Video Capture Cards Specifications GV-650A GV-800A Interface PCI, PCI-E (x1) Input Type D-Type BNC, D-Type Video Input 4, 8, 12, 16 Cams Audio Input 2 Channels 4 Channels NTSC 60 fps 120 fps 50 fps 100 fps Recording Rate NTSC 30 fps 60 fps 25 fps...
- Page 86 GV-650A x 2 GV-800A x 2 PCI x 2, PCI-E (x1) x 2, PCI-E (x1) x 2, Interface PCI x 1 + PCI-E (x1) x 1 PCI x 1 + PCI-E (x1) x 1 Input Type D-Type BNC, D-Type Video Input 32 Cams (Max.) Audio Input 4 Channels...
-
Page 87: Gv-600A
Video Capture Cards 1.11 GV-600A There are two types of GV-600A Cards: BNC and D-Type. BNC-Type only provides four video channels; video and audio extension cards are required for extension. D-Type can provide up to 16 video channels and one audio channel together. Minimum System Requirements 32-bit Windows XP / Windows Vista / Windows 7 / Windows Server 2008... - Page 88 Connecting One GV-600A Card For the D-Type video capture card, plug the black video / audio cable into the black connector on the GV-600A Card; the blue video cable into the blue connector, as illustrated below. Note: The GV-600A Card only supports one audio channel so that only one audio port can work in the supplied 1-8 Cams with 4-Port Audio D-Type cable.
- Page 89 Video Capture Cards For the BNC-Type video capture card, plug the Audio Extension Card into the connector on the GV-600A Card, as illustrated below. Audio Extension Card GV-NET/IO Card GV-600A Card Figure 1-49...
- Page 90 Connecting Two GV-600A Cards You can install two GV-600A Cards for up to 32 channels. Master Card is the card with 1-16 channels and Slave Card is that with 17-32 channels. Normally, the card attached to the lower PCI slot number will act as Master, and the card attached to the higher PCI slot number will act as Slave.
- Page 91 Video Capture Cards Connecting Hardware Watchdog To reboot the computer by the hardware watchdog on the GV-Video Capture Card, a connection needs to be made from the card to the motherboard. 1. Using the supplied jumper wire, connect the reset jumper pins on the card and on the motherboard.
- Page 92 After installing the GV-600A Card in the computer, insert the software DVD. The DVD will run automatically and an installation window will pop up. Select Install or Remove GeoVision GV-Series Driver, and select Install or Remove GeoVision GV-Series Card Drivers to install card drivers.
- Page 93 Video Capture Cards Specifications GV-600A GV-600A x 2 Interface PCI x 2 Input Type BNC, D-Type 1, 2, 4, 6, 8, 10, 12, 14, 16 Video Input 32 Cams (Max.) Cams Audio Input 1 Channel 2 Channels NTSC 30 fps 60 fps 25 fps 50 fps...
-
Page 94: Gv-600B, Gv-650B, Gv-800B
1.12 GV-600B, GV-650B, GV-800B There are two types of GV-600B / GV-650B / GV-800B Card: PCI and PCI-E. Both types of the GV-600B / GV-650B / GV-800B Card provide up to 16 video channels and 4 audio channels. The GV-600B, GV-650B and GV-800B Cards have the same appearances and similar system requirements so that we introduce the three cards together in this section. -
Page 95: Packing List
Video Capture Cards Packing List 1. GV-600B, GV-650B or GV-800B Card x 1 3. Hardware Watchdog Jumper Wire x 1 2. 1-16 Cams with 4-Port Audio DVI-Type Cable 4. Software DVD x 1 x 1 / 1-8 Cams with 4-Port Audio DVI-Type 5. - Page 96 Connecting Two GV-600B / GV-650B / GV-800B Cards You can install two GV-600B / GV-650B / GV-800B Cards of the same model for up to 32 channels. Master Card is the card with 1-16 channels and Slave Card is that with 17-32 channels.
- Page 97 Video Capture Cards Connecting Hardware Watchdog Insert the Hardware Watchdog Jumper Wire to the 2-pin connectors on the Card. The (+) pin on the Card must connect to the Reset (+) pin on the motherboard, and the (-) pin on the Card to the Ground (-) pin on the motherboard.
- Page 98 After installing the GV-600B / GV-650B / GV-800B Card in the computer, insert the software DVD. The DVD will run automatically and an installation window will pop up. Select Install or Remove GeoVision GV-Series Driver, and select Install or Remove GeoVision GV- Series Card Drivers to install card drivers.
- Page 99 Video Capture Cards Specifications GV-600B GV-650B GV-800B Interface PCI, PCI-E (x1) Input Type Video Input 4, 8, 16 Cams Audio Input 4 Channels 4-port: 30 fps 4-port: 60 fps 4-port: 120 fps NTSC 16-port: 30 fps 16-port: 60 fps 16-port: 120 fps 4-port: 25 fps 4-port: 50 fps 4-port: 100 fps...
- Page 100 GV-600B x 2 GV-650B x 2 GV-800B x 2 Interface PCI-E (x1) x 2, PCI x 1 + PCI-E (x1) x 1 Input Type Video Input 8, 12, 16, 20, 24, 32 Cams Audio Input 8 Channels 4+4 port: 60 fps 4+4 port: 120 fps 4+4 port: 240 fps NTSC...
-
Page 101: Installing Two Cards
Video Capture Cards 1.13 Installing Two Cards You can install two video capture cards of the same model for a total of 32 channels. For example, 2 x GV-650A Cards (16 channels) = 32 channels. It is also possible to implement two video capture cards of different channels. For example, GV-650A Card (12 channels) + GV-650A Card (16 channels) = 28 channels. - Page 102 • GV-600B, GV-650B, GV-800B Card Combination GV-600B / 650B / 800B PCI-E x 2 GV-600B / 650B / 800B PCI x 1+ PCI-E x 1 1. For GV-600B / 650B / 800B card, it is required to use two PCI Express slots, or the combination of PCI and PCI Express slots.
-
Page 103: Installing Drivers
Wizard will automatically detect the device. Ignore the wizard and follow these steps to install drivers: 1. Insert the software DVD. It will run automatically and pop up a window. 2. Select Install or Remove GeoVision GV-Series Cards Driver and select Install or Remove GeoVision GV-Series Card Drivers. This dialog box appears. Figure 1-55 3. -
Page 104: Comparison Chart (H/W Compression)
1.15 Comparison Chart (H/W Compression) GV-SDI-204 GV-SDI-204 x 4 Interface PCI-E (x1) PCI-E (x1) x 4 Input Type Video Input NTSC 120 fps 480 fps 1080p 100 fps 400 fps Recording Rate NTSC 240 fps 960 fps 720p and Display 200 fps 800 fps Rate... - Page 105 Video Capture Cards GV-5016 GV-5016 x 2 Interface PCI-E (x1) PCI-E (x1) x 2 Input Type Video Input NTSC 480 fps 960 fps Total Recording Rate (D1) 400 fps 800 fps NTSC 480 fps 960 fps Display Rate 400 fps 800 fps H.264 Video Codec...
- Page 106 GV-4008A GV-4008A x 2 Interface PCI-E (x1) PCI-E (x1) x 2 Input Type Video Input Total Recording Rate NTSC 240 fps 480 fps (D1) 200 fps 400 fps NTSC 240 fps 480 fps Display Rate 200 fps 400 fps H.264 Video Codec Geo MPEG4, Geo H.264 704 x 480...
- Page 107 Video Capture Cards GV-4008 GV-4008 x 2 Interface PCI-E (x1) PCI-E (x1) x 2 Input Type Video Input NTSC 240 fps 480 fps Total Recording Rate (D1) 200 fps 400 fps NTSC 240 fps 480 fps Display Rate 200 fps 400 fps H.264 Video Codec...
- Page 108 GV-3008 GV-3008 x 2 Interface PCI-E (x1) PCI-E (x1) x 2 Input Type D-Type Video Input Total Recording Rate NTSC 240 fps 480 fps (D1) 200 fps 400 fps NTSC 240 fps 480 fps Display Rate 200 fps 400 fps H.264 Video Codec Geo MPEG4, Geo H.264...
-
Page 109: Comparison Chart (S/W Compression: Single Card)
Video Capture Cards 1.16 Comparison Chart (S/W Compression: Single Card) GV-600A GV-650A GV-800A Interface PCI, PCI-E (x1) Input Type BNC, D-Type D-Type BNC, D-Type 1, 2, 4, 6, 8, Video Input 4, 8, 12, 16 4, 8, 12, 16 10, 12, 14, 16 NTSC 30 fps 60 fps... - Page 110 GV-600B GV-650B GV-800B GV-900A Interface PCI, PCI-E (x1) PCI-E (x1) Input Type Video Input 4, 8, 16 8, 16, 32 NTSC 30 fps 60 fps 120 fps 240 fps Total 25 fps 50 fps 100 fps 200 fps Recording NTSC 15 fps 30 fps 60 fps...
- Page 111 Video Capture Cards GV-1008 GV-1120A GV-1240A GV-1480A Interface PCI-E (x1) Input Type D-Type, DVI Video Input 8, 12, 16 8, 16 NTSC 240 fps 120 fps 240 fps 480 fps 200 fps 100 fps 200 fps 400 fps Total Recording Rate NTSC 240 fps...
- Page 112 GV-1120B GV-1240B GV-1480B Interface PCI-E (x4) Input Type Video Input NTSC 120 fps 240 fps 480 fps 100 fps 200 fps 400 fps Total Recording Rate NTSC 120 fps 240 fps 480 fps 100 fps 200 fps 400 fps NTSC 480 fps 480 fps 480 fps...
-
Page 113: Comparison Chart (S/W Compression: Two Cards)
Video Capture Cards 1.17 Comparison Chart (S/W Compression: Two Cards) GV-600A x 2 GV-650A x 2 GV-800A x 2 PCIx 2, PCI-E(x1) x 2, Interface PCI x 2 PCI-E(x1)x 2, PCI x 1 + PCI-E(x1) x 1 PCIx 1 + PCI-E(x1)x 1 Input Type BNC, D-Type D-Type... - Page 114 GV-600B x 2 GV-650B x 2 GV-800B x 2 GV-900A x 2 PCI-E (x1) x 2, PCI x 1 + PCI-E Interface PCI-E (x1) x 2 (x1) x 1 Input Type Video Input 8, 12, 16, 20, 24, 32 16, 24, 32 NTSC 60 fps 120 fps...
- Page 115 Video Capture Cards GV-1008 x 2 GV-1120A x 2 GV-1240A x 2 GV-1480A x 2 Interface PCI-E (x1) x 2 Input Type D-Type, DVI Video Input 16, 20, 24, 28, 32 16, 24, 32 NTSC 480 fps 240 fps 480 fps 960 fps 400 fps 200 fps...
- Page 116 GV-1120B x 2 GV-1240B x 2 GV-1480B x 2 Interface PCI-E (x4) x 2 Input Type Video Input NTSC 240 fps 480 fps 960 fps 200 fps 400 fps 800 fps Total Recording Rate NTSC 240 fps 480 fps 960 fps 200 fps 400 fps 800 fps...
-
Page 117: Chapter 2 Hardware Accessories
Chapter 2 Hardware Accessories This chapter includes the following information: • System requirements • Packing list • Connection diagrams • Specifications • Driver installation... -
Page 118: Gv-Multi Quad Card
2.1 GV-Multi Quad Card The GV-Multi Quad Card connects up to 5 TV monitors (spot monitors). One port supports up to 16 screen divisions, while the other 4 ports support 1 and 4 screen divisions. It also allows self-defined channel sequence and position changes of divisions on the monitor screen. - Page 119 Hardware Accessories Connections • Use the supplied Ribbon Cable to connect the GV-Multi Quad Card to the GV-Video Capture Card as illustrated below. 40-Pin Ribbon Cable GV-Video Capture Card 1-5 D-Type TV 1 Video Cable TV 2 TV 3 TV 4 GV-Multi Quad Card TV 5 Figure 2-1 GV-Multi Quad Card connections...
- Page 120 Connections with Two Video Capture Cards In the computer where two video capture cards are installed, the GV-Multi Quad Card should connect to only one video capture card. Use the supplied Ribbon Cable to connect the GV- Multi Quad Card to the video capture card of your choice. Figure 2-2...
-
Page 121: Ordering Information
Hardware Accessories Installing Drivers After you install the GV-Multi Quad Card to the computer, the Hardware Wizard will automatically detect the device. Ignore the wizard, and follow the steps in 1.8 Installing Drivers to install drivers. To verify the drivers are installed correctly, go to Device Manager. Expanding the Sound, video and game controllers field, you should see the entries for GVTVOUT Audio #A and GVTVOUT Video Capture #A. -
Page 122: Gv-Loop Through Card
2.2 GV-Loop Through Card The GV-Loop Through Card is designed to take the video signal directly from the GV-Video Capture Card, without internal device processes, and then split it into 16 signals while maintaining video quality. With the duplicate 16 signals, the card can meet your need for multiple monitors. - Page 123 Hardware Accessories Connections • Connect D-type cables and the GV-Video Capture Card to the GV-Loop Through Card as illustrated below. GV Video Capture Card 40-Pin Ribbon Cable Video out 1~8 1-8 D-Type (Loop out) Video Cable 9-16 D-Type Video Cable Video out 9~16 (Loop out) GV-Loop Through Card...
- Page 124 Connections with Two Video Capture Cards If your system is equipped with two video capture cards, you can connect the GV-Loop Through Card to each video capture card. Specifications Interface for GV-Video Capture Card 40-Pin Connector x 2 DB15 Connector x 2 Output Interface 40-Pin Connector x 1 Input Signal...
-
Page 125: Gv-Net Card V3.1
Hardware Accessories 2.3 GV-NET Card V3.1 The GV-NET Card is a RS-485 / RS-232 interface converter. This Card connects to the RS- 232 port or USB port on your computer, and allows RS-485 devices, such as PTZ domes, to be connected through the Card. Packing List 1. - Page 126 RS-485 Device Connections To connect the GV-NET Card to the RS-485 devices, there are three ways of connections. See the pictures below. You can connect a RJ-11 to DB9 Cable to the PC's COM Port when a RS-485 device is connected. PTZ Dome RS-485+ RS-485-...
- Page 127 Hardware Accessories You can connect a 3-Pin Internal USB Cable to the USB connectors on the PC's Motherboard when a RS-485 device is connected. PTZ Dome RS-485+ RS-485- (white) DM (D-) 3-pin Internal (green) DP (D+) USB Cable (black) (white) (green) Connects to the USB (black)
-
Page 128: Gv-Net/Io Card V3.1
2.4 GV-NET/IO Card V3.1 The GV-NET/IO Card is a RS-485 / RS-232 interface converter, providing 4 inputs and 4 relay outputs as well. It supports both DC and AC output voltages. Key Features • A USB port is provided for PC connection, and it is used with 30 DC output voltages. •... - Page 129 Hardware Accessories Overview Relay Out 1 GV-NET I/O Card Relay Out 2 Relay Out 3 Relay Out 4 1 O N Input 1 Input 2 Input 3 Input 4 Ground RS-485 + RS-485 - 4-pin to 4-pin Mini Power Cable 20-pin Ribbon Cable GV Video Capture Card...
- Page 130 Ensure to connect the GV-NET/IO Card to the 20-pin GV-NET/IO port on the GV- Combo A Card as illustrated below. The wrong connection may lead to the GV- NET/IO Card or the GV-Combo A Card to be damaged, causing Video Lost or an error message of “can’t find keypro”...
- Page 131 Hardware Accessories Connections with Two Video Capture Cards If your system is equipped with two video capture cards, connect the GV-NET/IO Card to the video capture card of 1-16 channels. Connections in NET/IO Card Mode For the connections in the NET/IO Card Mode, please follow the instructions below: •...
- Page 132 2. You can connect a RJ-11 to USB Cable to the PC's USB Port when a RS-485 device is connected. (Allowed for AC/DC Output Voltage) GV Video Capture Card PTZ Dome RS-485+ RS-485- With 2-pin header RJ-11 to USB Cable Connects to PC's USB Port Figure 2-12 Note: It is required to install the USB driver.
- Page 133 Hardware Accessories Connections In I/O Box Mode For the connections in the I/O Box Mode, please follow the instructions below: • It is not necessary to connect the GV-NET/IO Card to GV-Video Capture Card. • Connect the GV-NET/IO Card to the PC by one of the following three ways. Three Ways of Connections of GV-NET/IO Card and PC: 1.
- Page 134 2. You can connect a RJ-11 to USB Cable to the PC's USB Port. (Allowed for DC Output Voltage only) Figure 2-15 Note: It is required to install the USB driver. For details, see 2.22 Installing USB Driver. 3. You can connect a 3-Pin Internal USB Cable to the USB Connectors on the PC's Motherboard.
- Page 135 Hardware Accessories Switching Modes The GV-NET/IO Card provides two modes for users to expand its capability: I/O Box Mode and NET/IO Card Mode. With a mode-switch jumper to insert on the 2-pin header, you can switch between modes. • NET/IO Card Mode (default): With the switch jumper inserted, this default mode acts as a GV-NET/IO Card.
- Page 136 Extended Connections Via the RS-485 connectors, up to 4 GV-NET/IO Cards can be chained together when the GV-NET/IO Card is on the I/O Box mode. For extended connections, the address assignment is shown below. Figure 2-18 Note: When the GV-NET/IO Card is set to the I/O Box Mode, it can have extended connections with GV-I/O Boxes.
- Page 137 Hardware Accessories Specifications 32-bit Windows XP / Vista / 7 / Server 2008 OS Supported 64-bit Windows 7 / Server 2008 Input Input Input Signal Dry Contact, Wet Contact 9~30V AC/DC Relay Output Relay Status Normal Open Output USB Connection 30V DC, 3A Relay Capacitance 125 / 250V AC, 3A...
-
Page 138: Gv-Hub V2
2.5 GV-Hub V2 The GV-Hub V2 adds four RS-232/RS-485 serial ports through your computer’s USB port. The USB solution for serial port extension is perfect for any RS-485 to RS-232 conversion requirements, such as POS and PTZ applications. Packing List 1. - Page 139 Hardware Accessories Connections Following provides two examples of using the GV-Hub V2: Connecting POS Systems The GV-Hub V2 can provide a local connection for up to four POS systems, and deliver transaction data to the GV-System over a USB cable. Figure 2-21 Connecting RS-485 Devices With the GV-Hub V2, the GV-System can connect up to 16 PTZ domes and nine GV-I/O...
- Page 140 Extending Transmission over the Distance The transmission signals between the RS-485 communications become weak over the distance. To maintain the signals, switch on the Terminal Resistance Switch to reduce the resistance value. The loger the distance, the smaller the resistance value (Ω) should be switched on.
- Page 141 Hardware Accessories Specifications 32-bit Windows XP / Vista / 7 / Server 2008 OS Supported 64-bit Windows 7 / Server 2008 Signal: DCD, RxD, TxD, DTR, GND, DSR, RTS, CTS RS-232 Connecter: DB9 Male x 4 (A, B, C, D) Serial Interface Signal: D+, D- RS-485...
-
Page 142: Gv-Com V2
2.6 GV-COM V2 The GV-COM V2 adds one RS-485 serial port through your computer’s USB port. The USB solution for serial port extension is perfect for any RS-485 to RS-232 conversion requirement such as POS and PTZ applications. Packing List 1. - Page 143 Hardware Accessories Extending Transmission over the Distance When the transmission signals between the RS-485 communications become weak over the distance, switch on the Terminal Resistance Switch to maintain the signals. The diagram below illustrates how to use the Terminal Resistance Switch to maintain the signals: Figure 2-26 Terminal Resistor connections Terminal Resistance Switch...
- Page 144 Specifications 32-bit Windows XP / Vista / 7 / Server 2008 OS Supported 64-bit Windows 7 / Server 2008 Signal: RS485+, RS485- RS-485 Connector: Terminal Resistance Switch (120Ω) Serial Interface Serial Line 16 KV ESD for All Signals Protection Compliance USB 2.0 Backward Compatible Speed Full speed 12 Mbps...
-
Page 145: Gv-I/O 12-In Card V3
Hardware Accessories 2.7 GV-I/O 12-In Card V3 The GV-I/O 12-In Card is designed to work with the GV-NET/IO Card. With 12 digital inputs, the GV-I/O 12-In Card can expand the GV-System’s capacity up to 16 digital inputs. System Requirements • GV-NET/IO Card Packing List 1. - Page 146 Connections Insert the GV-I/O 12-In Card to an empty card slot. Connect the 20-Pin Ribbon Cable to the GV Video Capture Card, the GV-I/O 12-Out Card, and the GV-NET/IO Card as shown below. Connect to GV-NET/IO Card and GV-IO 12-Out Card GV-IO 12-In Card Input 5 Input 6...
- Page 147 Hardware Accessories Note: 1. Use of DIP switch: a. Use the switch for dry contact and 9-30V wet contact. b. The card allows the use of mixing dry and wet contact devices together. (Default Setting: Dry Contact) c. The 12 inputs divided as four-in-one groups are related to the three switches on the card for dry and wet contact.
-
Page 148: Gv-I/O 12-Out Card V3
2.8 GV-I/O 12-Out Card V3 The GV-I/O 12-Out Card is designed to work with the GV-NET/IO Card. With 12 relay outputs, the GV-I/O 12-out Card can expand the GV-System’s capacity up to 16 relay outputs. System Requirements • GV-NET/IO Card Packing List 1. - Page 149 Hardware Accessories Connections Insert the GV-I/O 12-Out Card to an empty card slot. Connect the 20-Pin Ribbon Cable to the GV Video Capture Card, the GV-I/O 12-In Card, and the GV-NET/IO Card as shown below. Connect to GV-NET/IO Card and GV-IO 12-In Card GV-IO 12-Out Card Relay Out 5...
- Page 150 Specifications 32-bit Windows XP / Vista / 7 / Server 2008 OS Supported 64-bit Windows 7 / Server 2008 Relay Output Relay Status Normal Open Output USB Connection 30V DC, 3A Relay Capacitance RS-232 125 / 250V AC, 3A Connection DC IN DC 5V, 1A 0~50 Degree C / 32~122 Degree F...
-
Page 151: Gv-I/O Box (16 Ports)
Hardware Accessories 2.9 GV-I/O Box (16 Ports) The GV-I/O Box 16 provides 16 inputs and 16 relay outputs, and supports both DC and AC output voltages. Key Features • 16 inputs and 16 outputs are provided. • Up to 9 pieces of GV-I/O Box 16 can be chained together. •... - Page 152 Overview Figure 2-30 DIP Switch The GV-I/O Box 16 allows the use of mixing dry and wet contact devices together. The 16 inputs divided as four-in-one groups (A, B, C and D) are related to the 4 switches on the box for dry and wet contact.
- Page 153 Hardware Accessories Connections to PC There are three ways to connect the GV-I/O Box 16 to the PC: (1) Use the USB cable to connect the PC. (2) Through the option of GV-Hub, GV-COM, GV-NET Card or GV-NET/IO Card, use the RS-485 connectors to connect the PC.
- Page 154 Assigning Addresses to GV-I/O Box 16 Up to 9 pieces of GV-I/O Box 16 can be chained together to expand the I/O capacity. Use the ID switch (1~9) to assign addresses 1~9 to the connected GV-I/O Box 16. Output Output Output Input Input...
- Page 155 Hardware Accessories Extending Transmission over the Distance When the transmission signals between the RS-485 communications become weak over the distance, switch on the Terminal Resistance Switches to maintain the signals. Three conditions below illustrate how the Terminal Resistance Switches should be switched on. 1.
- Page 156 3. Multiple pieces of GV-I/O Box 16 are connected with the PC through separate RS-485 cables. After you connect multiple pieces of GV-I/O Box 16 with the PC through separate RS- 485 cables, switch on Terminal Resistance Switches of the connected piece of GV-I/O Box 16 at the end of each cable.
- Page 157 Hardware Accessories Specifications Input Input Dry Contact Input Signal Wet Contact, 9-30V AC/DC Relay Output Relay Status Normal Open Output 30V DC, 3A Relay Connection Capacitance RS-485 125 / 250V AC, 3A Connection 30V DC, 3A Ethernet RJ-45, 10/100 Mbps (Optional) DC IN DC 12V, 1A Address...
-
Page 158: Gv-I/O Box (8 Ports)
2.10 GV-I/O Box (8 Ports) The GV-I/O Box 8 provides 8 inputs and 8 relay outputs, and supports both DC and AC output voltages. Key Features • 8 inputs and 8 outputs are provided. • Up to 9 pieces of GV-I/O Box 8 can be chained together. •... - Page 159 Hardware Accessories Overview Figure 2-37 DIP Switch The GV-I/O Box 8 allows the use of mixing dry and wet contact devices together. The 8 inputs divided as four-in-one groups (A and B) are related to the 2 switches on the box for dry and wet contact.
- Page 160 Connections There are three ways to connect a GV-I/O Box 8 to the PC: (1) Use the USB cable to connect the PC. (2) Through the option of GV-Hub, GV-COM, GV-NET Card or GV-NET/IO Card, use the RS-485 connectors to connect the PC. (3) Through network connection that is an optional function.
- Page 161 Hardware Accessories Assigning Addresses to GV-I/O Box 8 Up to 9 pieces of GV-I/O Box 8 can be chained together to expand the I/O capacity. Use the ID switch (1~9) to assign addresses 1~9 to the connected pieces of GV-I/O Box 8. Output Input Output...
- Page 162 Extending Transmission over the Distance When the transmission signals between the RS-485 communications become weak over the distance, switch on the Terminal Resistance Switches to maintain the signals. Three conditions below illustrate how the Terminal Resistance Switches should be switched on. 1.
- Page 163 Hardware Accessories 3. Multiple pieces of GV-I/O Box 8 are connected with the PC through separate RS- 485 cables. After you connect multiple pieces of GV-I/O Box 8 with the PC through separate RS- 485 cables, switch on Terminal Resistance Switches of the connected piece of GV-I/O Box 8 at the end of each cable.
- Page 164 Specifications Input Input Dry Contact Input Signal Wet Contact, 9-30V AC/DC Relay Output Relay Status Normal Open Output USB Connection 30V DC, 3A Relay RS-485 125 / 250V AC, 3A Capacitance Connection 30V DC, 3A Ethernet RJ-45, 10/100 Mbps (Optional) DC IN DC 12V, 1A Address...
-
Page 165: Gv-I/O Box (4 Ports)
Hardware Accessories 2.11 GV-I/O Box (4 Ports) As a small but a capable device, the GV-I/O Box 4 provides 4 inputs and 4 relay outputs. It supports both DC and AC output voltages, and provides a USB port for PC connection. Key Features •... - Page 166 Overview Figure 2-44 DIP Switch Dry Contact To change the inputs to different kind of To change the inputs to different kind of contact, push the switch upward. contact, push the switch downward. Note: The RS-485 connectors do not have the conversion function from RS-485 to RS-232. It will not work if you connect RS-485 devices, such as PTZ camera, to the connectors.
- Page 167 Hardware Accessories Connections to PC There are two ways to connect a GV-I/O Box 4 to the PC: 1. Use the RJ-11 to USB cable to connect a GV-I/O Box 4 to the PC. (Allowed for DC Output Voltage only) w w w .
- Page 168 Assigning Addresses to GV-I/O Box 4 Up to 9 pieces of GV-I/O Box 4 can be chained together to expand the I/O capacity. Use the ID switch to assign addresses 1~ 9 to the connected pieces of GV-I/O Box 4. w w w .
- Page 169 Hardware Accessories Extending Transmission over the Distance When the transmission signals between the RS-485 communications become weak over the distance, use the supplied Terminal Resistor to maintain the signals. Three conditions below illustrate how the Terminal Resistors should be inserted. 1.
- Page 170 3. Multiple pieces of GV-I/O Box 4 are connected with the PC through separate RS- 485 cables. After you connect multiple pieces of GV-I/O Box 4 with the PC through separate RS-485 cables, insert the Terminal Resistors in the connected piece of GV-I/O Box 4 at the end of each cable.
-
Page 171: Accessing Gv-I/O Box Over Networks
Hardware Accessories 2.12 Accessing GV-I/O Box over Networks GV-I/O Box 8 and GV-I/O Box 16 come with the option of network connectivity. With network connectivity, GV-I/O Box can be linked to GV-System, GV-GIS and Control Center over networks for I/O management. GV-I/O Box with network connectivity can support two network environments: Fixed IP and DHCP. - Page 172 2.12.1 Fixed IP Connection To assign GV-I/O Box to a fixed IP: Open an Internet browser, and type the default IP address https://192.168.0.100. The login dialog box appears. Type default value admin for both Username and Password, and click OK. This page appears.
- Page 173 To enable the DDNS function, first you should apply for a domain name from the DDNS service provider’s website. There are 2 providers listed in GV-I/O Box: GeoVision DDNS Server and DynDNS.org. To register at GeoVision DDNS Server, see the following instructions.
- Page 174 In the Username field, type a name. Username can be up to 16 characters with the choices of “a ~ z”, “0 ~9”, and “-”. Note that space or “-” cannot be used as the first character. In the Password filed, type a password. Passwords are case-sensitive and must be at least 6 characters.
- Page 175 Click Enable, and select Send to DDNS. Type Host Name, User Name and Password that are registered on the DDNS Server. If you select GeoVision DDNS, the system will automatically bring up the Host Name. Figure 2-57 Click Submit. When the setting is complete, the Status field will indicate: Register...
-
Page 176: Other Setting
2.12.3 Other Setting In the left menu, click Other Setting. This page appears. Figure 2-58 [Device ID] Indicates the current ID of the device. [Connection to IO-BOX] Select Enable to use GV-I/O Box through network or select Disable to use GV-I/O Box through USB or RS-485 connection. GV-I/O Box cannot support more than one method simultaneously. - Page 177 Hardware Accessories 2.12.4 Input Setting In the left menu, click Input Setting. This page appears. Figure 2-59 Enable: Select to enable this Input function to be used by GV-I/O Box. Name: Edit the name of the Input. Input Mode: Configure the input to NC (normally closed) or NO (normally open) mode. Enable Latch: Instead of constant output alarm in N/O and N/C, the option provides a momentary alarm when triggered.
- Page 178 2.12.5 Output Setting In the left menu, click Output Setting. This page appears. Figure 2-60 Enable: Select to enable this Output function to be used by GV-I/O Box. Name: Edit the name of the Output. Output Mode: Configure the input to NC (normally closed) or NO (normally open) mode.
- Page 179 Hardware Accessories 2.12.6 In/Out Monitor In the left menu, click In/Out Monitor. This page appears. Figure 2-61 Input Status: Indicates the current status of the 16 inputs, whether it is On (triggered) or OFF (no input). Output Status: Indicates the current status of the 16 outputs, whether it is ON (triggered) or Off (no output).
-
Page 180: Updating Firmware
2.12.7 Updating Firmware To update the firmware of GV-I/O Box: In the left menu, click Firmware Update. This page appears. Figure 2-62 Click the Browse… button to open the firmware file (*.bin) Click the Upload button. This update procedure may take 60 seconds to complete. When the Update is complete, a dialog box appears and asks you to reboot the system. - Page 181 Hardware Accessories 2.12.8 Changing Login ID and Password In the left menu, click Account Setting. This page appears. You can modify the login name and password. The password is case sensitive and is limited to 4 characters with the choices of “a ~ z”...
-
Page 182: Installing Usb Driver
To use the USB function, it is required to install the driver on the PC. Follow these steps to install the driver: Insert the software CD. It will run automatically and pop up a window. Select Install or Remove GeoVision GV-Series Driver, and then click Install GeoVision USB Devices Driver. This dialog box appears. Figure 2-51 Click Install to install the drivers. -
Page 183: Chapter 3 Software Installation
Chapter 3 Software Installation This chapter includes the following information: • Important notice • Installing a program • Program list... -
Page 184: Before You Start
3.1 Before You Start For optimal performance of your system, it is important to follow these recommendations before installing GV-System software: • It is strongly recommended to use two separate hard disks. One is for installing Windows OS and GV-System software, and the other is for storing recorded files and system logs. -
Page 185: Installing The System
Software Installation 3.2 Installing the System When you insert the Surveillance System Software CD, the Install Program window will pop up automatically: Figure 3-1 The Install Program Window Before installing the system software, make sure DirectX 9.0c is already installed on your computer. - Page 186 In the Install Program window, click Install GeoVision xxx System (ex. Install GeoVision V8.5.5.0 System). To install the Main System, select GeoVision Main System, and follow the on-screen instructions. Follow the above steps to install other programs one by one.
-
Page 187: Program List
Software Installation 3.3 Program List The Surveillance System Software CD includes the following programs: First Page: Main System Remote ViewLog Fast Backup and Restore Multicam System Skype Video Utility GV-IP Device Utility GV-SDCardSync Utility MultiLang Tool Multi View E-Map Server Figure 3-2 First page of program installation Remote E-Map Second page:... - Page 188 Third page: Backup Viewer Mobile Server Local DDNS Server GV-AView for Android Smartphone in Android Market GV-iView for iPhone and iPod Touch in iTunes Store GV-iView HD for iPad in iTunes Store GV-Remote View for BlackBerry Smartphone in BlackBerry App Figure 3-4 Third page of program installation World...
-
Page 189: Chapter 4 Screen Overview
Chapter 4 Screen Overview This chapter provides an overview of the major screens: • Main System • ViewLog • SingleView Viewer • MultiView Viewer • Center V2... -
Page 190: Main System
4.1 Main System... -
Page 191: Screen Overview
Screen Overview The controls in the main screen: Name Description Indicates the camera number matching the port number in the GV Camera Number video capture card. Camera Name Indicates the given camera name. Date/Time Indicates the current date and time. Storage Space Indicates the remaining disk space. -
Page 192: Viewlog
4.2 ViewLog 20 21... - Page 193 Screen Overview The controls in the ViewLog window: No Name Description Camera Name Indicates the given camera name. Camera View Displays the playback video. Arrow Switch Switches between list mode and line mode. Sets up MDB filter. Date Tree Displays date folders. Display Option Specifies event type to display in List Mode or Line Mode.
- Page 194 Functional Panel The controls in the Functional Panel: No Name Description Adds effects to the images. The effect options include: Contrast/Brightness, Light Enhancement, Equalization, 1 Effects Sharpen, Smooth, Grayscale, Undo to Prev. Action, Undo All Effects, Copy Image to Clipboard, Sample, and Advanced Video Analysis.
-
Page 195: Singleview Viewer
Screen Overview 4.3 SingleView Viewer The controls in the SingleView Viewer: No Name Description Indicates the remaining time when you log in as Guest. When the Countdown Timer time is up, you will be logged out automatically. Includes these options: Information, Video, Audio, Preset Go, I/O Menu Control, Alarm Notify, Camera Adjustment, Download and POS/Wiegand. -
Page 196: Multiview Viewer
4.4 MultiView Viewer... - Page 197 Screen Overview The controls in the MultiView Viewer: No Name Description 1 Monitoring Window Displays live video. Displays the connected GV-Systems and their available 2 Host Window cameras. 3 Auto Search Displays all hosts on the same LAN. Select the desired camera for display. If a panorama view is 4 Show Camera Menu created at the GV-System, it is also included in this menu.
-
Page 198: Center V2
4.5 Center V2... - Page 199 Screen Overview The controls in the Center V2 window: No Name Description 1 Monitoring Window Displays live video. Indicates the date, time, remaining disk space and the total 2 Status Panel number of online channels versus available channels. 3 Find A Subscriber Searches for desired ID in the Current Subscriber field.
-
Page 200: Troubleshooting
Troubleshooting... - Page 201 Troubleshooting GV-System is designed to provide you with trouble-free performance. If it does not appear to be functioning correctly, please make sure all connectors are properly attached and follow these troubleshooting steps: GV-System has video and/or audio lost. If your GV-System fails to show video, audio or both, try these steps: Check the video/audio connection.
- Page 202 Panel”, Chapter 1, DVR User’s Manual on the Surveillance System Software CD. If multiple PTZ cameras are installed, make sure to activate each PTZ camera individually. How can I find more help? Visit our website at http://www.geovision.com.tw/english/4_1.asp Write us at support@geovision.com.tw...
Need help?
Do you have a question about the IGV8550-A and is the answer not in the manual?
Questions and answers