
Related Manuals for Mercury Bravo Three


Summary of Contents for Mercury Bravo Three
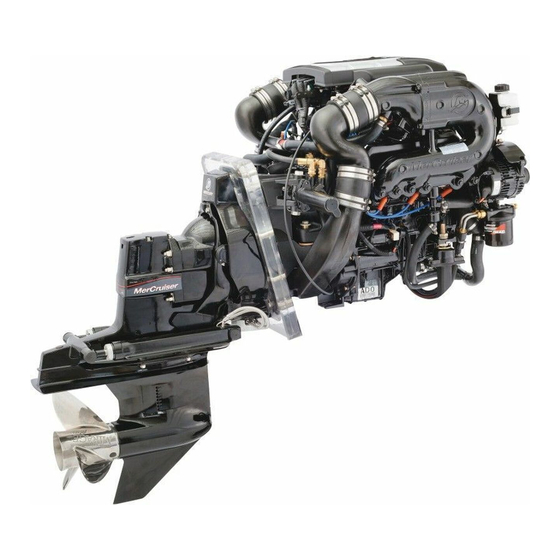
- Page 1 OPERATION & MAINTENANCE MANUAL 7.4L Bravo Three 1995, Brunswick Corporation 90-805718960 595...
- Page 2 MerCruiser Dealer about service, always specify model and serial numbers. The description and specifications contained herein were in effect at the time this guide was approved for printing. Mercury Marine, whose policy is one of continuous improvement, reserves the right to discontinue models at any time, or to change specifications or designs, without notice and without incurring obligation.
- Page 3 71348 71352 71350 ABC12345Z123 71773 48-12345 71360...
-
Page 4: Table Of Contents
CB390 Table Of Contents Page Welcome! ........... . . Read This Manual Thoroughly . - Page 5 Page Maintenance ..........Maintenance Aids .
-
Page 6: Welcome
CA165 Welcome! You have selected one of the finest marine power packages available. It in- corporates numerous design features to assure operating ease and durabil- ity. With proper care and maintenance, you will thoroughly enjoy using this product for many boating seasons. To ensure maximum performance and carefree use, we ask that you thoroughly read this manual. -
Page 7: Read This Manual Thoroughly
CA166 Read This Manual Thoroughly IF YOU DON’T UNDERSTAND ANY PORTION, CONTACT YOUR DEALER FOR A DEMONSTRATION OF ACTUAL STARTING AND OPERATING PROCEDURES. NOTICE Throughout this publication, and on your power package, WARN- INGS and CAUTIONS, accompanied by the International Hazard Symbol , may be used to alert the installer/user to special instruc- tions concerning a particular service or operation that may be haz-... -
Page 8: Lanyard Stop Switch
CA280 Lanyard Stop Switch 74608 Some boats come equipped with a lanyard stop switch. A lanyard stop switch can also be installed as an accessory. The purpose of this switch is to turn off the engine ignition whenever the operator (when attached to the lanyard) moves far enough away from the operator’s position to activate the switch. - Page 9 ADVANTAGES: The purpose of a lanyard stop switch is to stop the engine ignition whenever the operator (when attached to the lanyard) moves far enough away from the operator’s position to activate the switch. This would occur if the operator falls or moves within the boat a sufficient distance from the operator’s position.
-
Page 10: Safe Boating Suggestions
CA281 Safe Boating Suggestions In order to safely enjoy the waterways, familiarize yourself with local and other governmental boating regulations and restrictions, and consider the following suggestions. Know and obey all nautical rules and laws of the waterways. Boat operators should complete a boating safety course. Courses are offered in the U.S.A. - Page 11 Know signs of weather change and avoid foul weather and rough-sea boating. Tell someone where you are going and when you expect to return. Passenger boarding. Stop the engine whenever passengers are boarding, unloading or are near the back (stern) of the boat. Just shifting the drive unit into neutral is not sufficient.
- Page 12 Never drive your boat directly behind a water skier in case the skier falls. As an example, your boat traveling at 25 miles per hour (40 km/hr) in 5 seconds will overtake a fallen skier who was 200 feet in front of you. Watch fallen skiers.
-
Page 13: Protecting People In The Water
For additional information, obtain a copy of our “Hi-Performance Boat Operation” booklet (Part Number 90-86168--3) from your dealer, distributor, or Mercury Marine. -
Page 14: Conditions Affecting Operation
Conditions Affecting Operation Weight Distribution Positioning of weight (passengers and gear) inside the boat has the following effects: Shifting weight to rear (stern) will: Generally increases speed and engine RPM. At extremes can cause boat to porpoise. Causes bow to bounce in choppy water. Increases danger of following wave splashing into boat when coming off plane. -
Page 15: Cavitation
Cavitation Cavitation occurs when water flow cannot follow the contour of a fast-moving underwater object, such as a gear housing or propeller. Cavitation permits the propeller to speed up, but the boat speed to reduce. Cavitation can seriously erode the surface of the gear hous- ing or propeller. - Page 16 IMPORTANT: The engines covered in this manual are equipped with an RPM rev-limiter that is set to an upper (or limited) RPM amount. This limit is slightly above the normal operating range of the engine and is designed to help prevent damage from ex- cessive engine RPM.
-
Page 17: How Elevation And Climate Affect Performance
CA12 How Elevation And Climate Affect Performance Elevation has a very noticeable effect on the wide-open-throttle pow- er of an engine. Since air (containing oxygen) gets thinner as eleva- tion increases, the engine begins to starve for air. Humidity, baromet- ric pressure and temperature do have a noticeable effect on the density of air. -
Page 18: Important Information
CA13 Important Information Operation And Maintenance OWNER/OPERATOR RESPONSIBILITIES It is the operator’s responsibility to perform all safety checks; to en- sure that all lubrication and maintenance instructions are complied with for safe operation and to return the unit to an Authorized Mer- Cruiser Dealer for a periodic checkup. -
Page 19: Freezing Temperature Operation
CA15 Freezing Temperature Operation IMPORTANT: It boat is operated during periods of freezing tem- perature, precautions must be taken to prevent freezing dam- age to power package. Refer to “COLD WEATHER or EX- TENDED STORAGE” for draining instructions. CA17 Drive Unit Impact Protection The Power Trim hydraulic system is designed to provide impact pro- tection for drive unit. -
Page 20: Attention Required After Submersion
CA18 Attention Required After Submersion Before recovery, contact a MerCruiser Dealer. After recovery, immediate service by an Authorized MerCruiser Dealer is required to prevent serious damage to power package. CA19 Trailering Boat Boat can be trailered with drive unit in “up” or “down” position. Ade- quate road clearance is required between road and gear housing skeg when trailering with drive unit in “down”... -
Page 21: Launching And Boat Operation Care
Mercury Marine of the model and serial number(s) and to whom the recovery is to be reported. This “Stolen Motor” information is placed into a file at Mercury Marine to aid authorities and dealers in recovery of stolen motors. -
Page 22: Replacement Service Parts
CA22 Replacement Service Parts WARNING Electrical, ignition and fuel system components on MerCruiser gasoline power packages are designed and manufactured to comply with U.S. Coast Guard rules and regulations to minimize risks of fire or explosion. Use of replacement electrical, ignition or fuel system compo- nents, which do not comply to these rules and regulations, could result in a fire or explosion hazard and should be avoided. -
Page 23: Do-It-Yourself Maintenance Suggestions
CA23 Do-It-Yourself Maintenance Suggestions If you are one of those persons who likes to do-it-yourself, here are some suggestions for you. Present-day marine equipment, such as your MerCruiser power package, are highly technical pieces of machinery. Electronic ig- nition and special carburetion provide greater fuel economies, but also are more complex for the untrained mechanic. -
Page 24: 20-Hour Break-In Period
CA24 20-Hour Break-In Period IMPORTANT: The first 20 hours of operation is the engine break-in period. Correct break-in is essential to obtain mini- mum oil consumption and maximum engine performance. Dur- ing this break-in period, the following rules must be observed: Do not operate below 1500 RPM for extended periods of time for first 10 hours. - Page 25 CB270 20-Hour Checkup After first 20 hours of operation, an Authorized MerCruiser Dealer should be contacted for the following maintenance. The boat owner is responsible for any charges. Change crankcase oil and filter. Retorque intake manifold to 35 lb.ft. (48 N·m). Check all fluid levels.
- Page 26 CA26 70515 70516 70514 70517 70523 70522 70518 70520 70521 70519...
-
Page 27: Operation
CA27 Operation Instrumentation The following is a brief explanation of instrumentation typically found on some boats. The owner/operator should be familiar with all instru- ments and their functions on the boat. Because of the large variety of instrumentation and manufacturers, you should have your boat dealer explain the particular gauges and normal readings that will ap- pear on your style gauges. - Page 28 CB218 70516 70518 71987...
- Page 29 CB200 Audio Warning System Your MerCruiser power package is equipped with an Audio Warning System. The audio warning system buzzer will sound if one of the following occur: A Insufficient Oil Pressure B Excessive Engine Temperature C Insufficient Drive Lubricant NOTE: To provide a test of the system, the audio warning buzzer will sound when the ignition switch is first turned to the run position, prior to cranking the engine.
- Page 30 CB125 71466 70525 70527 70528 71773 70526...
-
Page 31: Electrical System Overload Protection
CA30 Electrical System Overload Protection If an electrical overload occurs, a fuse will blow or the circuit breaker will trip open. The cause must be found and corrected before replac- ing fuse or resetting circuit breaker. A circuit breaker provides protection for engine wiring harness and instrumentation power lead. - Page 32 CB181...
-
Page 33: Remote Controls (Panel Mounted)
CB182 Remote Controls (Panel Mounted) Your boat may be equipped with one of many Quicksilver remote controls available. All controls feature an integral safety switch that allows starting engine in NEUTRAL only. Also, all controls may not have all features shown. If boat is equipped with a remote control oth- er than shown, consult your dealer for a description and/or demon- stration of the control. - Page 34 CB183...
-
Page 35: Remote Controls (Console Mounted)
CB184 Remote Controls (Console Mounted) Control Handle(s) - Operation of the the shift and throttle are controlled by the movement of the control handle. “Push” the control handle forward from “Neutral” with a quick firm motion to the first det- ent for “Forward”... - Page 36 CB185 71339 70537...
-
Page 37: Remote Controls (Two Lever)
CB186 Remote Controls (Two Lever) Shift Lever - shifts unit into gear with full lever movement. Move lever forward to shift to FORWARD gear. Move lever backward to shift to REVERSE gear. Lever in full vertical position shifts to NEU- TRAL. - Page 38 CA34 3 - 5 71338...
-
Page 39: Power Trim
CA284 Power Trim Power Trim allows the operator to adjust the drive angle, while under- way, to provide the ideal boat angle for varying load and water condi- tions. Also, the Power Trim system “Trailering” feature allows the op- erator to raise and lower the drive unit for trailering, beaching, launching and low speed (below 1200 RPM engine speed), shallow water operation. - Page 40 CB187 73976 73977...
- Page 41 CB188 POWER TRIM OPERATION - PANEL MOUNT REMOTE CONTROL IMPORTANT: If TRAILER button is held depressed after drive unit reaches end of upward travel, an internal circuit breaker will open and pump will stop. Should this happen, release button and allow motor to cool for about one minute. Circuit breaker will reset and Power Trim operation may be resumed.
- Page 42 CB190 73979 73978...
- Page 43 CA285 POWER TRIM OPERATION - DUAL ENGINE CONSOLE MOUNT REMOTE CONTROL (TWO BUTTON AND THREE BUTTON VERSIONS) IMPORTANT: If TRAILER button is held depressed after drive unit reaches end of upward travel, an internal circuit breaker will open and pump will stop. Should this happen, release button and allow motor to cool for about one minute.
- Page 44 CB192 70540 70540 70540...
- Page 45 CB193 POWER TRIM OPERATION - THREE BUTTON TRIM PANEL (USED ON MODELS WITHTWO-LEVER CONTROL) IMPORTANT: If TRAILER button is held depressed after drive unit reaches end of upward travel, an internal circuit breaker will open and pump will stop. Should this happen, release button(s) and allow motor to cool for about one minute.
-
Page 46: Starting, Shifting And Stopping
CA40 Starting, Shifting And Stopping WARNING Before starting engine, operate bilge blower for at least five min- utes to remove any explosive fumes from engine compartment. If boat is not equipped with a bilge blower, open engine hatch and leave open while starting engine. IMPORTANT: Observe the following: Do not start engine without water being supplied to seawater pickup pump (to prevent pump or engine damage). - Page 47 FLOODED ENGINE - Move control/throttle lever to full throttle. Be prepared to decrease engine speed to 1000-1500 RPM as soon as engine starts. F Turn ignition key to START Release key when engine starts and allow switch to return to RUN position. Move control/ throttle lever back to decrease engine RPM to 1000-1500 RPM if necessary.
-
Page 48: Operation Chart
CA41 Operation Chart BEFORE AFTER WHILE AFTER STARTING STARTING UNDERWAY STOPPING Open engine Observe all Observe all Turn ignition hatch. gauges to gauges to key OFF. monitor check engine condition of condition. engine. If not normal, stop engine. Turn battery Check Turn bat- switch ON, if so... -
Page 49: Specifications
CA261 Specifications Fuel Recommendations IMPORTANT: Use of improper gasoline can damage your en- gine seriously. Engine damage resulting from use of improper gasoline is considered misuse of engine, and damage caused thereby will not be covered under the limited warranty. FUEL RATINGS MerCruiser engines will operate satisfactorily when using a major brand of unleaded gasoline as follows:... - Page 50 The fuel system components on your MerCruiser engine will with- stand up to 10% alcohol content in the gasoline. We do not know what percentage your boat’s fuel system will withstand. Contact your boat manufacturer for specific recommendations on the boats fuel system components (fuel tanks,fuel lines, and fittings).
-
Page 51: Crankcase Oil
Quicksilver Gasoline Stabilizer for Marine Engines (92-817529A12) is highly recommended for addition during storage periods. See “Cold Weather or Extended Storage” later in this manual. CA43 Crankcase Oil To help obtain optimum engine performance and to provide maxi- mum protection, we strongly recommend the use of Quicksilver 4-Cycle Marine Engine Oil. -
Page 52: Engine Specifications
CB175 Engine Specifications 7.4L Bravo Three MODEL Propshaft Horsepower Propshaft Kilowatts 454 C.I.D. Displacement (7.4 L) Engine Type 4.25 in. Bore (108mm) 4.00 in. Stroke (101.6mm) Compression Ratio 8.6:1 150 psi Compression Pressure (1035 kPa) Maximum RPM @ 4200-4600 RPM... -
Page 53: Tune-Up Specifications
CB391 Tune-Up Specifications 7.4L Bravo Three MODEL AC-MR43T or Spark Plug Type Champion RV15YC4 or NGK BR6FS Spark Plug Gap .035 in. (.9mm) Timing @ Idle RPM 10 BTDC Firing Order 1-8-4-3-6-5-7-2 Electrical System 12-Volt Negative (-) Ground Alternator 55 Amps... -
Page 54: Capacities
CB19 Capacities 7.4L Bravo Three MODEL Crankcase Oil 7 U.S. Qts. Capacity (6.6 L) w/New Filter Drive Unit Oil Capacity 3 U.S. Qts. (2.9 L) (w/Reservoir) Seawater Cooling 20 U.S. Qts. System (18.9 L) 28 U.S. Qts. Closed Cooling (26.5 L) System Always use dipstick to determine exact quantity of oil required. -
Page 55: Maintenance
CA290 Maintenance WARNING Always disconnect battery cables from battery before working around electrical system components to prevent injury to your- self or damage to electrical system. IMPORTANT: Refer to MAINTENANCE CHART for complete listing of all scheduled maintenance to be performed. Some list- ings can be done by owner/operator, while others should be performed by an Authorized MerCruiser Dealer. - Page 56 Crankcase Oil - Quicksilver 4-Cycle Marine Engine Oil (Refer to SPECIFICATIONS for alternatives and oil recommendations for va- rying ambient temperatures.) Closed Cooling System Coolant - 50/50 mixture of ethylene glycol antifreeze (must meet GM specification 1825 M) and tap water. Areas where temperatures generally do not go below 32 F (0 C), rust inhibitor and tap water is acceptable.
-
Page 57: Maintenance Chart
CB26 Maintenance Chart Only perform maintenance which applies to your particular power package. SCHEDULED MAINTENANCE TO BE PERFORMED BY OWNER/OPERATOR TASK INTERVAL Engine Crankcase Oil - Check level Closed Cooling Coolant - Check level Power Steering Fluid - Check level Stern Drive Unit Oil - Check level Battery - Check level... - Page 58 CB27 Only perform maintenance which applies to your particular power package. SCHEDULED MAINTENANCE TO BE PERFORMED BY OWNER/OPERATOR TASK INTERVAL Drive Belts (All) - Every 100 Hours of Operation or Inspect condition and 120 Days, Whichever Occurs First. check tension Propeller Shaft - Saltwater use: Every 50 Hours of Lubricate...
- Page 59 CB258 Only perform maintenance which applies to your particular power package. SCHEDULED MAINTENANCE TO BE PERFORMED BY DEALER TASK INTERVAL 20-Hour Checkup (See At First 20 Hours of Operation NOTE 1) Seawater Pickup Pump Whenever Insufficient Seawater Flow -Disassemble and is Suspected.
- Page 60 CB29 Only perform maintenance which applies to your particular power package. SCHEDULED MAINTENANCE TO BE PERFORMED BY DEALER TASK INTERVAL Engine Alignment - Check Every 100 Hours of Operation or Engine Coupling, Once Yearly, Whichever Occurs Universal Joint Shaft First. Splines - Lubricate Universal Joint Cross Every 200 Hours of Operation or...
- Page 61 CB254 Only perform maintenance which applies to your particular power package. SCHEDULED MAINTENANCE TO BE PERFORMED BY DEALER TASK INTERVAL Saltwater use: Every 50 Hours of Engine Exhaust System- Operation or 60 Days, Whichever Inspect for external Occurs First damage,deterioration Freshwater use: Every 100 Hours and restrictions.
- Page 62 CB33 71451 70543 70542 71773 70548 70546 70547 70545...
-
Page 63: Checking Fluid Levels
CA54 Checking Fluid Levels CHECKING CRANKCASE OIL Stop engine. Allow approximately five minutes for oil to drain into oil pan. Boat must be at rest in water. Remove dipstick. Wipe clean and reinstall fully into dipstick tube. Remove dipstick and observe oil level. Oil level must be between FULL and ADD. - Page 64 CB207 71987 71773 70551 70979...
- Page 65 CB40 CHECKING DRIVE UNIT OIL Check gear lube monitor oil level; keep oil level at or near “Fill” line. Check for water at bottom of monitor and/or if oil appears a milk- tan, contact your Authorized MerCruiser Dealer immediately; both conditions indicate a water leak somewhere in the drive unit.
- Page 66 CB43 70572 70571 71451 71773...
-
Page 67: Changing Fluids
CA63 Changing Fluids See MAINTENANCE CHART for lubricant change frequency. Lubri- cant should be changed before placing boat in storage. Power Trim or Power Steering fluids do not require changing. Coolant in closed cooling system should be changed at specified in- tervals by your Authorized MerCruiser Dealer. - Page 68 CB46 71987 71773 72522 70570...
- Page 69 CB49 CHANGING DRIVE UNIT OIL IMPORTANT: Use only Quicksilver High Performance Gear Lube in drive unit. Place drive unit in full trim limit (out) position, remove OIL FILL/ DRAIN SCREW and sealing washer. Remove OIL VENT screw and sealing washer. Allow oil to drain completely.
- Page 70 CB79 70573 71773 71169...
-
Page 71: Water Separating Fuel Filter
CB82 Water Separating Fuel Filter WARNING Be careful when changing water separating fuel filter. Gasoline is extremely flammable and highly explosive under certain con- ditions. Be sure ignition key is OFF. Do not smoke or allow spark or open flame in area when changing fuel filter. Wipe up any spilled fuel immediately. - Page 72 CB177 71903 71904 71901 70556 71359...
-
Page 73: Lubrication
CA286 Lubrication STEERING SYSTEM If Steering Cable Has Grease Fittings: With cable fully retracted into cable housing, lubricate fitting with 2-4-C Marine Lubricant with Teflon. WARNING Do not grease steering cable while extended. Hydraulic lock could occur and cause loss of steering control. NOTE: If steering cable does not have grease fitting, inner wire of cable cannot be greased. - Page 74 CB389 70558 70559...
- Page 75 CB372 DRIVE UNIT AND TRANSOM ASSEMBLY Lubricate gimbal bearing with Quicksilver U-joint and Gimbal Bearing Grease. For propeller shaft lubrication, see PROPELLER. NOTE: Engine coupling and shaft splines are greased with Quicksil- ver Engine Coupler Spline Grease, P/N 92-816391A4; universal joints are greased with Quicksilver U-joint and Gimbal Bearing Grease.
- Page 76 CB373 72239...
-
Page 77: Propeller
Periodically check propeller nut for tightness during boating season. A minimum of 55 lbs. ft. (75 N m) torque is required. CB157 REMOVAL (BRAVO THREE) Place wood block between propeller blades and anti-ventilation plate to prevent rotation. Turn aft propeller shaft nut counterclockwise to remove nut. - Page 78 CB150 72239...
- Page 79 CB345 INSTALLATION (BRAVO THREE) Apply a liberal coat of one of the following Quicksilver lubricants to both propeller shafts: Special Lubricant 101, 2-4-C Marine Lubri- cant with Teflon, or Anti-Corrosion Grease. Slide forward thrust hub onto propeller shaft, with tappered side toward propeller hub (Toward end of shaft).
- Page 80 CB64 70565 71353 70564 71170...
-
Page 81: Flushing Cooling System
CB65 Flushing Cooling System WARNING When flushing, be certain the area around propeller is clear, and no one is standing nearby. To avoid possible injury, remove pro- peller. CAUTION Do not run engine above 1500 RPM when flushing. Suction created by seawater pickup pump may collapse flushing hose, causing engine and/or drive unit to overheat. - Page 82 CB68 70566 70567...
-
Page 83: Cleaning Seawater (Raw Water) Section Of Heat Exchanger And Oil/Power Steering Cooler - Closed Cooling Models Only
CB71 Cleaning Seawater (Raw Water) Section Of Heat Exchanger And Oil/Power Steering Cooler - Closed Cooling Models Only Seawater sections of heat exchanger and oil/power steering cooler should be cleaned at least once a year or whenever decreased cool- ing efficiency is noticed. HEAT EXCHANGER Remove end plate(s), O-rings and gaskets. - Page 84 CB75 70562 70353 70351 70351 70563...
-
Page 85: Drive Belts
CB77 Drive Belts WARNING Make sure engine is shut off and ignition key is removed before inspecting belts. All drive belts must be periodically inspected for condition and ten- sion. Perform the following inspections of alternator drive belt, power steering pump drive belt (if so equipped) and seawater pickup pump drive belt. - Page 86 CB88 70575 70577 70578...
-
Page 87: Corrosion And Corrosion Protection
CB383 Corrosion And Corrosion Protection Whenever two or more dissimilar metals (like those found on the stern drive) are submerged in a conductive solution, such as saltwa- ter, polluted water, or water with a high mineral content, a chemical reaction takes place causing electrical current to flow between met- als. - Page 88 CB384 71966 71804 72029...
- Page 89 A Remove two screws from each anode. B Install new anodes and tighten securely. CB329 NOTE: Bravo Three Models may be equipped with one or two pro- peller anodes. Propeller Anodes (Bravo Three Model) - are located in the splash plate, just above the propellers. To replace the propeller anodes: A Remove the bolts that secure the anodes to the splash plate.
- Page 90 CB392 74631...
- Page 91 CA168 In addition to the corrosion protection devices, the following steps should be taken to inhibit corrosion: IMPORTANT: Corrosion damage that results from the improper application of anti-fouling paint will not be covered by the lim- ited warranty. Painting Boat Hull or Boat Transom: Antifouling paint may be applied to boat hull and boat transom but you must observe the fol- lowing precautions: IMPORTANT: DO NOT paint anodes or MerCathode System ref-...
-
Page 92: Miscellaneous Maintenance
CA103 Miscellaneous Maintenance Battery All lead acid batteries discharge when not in use. Recharge every 30 to 45 days, or when specific gravity drops below battery manufactur- er’s specifications. Refer to specific instructions and warnings accompanying your bat- tery. If this information is not available, observe the following precau- tions when handling a battery. -
Page 93: Bottom Of Boat
CA104 Bottom Of Boat To maintain maximum speed, the following conditions of the boat bot- tom should be observed: Clean, free of barnacles and marine growth. Free of distortion, nearly flat where it contacts water. Straight and smooth, fore and aft. ANTIFOULING PAINTS See Antifouling Paint recommendations and related information on previous pages. -
Page 94: Cold Weather Or Extended
CA278 Cold Weather Or Extended Storage Power Package Lay Up IMPORTANT: This service should be performed by an Autho- rized MerCruiser Dealer. CAUTION DO NOT operate engine without water flowing thru seawater pickup pump, as pump impeller may be damaged and subse- quent overheating damage to engine or stern drive unit may re- sult. - Page 95 Remove flame arrestor and restart engine. While operating en- gine at fast idle (1000-1500 RPM), fog internal surfaces of engine by squirting approximately 8 ounces (227 g) of Quicksilver Storage Seal (or if not available, SAE 20W motor oil) into carburetor bores. Stall engine by squirting last 2 ounces (57 g) of Storage Seal (or oil) rapidly into carburetor.
- Page 96 CB241 74073...
-
Page 97: Draining Instructions
CB242 Draining Instructions DRAINING SEAWATER (RAW-WATER) COOLED MODELS CAUTION If boat is to remain in water after draining, seawater inlet hose must be removed and plugged to prevent a siphoning action that may occur, allowing seawater to flow from the drain holes or removed hoses. - Page 98 CB105 71448 71334 71217 71758...
-
Page 99: Cold Weather Or Extended Storage
CB108 Loosen hose clamps and remove the following hoses: From engine circulating pump. From oil/power steering fluid cooler. Make sure that speedometer pitot tube, trim tab cavity vent hole, and trim tab cavity drain passage are unobstructed. After cooling system has been drained completely, install drain plugs, reconnect hoses and tighten all hose clamps securely. - Page 100 CB111 70583...
- Page 101 CB112 DRAINING CLOSED COOLING (COOLANT) MODELS IMPORTANT: Drain seawater section of closed cooling system only. CAUTION If boat is to remain in water after draining seawater inlet hose must be removed and plugged to prevent a siphoning action that may occur allowing seawater to tow from the drain holes or removed hoses.
- Page 102 CB114 71170 70584 70586 71217...
- Page 103 CB117 Loosen hose clamps and remove the following hoses: NOTE: It may be necessary to lift or bend hoses to allow water to drain completely. Crank engine over slightly with starter motor to purge any water trapped in seawater pickup pump. Do not allow en- gine to start.
-
Page 104: Battery Winter Storage
CA115 Battery Winter Storage Follow battery manufacturer’s instructions for storage. CB309 Power Package Recommissioning WARNING To prevent possible injury or damage to equipment, do not in- stall battery until all maintenance has been performed on en- gine. Check that all cooling system hoses are connected properly and hose clamps are tight. -
Page 105: Troubleshooting
CB215 Troubleshooting Starter Motor Will Not Crank Engine, Or Cranks Slow Possible Cause Remedy Battery switch turned off. Turn switch on. Remote control not in neu- Position control lever in tral position. neutral. Open circuit breaker or Check and reset circuit blown fuse. - Page 106 Engine Will Not Start, Or Is Hard To Start Possible Cause Remedy Improper starting proce- Read starting procedure. dure. Empty fuel tank or fuel Fill tank or open valve. shutoff valve closed. Faulty fuel pump. Check sight tube for fuel. Have Authorized Mer-...
-
Page 107: Poor Performance
Engine Runs Rough, Misses And/Or Backfires Possible Cause Remedy Choke not operating prop- Check that choke is closed erly. when engine is cold. Check that it opens when engine warms up. Idle speed too low. Check idle speed and ad- just, if necessary. - Page 108 Excessive Engine Temperature Possible Cause Remedy Seacock closed. Open. Drive belt loose or in poor Replace and/or adjust belt. condition. Seawater pickups Remove obstruction. structed. Faulty thermostat. Replace. Coolant level low in closed Check for cause of low cooling section coolant level and repair.
-
Page 109: Low Engine Oil Pressure
Low Engine Oil Pressure Possible Cause Remedy Insufficient oil in crank- Check and add oil. case. Check and remove re- Excessive oil in crankcase quired amount of oil. Check (causing it to become for cause of excessive oil aerated). (improper filling, bad fuel pump, etc.). -
Page 110: Steering Wheel Turns Hard Or Jerky
Remote Control Operates Hard, Binds, Has Excessive Free–play Or Makes Unusual Sounds Possible Cause Remedy Insufficient lubrication on Lubricate. shift and throttle linkage fasteners. Loose or missing shift and Check all linkages. If any throttle linkage fasteners. are loose or missing, see Authorized MerCruiser Dealer immediately. - Page 111 Power Trim Does Not Operate (Motor Doesn’t Run) Possible Cause Remedy Blown fuse. Replace fuse. Loose or dirty electrical Check all associated elec- connections or damaged trical connections wiring. wires (especially battery cables). Clean and tighten faulty connection. Repair or replace wiring. Power Trim Does Not Operate (Motor Runs But Drive Unit Does Not Move) Possible Cause...
-
Page 112: Warranty Information
CA262 Warranty Information Owner Warranty Registration UNITED STATES AND CANADA ONLY It is important that your selling dealer fills out the Warranty Regis- tration Card completely and mails it to the factory immediately upon sale of the new product. It identifies name and address of the original purchaser, product model and serial number(s), date of sale, type of use and selling dealer’s code, name and address. -
Page 113: International Owner Registration
International Owner Registration OUTSIDE THE UNITED STATES AND CANADA It is important that your selling dealer fills out the Warranty Regis- tration Card completely and mails it to the distributor or Marine Power Service Center responsible for administering the warranty registration/claim program for your area. -
Page 114: Warranty Policies
Warranty Policies Mercruiser Limited Warranty - Gasoline Engines UNITED STATES AND CANADA ONLY I. We warrant each new production (not those made for high per- formance purposes) MerCruiser Stern Drive Power Package, Inboard Engine and accessories attached thereto, (hereafter referred to as “Product”) to be free from defects in material and workmanship, but only when the consumer sale is made in the country to which distribution is authorized by us. - Page 115 V. Claim shall be made under this warranty by delivering the Prod- uct for inspection to a MerCruiser dealer authorized to service the Purchaser’s product. If purchaser cannot deliver Product to such authorized dealer, he may give notice in writing to the Company.
-
Page 116: Mercruiser International Warranty - Gasoline Engines
Mercruiser International Warranty - Gasoline Engines OUTSIDE THE UNITED STATES AND CANADA I. We warrant each new production (not those made for high per- formance purposes) MerCruiser Stern Drive Power Package, Inboard Engine and accessories attached thereto, (hereafter referred to as “Product”) to be free from defects in material and workmanship, but only when the consumer sale is made in the country to which distribution is authorized by us. - Page 117 V. Purchaser must provide “proof of purchase” and substantiate “date of purchase” by presenting the “Purchaser’s Copy” of the “Warranty Registration Card” or the plastic “Warranty Registra- tion Card” to the dealer authorized to service the Product. lf ei- ther of these items is not available purchaser must provide a copy of the original ”Bill of Sale”...
-
Page 118: Year Limited Warranty Against
3 Year Limited Warranty Against Corrosion Failure (Applicable In The United States, Canada And Australia) I. We warrant parts and assemblies of each 1988 and newer pro- duction MerCruiser (Product) sold with a one year limited Prod- uct warranty or the Bravo and TRS Drive Units on performance Products that have a 90 day limited warranty rendered inopera- tive as a direct result of corrosion, provided the following simple precautionary steps which are specified in Owner’s Manuals... - Page 119 Warranty, contained in this manual, which paragraphs are in- corporated herein by reference. Mercury Marine products are built using the most advanced corro- sion protection process available. This manufacturing system, com- plemented by dealer and customer participation in an anti-corrosion preventive maintenance program, provides protection against repair costs incurred by the effects of marine corrosion.
-
Page 120: Warranty Coverage
OWNER’S RESPONSIBILITY Protection against certain types of corrosion damage must be pro- vided by using such systems as the Quicksilver MerCathode System and/or Galvanic Isolator. These certain types of corrosion damage are: damage due to stray electrical currents (on-shore power con- nections, nearby boats, submerged metal), or improper application of copper base anti-fouling paint. - Page 121 Warranty Does Not Apply To The Following: Minor adjustments and tune-ups, including checking, cleaning or adjusting spark plugs, ignition components, carburetor settings, filters, belts, controls, and checking lubrication made in connec- tion with normal services. Damage caused by neglect, lack of maintenance, accident, ab- normal operation or improper installation or service.
- Page 122 Engine noise does not necessarily indicate a serious engine prob- lem. If diagnosis indicates a serious internal engine condition which could result in a failure, condition responsible for noise should be corrected under the warranty. Lower unit and/or propeller damage caused by striking a sub- merged object is considered a marine hazard.
-
Page 123: Transferable Warranty
Owner Warranty Registration Card and a copy of the bill of sale to show proof of ownership. In the United States and Canada, mail to: Mercury Marine Attn: Warranty Registration Department W6250 West Pioneer Road P.O. Box 1939... -
Page 124: Q-Guard Product Protection Plan
United States And Canada Only (Certain performance products,triple engine installations, and com- mercial applications are excluded) The Mercury Marine Q-Guard Product Protection Plan provides cov- erage against unexpected mechanical and electrical breakdowns that may occur beyond the standard limited warranty. -
Page 125: Owner Service Assistance
Only Authorized Dealers can pur- chase genuine Quicksilver parts and accessories from the factory. Mercury Marine does not sell to unauthorized dealers or retail cus- tomers. When inquiring on parts and accessories, the dealer re- quires the motor model and serial number(s) to order the correct parts. - Page 126 Resolving A Problem Your satisfaction and goodwill are of primary importance to your dealer and to MerCruiser. Any problems with service, sales, warranty or operation of your MerCruiser power package will be resolved by your dealer. He also is your primary source of information on your boat, power package and trailer.
- Page 127 Please bear in mind that Service Centers resolve all problems through the dealership using the dealer’s facilities, equipment and personnel. This is the reason we request you use the preceding steps in sequence when you have a problem or complaint. Our expe- rience has shown that this is the most expedient and successful pro- cedure to follow to ensure satisfaction to our customers.
-
Page 128: Service Centers
UNITED STATES MerCruiser 3003 N. Perkins Road Stillwater, OK 74075-2299 Telephone (405) 743-6566 Fax (405) 743-6570 CANADA Mercury Marine 1156 Dundas Highway East Mississauga, Ontario L4Y 2C2 Canada Telephone (416) 270-4481 Fax (905) 270-4510 MEXICO, CENTRAL AMERICA, SOUTH AMERICA, CARIBBEAN Marine Power International 9350 SW 72nd St. - Page 129 AUSTRALIA, PACIFIC Marine Power International Pty. Ltd. P.O.Box 80,132-140 Frankston Road Dandenong, Victoria 3175 Australia Telephone (61) (3) 791-5822 Fax (61) (3) 791-5880 ASIA Marine Power International Ltd. Block 1002 Jalan Bukit Merah #07-08 Redhill Industrial Estate JTC Flatted Factories Singapore 0315 Telephone (65) 270-7680 Fax (65) 270-7898...
-
Page 130: Customer Service Literature
Customer Service Literature English language publications are available from: Mercury Marine Attn: Publications Department W6250 West Pioneer Road P.O. Box 1939 Fond du Lac, WI 54936-1939 Outside the United States and Canada, contact the nearest Ma- rine Power International Service Center for further information. -
Page 131: General Maintenance Parts
CB393 General Maintenance Parts Engine Parts Part 7.4L Bravo III Oil Filter 14957 Spark Plug 33-59571 Distributor Cap 805759A2 Ignition Coil 392-805570A2 Spark Plug Wire Set 84-816608A61 Thermostat (160 F) 807252--2 Thermostat Gaskets 27-33179--2 27-53045--1 Alternator Belt 57-48122 Power Steering Belt 57-816295T (7”... - Page 132 Drive Parts Part Bravo III Front Propeller Nut 11-805092 Rear Propeller Nut 11-805093 Front Thrust Hub 11-805100T Rear Thrust Hub 11-805101T Decal Set 37-15167A90 D.S.H. Anodic Plate 821630A1 Anodic Plate (Propeller) 76214A5 Trim Cylinder Anodes 806190A1 Gimbal Housing Anode 821631A1 Drain Screw 10-14834A1 Drain Screw O-Ring...
-
Page 133: Literature Order Form
CC172 Literature Order Form Model __________ Horsepower__________ Serial Number__________ Year_____ Service Manual - shows the complete assembly and disassembly of the engine or stern drive. Parts Manual - shows the exploded view of the engine or stern drive with corresponding part number. Operation and maintenance manual (Owner’s Guide) - explains basic operation and maintenance. - Page 134 Please Return with Payment to: Mercury Marine Attn: Publications Dept. P.O. Box 1939 Fond du Lac, WI 54936-1939 Ship To: (Please Print or Type - This is your Shipping Label) Name Address City State METHOD OF PAYMENT: (NO CASH OR C.O.D.)
Need help?
Do you have a question about the Bravo Three and is the answer not in the manual?
Questions and answers