Table of Contents
Advertisement
Quick Links
All of us at Mercury Marine want to thank you for choosing a
Mercury Marine inflatable boat. You have made a sound
investment in boating pleasure. We firmly believe it will bring
you many years of boating fun and excitement.
This owner's manual contains safety and operating
information you need to get the most out of your inflatable
boat. It also contains information on how to provide care and
maintenance to help protect your investment. Store this
manual for future reference.
The operator, passengers, and craft are governed by local,
national, and when applicable, international rules and
regulations of the waterways. If you are not familiar with
these rules and regulations, your state or provincial boating
law enforcement agency can assist you. Safety courses are
available from national and local organizations and are
highly recommended for anyone who is not familiar with the
rules and regulations on operating a boat.
Please read and understand this manual carefully before
operating your inflatable boat.
Warranty Message
The product you have purchased comes with a limited
warranty from Mercury Marine. The terms of the warranty
are set forth in the Warranty Information section of this
manual. The warranty statement contains a description of
what is covered, what is not covered, the duration of
coverage, how to best obtain warranty coverage, important
disclaimers and limitations of damages, and other related
information. Please review this important information.
The description and specifications contained herein were in
effect at the time this manual was approved for printing.
Mercury Marine, whose policy is one of continued
improvement, reserves the right to discontinue models at
any time, and to change specifications, designs, methods, or
procedures without notice and without incurring obligation.
i
eng
Advertisement
Table of Contents

Related Manuals for Mercury Dynamic 250/260


Summary of Contents for Mercury Dynamic 250/260
- Page 1 All of us at Mercury Marine want to thank you for choosing a Mercury Marine inflatable boat. You have made a sound investment in boating pleasure. We firmly believe it will bring you many years of boating fun and excitement.
- Page 2 © 2013, Mercury Marine Alpha, Axius, Bravo One, Bravo Two, Bravo Three, Circle M with Waves Logo, K‑planes, Mariner, MerCathode, MerCruiser, Mercury, Mercury with Waves Logo, Mercury Marine, Mercury Precision Parts, Mercury Propellers, Mercury Racing, MotorGuide, OptiMax, Quicksilver, SeaCore, Skyhook, SmartCraft, Sport‑Jet, Verado, VesselView, Zero Effort, Zeus,...
-
Page 3: Table Of Contents
WARRANTY INFORMATION Transfer of Warranty..............1 Warranty Registration United States and Canada....... 1 Mercury Inflatable Boat Limited Warranty United States and Canada..................2 GENERAL INFORMATION Boater's Responsibilities.............. 6 Before Operating Your Boat ............6 Lanyard Stop Switch..............7 Protecting People in the Water..........10 Wave and Wake Jumping............ - Page 4 OPERATION Inflating..................26 Lifting the Boat with a Hoist............29 Outboard Power................. 29 Pre‑Operating Check List............30 Loading..................31 Drain Valve Operation............... 33 Towing..................33 Air Chamber Deflates Accidently..........34 Beaching..................34 MAINTENANCE Cleaning Procedure..............35 Deflating..................35 REPAIRS General Repair Information............37 Air Chamber Repair—CSM Fabric..........
-
Page 5: Warranty Information
1. You may change your registered address at any time, including at the time of a warranty claim, by calling Mercury Marine or sending a letter or fax with your name, old address, new address, and hull identification number (HIN) to Mercury Marine’s warranty registration department. -
Page 6: Mercury Inflatable Boat Limited Warranty United States And Canada
Federal Safety Act is required. 2. To be eligible for warranty coverage, the product must be registered with Mercury Marine. At the time of sale, the dealer should complete the warranty registration and immediately submit it to Mercury Marine via MercNET, E‑mail, or mail. - Page 7 CONDITIONS THAT MUST BE MET IN ORDER TO OBTAIN WARRANTY COVERAGE Warranty coverage is available only to retail customers that purchase from a dealer authorized by Mercury Marine to distribute the product in the country in which the sale occurred. Warranty coverage becomes available upon proper registration of the product by the authorized dealer.
- Page 8 Mercury Marine dealer authorized to service the product. If the purchaser cannot deliver the product to such a dealer, written notice must be given to Mercury Marine's service department. We will then arrange for the inspection and any covered repair.
- Page 9 No individual or entity, including Mercury Marine authorized dealers, has been given the authority by Mercury Marine to make any affirmation, representation, or warranty regarding the product, other than those contained in this limited warranty, and if made, shall not be enforceable against Mercury Marine.
-
Page 10: General Information
GENERAL INFORMATION Boater's Responsibilities The operator (driver) is responsible for the safe operation of the boat and the safety of its occupants and the general public. It is strongly recommended that the operator read and understand this entire manual before operating the boat. Be sure that at least one additional person on board is instructed in the basics of starting and operating the outboard and boat handling in case the driver is unable to operate the boat. -
Page 11: Lanyard Stop Switch
GENERAL INFORMATION Lanyard Stop Switch The purpose of a lanyard stop switch is to turn off the engine when the operator moves far enough away from the operator's position (as in accidental ejection from the operator's position) to activate the switch. Tiller handle outboards and some remote control units are equipped with a lanyard stop switch. - Page 12 GENERAL INFORMATION Important Safety Information: The purpose of a lanyard stop switch is to stop the engine when the operator moves far enough away from the operator's position to activate the switch. This would occur if the operator accidentally falls overboard or moves within the boat a sufficient distance from the operator's position.
- Page 13 GENERAL INFORMATION WARNING Avoid serious injury or death from deceleration forces resulting from accidental or unintended stop switch activation. The boat operator should never leave the operator's station without first disconnecting the stop switch lanyard from the operator. Accidental or unintended activation of the switch during normal operation is also a possibility.
-
Page 14: Protecting People In The Water
GENERAL INFORMATION Protecting People in the Water WHILE YOU ARE CRUISING It is very difficult for a person standing or floating in the water to take quick action to avoid a boat heading in his/her direction, even at slow speed. 21604 Always slow down and exercise extreme caution any time you are boating in an area where there might be people in the water. -
Page 15: Wave And Wake Jumping
GENERAL INFORMATION Wave and Wake Jumping Operating recreational boats over waves and wakes is a natural part of boating. However, when this activity is done with sufficient speed to force the boat hull partially or completely out of the water, certain hazards arise, particularly when the boat re‑enters the water. -
Page 16: Impact With Underwater Hazards
GENERAL INFORMATION Impact with Underwater Hazards Reduce speed and proceed with caution whenever you drive a boat in shallow water, or where you suspect underwater obstacles may exist that could be struck by the outboard or the boat bottom. The most important thing you can do to help reduce injury or impact damage from striking a floating or underwater object is to control the boat speed. -
Page 17: Exhaust Emissions
Operating a boat or engine with impact damage can result in product damage, serious injury, or death. If the vessel experiences any form of impact, have an authorized Mercury Marine dealer inspect and repair the vessel or power package. Exhaust Emissions... - Page 18 GENERAL INFORMATION STAY CLEAR OF EXHAUST AREAS 41127 Engine exhaust gases contain harmful carbon monoxide. Avoid areas of concentrated engine exhaust gases. When engines are running, keep swimmers away from the boat, and do not sit, lie, or stand on swim platforms or boarding ladders. While underway, do not allow passengers to be positioned immediately behind the boat (platform dragging, teak/body surfing).
-
Page 19: Safe Boating Recommendations
GENERAL INFORMATION Although the occurrence is rare, on a very calm day, swimmers and passengers in an open area of a stationary boat that contains, or is near, a running engine may be exposed to a hazardous level of carbon monoxide. 1. - Page 20 GENERAL INFORMATION • We recommend that all powerboat operators complete a boating safety course. In the U.S., the U.S. Coast Guard Auxiliary, the Power Squadron, the Red Cross, and your state or provincial boating law enforcement agency provide courses. For more information in the U.S., call the Boat U.S. Foundation at 1‑800‑336‑BOAT (2628).
- Page 21 Know your boat's operating and loading limitations. Know if your boat will float if it is full of water. When in doubt, contact your authorized Mercury Marine dealer or the boat manufacturer. Ensure that everyone in the boat is properly seated.
- Page 22 GENERAL INFORMATION Know your boating area and avoid hazardous locations. Be alert. • The operator of the boat is responsible by law to maintain a proper lookout by sight and hearing. The operator must have an unobstructed view particularly to the front. No passengers, load, or fishing seats should block the operator's view when the boat is above idle or planing transition speed.
-
Page 23: Dynamic Specifications
GENERAL INFORMATION Dynamic Specifications Model Description 250/260 270/280 300/310 Gross weight—PVC 35.0 kg (77 lb) 39.0 kg (86 lb) 51.0 kg (113 lb) fabric Gross weight—CSM 37.0 kg (82 lb) 42.0 kg (93 lb) 53.0 kg (117 lb) fabric 455 kg Maximum load 340 kg (750 lb) 365 kg (805 lb) -
Page 24: Manufacturer's Plate
GENERAL INFORMATION Manufacturer's Plate The manufacturer's plate is located on the inside of the boat transom. 52268 Model number Maximum outboard power Maximum number of people Maximum load capacity—people + outboard + fuel tank and equipment Air chamber pressure ISO 6185 part (Refer to general information following) Boat design category—refer to the following table Maximum outboard weight Boat design category—The following table shows the navigation... - Page 25 GENERAL INFORMATION Boat Design Navigation Wind Force and Wave Height Categories Designed for extended voyages where conditions may exceed wind force 8 (Beaufort Ocean scale) and wave heights of 4 m (13 ft) and higher. Designed for offshore voyages where conditions may experience wind force 8 Offshore (Beaufort scale) and wave heights up to 4 m...
-
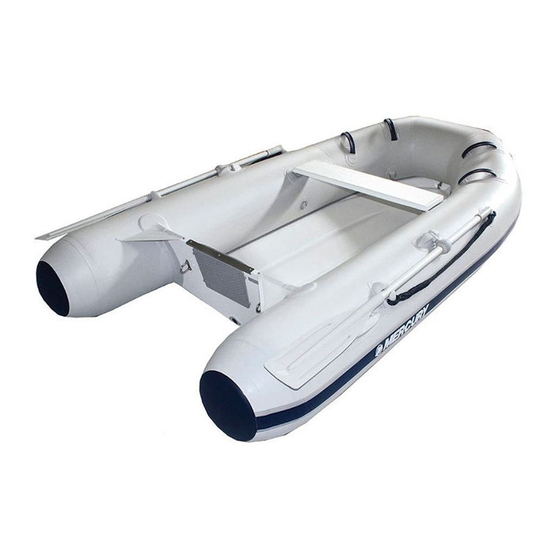
Page 26: Boat Components
BOAT COMPONENTS Dynamic Component Location FRONT VIEW 52267 Lifting handle Mooring ring Keel Rub strake AFT VIEW 52266 Hull identification number (HIN) Aft mooring ring Motor plate Drain... - Page 27 BOAT COMPONENTS TRANSOM VIEW 52263 Lifting ring Carbon monoxide danger decal Motor plate Manufacturer's plate Drain valve...
- Page 28 BOAT COMPONENTS OVERVIEW 52264 Oar lock Port air chamber valve Front air chamber valve Tie down rings (not for lifting) Bow handles (4) Front lift ring Seat Rope handle Starboard air chamber valve Lifting handle...
-
Page 29: Transporting
TRANSPORTING Trailering the Boat Use a trailer that will properly support the boat hull. Position the boat on the trailer so it will rest in a stable position on the trailer supports. The boat must be properly secured to the trailer. Secure the boat to the trailer using tie‑down straps. -
Page 30: Inflating
OPERATION Inflating NOTICE Overinflation may result in damaged seams or bulkheads. Do not use a compressed air source to fill the air chambers. IMPORTANT: Do not inflate or deflate one air chamber at a time. When inflating or deflating, maintain a balanced air pressure between air chambers to prevent stress or potential damage to the inside diaphragms that separate the air chambers. - Page 31 OPERATION 3. Insert and lock the fill adapter into the air pump hose. “INFLATE” 52296 Hose Air gauge Double‑action/single‑action valve Inflate port Air pump hose Fill adapter 52300 INFLATING THE BOAT 1. Inflate the side air chambers first; then, inflate the front air chamber.
- Page 32 OPERATION c. Remove the valve caps by turning them a quarter of a turn counterclockwise. d. Verify that the valve stems are in the closed position. Push the valve stem in and rotate it to the closed position. e. Insert and lock the air pump fill adapter into the air chamber valve.
-
Page 33: Lifting The Boat With A Hoist
OPERATION NOTE: Always be aware of the air pressure in the air chambers. The air pressure inside the air chambers increases as the internal air temperature rises; this will cause the air pressure to fluctuate depending on water temperature and weather conditions. -
Page 34: Pre-Operating Check List
OPERATION Install the outboard along the centerline of the boat transom. Fasten the outboard to the transom following the recommended installation instructions provided with the outboard or from the outboard manufacturer. Verify that the outboard is tightly secured on the transom before each use. -
Page 35: Loading
OPERATION • Arrange the passengers and load in the boat so that the weight is distributed evenly and everyone is seated in a proper seat or on the floor. Refer to Loading. • Instruct at least one passenger in the basics of boat handling and the starting and operation of the outboard, in case the driver becomes disabled or falls overboard. - Page 36 OPERATION Mercury recommends that the operator and passengers sit on a seat, or kneel, or sit inside the boat while the boat is underway, and use the available handholds to secure themselves. The operator should always use the lanyard stop switch when operating the boat.
-
Page 37: Drain Valve Operation
OPERATION Drain Valve Operation The inflatable boat is fitted with a slide drain valve. 52265 Slide drain valve Open position Closed position SLIDE DRAIN VALVE OPERATION When underway, slide the drain to the open position and the water will run out. The inner diaphragm will prevent water from entering the boat. -
Page 38: Air Chamber Deflates Accidently
OPERATION Air Chamber Deflates Accidently If one of the air chambers should accidently deflate while you are operating the boat, shift the weight to the opposite side of the deflated air chamber and slowly head for shore. Beaching Do not power the boat onto the beach or drag it across rocks, sand or gravel. -
Page 39: Maintenance
MAINTENANCE Cleaning Procedure FABRIC SURFACES Inflate the air chambers. Clean the fabric with a mild soap and fresh water solution. Rinse it with fresh water and dry it thoroughly. Open the drain valve. Use a hose to wash out any debris from ®... - Page 40 MAINTENANCE 2. Push the valve stem in and deflate the front air chamber a quarter of the way. 3. Push the valve stems in on the side air chambers and release the air pressure a quarter of the way. 4. Repeat this procedure to evenly deflate all of the air chambers.
-
Page 41: Repairs
The repair kit that comes with the boat is a one‑part glue operation and should be used for emergency minor repair. For a permanent repair, a two‑part CSM glue should be used. This two‑part CSM glue and patching materials are available from Mercury Marine. - Page 42 Contact your local Mercury dealer for the nearest inflatable repair station. For the best results when gluing, the relative humidity should be less than 60%, ambient air temperature should be between 18 °C to 25 °C (65 °F to 77 °F) and the boat should not be in...
-
Page 43: Air Chamber Repair-Pvc Fabric
(0.393 in.) or less, can be repaired in an emergency. Larger areas, or if the patch will overlap a seam, should be patched by a professional repair technician at an inflatable repair station. Contact your local Mercury dealer for the nearest inflatable repair station. - Page 44 REPAIRS For the best results when gluing, the relative humidity should be less than 60%, ambient air temperature should be between 18 °C to 25 °C (65 °F to 77 °F) and not in direct sunlight. Cut out a patch large enough to overlap the damaged area by 38 mm (1.5 in.) on all sides.
-
Page 45: Storage
STORAGE Storage Preparation NOTE: The boat should be cleaned and rinsed with fresh water before being placed in long‑term storage. Refer to the Cleaning Procedure IMPORTANT: To prevent fabric discoloration from marine growth or polluted waters, do not store the boat in water for extended periods of time. -
Page 46: Owners' Service Assistance
If you ever have a problem, question or concern about your inflatable boat or outboard motor, contact your dealer or any authorized Mercury Marine dealership. If additional assistance is required, take these steps. 1. Talk with the dealership's sales manager or service manager.
Need help?
Do you have a question about the Dynamic 250/260 and is the answer not in the manual?
Questions and answers