Table of Contents
Advertisement
Available languages
Available languages
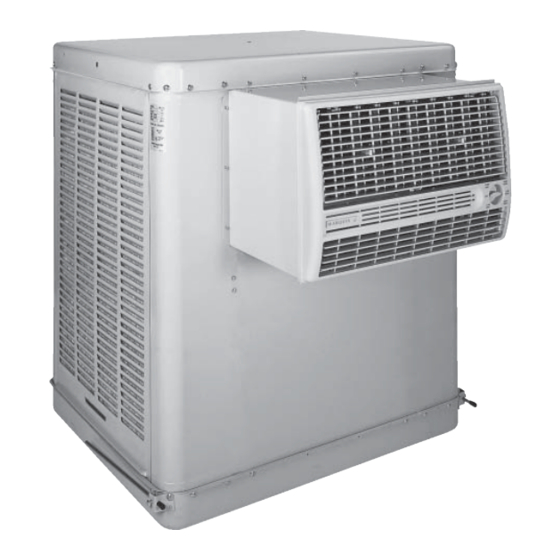
Models
WC 35
WC 44
WC 46
WC 50
Circle the model of your cooler and
record the serial number below.
Encierre con un circulo el modelo de su
enfriador y escribe el número de serie abajo.
Serial #
Número De Serie
Read Carefully All Of This Manual
Before Installing The Unit.
Read And Save These Instructions
Vea el Español en el interior
Evaporative Cooling
Evaporative cooling is nature's way of cooling. When air is moved
over a wet surface, water is evaporated and heat is absorbed. When
stepping out of a swimming pool with the wind blowing, evaporative
cooling makes you feel cool, even though the air may be warm. The
human body itself is cooled primarily by the evaporation of
perspiration.
This unit works on the same principle. Air is drawn across wet
filter pads where the air is cooled by evaporation and then circulated
throughout the building. It is this combination of cooled air and the
movement of air over the skin which makes it feel cool.
Unlike refrigeration systems which recirculate the air, an evaporative
cooler continually brings in fresh air while exhausting old air. You
are completely replacing the air every 2 to 4 minutes by opening
windows or doors or a combination of both. The air is always fresh,
not stale, laden with smoke and odors as happens with refrigerated
air conditioning.
110496-1
C H A M P I O N • M A R Q U I S
EVAPORATIVE COOLER
RWC35
RWC46
RWC50
www.championcooler.com
Lea Con Cuidado Todo Este Manual Antes
De Instalar La Unidad.
Safety Rules
1. Read these instructions carefully.
2. Electrical hook up should be done by a qualified electrician, so
that all electrical wiring will conform to your local standards.
3. Unit must be in the Off Position and Unplugged from power
receptacle when installing or performing any maintenance.
4. This cooler will run on 120 volt A.C., 60 Hz (cycle) current only.
5. Motor and pump are grounded and have an automatic thermal
overload switch which will shut motor off when it overheats.
The motor will restart automatically when it cools down.
6. Pump receptacle is for grounded evaporative cooler pump only.
Do not plug anything else into receptacle.
WARNING
: To reduce the risk of fire or electric shock, do
not use this fan with any "solid-state fan speed control device."
1-04
Advertisement
Table of Contents

Related Manuals for Champion WC 35


Summary of Contents for Champion WC 35
-
Page 1: Safety Rules
C H A M P I O N • M A R Q U I S EVAPORATIVE COOLER Models WC 35 RWC35 WC 44 RWC46 WC 46 RWC50 WC 50 Circle the model of your cooler and record the serial number below. -
Page 2: Operation
It falls down. Operation THEN CLOSE all of the windows one inch and try step 4 again. Manual Control Units • Pump setting. The rotary switch has 6 settings. The “Pump” It plasters itself to the screen. setting will operate the pump without the blower. For best THEN OPEN all of the windows one inch and try step 4 again. -
Page 3: Maintenance
Water Supply • Install window panel • Install float valve. Install Window Fill-In Line retainers. Place two Panels valve in the provided hole in panel retainer strips onto corner post (Fig. 6) and at- Corner Post bottom of neck flange tach water supply line. -
Page 4: Wiring Diagrams
For Eight Years from date of installation, we will replace the original base assembly if water leakage should occur due to rust out. For One Year from date of installation, we will replace any original component provided by Champion Cooler which fails due to any defect in material or factory workmanship only. -
Page 5: Troubleshooting
Troubleshooting Problem Possible Cause Remedy Failure to start or no air 1. No electrical power to unit 1. Check power delivery • Fuse blown • Replace fuse • Circuit breaker tripped • Reset breaker • Electric cord unplugged or damaged •... - Page 6 Motor Specifications / Especificaciones Del Motor Model No. Motor Part # Speed Volts Motor Pulley Part # Electrical Cord Part # Drive Belt Part # Modelo Motor - N° Velocidad Voltios Polea Del Motor - N° Cable Eléctrico - N° Banda - N°...
- Page 7 Replacement Parts List / Lista De Piezas De Repuesto When ordering parts, please be sure to furnish the following information on all orders. Failure to do so may delay your order. / Al pedir piezas, incluya toda la información siguiente con su pedido. El no proporcionar toda esta información resultará en una demora. Cooler serial number / Número de serie de la unidad Description and part number / Descripción y número de pieza Cooler size / Tamaño de la unidad...
-
Page 8: Reglas De Seguridad
Lea y Conserve Estas Instrucciones • Los posiciones HIGH COOL y LOW COOL. Ajuste el inte- rruptor a la posición HIGH COOL o LOW COOL para poner en marcha el ventilador a una alta o baja velocidad junto con la bomba. Reglas De Seguridad Ajuste el interruptor a la posición LOW COOL cuando posible. -
Page 9: Instalación
4. Tome un pedazo de papel de seda y póngalo contra la pantalla de un gancho “S” en cada cadena. NOTA: Los ganchos que vienen la ventana abierta más lejos de la apertura del enfriador. Suéltalo con ésta unidad tienen rosca de tornillo para madera y son para uso al papel de seda. -
Page 10: Mantenimiento
Conectar El Agua • Limpie la bomba. Es necesario limpiar la bomba una vez al principio de cada año. Por su propia seguridad, apague la unidad • Instale el montaje de desagüe. Quite la tuerca y pase la boquilla y desconéctela de la electricidad. Quite el sujetador de plástico de por el agujero de la bandeja, colocando la arandela de goma entre la la montura y jale la bomba, deslizándola hacia usted. -
Page 11: Garantía Limitada
Durante Ocho Años a partir de la fecha de instalación, nosotros reemplazaremos la base original del enfriador en caso de que goteara agua debido a oxidación. Durante Un Año a partir de la fecha de instalación, reemplazaremos cualquier componente original proporcionado por Champion Cooler que falle debido a cualquier defecto de material o mano de obra en la fábrica solamente. - Page 12 La Localización De Averías Problema Causa Posible Remedio No arranca o no sale aire 1. No llega corriente 1. Revise la corriente • Fusible fundido • Cambie el fusible • Cortacircuito desactivado • Restablecer el cortacircuito • Cable eléctrico dañado •...
Need help?
Do you have a question about the WC 35 and is the answer not in the manual?
Questions and answers
G'day! I just purchased a new WC35. I installed it into my window, got it all hooked up to water and plugged it in. The cooler runs for aboput 5 seconds and then abruptly stops. I am on solar, and have run an AC unit with the same solar system. What are some of the issues I am be looking at?
The potential issues causing the Champion WC 35 cooler to run for only 5 seconds before stopping could include:
1. Electrical problems such as a faulty plug, connection, or wiring issue.
2. Use of an incompatible solid-state fan speed control device, which is warned against in the manual.
3. Improper installation or operation, such as not following startup procedures.
4. Overloaded electrical receptacle, as the manual advises not to plug anything else into the same outlet.
5. The unit not being in the correct mode or setting.
Further troubleshooting may be needed to identify the exact cause.
This answer is automatically generated