Table of Contents
Advertisement
Available languages
Available languages
Quick Links
Advertisement
Table of Contents

Related Manuals for Champion MasterCool SAD150B


Summary of Contents for Champion MasterCool SAD150B
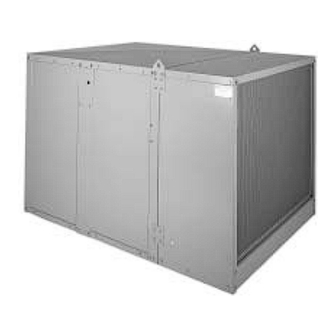
- Page 1 This Owner's Manual is provided and hosted by Appliance Factory Parts. MASTERCOOL SAD150B Owner's Manual Shop genuine replacement parts for MASTERCOOL SAD150B Find Your MASTERCOOL Evaporative Cooler Parts - Select From 135 Models -------- Manual continues below --------...
-
Page 2: Table Of Contents
The New Industrial Models (Double Inlet) AD100, AS100, AD10012, AS10012 AD150, AS150, AD15012, AS15012 AD20012, AS20012, AU20012 (Single Inlet) SAD100, SAS100, SAD10012, SAS10012 SAD150, SAS150, SAD15012, SAS15012 Circle the model of your cooler and record the serial number below. Encierre con un circulo el modelo de su enfriador y escribe el número de serie abajo. -
Page 3: Safety Instructions
Safety Rules motor mount using these carriage bolts Motor and the washers and nuts provided Pulley (see Fig. 1). Make sure all bolts are 1. Read instructions carefully. securely tightened. Blower 2. Disconnect all electrical service that will be used for the unit Blower Housing Pulley... -
Page 4: Maintenance Section
keep fl oat from turning. Place nut • Pad replacement. The pads should be replaced after 5 years or if (4) and ferrule (3) on water supply necessary. To change pads, remove top access panel, remove grill, line. Connect to fl oat fi tting and and disconnect water delivery tube. -
Page 5: Troubleshooting
Troubleshooting Guide Problem Possible Cause Remedy Problem Possible Cause Remedy Failure to 1. No electrical power 1. Check power Motor 1. Low voltage 1. Check voltage start or no air to unit cycles on 2. Excessive belt tension 2. Adjust belt tension delivery •... -
Page 6: Electrical Wiring Diagrams
Typical Electrical Wiring Diagrams 120 Volt, 1 Phase Electric Supply 240 Volt, 1 Phase Electric Supply Disconnect Switch At Cooler Disconnect Switch At Cooler Control Contacts Control Contacts See Notes 1 & 2 See Notes 1 & 2 See Note 4 See Note 1 120V 120 Volts... -
Page 7: General Specifi Cations
General Specifi cations / Especifi caciones Generales *Weight (lbs.) Cabinet Dimensions (in.) Duct Opening (in.) Model No. Peso (libras) Dimensiones De La Caja (pulgadas) Abertura De Ducto (pulgadas) Modelo *Dry *Operating Height Width Depth Width Height Seco Lleno Altura Anchura Profundidad Anchura Altura... - Page 8 Replacement Parts / Piezas De Repuesto When ordering parts, please be sure to furnish the following information on all orders. Failure to do so may delay your order. / Al pedir piezas, incluya toda la información siguiente con su pedido. El no proporcionar toda esta información resultará en una demora. Cooler serial number / Número de serie de la unidad.
-
Page 9: Parts List - Blower Section (Ad100B, Ad150B, Ad200B)
Replacement Parts / Piezas De Repuesto AD100B, AD150B, AD200B N° Description / Descripción AD100B AD150B AD200B Top, Cabinet / Tapa De La Caja ------------------------------------------------------------- 218115-003 218116-008 216117-003 Bottom, Cabinet / Base De La Caja ---------------------------------------------------------- 318115-005 318116-010 318117-007 Corner Post / Poste De Esquina -------------------------------------------------------------- 318115-013 318116-018 318117-012 Divider Channel / Canal Divisora ------------------------------------------------------------ 218115-014... -
Page 10: Parts List - Blower Section (As100B, As150B, As200B)
Replacement Parts / Piezas De Repuesto AS100B, AS150B, AS200B N° Description / Descripción AS100B AS150B AS200B Top, Cabinet / Tapa De La Caja ------------------------------------------------------------- 218115-003 218116-008 216117-003 Bottom, Cabinet / Base De La Caja ---------------------------------------------------------- 318115-020 318116-026 316117-004 Corner Post / Poste De Esquina -------------------------------------------------------------- 318115-013 318116-018 318117-018 Divider Channel / Canal Divisora ------------------------------------------------------------ 218115-014... -
Page 11: Parts List - Blower Section (Au200B)
Replacement Parts / Piezas De Repuesto AU200B N° Description / Descripción AU200B Top, Cabinet / Tapa De La Caja ...........................316117-007 Bottom, Cabinet / Base De La Caja ........................316117-004 Corner Post / Poste De Esquina ..........................318117-020 Divider Channel / Canal Divisora .........................218117-013 Cut-Off Plate / Placa Limitadora...........................318112-003 Blower Housing / Caja De La Rueda ........................320117-001 Blower Wheel / Rueda ............................110751... -
Page 12: Parts List - Blower Section (Single Inlet Coolers)
Replacement Parts / Piezas De Repuesto SAD100B, SAD150B SAS100B,SAS150B N° Description / Descripción SAD100B SAS100B SAD150B SAS150B Top, Cabinet / Tapa De La Caja ..............218115-003 218115-003 218116-008 218116-008 Bottom, Cabinet / Base De La Caja ............. 318115-005 318115-020 318116-010 318116-026 Corner Post / Poste De Esquina .............. -
Page 13: Motor Specifi Cations
Motor Specifi cations / Especifi caciones Del Motor Motor Part No. Phase Speed Volts Amperage* Weight (lbs.) Shaft (in.) C.V. N° Del Motor Fase Velocidad Voltios Amperaje Peso (libras) Eje (pulgadas) 110455 115/208-230 13.8/7.6-6.9 110461 208-230/460 3.5-3.2/1.6 110457 115/230 16/8 110458 +110462-9 208-230/460... -
Page 14: Spanish (Instrucciones En Español)
Lea y Conserve Estas Instrucciones y para alinear la polea del motor con la polea de la rueda. Instale el motor usando Polea Del los pernos y las tuercas provistos (véase Reglas De Seguridad Motor fi g. 1). Asegúrese que los pernos estén apretados seguramente. - Page 15 • La válvula de fl otador. Véase la fi gura • Limpiar el medio evaporativo. Un fi ltro limpio es más absorbente y efi - 5 para instalar la válvula de fl otador. ciente y producirá un mayor volumen de aire frío. Cada año o cuando sea Remueva las partes 1, 2, 3 y 4.
- Page 16 Esquemas Típicas Del Cableado Eléctrico Alimentación Eléctrica De 120 Voltios y 1 Fase Alimentación Eléctrica De 240 Voltios y 1 Fase Desconectador Al Enfriador Desconectador Al Enfriador Contactos Del Mando Contactos Del Mando Vea Las Notas 1 & 2 Vea Las Notas 1 & 2 Vea Nota 4 Vea Nota 4 Alimentación...
- Page 17 La Localización De Averias Problema Causa Posible Remedio Problema Causa Posible Remedio No arranca o 1. No llega corriente 1. Revise la corriente Motor se apaga 1. Voltaje defi ciente 1. Compruebe el voltaje no sale aire • Fusible fundido •...
Need help?
Do you have a question about the MasterCool SAD150B and is the answer not in the manual?
Questions and answers