Table of Contents
Advertisement
Available languages
Available languages
Quick Links
- 1 Table of Contents
- 2 Installation Instructions
- 3 Maintenance Section
- 4 Parts Drawing (Dibujo de Piezas) - 10/12Sd, 14/21Sd
- 5 Parts List (Lista de Piezas) - 10/12, 14/21
- 6 Parts List (Lista de Piezas) - 75/85, 95
- 7 Parts Drawing (Dibujo de Piezas) - 75/85Dd, 95Dd
- 8 General Specifi Cations (Especifi Caciones Generales)
- Download this manual
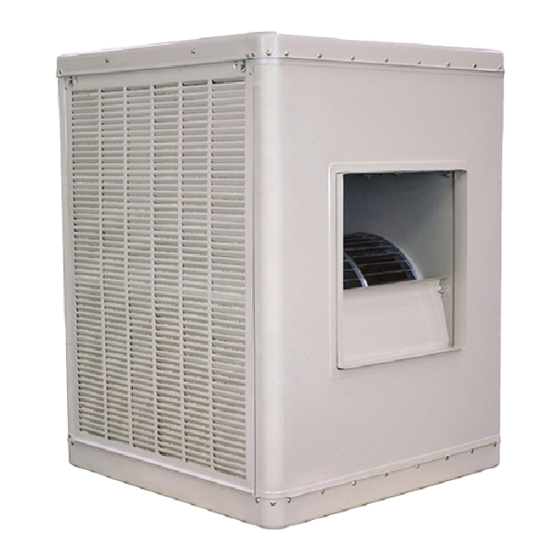
Models
75/85 DD
95 DD
10/12 DD
14/21 DD
Read Carefully All Of This Manual Before
Installing The Unit.
Lea Con Cuidado Todo Este Manual Antes De
Instalar La Unidad.
Read And Save These Instructions
Safety Instructions ...........................................................................2
Operation ..........................................................................................2
Installation Instructions ................................................................ 2-3
Maintenance Section ........................................................................3
Electrical Wiring Diagrams ..............................................................4
Warranty ...........................................................................................5
Parts Drawing (Dibujo de Piezas) - 10/12SD, 14/21SD ..................6
Parts Drawing (Dibujo de Piezas) - 10/12DD, 14/21DD ................7
110525
Industrial / Commercial
Evaporative Cooler Manual
75/85 SD
95 SD
10/12 SD
14/21 SD
Table Of Contents
Circle the model of your cooler and record the
serial number below.
Encierre con un circulo el modelo de su enfriador y
escribe el número de serie abajo.
Serial #
Número De Serie
Vea el Español en el interior.
Parts List (Lista de Piezas) - 10/12, 14/21 .......................................8
Parts List (Lista de Piezas) - 75/85, 95 ............................................9
Parts Drawing (Dibujo de Piezas) - 75/85DD, 95DD ....................10
Parts Drawing (Dibujo de Piezas) - 75/85SD, 95SD .....................11
Motor Specifi cations (Especifi caciones del Motor) - 75/85DD, 95DD .10
Motor Specifi cations (Especifi caciones del Motor) - 75/85SD, 95SD ..11
General Specifi cations (Especifi caciones Generales) ...................12
Spanish (Instrucciones en Español) ......................................... 13-16
9-09
Advertisement
Table of Contents

Related Manuals for Champion 14 DD


Summary of Contents for Champion 14 DD
-
Page 1: Table Of Contents
Industrial / Commercial Evaporative Cooler Manual Models 75/85 DD 95 DD 10/12 DD 14/21 DD Read Carefully All Of This Manual Before Installing The Unit. Lea Con Cuidado Todo Este Manual Antes De Instalar La Unidad. Read And Save These Instructions Safety Instructions ...2 Operation ...2 Installation Instructions ... -
Page 2: Electrical Installation
Safety Rules 1. Read instructions carefully. 2. Disconnect all electrical service that will be used for the unit before you begin the installation. 3. Electrical hook up should be done by a qualifi ed electrician, so that all electrical wiring will conform to your local standards. 4. -
Page 3: Maintenance Section
• Water Supply. Run a water supply line to the unit. The fl oat valve requires a 3/8 inch tube connection. NOTE: Do not use water supplied from a water softener. Mount Bracket • Float valve. Install the fl oat valve to the mount bracket in the cooler (Fig. -
Page 4: Electrical Wiring Diagrams
Low speed circuit drawn with dashed lines is not required for single speed. Typical Control Contacts 208, 240, or 480V Function and Connection 3 Phase Power Supply L - Low Fan - Pump H - Hi Fan L1 - Supply Power 120V 1 Phase Function... -
Page 5: Troubleshooting Guide
Problem Possible Cause Failure to 1. No electrical power to unit start or no • Fuse blown air delivery • Circuit breaker tripped 2. Belt too loose or tight 3. Motor overheated • Belt too tight • Blower bearings dry •... -
Page 6: Parts Drawing (Dibujo De Piezas) - 10/12Sd, 14/21Sd
Replacement Parts / Piezas De Repuesto 10/12 SD, 14/21 SD 110525... -
Page 7: Parts Drawing (Dibujo De Piezas) - 10/12Dd, 14/21Dd
Replacement Parts / Piezas De Repuesto 10/12 DD, 14/21 DD 110525... -
Page 8: Parts List (Lista De Piezas) - 10/12, 14/21
Replacement Parts List / Lista De Piezas De Repuesto All parts may be ordered from your dealer, but not directly from the factory. Be sure that you furnish the following information on all orders. / Todas las partes pueden ser pedidas con su concesionario, pero no directamente a la fábrica. Incluya toda la información siguiente con su pe- dido: Cooler serial number / Número de serie de la unidad Description and part number / Descripción y número de parte... -
Page 9: Parts List (Lista De Piezas) - 75/85, 95
Replacement Parts List / Lista De Piezas De Repuesto All parts may be ordered from your dealer, but not directly from the factory. Be sure that you furnish the following information on all orders. / Todas las partes pueden ser pedidas con su concesionario, pero no directamente a la fábrica. Incluya toda la información siguiente con su pe- dido: Cooler serial number / Número de serie de la unidad Description and part number / Descripción y número de parte... -
Page 10: Parts Drawing (Dibujo De Piezas) - 75/85Dd, 95Dd
Replacement Parts / Piezas De Repuesto Motor Specifi cations / Especifi caciones Del Motor Model Motor Phase Modelo C.V. Motor Fase *110455 *110480 110461 75/85 DD *110457 *110458 +110462-9 *110459-1 1-1/2 +110463-9 95 DD *110460-1 +110464-9 +110465-9 * Resilient mounted motors / Motores con bases resistentes. + EPACT Motors / Motores de buen rendimiento. -
Page 11: Parts Drawing (Dibujo De Piezas) - 75/85Sd, 95Sd
Replacement Parts / Piezas De Repuesto Motor Specifi cations / Especifi caciones Del Motor Model Motor Phase Modelo C.V. Motor Fase *110455 *110480 110461 75/85 SD *110457 *110458 +110462-9 *110459-1 1-1/2 +110463-9 95 SD *110460-1 +110464-9 * Resilient mounted motors / Motores con bases resistentes. + EPACT Motors / Motores de buen rendimiento. -
Page 12: Motor Specifi Cations (Especifi Caciones Del Motor) - 10/12, 14/21
Motor Specifi cations / Especifi caciones Del Motor Model Motor Modelo C.V. Motor *110457 *110458 +110462-9 *110459-1 10/12 DD 1 1/2 +110463-9 *110460-1 +110464-9 *110457 *110458 +110462-9 *110459-1 10/12 SD 1 1/2 +110463-9 *110460-1 +110464-9 *110459-1 1 1/2 +110463-9 *110460-1 +110464-9 14/21 DD +110465-9... -
Page 13: Reglas De Seguridad
Lea y Conserve Estas Instrucciones Reglas De Seguridad 1. Lea las instrucciones con cuidado. 2. Desconecte todos los servicios eléctricos que serán usados en esta unidad antes de instalar el enfriador. 3. Las conexiones eléctricas deben ser hechas por un electricista competente, para que todo el cableado eléctrico cumpla con los requisitos establecidos en su localidad. -
Page 14: Mantenimiento
• La válvula de fl otador. Instale la válvula de flotador en el Soporte Del soporte del fl otador dentro del Flotador enfriador y conecte el tubo de agua (véase fi g. 4). Nota: La Varilla Del válvula de fl otador está instala- Flotador da en los modelos 75/85 y 95. - Page 15 Esquemas Típicas Del Cableado Eléctrico Alimentación Eléctrica De 120 Voltios y 1 Fase Desconectador Al Enfriador Contactos Del Mando Vea Las Notas 1 & 2 Vea Nota 4 Tierra Fusibles Vea Nota 1 Caja Del Enfriador Vea Nota 3 • Motor del ventilador de 115V y una fase. •...
-
Page 16: Garantía Limitada
Problema Causa Posible No arranca o 1. No llega corriente no sale aire • Fusible fundido • Cortacircuito desactiva- 2. Correa muy fl oja o apre- tada 3. Motor recalentado • Correa muy apretada • Cojinetes de la rueda están secos •...
Need help?
Do you have a question about the 14 DD and is the answer not in the manual?
Questions and answers