Table of Contents
Advertisement
Available languages
Available languages
Quick Links
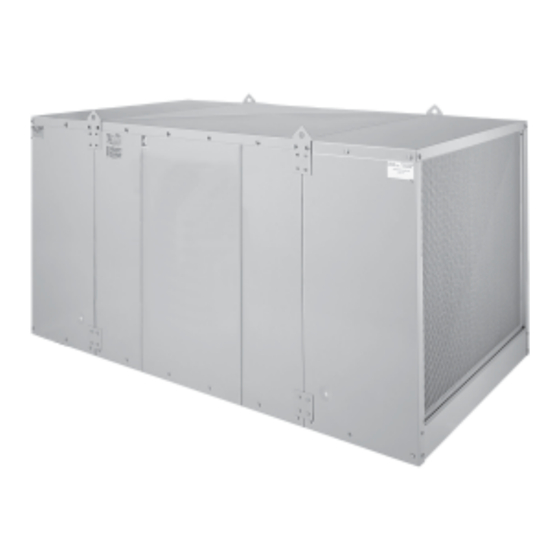
High Capacity
Axial Fan
Evaporative Cooler
Model Series
FAD242
FAD248
Circle the model of your cooler and record
the serial number below.
Encierre con un circulo el modelo de su
enfriador y escribe el número de serie
abajo.
Serial #
Número de Serie
Safety Instructions ......................................................................... 1
Operation ........................................................................................ 1
Installation Instructions .................................................................. 2
Maintenance Section .................................................................... 2-3
Electrical Wiring Diagrams .............................................................. 3
Troubleshooting .............................................................................. 4
Read And Save These Instructions
Safety Rules
1. Read instructions carefully.
2. Disconnect all electrical service that will be used for the unit before
you begin the installation.
3. Electrical hook up should be done by a qualified electrician, so that
all electrical wiring will conform to your local standards.
4. For a maximum safety precaution, make sure cooler cabinet is
properly grounded to a suitable ground connection.
5. Cooler must be connected to proper line current, voltage and cycle,
as stamped on cooler motor and pump motor specification plate.
110497
Read Carefully All Of This Manual Before
Installing The Unit
Lea Con Cuidado Todo Este Manual Antes De
Instalar La Unidad
Table Of Contents
Warranty ......................................................................................... 4
General Specifications (Especificaciones Generales) ..................... 5
Motor Specifications (Especificaciones Del Motor) ....................... 5
Parts List - Blower Section (Lista De Piezas) ............................ 6-7
Parts List - Wet Section (Lista De Piezas) .................................. 8-9
Spanish (Instrucciones en Español) ........................................... 9-12
6. This unit must be installed at a height of 10 feet or greater from the
floor.
7. Always Disconnect Power before performing any maintenance.
To eliminate delivery of hot air when starting cooler, Start the pump
without the blower for the first few minutes, then turn on the blower
motor.
These coolers may be used without water for ventilation purposes.
When outside air is cool (for example, at night) or when humidity is
high the water pump can be turned off.
Operation
12-09
Advertisement
Table of Contents

Subscribe to Our Youtube Channel
Related Manuals for Champion FAD242


Summary of Contents for Champion FAD242
- Page 1 High Capacity Axial Fan Evaporative Cooler Model Series FAD242 FAD248 Circle the model of your cooler and record the serial number below. Encierre con un circulo el modelo de su enfriador y escribe el número de serie abajo. Serial # Número de Serie...
-
Page 2: Maintenance
Installation CAUTION: Make sure that the mounting surface is strong enough to support the operating weight of the cooler when in use. (For operating weight, see Specification Table.) CAUTION: Never start cooler until installation is complete and unit has been tested for rigidity. CAUTION: This unit must be installed at a height of 10 feet or greater from the floor. -
Page 3: Wiring Diagrams
• Pad replacement. The pads should be replaced after 5 years or before if necessary. To change pads, remove top access panel, remove grill, and disconnect water delivery tube. Remove water distributor holder and lift out media sections. Replace with the same type media. -
Page 4: Troubleshooting Guide
1. Low voltage cycles on 2. Excessive belt tension and off 3. Fan shaft tight or locked 4. Bearings dry 5. Faulty motor This warranty is extended to the original purchaser of an evaporative cooler installed and used under normal conditions. It does not cover damages incurred through accident, neglect, or abuse by the owner. - Page 5 Peso (libras) Model Series Serie de Modelo Operating Seco Lleno FAD242 1041 FAD248 1069 *The weight includes a 2 HP motor. / El peso total incluye el peso de un motor de 2 C.V. Motor Specifications / Especificaciones Del Motor...
- Page 6 Replacement Parts Drawing / Dibujo De Piezas De Repuesto FAD242B, FAD248B 110497...
- Page 7 Motor Mount Adjustment Plate / Placa Ajustable Del Montura Del Motor ------------------------- 214109-007 Belt Ajustment Support Angle / Ángulo De Soporte Para Ajustar El Correa ------------------------- 211101-001 Bearings, Fan Blade / Cojinetes Del Eje Del Ventilador --------------------------------------------------- 110355 Drive Belt / Correa -------------------------------------------------------------------------------------------- *...
- Page 8 Replacement Parts Drawing / Dibujo De Piezas De Repuesto FAD242W8, FAD248W8 110497...
-
Page 9: Reglas De Seguridad
Replacement Parts List / Lista De Piezas De Repuesto All parts may be ordered from your dealer, but not directly from the factory. Be sure that you furnish the following information on all orders. / Todas las partes pueden ser pedidas con su concesionario, pero no directamente a la fábrica. Incluya toda la información siguiente con su pedido: Cooler serial number / Número de serie de la unidad Description and part number / Descripción y número de parte Cooler size / Tamaño de la unidad... -
Page 10: Instalación
Instalación PRECAUCION: La superficie en que ha de colocarse el enfriador deberá aguantar el peso completo de la unidad cuando ésta está en funcionamiento. (Para saber este peso, vea la tabla de especificaciones.) PRECAUCION: No conecte el enfriador hasta que la insta- lación esté... - Page 11 Luego limpie el lado de adentro de cualquier escama u otra obstrucción a las aberturas. Si requiere, raspe ligeramente para remover escama endurecida. • Cambie el medio evaporativo después de 5 años o cuando sea necessario. Cambiar el medio evaporativo, remueva el panel supe- rior de acceso, remueva la parrilla y desconecte el tubo del distribuidor de agua.
-
Page 12: Garantía Limitada
Problema Causa Posible Remedio No arranca 1. No llega corriente o no sale • Fusible fundido aire • Cortacircuito desactivado 2. Correa muy floja o apretada 3. Motor recalentado • Correa muy apretada • Cojinetes de la rueda están secos 4.
Need help?
Do you have a question about the FAD242 and is the answer not in the manual?
Questions and answers