KTM 50 SX Owner's Manual
Ktm 50 sx series motorcycles owner's manual
Hide thumbs
Also See for 50 SX:
- Repair manual (159 pages) ,
- Owner's manual (91 pages) ,
- Setup instructions (19 pages)
Table of Contents
Advertisement
Quick Links
Advertisement
Table of Contents

Related Manuals for KTM 50 SX


Summary of Contents for KTM 50 SX
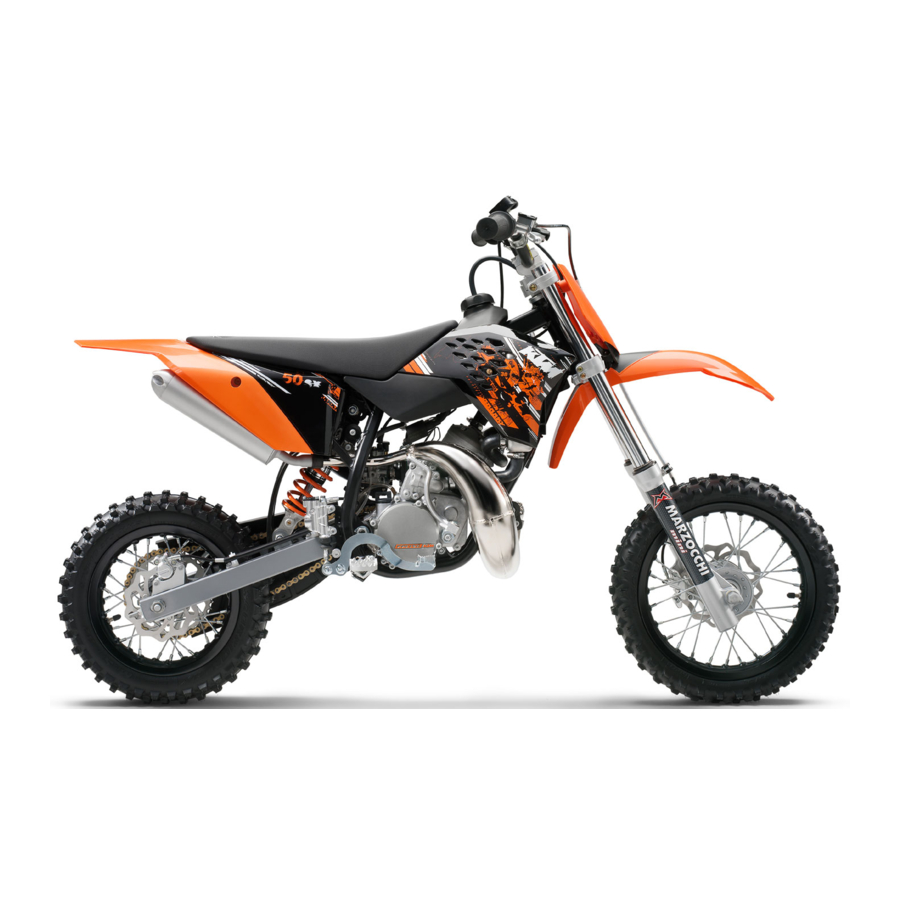
- Page 1 OWNER'S MANUAL 2009 50 SX 50 SX Junior 50 SX Mini ART. NO. 3211344en...
- Page 3 KTM accepts no liability for delivery options, deviations from illustrations and descriptions, as well as printing and other errors.
-
Page 4: Table Of Contents
Checking rear sprocket / engine sprocket for wear ..... 34 Closing filler cap ............11 Adjusting chain tension..........34 Opening oil tank cap (50 SX Mini) ........11 Adjusting chain tension - after checking ......35 Closing oil tank cap (50 SX Mini)........11 Adjusting chain tension - installing rear wheel.... - Page 5 CONTENTS Carburetor - idle (50 SX) ..........52 Carburetor - idle (50 SX Junior, 50 SX Mini) ....52 Carburetor - adjusting idle (50 SX) ......52 Carburetor - adjusting idle (50 SX Junior, 50 SX Mini) ..............53 Checking oil level (50 SX Mini)........54 Bleeding the oil pump (50 SX Mini) ......
-
Page 6: Means Of Representation
All work marked with this symbol requires specialist knowledge and technical understanding. In the interest of your own safety, have these jobs done in an authorized KTM workshop! There, your motorcycle will be serviced optimally by specially trained experts using the specialist tools required. -
Page 7: Important Notes
Warranty The work prescribed in the service schedule must be carried out in an authorized KTM workshop only and confirmed in the customer's service record, since otherwise no warranty claims will be honored. No warranty claims can be honored for damage resulting from manipulations and/or alterations to the vehicle. - Page 8 IMPORTANT NOTES Environment Motorcycling is a wonderful sport and we naturally hope that you and your child will be able to enjoy it to the fullest. However, it is a potential problem for the environment and can lead to conflicts with other persons. But if you use your motorcycle responsibly, you can ensure that such problems and conflicts do not have to occur.
-
Page 9: View Of Vehicle
VIEW OF VEHICLE View of the vehicle from the left front (example) 700526-01 Hand brake lever Filler cap Fuel tap Quick release for seat lock Shock absorber compression adjustment Chain guide Plug-in stand... -
Page 10: View Of The Vehicle From The Right Rear (Example)
VIEW OF VEHICLE View of the vehicle from the right rear (example) 700527-01 Short circuit button Chassis number Throttle grip Level viewer for brake fluid, rear Foot brake pedal Kickstarter... -
Page 11: Location Of Serial Numbers
LOCATION OF SERIAL NUMBERS Chassis number The chassis number is stamped on right of the steering head. 700460-01 Engine number The engine number is stamped on the left side of the engine under the engine sprocket. 700461-01 Shock absorber part number The shock absorber part number is stamped on the top of the shock absorber above ... -
Page 12: Controls
CONTROLS Throttle grip Trottle grip is fitted on the right side of the handlebar. 700470-01 Hand brake lever Hand brake lever is fitted on the right side of the handlebar. The hand brake lever is used to activate the front brake. 700471-01 Short circuit button Short circuit button... -
Page 13: Closing Filler Cap
Put the tank cap on and turn it clockwise. Info Run the fuel tank breather hose without kinks. 700465-11 Opening oil tank cap (50 SX Mini) – Turn the oil tank cap counterclockwise and pull it up. 700517-01 Closing oil tank cap (50 SX Mini) –... -
Page 14: Kickstarter
CONTROLS Kickstarter 5.11 The kickstarter is fitted on the right of the engine. The kickstarter can be swiveled. Info Before riding, swing the kickstarter inwards towards the engine. 700472-01 Foot brake pedal 5.12 Foot brake pedal is located in front of the right footrest. ... -
Page 15: General Tips And Hints On Putting Into Operation
When using your motorcycle, remember that others may feel disturbed by excessive noise. – Make sure that the pre-delivery inspection work has been carried out by an authorized KTM workshop. You receive a delivery certificate and the service record at vehicle handover. -
Page 16: Running In The Engine
GENERAL TIPS AND HINTS ON PUTTING INTO OPERATION – Accustom your child to the handling of the motorcycle on suitable terrain, preferably on a large open meadow. Info To give your child a feel for the brake, you should push your child at first. Do not start the engine until your child can is able to apply the necessary brake pressure. -
Page 17: Riding Instructions
The engine is cold (50 SX) – Pull up the choke lever as far as possible and turn it max. ¼ of a turn. (50 SX Junior, 50 SX Mini) – Push the choke lever up all the way. –... -
Page 18: Starting Up
Open the throttle carefully. Shifting, riding Info If you hear unusual noises while riding, stop immediately, switch off the engine and contact an authorized KTM workshop. – If the choke function was activated, deactivate it after the engine has warmed up. -
Page 19: Refueling
50 SX Junior) – Close the filler cap. ( p. 11) Filling up with oil (50 SX Mini) Warning Engine failure If the vehicle is run without 2-stroke oil in the tank, the result is engine failure. – The oil tank must always be filled up to the MIN mark. - Page 20 RIDING INSTRUCTIONS – Fill the oil tank at least up to the MIN mark Requirement MIN mark Sufficient for a single tank filling Oil tank contents 0.2 l (0.2 qt.) 2-stroke engine oil ( p. 73) – Close the oil tank cap. ( p.
-
Page 21: Service Schedule
SERVICE SCHEDULE Important maintenance work to be carried out by an authorized KTM workshop. S20A S40A Engine • Change the gear oil. p. 55) Check spark plug and replace if required. • • Clean spark plug connectors and check for tightness. -
Page 22: Important Maintenance Work To Be Carried Out By An Authorized Ktm Workshop. (As Additional Order)
SERVICE SCHEDULE Important maintenance work to be carried out by an authorized KTM workshop. (as additional order) S20A S40A • Clean and adjust carburetor. Check intake membrane for wear. • • Checking wear of clutch linings. • • Checking wear of clutch drum. -
Page 23: Maintenance Work On Chassis And Engine
– Turn back counterclockwise by the number of clicks corresponding to the shock absorber type. Requirement Rebound damping (50 SX) Standard 10 clicks Rebound damping (50 SX Junior) Standard 12 clicks 700476-01 Rebound damping (50 SX Mini) Standard 12 clicks... -
Page 24: Checking The Static Sag Of The Shock Absorber
– Check the static sag. Static sag (50 SX) 20 mm (0.79 in) Static sag (50 SX Junior) 20 mm (0.79 in) Static sag (50 SX Mini) 10 mm (0.39 in) » If the static sag is less or more than the specified value: 0 0 0 B –... -
Page 25: Removing The Shock Absorber
MAINTENANCE WORK ON CHASSIS AND ENGINE Removing the shock absorber – Jack up the motorcycle. ( p. 21) – Remove screw and lower the rear wheel with the swing arm as far as possible without blocking the rear wheel. Fix the rear wheel in this position. –... -
Page 26: Adjusting Upper Fork Projection
MAINTENANCE WORK ON CHASSIS AND ENGINE Adjusting upper fork projection 9.10 Warning Danger of accidents Modifications to the chassis can seriously alter the vehicle's handling characteristics. – Following modifications, ride slowly at first to get the feel of the new handling characteristics. –... -
Page 27: Checking Play Of Steering Head Bearing
Danger of accidents Unsafe riding behavior due to incorrect steering head bearing play. – The steering head bearing play should be adjusted immediately in an authorized KTM workshop. Info If the bike is driven for a longer time with play in the steering head bearing, the bearing and the bearing seats in the frame can be damaged after time. - Page 28 MAINTENANCE WORK ON CHASSIS AND ENGINE – Remove screws – Take off the handlebar support. 300737-10 – Remove nut – Take off the upper triple clamp. 300738-11 – Tighten nut Requirement Steering head nut M20x1.5 10 Nm (7.4 lbf ft) 300739-10 –...
-
Page 29: Removing The Fork Legs
MAINTENANCE WORK ON CHASSIS AND ENGINE Removing the fork legs 9.15 – Remove front wheel. p. 44) – Dismount the start number plate. ( p. 31) – Remove screws and take off clamp. 300731-10 – Remove the screws with the washers and take off the brake caliper. ... -
Page 30: Removing The Lower Triple Clamp
MAINTENANCE WORK ON CHASSIS AND ENGINE – Position the brake caliper, fit and tighten the screws together with the washers. Requirement Screw, front brake caliper 20 Nm Loctite ® 243™ (14.8 lbf ft) 300732-11 – Position the brake line. Put the clamp on, and mount and tighten screws ... -
Page 31: Installing The Lower Triple Clamp
MAINTENANCE WORK ON CHASSIS AND ENGINE – Remove nut 300739-10 – Remove protector ring – Remove the lower triple clamp with the steering stem. – Remove the upper steering head bearing. 300740-10 Installing the lower triple clamp 9.18 –... -
Page 32: Greasing The Steering Head Bearing
MAINTENANCE WORK ON CHASSIS AND ENGINE – Tighten nut Requirement Nut, steering stem M20x1.5 30 Nm (22.1 lbf ft) – Position the handlebar support. – Mount and tighten screws Requirement Loctite ® 243™ Screw, handlebar support 40 Nm (29.5 lbf ft) 300742-10 –... -
Page 33: Dismount The Start Number Plate
MAINTENANCE WORK ON CHASSIS AND ENGINE – Position the front fender. Mount and tighten screws Requirement Remaining screws, chassis 10 Nm (7.4 lbf ft) 700479-11 Dismount the start number plate 9.22 – Remove screw and take off clamp. –... -
Page 34: Adjusting Handlebar Position
MAINTENANCE WORK ON CHASSIS AND ENGINE Adjusting handlebar position 9.25 – Remove the four screws . Remove the handlebar clamp. Remove the handlebar 0 0 1 and lay it to one side. Info 0 0 2 Protect the motorcycle and its attachments from damage by covering them. Do not bend the cables and lines. -
Page 35: Checking Chain Dirt
MAINTENANCE WORK ON CHASSIS AND ENGINE Checking chain dirt 9.28 – Check the chain for coarse dirt accumulation. » If the chain is very dirty: – Clean the chain. ( p. 33) 800012-10 Cleaning the chain 9.29 Warning Danger of accidents Oil or grease on the tires reduces their grip. –... -
Page 36: Checking The Chain Tension - Installing Rear Wheel
MAINTENANCE WORK ON CHASSIS AND ENGINE Checking the chain tension - installing rear wheel 9.31 Warning Danger of accidents Danger caused by incorrect chain tension. – If the chain tension is too high, the components of the secondary power train (chain, engine sprocket, rear sprocket, bear- ings in transmission and rear wheel) are under additional load. -
Page 37: Adjusting Chain Tension - After Checking
MAINTENANCE WORK ON CHASSIS AND ENGINE – Loosen nut – Adjust the chain tension by turning the adjusting screws left and right. Requirement ≥ 3 mm (≥ 0.12 in) Chain tension Turn adjusting screws equally on the left and right. Check that the rear wheel ... -
Page 38: Checking Brake Discs
Warning Danger of accidents Reduced braking due to worn brake discs. – Worn brake discs should be replaced immediately in an authorized KTM workshop. – Check the thickness of the front and rear brake discs at several places on the disc to see if it conforms to measurement ... -
Page 39: Checking Front Brake Fluid Level
If brake fluid gets into your eyes, rinse thoroughly with water and contact a doctor immediately. Warning Danger of accidents Reduced braking due to old brake fluid. – Have the front and rear brake fluid replaced according to the service plan in an authorized KTM workshop. Warning Environmental hazard Problem materials cause environmental damage. –... -
Page 40: Checking The Front Brake Linings
700498-01 Removing front brake linings 9.44 Warning Danger of accidents Improper brake maintenance and repair. – Always have your brake system maintained and repaired in an authorized KTM workshop. – Remove front wheel. p. 44) – Remove the lock washer ... -
Page 41: Installing The Front Brake Linings
Brake linings available from accessory suppliers are often not tested and approved for use on KTM vehicles. The construc- tion and friction factor of the brake linings and therefore the brake power can differ considerably from the original KTM brake linings. If brake linings are used that differ from the originals, there is no guarantee that they comply with the origi- nal license. -
Page 42: Checking Free Play Of Foot Brake Lever
MAINTENANCE WORK ON CHASSIS AND ENGINE Info Never user DOT 5 brake fluid! This is based on silicone oil and is colored purple. Oil seals and brake lines are not designed for DOT 5 brake fluid. Avoid contact between brake fluid and painted parts. Brake fluid attacks paint! Use only clean brake fluid from a sealed container! –... -
Page 43: Checking Rear Brake Fluid Level
Have the brake system checked in an authorized KTM workshop, and do not ride any further. Warning Danger of accidents Reduced braking due to old brake fluid. – Have the front and rear brake fluid replaced according to the service plan in an authorized KTM workshop. – Stand the vehicle upright. –... -
Page 44: Checking Rear Brake Linings
Brake linings available from accessory suppliers are often not tested and approved for use on KTM vehicles. The construc- tion and friction factor of the brake linings and therefore the brake power can differ considerably from the original KTM brake linings. If brake linings are used that differ from the originals, there is no guarantee that they comply with the origi- nal license. -
Page 45: Changing The Rear Brake Linings
If brake fluid gets into your eyes, rinse thoroughly with water and contact a doctor immediately. Warning Danger of accidents Reduced braking due to old brake fluid. – Have the front and rear brake fluid replaced according to the service plan in an authorized KTM workshop. Warning Environmental hazard Problem materials cause environmental damage. –... -
Page 46: Removing Front Wheel
MAINTENANCE WORK ON CHASSIS AND ENGINE Removing front wheel 9.55 – Jack up the motorcycle. ( p. 21) – Remove nut with washer. 700502-01 – Hold the front wheel and pull out the wheel spindle with the washer . Take the ... -
Page 47: Removing Rear Wheel
9.59 Info Only mount tires approved and/or recommended by KTM. Other tires could have a negative effect on riding behavior. The type, condition and air pressure of the tires all have an important impact on the riding behavior of the motorcycle. -
Page 48: Checking Tire Air Pressure
Danger of accidents Unstable riding behavior due to loose spokes. – If you ride with loose spokes, the spokes can break. Have the spoke tension corrected in an authorized KTM workshop. Info A loose spoke can cause wheel imbalance, which leads to more loose spokes in a short time. -
Page 49: Mounting The Seat
MAINTENANCE WORK ON CHASSIS AND ENGINE Mounting the seat 9.63 – Hook the seat onto screw and lower the seat at the rear while pushing it forward. Projection hooks into the fuel tank. 300612-10 – Close quick release ... -
Page 50: Checking The Coolant Level
MAINTENANCE WORK ON CHASSIS AND ENGINE – Check the coolant level in the radiator. Coolant level above radiator fins. 10 mm (0.39 in) » If the level of the coolant does not meet specifications: – Correct the coolant level. Alternatively 1 Coolant ( p. -
Page 51: Refilling Coolant
MAINTENANCE WORK ON CHASSIS AND ENGINE – Stand the vehicle upright. – Place a suitable container under the engine. – Remove screw . Remove the radiator cap. – Completely drain the coolant. – Mount and tighten screw with a new seal ring. ... -
Page 52: Installing The Main Silencer
MAINTENANCE WORK ON CHASSIS AND ENGINE Installing the main silencer 9.70 – Position the main silencer. – Mount the main silencer with the rubber sleeve – Mount the silentblock with the screw Requirement Remaining screws, chassis 10 Nm (7.4 lbf ft) 700513-01 –... -
Page 53: Removing The Air Filter
MAINTENANCE WORK ON CHASSIS AND ENGINE Removing the air filter 9.74 Note Engine failure Unfiltered intake air has a negative effect on the service life of the engine. – Never ride the vehicle without an air filter since dust and dirt can get into the engine and result in increased wear. Warning Environmental hazard Problem materials cause environmental damage. -
Page 54: Carburetor - Idle (50 Sx)
700520-01 The idle mixture is adjusted with the idle mixture adjustment screw Carburetor - idle (50 SX Junior, 50 SX Mini) 9.78 The idle setting of the carburetor has a big influence on the starting behavior, stable idling and the response to throttle opening. That means that an engine with a correctly set idle speed is easier to start than if the idle is set wrongly. -
Page 55: Carburetor - Adjusting Idle (50 Sx Junior, 50 Sx Mini)
Following extreme air temperature or altitude changes, adjust the idle speed again. Carburetor - adjusting idle (50 SX Junior, 50 SX Mini) 9.80 – Screw in the idle mixture adjusting screw until it stops and then turn to the pre- ... -
Page 56: Checking Oil Level (50 Sx Mini)
MAINTENANCE WORK ON CHASSIS AND ENGINE Checking oil level (50 SX Mini) 9.81 – Stand the motorcycle upright on a horizontal surface. – Check the level of the oil in the oil tank. For one fuel tank filling, the oil tank must be filled at least up to tje MIN mark ... -
Page 57: Checking Gear Oil Level
MAINTENANCE WORK ON CHASSIS AND ENGINE – Turn the oil pump gear counterclockwise until oil escapes bubble-free from the oil line 300653-10 – Connect the oil line – Position the oil pump. – Mount and tighten screws ... -
Page 58: Filling Up With Gear Oil
MAINTENANCE WORK ON CHASSIS AND ENGINE – Place a suitable container under the engine. – Remove the gear oil drain plug with magnet – Completely drain the gear oil. – Thoroughly clean gear oil drain plug with magnet –... -
Page 59: Checking Clutch Engagement Speed
MAINTENANCE WORK ON CHASSIS AND ENGINE Danger Danger of poisoning Exhaust gases are poisonous and can result in uncon- sciousness and/or death. – When running the engine, always make sure there is sufficient venti- lation, and do not start or run the engine in a closed space without an effective exhaust extraction system. -
Page 60: Fitting Centrifugal Clutch
MAINTENANCE WORK ON CHASSIS AND ENGINE – Lay the motorcycle on its side. – Remove screws – Take off the clutch cover. 300655-10 – Hold the clutch drum using the special tool Holding spanner (54629012100) – Remove screw ... -
Page 61: Checking/Measuring Clutch
MAINTENANCE WORK ON CHASSIS AND ENGINE – Position the footbrake pedal. – Mount and tighten nut Requirement Remaining nuts, chassis 30 Nm (22.1 lbf ft) – Mount the spring – Check the gear oil level. ( p. 55) –... - Page 62 MAINTENANCE WORK ON CHASSIS AND ENGINE – Position the clutch lining – Fit the screw with the spacer and spring Info The washer is used for adjusting the clutch engagement speed and must be included in the clutch lining assembly identically for all linings, accord- ing to the clutch engagement speed.
-
Page 63: Troubleshooting
Check/set the carburetor components. Adjusting screws on carburetor dis- (50 SX) – torted Carburetor - adjust the idle speed. p. 52) (50 SX Junior, 50 SX Mini) – Carburetor - adjust the idle speed. p. 53) – Spark plug defective Change spark plug. - Page 64 TROUBLESHOOTING Faults Possible cause Action – Engine stalls or is popping into the Engine takes in bad air Check rubber sleeves and carburetor for tight- carburetor ness. – Socket connector or ignition coil is Clean the socket connector and treat it with loose or oxidized contact spray.
-
Page 65: Cleaning
CLEANING Cleaning motorcycle 11.1 Note Material damage Damage and destruction of components by high-pressure cleaning equipment. – Never clean the vehicle with high-pressure cleaning equipment or a strong water-jet. The excessive pressure can penetrate electri- cal components, plug connectors, Bowden cables and bearings, etc., and can damage or destroy these parts. Warning Environmental hazard Problem materials cause environmental damage. -
Page 66: Storage
Check the tire air pressure. ( p. 46) – The storage place should be dry and not subject to large temperature fluctuations. Info KTM recommends jacking up the motorcycle. – Jack up the motorcycle. ( p. 21) – Cover the motorcycle with a porous sheet or blanket. Do not use non-porous materials since they prevent humidity from escaping, thus causing corrosion. -
Page 67: Technical Data - Engine
Needle bearing Piston pin bearing Needle bearing Pistons Aluminum cast Piston rings 1 rectangular ring Engine lubrication (50 SX, 50 SX Junior) Mixture oil lubrication Engine lubrication (50 SX Mini) Separate lubrication Primary transmission 61:33 straight cut spur gear Clutch... -
Page 68: Technical Data - Engine Tightening Torques
5 Nm (3.7 lbf ft) ® Screw, kickstarter 6 Nm (4.4 lbf ft) Loctite 243™ – Screw, oil pump (50 SX Mini) 6 Nm (4.4 lbf ft) – Screw, stator clamp 6 Nm (4.4 lbf ft) ® Screw, water pump wheel 5 Nm (3.7 lbf ft) -
Page 69: Technical Data - Carburetor
Open 3 turns Main jet Jet needle Idling jet Needle jet 260AU Throttle slide Cold start jet 50 SX Junior 15.2 Carburetor type Dell`Orto PHVA 14DS Needle position 3rd position from top Idle air adjustment screw Open 3.5 turns Main jet... -
Page 70: Technical Data - Chassis
Ground clearance unloaded (50 SX Junior) 220 mm (8.66 in) Ground clearance unloaded (50 SX Mini) 184 mm (7.24 in) Weight without fuel, approx. (50 SX) 39.8 kg (87.7 lb.) Weight without fuel, approx. (50 SX Junior, 50 SX Mini) 39.0 kg (86 lb.) -
Page 71: Tires
2.75 - 10 37J TT Pirelli SCORPION MX Mid Soft 32 NHS Pirelli SCORPION MX Mid Soft 32 NHS (50 SX Junior, 50 SX Mini) 2.50 - 10 33J TT 2.75 - 10 37J TT Pirelli SCORPION MX Mid Soft 32 NHS... -
Page 72: Technical Data - Fork
100±2.5 mm (3.94±0.098 in) Fork length 692 mm (27.24 in) Fork oil Fork oil (SAE 7.5) ( p. 73) 50 SX Junior 17.2 Fork Marzocchi Spring rate Weight of rider: 25… 35 kg (55… 77 lb.) 2 N/mm (11 lb/in) Air chamber length 100±2.5 mm (3.94±0.098 in) -
Page 73: Technical Data - Shock Absorber
Spring length 130 mm (5.12 in) Gas pressure 10 bar (145 psi) Static sag 20 mm (0.79 in) Fitted length 275 mm (10.83 in) 50 SX Junior 18.2 Shock absorber WP Suspension 3614 BAEM Rebound damping Standard 12 clicks Spring preload Standard 5 mm (0.2 in) -
Page 74: Technical Data - Chassis Tightening Torques
TECHNICAL DATA - CHASSIS TIGHTENING TORQUES – Spoke nipple M3.5 3 Nm (2.2 lbf ft) ® Rear brake caliper screw 10 Nm (7.4 lbf ft) Loctite 243™ – Remaining nuts, chassis 15 Nm (11.1 lbf ft) – Screw, ball joint, push rod on foot- 10 Nm (7.4 lbf ft) brake cylinder –... -
Page 75: Substances
2-stroke engine oil According to – JASO FC ( p. 77) Guideline – ® Only use high quality 2-stroke engine oil of a well-known brand. KTM recommends Motorex products. Fully synthetic Supplier ® Motorex – Cross Power 2T Brake fluid DOT 4 / DOT 5.1 According to –... - Page 76 SUBSTANCES Super unleaded (ROZ 95 / RON 95 / PON 91) According to – DIN EN 228 (ROZ 95 / RON 95 / PON 91) Super unleaded gasoline, mixed with 2-stroke engine oil According to – DIN EN 228 – JASO FC ( p.
-
Page 77: Auxiliary Substances
AUXILIARY SUBSTANCES Air filter cleaner Specification – ® KTM recommends Motorex products. Supplier ® Motorex – Twin Air Dirt Bio Remover Chain cleaner Specification – ® KTM recommends Motorex products. Supplier ® Motorex – Chain Clean 611 Cleaning and polishing materials for metal, rubber and plastic Specification –... - Page 78 AUXILIARY SUBSTANCES Oil for foam air filter Specification – ® KTM recommends Motorex products. Supplier ® Motorex – Twin Air Liquid Bio Power Universal oil spray Specification – ® KTM recommends Motorex products. Supplier ® Motorex – Joker 440 Universal...
-
Page 79: Standards
STANDARDS JASO FC JASO FC is a classification for a 2-stroke engine oil that was specifically developed for the extreme demands of racing. Thanks to first rate synthetic esters and specially designed additives, superb combustion is achieved even under extreme operating conditions. The SAE viscosity classes were defined by the Society of Automotive Engineers and are used for classifying oils according to their vis- cosity. -
Page 80: Index
INDEX INDEX Engine Air filter running in ....... . 14 cleaning . - Page 81 INDEX Start number plate installing ....... . . 31 Main silencer removing .
- Page 82 *3211344en* 3211344en KTM-Sportmotorcycle AG 5230 Mattighofen/Austria http://www.ktm.com...
Need help?
Do you have a question about the 50 SX and is the answer not in the manual?
Questions and answers