Table of Contents
Advertisement
Quick Links
INSTALLATION, MAINTENANCE AND USE
INSTRUCTIONS FOR
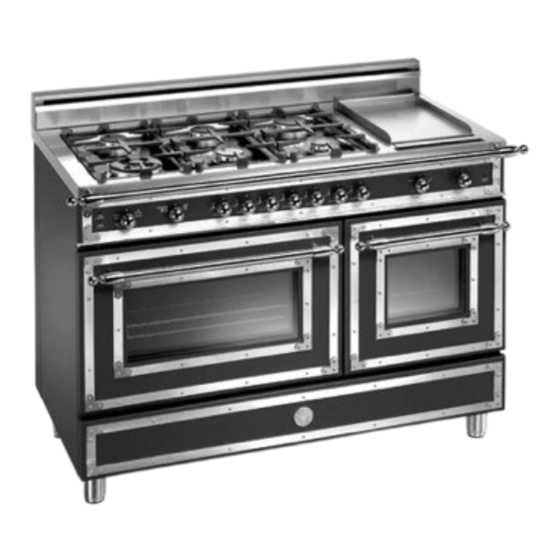
FREE-STANDING COOKERS
cm (type MT/MTV)
121,9x64
READ THE INSTRUCTION BOOKLET BEFORE INSTALLING AND USING
THE APPLIANCE.
The manufacturer will not be responsible for any damage to property or to persons
caused by incorrect installation or improper use of the appliance.
The manufacturer is not responsible for any inaccuracies, due to printing or transcription
errors, contained in this booklet. In addition, the appearance of the figures reported is also
purely indicative.
The manufacturer reserves the right to make changes to its products when considered
necessary and useful, without affecting the essential safety and operating characteristics.
Advertisement
Table of Contents

Related Manuals for Bertazzoni MT


Summary of Contents for Bertazzoni MT
- Page 1 INSTALLATION, MAINTENANCE AND USE INSTRUCTIONS FOR FREE-STANDING COOKERS cm (type MT/MTV) 121,9x64 READ THE INSTRUCTION BOOKLET BEFORE INSTALLING AND USING THE APPLIANCE. The manufacturer will not be responsible for any damage to property or to persons caused by incorrect installation or improper use of the appliance.
-
Page 2: Table Of Contents
CONTENTS: INSTALLER TECHNICAL MANUAL .......................pg. 2 Installing the cooker - Installation information ....................pg. 2 Ventilation and aeration of rooms........................pg. 3 Height adjustable legs ............................pg. 3 Backguard installation instruct ........................pg. 3 Gas connection ...............................pg. 3 Adaptation to different types of Gas and burner adjustments................pg. 3-4 Electric connection ............................pg. -
Page 3: Ventilation And Aeration Of Rooms
ROOM VENTILATION To ensure that the appliance operate correctly, the room where it is installed must be continuously ventilated. The room volume should not be less than 25 m³ and the quantity of air needed shall be based on the regular combustion of gas and on the ventilation of the room. -
Page 4: Electric Connection
TABLE N°1: Adaption to various types of gas APPLIANCE CATEGORY: 2H3+ Burner Types of Gas Pressure Nozzle Rater Capacity Reduced by-pass Diameter Capacity Diameter mbar 1/100 mm. kcal/h kcal/h 1/100 mm. Natural G20 0,48 34 reg. Auxiliary Butane G30 0,48 Propane G31 0,48 Natural G20... -
Page 5: Appliance Maintenance - Replacing Parts
APPLIANCE MAINTENANCE ATTENTION: IMPORTANT WARNINGS For cookers resting on a base ATTENTION: If the cooker rests on a base, take the measures necessary to prevent the cooker from sliding along the support base. For cookers with glass covers ATTENTION: Before opening the appliance’s glass cover, carefully remove all liquid residues from the top of it. ATTENTION: Before closing the appliance’s glass cover, make sure that the work surface has cooled. -
Page 6: Description Of Control Panel And Control Types
the symbol shows the running of left or right oven (conventional electric for right oven, 9 positions switch for left oven) the symbol shows the electric thermostat for electric left oven USING BURNERS A diagram is etched on the control panel above each knob which indicates which burner corresponds to that knob. The burners can be ignited in different ways depending on the type of appliance and its specific characteristics: - Manual lighting (it is always possible even when the power is cut off): Turn the knob anticlockwise that corresponds to the burner selected, setting it to the MAXIMUM position at the etched star (large flame Fig.18) and place... -
Page 7: Using The Electric Thermostat
Press and turn the knob anti-clockwise to the selected position Pre-heat at the maximum temperature, ( 7 position) for 15 minutes, then place the food on the griddle and cook to the desired temperature. The activation of the griddle is shown by the indicator light which is also found on the front panel of the appliance. Table 5 Griddle cooking recommendations FOOD KNOB POSITION... -
Page 8: Using The Thermostat With Switch In Series
USING THE THERMOSTAT WITH SWITCH IN SERIES (Right oven) (COOKERS WITH A SINGLE-CONTROL CONVENTIONAL ELECTRIC OVEN) The electric oven is controlled by an electric thermostat combined with a switch used to turn on the elements. The electric oven can be combined with an electric grill. The oven is heated by 2 elements: one on the top and one on the bottom. -
Page 9: Using The Ventilated Electric Oven
USING THE VENTILATED ELECTRIC OVEN (Left oven) When using the oven for the first time it should be operated for a maximum of 30 minutes at a temperature of about 250° to eliminate any odours generated by the internal insulation. Before cooking, allow the oven to reach the desired temperature setting waiting for the orange light to turn off. -
Page 10: Using The Ventilated Electric Grill
USING THE VENTILATED ELECTRIC GRILL (Left oven) The ventilated electric grill is a special function equipped only on the multifunction oven. Set the 9 + 0 switch to the relative position to activate the grill element and the electric fan. Generally, to ensure excellent grilling, place the oven shelf in the middle position while the oven tray should be inserted at the bottom. - Page 11 Fig. 1 Fig. 3 Fig. 4 Fig. 5 Fig.6 Fig.7...
- Page 12 Fig.8 Fig.9 Fig.10 Fig.11 Fig.12 Fig.13 Fig.14 Fig.15 Fig.16 Fig 17 Fig 18...
- Page 13 Fig.19 Fig 20 Fig. 21 Fig 22 Fig 23 Fig. 24 Fig. 25 Fig. 26...
- Page 16 Cod. 310327...
Need help?
Do you have a question about the MT and is the answer not in the manual?
Questions and answers