
Related Manuals for Wascomat WS3 230-340-470-670 H


Summary of Contents for Wascomat WS3 230-340-470-670 H
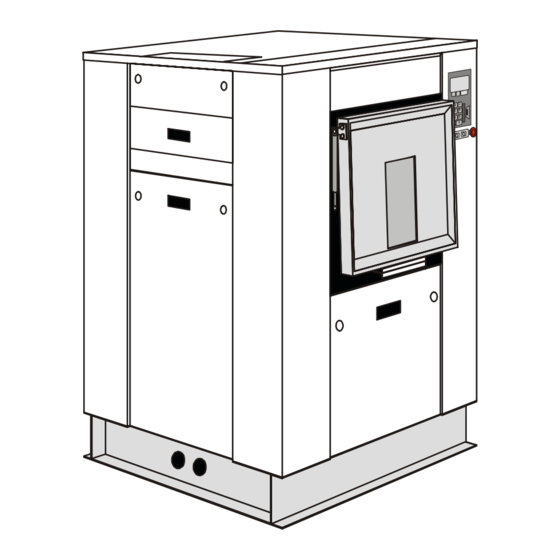
- Page 1 INSTRUCTION HANDBOOK ASHER- XTRACTORS WS3 230-340-470-670 H WSB3 230-340-470-670 H 08100226gb...
-
Page 2: Table Of Contents
01201055 0401 INSTRUCTION Table of contents Notice Date Page HANDBOOK Pages/Chapters Pages/Chapters General instructions Show weight ........... 15/11 General ............. 1/1 Pause ............. 17/11 Precautions for use ........1/2 Manual operation during a program ..18/11 Environmental information ......1/3 Text ............ -
Page 3: General Instructions
01201055 0300 INSTRUCTION 1. General Notice Date Page HANDBOOK General instructions The machines described in this handbook have a washing capacity of 229, 338, 467 or 668 litres according to their type. They are washer-extractors designed to meet the most severe requirements. They are designed to be installed in hotels, laundries, hospitals or collectivities. - Page 4 01201055 1199 INSTRUCTION 1. General Notice Date Page HANDBOOK This washer extractor is controlled by a microprocessor-based program control unit placed on the loading side. There are many advantages to this equipment, including : • Timing, levels and temperatures are controlled with great precision and flexibility. •...
- Page 5 1298 01201055 INSTRUCTION 1. General Notice Date Page HANDBOOK A very high working safety level of the machine is achieved thanks to a continuous monitoring and built-in safety devices. Even the compound textile fabrics can be washed at a high temperature with no crumpling risk thanks to a special cooling process before the rinsing cycle.
-
Page 6: Precautions For Use
0700 01201055 INSTRUCTION 2. Precautions for use Notice Date Page HANDBOOK Precautions for use The machine should not be used by children. The machine is designed for "water washing" of textile only. This machine is for professional use and must be used exclusively by qualified personnel. It is forbidden to wash textiles soaked with solvents. -
Page 7: Environmental Information
0401 3. Environmental 01201055 INSTRUCTION information Notice Date Page HANDBOOK Environmental information Concerned by providing the end user with useful and necessary environmental information, we wish to precise : Data about energetic consumptions, wastes (atmospheric and liquid) and sound level are indicated in the paragraph "Technical characteristics". -
Page 8: Preliminary Instructions
4. Preliminary 0401 01201055 INSTRUCTION instructions Notice Date Page HANDBOOK Preliminary instructions Before any use, it is compulsory to read the instruction handbook. Users must have learnt how the machine operates. The identification plate is placed on the left hand side of the machine. In order to prevent any risk of fire or explosion, flammable products should never be used to clean the machine. - Page 9 1199 4. Preliminary 01201055 INSTRUCTION instructions Notice Date Page HANDBOOK SAFETY This machine should be installed in con- formance to the health and safety regula- tions, and only used in a sufficiently aer- ated area. Check the instructions before installing or using the machine.
- Page 10 4. Preliminary 1101 01201055 INSTRUCTION instructions Notice Date Page HANDBOOK Ensure that the machine is not loaded beyond its nominal capacity (see "Specific load" in the instruction booklet’s technical charac- teristics). An excessive load has consequences for the lifetime of the ma- chine’s organs, as follows: ·...
- Page 11 4. Preliminary 1298 01201055 INSTRUCTION instructions Notice Date Page HANDBOOK Distributor Letter Chemical System Responsibility Disclaimer The following policy should be considered and understood as a warranty/disclaimer to customers operating textile care installations where liquid supply (chemical) systems use or may use peristaltic pumps to inject supplies into equipment.
-
Page 12: Locking And Tagging Procedure
5. Locking and 1298 01201055 INSTRUCTION tagging procedure Notice Date Page HANDBOOK Locking and tagging procedure A red insert at the beginning of this instruction handbook schematically shows the locking and tagging procedure described below. If you wish, you can detach this insert and display it close to the machine to remind maintenance personnel of the safety instructions. -
Page 13: Handling
01201055 1298 INSTRUCTION 6. Handling Notice Date Page HANDBOOK Handling Before any handling, check that the four transport locks fitted are still in place and well-tightened. To do so, remove the front and rear casings and check presence of four locks (B). D0650 SAFETY It is obligatory that all... - Page 14 01201055 1298 INSTRUCTION 6. Handling Notice Date Page HANDBOOK CAUTION You should never handle the machine in its longitudinal side (any other than shown on the drawing below) with a fork-lift truck. Important risk of parts deterioration for those fixed under the machine. 2/ Lifting with a fork-lift truck This can be carried out from the front or back, at the centre of the machine.
- Page 15 1298 01201055 INSTRUCTION 6. Handling Notice Date Page HANDBOOK 4/ Lifting with a jack Lifting in this case can only be done with a jack (minimum capacity 500 daN) which can bear the machine's weight. Nota : in order to avoid the bending of the sole, make sure to place the lifting jack at each corner of the machine at point A or B.
-
Page 16: Packing - Weight
0102 01201055 INSTRUCTION 7. Packing - Weight Notice Date Page HANDBOOK Packing Packing dimensions in mm/inch Size A Size B Size C Washer extractor Type 230 standard 1180/46.5 1230/48.4 1840/72.4 Washer extractor Type 230 barrier 1180/46.4 1230/48.4 1840/72.4 Washer extractor Type 340 standard 1180/46.4 1450/57 1840/72.4... -
Page 17: Technical Characteristics Technical Characteristics
8.Technical 01201055 0999 INSTRUCTION characteristics Notice Date Page HANDBOOK Washer extractor type 230 standard Right view Front view Left view > 1 m/40” > 1 m/40” 160/6.3” 150/5.9” H1-H2 H3-H4 110/ 110/ 430/17” 430/17” 4.33” 4.33” “Gripsol” 980/38.58” 980/38.58” 1045/41.14” 1015/39.96”... - Page 18 8.Technical 01201055 0102 INSTRUCTION characteristics Notice Date Page HANDBOOK Washer extractor type 230 standard Diagram no. 07100081 Heating Electric Steam Thermic fluid Characteristics Ø cage --------------------------- 770 mm (30.31")-------------------- Cage length --------------------------- 520 mm (20.47")-------------------- Cage volume ----------------------- 229 dm³ (229 l) -------------------- Specific load 1/11 ----------------------------- 21 kg (46 lb)----------------------- (dry linen, ISO 9398-4)
- Page 19 8.Technical 01201055 0999 INSTRUCTION characteristics Notice Date Page HANDBOOK Washer extractor type 340 standard Right view Front view Left view > 1 m/40” > 1 m/40” 160/6.3” 150/5.9” 110/ 110/ H1-H2 H3-H4 430/17” 430/17” 4.33” 4.33” “Gripsol” 980/38.58” 980/38.58” 1285/50.59” 1015/39.96”...
- Page 20 8.Technical 0201 01201055 INSTRUCTION characteristics Notice Date Page HANDBOOK Washer extractor type 340 standard Diagram n°. 07100083 Heating Electric Steam Thermic fluid Characteristics Ø cage --------------------------- 770 mm (30.31")-------------------- Cage length ----------------------------- 760 mm (30")---------------------- Cage voume ----------------------- 338 dm³ (338 l) -------------------- Specific load 1/11 ----------------------------- 31 kg (68 lb)----------------------- (dry linen, ISO 9398-4)
- Page 21 8.Technical 01201055 0999 INSTRUCTION characteristics Notice Date Page HANDBOOK Washer extractor type 470 standard Right view Front view Left view > 1 m/40” > 1 m/40” 160/6.3” 150/5.9” 110/ 110/ 430/17” 430/17” 4.33” 4.33” “Gripsol” H1-H2 H3-H4 980/38.58” 1565/61.61” 980/38.58” 1015/39.96”...
- Page 22 8.Technical 0102 01201055 INSTRUCTION characteristics Notice Date Page HANDBOOK Washer extractor type 470 standard Diagram no. 07100085 Heating Electric Steam Thermic fluid Characteristics Ø cage --------------------------- 770 mm (30.31")-------------------- Cage length ----------------------------- 1040 mm (41") ------------------- Cage volume ----------------------- 467 dm³ (467 l) -------------------- Specific load 1/11 --------------------------- 42.5 kg (94 lb)----------------------- (dry linen, ISO 9398-4)
- Page 23 8.Technical 01201055 0999 INSTRUCTION characteristics Notice Date Page HANDBOOK Washer extractor type 670 standard Right view Front view Left view > 1 m/40” > 1 m/40” 150/5.9” 160/6.3” 110/ 110/ H1-H2 H3-H4 430/17” 430/17” 4.33” 4.33” “Gripsol” 980/38.58” 980/38.58” 200078.74” 1015/39.96”...
- Page 24 8.Technical 0102 01201055 INSTRUCTION characteristics Notice Date Page HANDBOOK Washer extractor type 670 standard Diagram no. 07100087 Heating Electric Steam Thermic fluid Characteristics Ø cage --------------------------- 770 mm (30.31")-------------------- Cage length ----------------------------- 1500 mm (59") ------------------- Cage volume ----------------------- 668 dm³ (668 l) -------------------- Specific load 1/11 --------------------------- 61 kg (134 lb)----------------------- (dry linen, ISO 9398-4)
- Page 25 8.Technical 0999 01201055 INSTRUCTION characteristics Notice Date Page HANDBOOK Washer extractor type 230 barrier Right view Front view Left view 150/5.9” 160/6.3” H1-H2 H3-H4 110/ 110/ 4.33” 430/17” 430/17” 4.33” “Gripsol” 980/38.58” 1045/41.14” 980/38.58” 1055/41.53” 1055/41.53” 160/6.3” 135/5.3” > 1 m/40” 1045/41.14”...
- Page 26 8.Technical 0102 01201055 INSTRUCTION characteristics Notice Date Page HANDBOOK Washer extractor type 230 barrier Diagram no. 07100082 Heating Electric Steam Thermic fluid Characteristics Ø cage --------------------- 770 mm (30.31") ------------------- Cage length --------------------- 520 mm (20.47") ------------------- Cage volume ---------------------- 229 dm³ (229 l) --------------------- Specific load 1/11 -------------------- 21 kg (46 lb) ------------------- (dry linen, ISO 9398-4)
- Page 27 8.Technical 0999 01201055 INSTRUCTION characteristics Notice Date Page HANDBOOK Washer extractor type 340 barrier Right view Front view Left view 160/6.3” 150/5.9” 110/ 110/ 430/17” 4.33” 430/17” 4.33” “Gripsol” H1-H2 H3-H4 980/38.58” 980/38.58” 1285/50.59” 1055/41.53” 1055/41.53” 160/6.3” 135/5.3” > 1 m/40” 1285/50.59”...
- Page 28 8.Technical 01201055 0102 INSTRUCTION characteristics Notice Date Page HANDBOOK Washer extractor type 340 barrier Diagram no. 07100084 Heating Electric Steam Thermic fluid Characteristics Ø cage --------------------- 770 mm (30.31") ------------------- Cage lenght ----------------------- 760 mm (30") ------------------- Cage volume ---------------------- 338 dm³ (338 l) --------------------- Specific load 1/11 ------------------------ 31 kg (68 lb) ---------------------- (dry linen, ISO 9398-4)
- Page 29 8.Technical 01201055 0999 INSTRUCTION characteristics Notice Date Page HANDBOOK Washer extractor type 470 barrier Right view Front view Left view 160/6.3” 150/5.9” 110/ 110/ 430/17” 4.33” 4.33” 430/17” “Gripsol” H1-H2 H3-H4 980/38.58” 980/38.58” 1565/61.61” 1055/41.53” 1055/41.53” 160/6.3” 135/5.3” > 1 m/40” 1565/61.61”...
- Page 30 8. Characteristics 0102 01201055 INSTRUCTION techniques Notice Date Page HANDBOOK Washer extractor type 470 barrier Diagram no. 07100086 Heating Electric Steam Thermic fluid Characteristics Ø cage --------------------- 770 mm (30.31") ------------------- Cage length ----------------------- 1040 mm (41") ------------------- Cage volume ---------------------- 467 dm³...
- Page 31 8.Technical 01201055 0999 INSTRUCTION characteristics Notice Date Page HANDBOOK Washer extractor type 670 barrier Right view Front view Left view 160/6.3” 150/5.9” 110/ 110/ 430/17” 430/17” 4.33” 4.33” H1-H2 H3-H4 “Gripsol” 980/38.58” 980/38.58” 2000/78.74” 1055/41.53” 1055/41.53” 160/6.3” 135/5.3” > 1 m/40” 2000/78.74”...
- Page 32 8.Technical 01201055 0120 INSTRUCTION characteristics Notice Date Page HANDBOOK Washer extractor type 670 barrier Diagram no. 07100088 Heating Electric Steam Thermic fluid Characteristics Ø cage --------------------- 770 mm (30.31") ------------------- Cage length ----------------------- 1550 mm (59") ------------------- Cage volume ---------------------- 668 dm³ (668 l) --------------------- Specific load 1/11 ----------------------- 61 kg (134 lb) ---------------------- (dry linen, ISO 9398-4)
-
Page 33: Sound Level
8. Characteristics 0102 01201055 INSTRUCTION techniques Notice Date Page HANDBOOK Sound level Airborne noise emitted by the machine (values established from measurements made on machine at points A, B, C, and D). (40”) D0267 Weighted sound pressure level (A) in dB(A). Washer 230 Washer 340 Washer 470... -
Page 34: Installation
01201055 0102 INSTRUCTION 9. Installation Notice Date Page HANDBOOK You should have found an instruction handbook and keys to open the machine casings, in the machine. Depending on its destination, the washer extractor is delivered bare or may be placed on a transport pallet and/or packed with plastic film. -
Page 35: Working Place Lighting
01201055 0102 INSTRUCTION 9. Installation Notice Date Page HANDBOOK Working place lighting The lighting should be designed so as to avoid eye strain for the operator ; it should be uniform without any glare, and should be sufficient to detect any hazards. The average lighting value on the working place recommended by the clothing industry for inspecting linen is 500 lux. -
Page 36: Mechanical Installation
0102 01201055 INSTRUCTION 9. Installation Notice Date Page HANDBOOK Mechanical installation Setting of the "Gripsol" bolsters Preparation of the ground and machine : - Degrease carefully the ground and the soles of the machine. Preparation of the "Gripsol" bolsters : - Soak the bolsters in hot water during 5 minutes, then let them in open air for 3 to 4 minutes. - Page 37 0102 01201055 INSTRUCTION 9. Installation Notice Date Page HANDBOOK Instructions to fit the safety flanges Position the safety flanges (A) crosswise (one in the front and the other at the back of the sole). Mark the place of the drilling hole for the fixing pin (B) and drill the holes for fixing of flanges (holes diam.
- Page 38 0599 01201055 INSTRUCTION 9. Installation Notice Date Page HANDBOOK Instructions to fit the filling angles (barrier machines only) Two angles (A and B) allow to fill the the soles ends. Assemble each filling angle with screws and nuts to the sole ends which are next to the parti- tion wall, in the clean area.
- Page 39 01201055 0102 INSTRUCTION 9. Installation Notice Date Page HANDBOOK Instructions for installation of the washer with barrier partition The barrier partition (O) (provided by customer) should be assembled before the installation of the machine. Centre and align the washer-extractor with the frame (P) 50x100 mm (2x4") (provided by customer).
-
Page 40: Water Connections
0102 01201055 INSTRUCTION 9. Installation Notice Date Page HANDBOOK Waters connections Washer extractors are assembled in standard execution with two waters inlet. One hot water and one hard water. On option, a third water inlet (soft) is possible. The hereunder example sketch shows the connection of the machine to the different inlets. Manual stop valve DN 26 (1"... -
Page 41: Steam Connection
01201055 0102 INSTRUCTION 9. Installation Notice Date Page HANDBOOK Steam connection For transport reasons, the steam electrovalve is dismantled and placed in the cardboard box supplies. The inlet pipe to the machine has to be fit with a manual stopping valve to ease installation and maintenance. - Page 42 0999 01201055 INSTRUCTION 9. Installation Notice Date Page HANDBOOK You can drill the machine's steam diffuser to 4 holes to adjust the steam flow according to the countersink supply pressure. Hereunder chart sums up different possibili- Tow winden ties. only on type xxx Steam Steam...
-
Page 43: Drain Connection
01201055 0102 INSTRUCTION 9. Installation Notice Date Page HANDBOOK Drain connection The machine's exhaust sleeve outside diameter is of 75 mm (3"). Depending of your installa- tion, it might be fit on the left or right side of the machine. Adapt and connect the rubber bend (H) to the machine's exhaust sleeve and to the wasted waters collector (rubber bend supplied with one collar in the machine). -
Page 44: Air Vent Connection
01201055 0102 INSTRUCTION 9. Installation Notice Date Page HANDBOOK Air vent connection Air vent The air vent of the drum opens on the top of the machine. Remove the upper casing protecting the water inlets to reach the air intake sleeve, then connect the bent hose to this opening. - Page 45 0102 01201055 INSTRUCTION 9. Installation Notice Date Page HANDBOOK Machine type Units Length of exchanger mm/inch 1110/43.7" Dimension of output exchanger mm/inch 1040/41" Dimension of evacuation pipe mm/inch 645/25.39" Evacuation of burn gas mm/inch Ø 125/5" Exchanger bottom output mm/inch Ø...
-
Page 46: Connection Of The Evacuation Pipe Of The Gas Exchanger
01201055 0102 INSTRUCTION 9. Installation Notice Date Page HANDBOOK Connection of the evacuation pipe of the gas exchanger. Fresh air inlet To allow the gas exchanger to work at ist best, it is important that the laundry air inlet passes throught an opening from the outside. - Page 47 01201055 0102 INSTRUCTION 9. Installation Notice Date Page HANDBOOK Installation of the exhaust of burn gas Ø 125 - Connect the whole set of pipes on your cheminey pipe, that is to say : - 1 aluminium pipe (A) lenght 500 mm (20") on the exchanger.
-
Page 48: Gas Connection
01201055 0499 INSTRUCTION 9. Installation Notice Date Page HANDBOOK Gas connection CAUTION The installation, connection and gas arrival adjustments for the machine must be done by qualified personnel only. The customer must install a filter and a manual stop valve on the supply side of the machine if NATURAL GAS is used. - Page 49 01201055 0800 INSTRUCTION 9. Installation Notice Date Page HANDBOOK The gas exchanger is adjusted at the plant to be suitable for the kind of gas specified on the order. If you have to supply your machine with gas in a family different from the gas for which your machine was adjusted, proceed as follows.
- Page 50 0499 01201055 INSTRUCTION 9. Installation Notice Date Page HANDBOOK IMPORTANT Adjustments should be made by qualified personnel only. Adjustement and chesking of the outlet pressure The gas outlet pressure of the electrovalve is adjusted at the factory. If you have to make another adjustment, proced as follows.
- Page 51 01201055 0300 INSTRUCTION 9. Installation Notice Date Page HANDBOOK Legend of symbols used machine working with only one gas family machine working with two gas families family : caol gas or town gas (for information : not used here) family : natural gas family : liquefied petroleum gas (LPG) natural gas with high calorific value (type G20) natural gas with low calorific value (type G25)
- Page 52 0102 01201055 INSTRUCTION 9. Installation Notice Date Page HANDBOOK TABLE OF CORRESPONDENCES - Washer-Extractor 230 Category Type Working Ø of Pressure at Heat Consumption Consumption of gas supply injectors injectors emission Mn in Vn in index pressure in mm in mm H Qn in kW kg/h (Hi)** m³/h**...
- Page 53 01201055 0102 INSTRUCTION 9. Installation Notice Date Page HANDBOOK TABLE OF CORRESPONDENCES - Washer-Extractor 470 Category Type Working Ø of Pressure at Heat Consumption Consumption of gas supply injectors injectors emission Mn in Vn in index pressure in mm in mm H Qn in kW kg/h (Hi)** m³/h**...
- Page 54 01201055 0800 INSTRUCTION 9. Installation Notice Date Page HANDBOOK IMPORTANT Tightness test after installation The gas leak test is performed as follows : 1/ Paint pipe joints, pilot gas tubing connections and inspect outlets with rich soap and water solution ; do not use an aggressive soap. 2/ Put the machine into service.
-
Page 55: Liquid Detergents Connection
01201055 0499 INSTRUCTION 9. Installation Notice Date Page HANDBOOK Liquid detergents connection CAUTION Liquid detergents are particularly aggressive. We advise you to use only products with pH lower than 9 in order to avoid the machine's rubbers from being attacked. Dilute imperatively all of your detergents before letting them flow into the machine. - Page 56 1101 01201055 INSTRUCTION 9. Installation Notice Date Page HANDBOOK CAUTION The running of detergents must be independent from the running of the machine. The control information of detergents must imperatively be relayed. Connection scheme of liquid Water detergents Soap box rinsing electrovalve We advise you to use one of the two sys- Pump...
- Page 57 01201055 0401 INSTRUCTION 9. Installation Notice Date Page HANDBOOK Washer-extractor electricity power supply CAUTION Prior to use, the washer-extractor should be plugged into a correctly earthed power socket complying with the standards in force. SAFETY The electrical installation of the machine must be undertaken by quali- fied personnel.
- Page 58 01201055 1298 INSTRUCTION 9. Installation Notice Date Page HANDBOOK Pass the power supply cable of the machine through the stuffing box on the top of the machine. D0627 For each machine, install a fixed multipole circuit breaker (or fuses protector) in the laundry main cabinet.
- Page 59 01201055 1298 INSTRUCTION 9. Installation Notice Date Page HANDBOOK Connection diagrams for the control circuit power supply transformer (T1) as a function of the various customer power supply voltages. The tension of the control circuit delivered by the transformer must be 230 volts, single-phase. The supply tension for your machine is normally of 400 volts between 2 phases, this tension can however be different.
- Page 60 0102 01201055 INSTRUCTION 9. Installation Notice Date Page HANDBOOK The feeder cable sections mentioned in our literature are given only as a guide. To obtain a value perfectly suited to your own application and which takes account of the different correction factors in respect of your plant, refer to the tables below. Table 1 (in accordance with EN Standard 60204-1) Values given for :...
- Page 61 0102 01201055 INSTRUCTION 9. Installation Notice Date Page HANDBOOK Table 4 (B2, C and E correction factors for cable grouping) Number Seated in Wall Fixing Cable of cables Cable Duct or Cable Trough Tray 1.00 1.00 1.00 0.80 0.85 0.87 0.65 0.75 0.78...
-
Page 62: Remove Of The Transport Locks Fitted
01201055 1298 INSTRUCTION 9. Installation Notice Date Page HANDBOOK Remove of the transport locks fitted CAUTION Before putting the machine into service, it is compulsory to remove the 4 transport locks fitted. To do so, remove the front and rear casings, then the fixing screws of the transportation bridles (B). -
Page 63: Operating Inspection
10. Operating 0499 01201055 INSTRUCTION inspection Notice Date Page HANDBOOK Operating inspection Before putting the machine into service, carry out the working tests. The operating inspection must be done by an approved technician. Manual operation The procedure for operating the various machine functions manually is described in the chapter "Machine operation"... -
Page 64: Automatic Operation
10. Operating 01201055 1298 INSTRUCTION inspection Notice Date Page HANDBOOK Automatic operation • Check that the external switch or switches are switched on and that the manual valves for water and steam (if the machine has steam heating) are open. •... -
Page 65: Machine Operation
11. Machine 0999 01201055 INSTRUCTION operation Notice Date Page HANDBOOK Auxiliary controls Emergency stop The emergency stop must be unblocked, if not the machine will not work (to unblock, turn the red button to the right). If the machine for some reason has to be stopped, abnormal or dangerous running, press emergency stop button. - Page 66 11. Machine 0499 01201055 INSTRUCTION operation Notice Date Page HANDBOOK The control board on the loading side includes the following : Fig. Indicator (1) light = "power On". Key (2) "Cage positioning". Key (3) "Door unblocking". Emergency stop (4). D0682 The control board on the unloading side includes the following : Fig.
-
Page 67: Automatic Operation
0499 11. Machine 01201055 INSTRUCTION operation Notice Date Page HANDBOOK Automatic operation Preparation Sort the linen according to the instructions mentioned on the care labels. Empty the pockets and clasp the slide fasteners. • Position the cage doors in front of the Fig. - Page 68 11. Machine 01201055 0200 INSTRUCTION operation Notice Date Page HANDBOOK • Block the cage (B) by rotating it manually Fig. to the front and rear so that the upper door stops on the blocking straps (C). • Never press the doors in (A) to rotate the cage.
-
Page 69: Detergent Dispenser
11. Machine 0999 01201055 INSTRUCTION operation Notice Date Page HANDBOOK Detergent dispenser The detergent dispenser has five compartments. Each compartment is connected to a water valve. The water supply to individual compartment is as follows : Compartment Valve Water warm warm cold cold... -
Page 70: To Run A Wash Program
11. Machine 1298 01201055 INSTRUCTION operation Notice Date Page HANDBOOK Card reader for Display screen Numeric keyboard memory cards RUN A WASH PROGRAM GO TO THE MENU Function keys. During a wash : "Pause" key. The functions of these keys change, depending on Before and after a wash, and during programming : "Move which menu or part of a menu you are using. - Page 71 11. Machine 01201055 1298 INSTRUCTION operation Notice Date Page HANDBOOK Here you can select pro- grams from the program li- braries. See the section entit- led "To start a wash program from the program library". Displayed here will be the RUN A WASH PROGRAM number of the most frequent- If you have entered a wrong number…...
- Page 72 11. Machine 1298 01201055 INSTRUCTION operation Notice Date Page HANDBOOK Delayed start time RUN A WASH PROGRAM (hrs:mins) Nom du programme If you want to see the Pressing « Text » displays more information 3582 description of the program : The text displayed is a description of the wash program selected.
- Page 73 11. Machine 1298 01201055 INSTRUCTION operation Notice Date Page HANDBOOK Two ways of pausing during a wash program There are two ways of pausing during a wash During a wash program : program : Press to make the 1 By pressing machine pause during the 2 As an additional function.
-
Page 74: To Start A Wash Program From The Program Library
11. Machine 0102 01201055 INSTRUCTION operation Notice Date Page HANDBOOK To start a wash program from the program library If this menu is not currently Waht is the program library ? display : RUN A PROGRAM The program library lists all wash programs, both user GO TO THE MENU and standard programs, showing their program Press... - Page 75 1298 11. Machine 01201055 INSTRUCTION operation Notice Date Page HANDBOOK RUN A WASH PROGRAM Select library via menu You can also select the program library via the option "GO TO THE MENU". Then select "WASH To select a program from PROGRAM LIBRARY".
- Page 76 11. Machine 1298 01201055 INSTRUCTION operation Notice Date Page HANDBOOK RUN A WASH PROGRAM Delayed start time (hrs:mins) Program name If you want to see the description of the program : 3582 Pressing ”Text” displays more information Press TEXT . The text displayed is a description of the wash Choice 1 or 2 : program selected.
-
Page 77: To Change Parameters In The Current Program Step
11. Machine 01201055 1298 INSTRUCTION operation Notice Date Page HANDBOOK To change parameters in the current program step You can alter the following parameters : Prewash, Main wash, Rinse, Drain, Soak, Rinse During program operation the 991 NORMAL 95 °C STD display will look like this (see repeat STEP TIME :... -
Page 78: Rapid Advance
11. Machine 01201055 1298 INSTRUCTION operation Notice Date Page HANDBOOK Rapid advance To terminate a program before it has finished During program operation the 991 NORMAL 95 °C STD • Select RAPID ADVANCE and press SELECT. PROGRAM STEP : MAIN WASH display will look this (see section STEP TIME : 720 SEC... -
Page 79: Show Weight
11. Machine 01201055 0999 INSTRUCTION operation Notice Date Page HANDBOOK Show weight (for machines with weighing equipment installed only) Show weight The actual weight is shown in large digits on the During program operation, the 991 NORMAL 95 °C STD display (weight display mode). - Page 80 11. Machine 0999 01201055 INSTRUCTION operation Notice Date Page HANDBOOK No water reduction (for machines with weighing equipment installed only) No water reduction The wash load is weighed during the program and the During program operation, the 991 NORMAL 95 °C STD water level is adjusted automatically according to its display will look like this (see PROGRAM STEP : MAIN WASH...
-
Page 81: Pause
11. Machine 0999 01201055 INSTRUCTION operation Notice Date Page HANDBOOK Pause Two ways of pausing during a wash program Note that you must be in normal wash mode to be 991 NORMAL 95 °C STD During program operation the able to pause in this way. If, for example, you are PROGRAM STEP : MAIN WASH display will look this (see section STEP TIME :... -
Page 82: Manual Operation During A Program
11. Machine 0999 01201055 INSTRUCTION operation Notice Date Page HANDBOOK Manual operation during a program Two types of manual operation 991 NORMAL 95 °C STD During program operation the PROGRAM STEP : MAIN WASH There are two types of manual operation, which display will look this (see section STEP TIME : 720 SEC... - Page 83 11. Machine 0999 01201055 INSTRUCTION operation Notice Date Page HANDBOOK Automatic return to normal display Once you have selected any of the functions below, you must make any changes required within 20 seconds. If no further keys are pressed within 20 MANUAL FUNCTIONS seconds, the display will revert automatically to its MAKE A CHOICE :...
- Page 84 11. Machine 0999 01201055 INSTRUCTION operation Notice Date Page HANDBOOK Water / drain To access this function, see MANUAL FUNCTIONS instructions in section « Manual WATER / DRAIN COLD WATER MIXED WATER operation ». HOT WATER COLD HARD WATER WATER FROM TANK 1 WATER FROM TANK 2 LEVEL : 63 UNITS Water level in drum.
- Page 85 11. Machine 01201055 0999 INSTRUCTION operation Notice Date Page HANDBOOK Maximum extraction speed To limit the program’s highest extraction speed This function allows you to modify the highest To access this function, see MANUAL FUNCTIONS extraction speed allowed during the program. HIGH EXTRACT instructions in section «...
- Page 86 11. Machine 0999 01201055 INSTRUCTION operation Notice Date Page HANDBOOK Motor on after wash Motor to rotate after program has ended To access this function, see MANUAL FUNCTIONS MOTOR If you answer Yes (Y) : instructions in section « Manual MOTOR ON AFTER WASH EXIT operation ».
- Page 87 11. Machine 0999 01201055 INSTRUCTION operation Notice Date Page HANDBOOK Detergent signals and water flushing To access this function, see MANUAL FUNCTIONS instructions in section « Manual DETERGENT / FLUSH WATER FLUSH operation ». FLUSH COLD POWER POWDER SIGNAL 1 POWDER SIGNAL 2 POWDER SIGNAL 3 POWDER SIGNAL 4...
-
Page 88: Text
11. Machine 01201055 0999 INSTRUCTION operation Notice Date Page HANDBOOK Text Pressing ”Text” displays more information The text displayed is a description of the wash program selected. This text description is inserted During program operation the 991 NORMAL 95 °C STD when a new wash program is created. -
Page 89: To Change The Wash Program After Program Operation Has Commenced
0999 11. Machine 01201055 INSTRUCTION operation Notice Date Page HANDBOOK To change the wash program after program operation has commenced To change the wash program after program operation has commenced During program operation the 991 NORMAL 95 °C STD You can change to a different wash program at any PROGRAM STEP : MAIN WASH display will look this (see section STEP TIME :... -
Page 90: To Change Temperature Scale °C/°F
11. Machine 0999 01201055 INSTRUCTION operation Notice Date Page HANDBOOK To change temperature scale °C/°F To change temperature scale °C/°F During program operation the 991 NORMAL 95 °C STD display will look this (see section This function changes the temperature scale used for PROGRAM STEP : MAIN WASH STEP TIME : 720 SEC... -
Page 91: Auto Restart
11. Machine 0999 01201055 INSTRUCTION operation Notice Date Page HANDBOOK Auto restart What is Auto restart ? During program operation the 991 NORMAL 95 °C STD Auto restart means that the same program will be display will look this (see section PROGRAM STEP :MAIN WASH repeated one or more times, according to the number STEP TIME :... -
Page 92: Manual Operation
11. Machine 0999 01201055 INSTRUCTION operation Notice Date Page HANDBOOK Manual operation Two types of manual operation To select manual operation There are two types of manual operation, which should not be confused : If this menu is not currently •... -
Page 93: To Select A Manual Operation
11. Machine 0999 01201055 INSTRUCTION operation Notice Date Page HANDBOOK Manual operation when no program is running MANUAL MODE MAKE A CHOICE Motor/door (see section "Motor/door") MOTOR / DOOR WATER / DRAIN Lock/unlock door. Switch motor on/off (normal HEATING DETERGENT / FLUSH drum action). -
Page 94: Water/Drain
11. Machine 0999 01201055 INSTRUCTION operation Notice Date Page HANDBOOK Water/drain MANUAL FUNCTIONS To access this function, see WATER / DRAIN DRAIN CLOSED instructions in section « To COLD WATER MIXED WATER select manual operation ». HOT WATER COLD HARD WATER WATER FROM TANK 1 LEVEL : 0 UNITS Use ñ... -
Page 95: Heating
0102 11. Machine 01201055 INSTRUCTION operation Notice Date Page HANDBOOK Heating To access this function, see instructions in section « To select manual operation ». MANUAL FUNCTIONS HEATING SELECT SET TEMPERATURE 0 °C Temperature selected ACTUAL TEMPERATURE 24 °C Actual temperature 3689 Use the numeric key to enter ATTENTION... -
Page 96: Detergent Signals And Water Flushing
11. Machine 01201055 0999 INSTRUCTION operation Notice Date Page HANDBOOK Detegent signals and water flushing MANUAL FUNCTIONS To access this function, see DETERGENT / FLUSH instructions in section « To WATER FLUSH select manual operation ». FLUSH COLD POWER POWDER SIGNAL 1 POWDER SIGNAL 2 POWDER SIGNAL 3 POWDER SIGNAL 4... - Page 97 0999 11. Machine 01201055 INSTRUCTION operation Notice Date Page HANDBOOK This page is left blank on purpose.
-
Page 98: At The End Of The Wash
11. Machine 01201055 0599 INSTRUCTION operation Notice Date Page HANDBOOK At the end of the wash For your safety, the door can only be open after 40 seconds. Standard machines Fig. • Position the cage doors in front of the drum door with key "Cage positioning". -
Page 99: Statistics
11. Machine 01201055 0999 INSTRUCTION operation Notice Date Page HANDBOOK Statistics To select "Statistics" If this menu is not currently RUN A WASH PROGRAM diplayed : GO TO THE MENU Press repeatedly. Press ò to highlight « GO TO 3589 THE MENU ». - Page 100 11. Machine 0999 01201055 INSTRUCTION operation Notice Date Page HANDBOOK The Statistics function The Statistics function gives you access to the STATISTICS following information : TOTAL RUN TIME HOURS TOTAL TRIP RUN TIME HOURS HOURS SINCE LAST SERVICE TOTAL RUN TIME HOURS : LAST 5 ERROR CODES PROGRAM HOURS...
-
Page 101: Resetting Statistic Registers
11. Machine 01201055 0999 INSTRUCTION operation Notice Date Page HANDBOOK Resetting statistics registers If the menu is not currently Statistics registers which can be reset to zero displayed : RUN A WASH PROGRAM The following registers in the statistics function can be GO TO THE MENU cleared (reset to zero) : Press... - Page 102 11. Machine 0999 01201055 INSTRUCTION operation Notice Date Page HANDBOOK MENU MAKE A CHOICE : WASH PROGRAM LIBRARY PROGRAMMING MODE SETTINGS 1 MEMORY CARD SERVICE MODE The service mode may only be used by STATISTICS authorised personnel, because all safety 3693 interlocks are disabled when it is in use.
- Page 103 11. Machine 01201055 0999 INSTRUCTION operation Notice Date Page HANDBOOK Time counter « service time » and « last service » SERVICE MODE Both counters can be reset in the MAKE A CHOICE : same way. SERVICE PROGRAM CLEAR TRIP HOUR COUNTER CLEAR SERVICE COUNTER CLEAR WASH PROGRAM COUNTERIN PCS CLEAR WASH PROGRAM COUNTERIN SMC...
- Page 104 11. Machine 01201055 0999 INSTRUCTION operation Notice Date Page HANDBOOK Number of washes for program in timer or memory card You can reset program in both SERVICE MODE timer and the memory card (if MAKE A CHOICE : SERVICE PROGRAM inserted) : CLEAR TRIP HOUR COUNTER CLEAR SERVICE COUNTER...
- Page 105 11. Machine 01201055 0999 INSTRUCTION operation Notice Date Page HANDBOOK Write up to which program CLEAR COUNTER number you want to clear wash FROM PROGRAM NUMBER : programs. TO PROGRAM NUMBER : TO END : TO PROGRAM NUMBER = 0 4046 Press ERASE.
-
Page 106: Scale Adjustments
11. Machine 0999 01201055 INSTRUCTION operation Notice Date Page HANDBOOK Scale adjustments (for machines with weighing equipment installed only) Scale adjustments Press ò repeatedly until SERVICE PROGRAM The following functions are accessed via the SCALE SCALE ADJUSTMENTS is MAKE A CHOICE : ADJUSTMENTS menu : SERVICE PROGRAM highlighted. - Page 107 11. Machine 01201055 0999 INSTRUCTION operation Notice Date Page HANDBOOK Reset scale to zero (for machines with weighing equipment installed only) Reset scale to zero SERVICE PROGRAM Reset weighing equipment” is used to make the MAKE A CHOICE : weighing equipment display 0 when the machine has RESET SCALE TO ZERO RESET TARE TO ZERO TARE SCALE...
- Page 108 11. Machine 0999 01201055 INSTRUCTION operation Notice Date Page HANDBOOK Reste tare to zero (for machines with weighing equipment installed only) Reset tare to zero If your attempt to clear the tare parameter fails at this point, you will see an error message equivalent to : SERVICE PROGRAM "FAILED.
- Page 109 11. Machine 01201055 0999 INSTRUCTION operation Notice Date Page HANDBOOK Tare scale (for machines with weighing equipment installed only) Tare scale SERVICE PROGRAM This function involves first loading the drum with, for MAKE A CHOICE : example, a container, then taring (resetting) the RESET SCALE TO ZERO RESET TARE TO ZERO TARE SCALE...
- Page 110 11. Machine 01201055 0999 INSTRUCTION operation Notice Date Page HANDBOOK Set tare to a certain value (for machines with weighing equipment installed only) Set tare to a certain value SERVICE PROGRAM This function lets you enter a value for the tare MAKE A CHOICE : RESET SCALE TO ZERO parameter, i.e.
- Page 111 11. Machine 01201055 0999 INSTRUCTION operation Notice Date Page HANDBOOK Read tare value (for machines with weighing equipment installed only) Read tare value SERVICE PROGRAM This function lets you check the value currently stored MAKE A CHOICE : RESET SCALE TO ZERO as the tare parameter.
- Page 112 11. Machine 01201055 0999 INSTRUCTION operation Notice Date Page HANDBOOK Calibrate the scale (for machines with weighing equipment installed only) Please note : SERVICE PROGRAM This function is used only on installation of a new scale MAKE A CHOICE : unit.
- Page 113 11. Machine 01201055 0999 INSTRUCTION operation Notice Date Page HANDBOOK (for machines with weighing equipment installed only) Calibration weight SCALE ADJUSTMENTS A weight of between 40 kg and 400 kg should be used CALIBRATE THE SCALE as a calibration weight. Put the calibration FILL DRUM WITH CALIBRATION WEIGHT weight in the drum.
- Page 114 11. Machine 01201055 0999 INSTRUCTION operation Notice Date Page HANDBOOK (for machines with weighing equipment installed only) SCALE ADJUSTMENTS CALIBRATE THE SCALE DONE ! PRESS SELECT 4791 Press SELECT. Calibration mode/normal mode To gain access to the calibration switch in the scale unit, the left-hand rear side panel has to be taken off.
- Page 115 11. Machine 01201055 0999 INSTRUCTION operation Notice Date Page HANDBOOK Zero calibration (for machines with weighing equipment installed only) Zero calibration SERVICE PROGRAM The "Zero calibration" function is used to increase the MAKE A CHOICE : RESET SCALE TO ZERO accuracy of the weighing equipment.
- Page 116 11. Machine 01201055 0999 INSTRUCTION operation Notice Date Page HANDBOOK Read version number (for machines with weighing equipment installed only) Read version number SERVICE PROGRAM In the event of a fault in the weighing equipment (which MAKE A CHOICE : RESET SCALE TO ZERO cannot be put right with the aid of the section "Fault- RESET TARE TO ZERO...
- Page 117 11. Machine 01201055 0700 INSTRUCTION operation Notice Date Page HANDBOOK Functions "ON/OFF" and "Servo-control pause" by exterior signals Description Connector X15 on I/O CARTE no 1 of CLARUS During a programme, an on/off function and Exterior signal in 230 V : a servo-control pause can be used to vary - X15-1 and X15-2 putting into service by servo- the heating or the starting of a machine in...
-
Page 118: Memory Card General Introduction
11. Machine 0999 01201055 INSTRUCTION operation Notice Date Page HANDBOOK Memory card General introduction A memory card is a plastic card, the size of a credit card, with an electronic memory chip inside it. This memory card is capable of storing 10 to 15 wash programs of normal size. -
Page 119: To Select The "Memory Card" Function
0999 11. Machine 01201055 INSTRUCTION operation Notice Date Page HANDBOOK To select the « Memory card » function Memory Turn the memory card so chip its memory chip is at the far end, and on the left of the card... 3606 Card reader ...then insert the memory... - Page 120 11. Machine 0999 01201055 INSTRUCTION operation Notice Date Page HANDBOOK MENU MAKE A CHOICE : WASH PROGRAM LIBRARY PROGRAMMING MODE SETTINGS 1 MEMORY CARD SERVICE MODE STATISTICS 3596 Press ò three times… PROGRAM LIBRARY PROGRAMMING MODE SETTINGS 1 MEMORY CARD SERVICE MODE …...
- Page 121 11. Machine 0999 01201055 INSTRUCTION operation Notice Date Page HANDBOOK “The "Memory card" functions MEMORY CARD Run wash program straight from memory card COPY PROGRAM FROM MEMORY CARD TO PCS COPY PROGRAM FROM PCS TO MEMORY CARD (see section "To run a wash program straight DELETE PROGRAM IN MEMORY CARD CLEAR MEMORY CARD from a memory card")
-
Page 122: To Run A Wash Program Straight From A Memory Card
11. Machine 01201055 0999 INSTRUCTION operation Notice Date Page HANDBOOK To run a wash program straight from a memory card To run a program from the memory card MEMORY CARD To access this menu, follow the In broad terms, the program control unit has two instructions in section «... -
Page 123: To Copy A Program From A Memory Card To The Machine's Program Control Unit
11. Machine 0999 01201055 INSTRUCTION operation Notice Date Page HANDBOOK To copy a program from memory card to the machine's program control unit What is a restricted-use program ? A wash program which has been created on a PC can be made a "restricted-use"... - Page 124 11. Machine 0999 01201055 INSTRUCTION operation Notice Date Page HANDBOOK Change program number when you copied a program from memory card to program control unit Choose 1 or 2 : MEMORY CARD 1 If you want to give the COPY PROGRAM FROM MEMORY CARD TO PCS program a different program NOW YOU CAN CHANGE NUMBER.
-
Page 125: To Copy A Program From The Program Control Unit To A Memory Card
11. Machine 0999 01201055 INSTRUCTION operation Notice Date Page HANDBOOK To copy a program from the program control unit to a memory card To access this menu, follow the What happens when a program is copied ? MEMORY CARD instructions in section « To Both the memory card and the program control unit COPY PROGRAM FROM MEMORY CARD TO PCS select the "Memory card"... - Page 126 11. Machine 01201055 0999 INSTRUCTION operation Notice Date Page HANDBOOK Change program number when you copied a program from program control unit to memory card Choose 1 or 2 : MEMORY CARD 1 If you want to give the COPY PROGRAM FROM PCS TO MEMORY CARD program a different program NOW YOU CAN CHANGE NUMBER number (from the one it had...
-
Page 127: To Delete A Program On A Memory Card
11. Machine 0999 01201055 INSTRUCTION operation Notice Date Page HANDBOOK To delete a program on a memory card What is a restricted-use program ? MEMORY CARD To access this menu, follow the A wash program which has been created on a PC can instructions in section «... -
Page 128: To Delete All Programs On A Memory Card
11. Machine 01201055 0999 INSTRUCTION operation Notice Date Page HANDBOOK To delete all programs on a memory card To access this menu, follow the MEMORY CARD instructions in section « To What is a restricted-use program ? COPY PROGRAM FROM MEMORY CARD TO PCS select the "Memory card"... -
Page 129: Weighing Equipment
11. Machine 01201055 1100 INSTRUCTION operation Notice Date Page HANDBOOK Weighing equipment (optional equipment) Description Fig. The weighing equipment comprises the following units : • A scale unit located • Four load cells, one in each corner of the frame •... - Page 130 11. Machine 01201055 1100 INSTRUCTION operation Notice Date Page HANDBOOK After a power-cut Normal mode When the supply is restored after a power- cut, the weight display will show "0" if the RUN A WASH PROGRAM load inside the drum is less than 6.25 kg. If GO TO THE MENU the load weighs more than 6.25 kg, the true weight of the load will be shown.
- Page 131 11. Machine 01201055 1100 INSTRUCTION operation Notice Date Page HANDBOOK Resetting the weighing equipment If the display does not show the weight (in an empty machine) as zero after a program, the weighing equipment can be reset to zero using the TAR key. For a description of the functions used to set and check the tare value, see the section headed "Scale adjustments"...
- Page 132 11. Machine 01201055 1100 INSTRUCTION operation Notice Date Page HANDBOOK Checking accuracy of weighing equipment display Twice a year you need to check that the weighing equipment is displaying the accu- rate weight, with the aid of an object of known weight.
- Page 133 11. Machine 01201055 1100 INSTRUCTION operation Notice Date Page HANDBOOK The dead load selector Fig. The dead load selector, located in the scale DEAD unit, is used for setting the machine’s "dead LOAD load". The dead load is the load (weight) to which the load cells are subjected before any load is placed in the wash drum.
- Page 134 11. Machine 1100 01201055 INSTRUCTION operation Notice Date Page HANDBOOK To replace the scale unit • Remove the machine’s side panel. Fig. • Disconnect the six connectors to the scale unit. • Remove the scale unit. • Install the new scale unit, assembly in reverse order of disassembly. •...
- Page 135 11. Machine 1100 01201055 INSTRUCTION operation Notice Date Page HANDBOOK Component locations X9-CPU 230 V P0842-4822-4822bis Fig. Scale unit Load cells Connectors 230 V Voltage feed X9-CPU Communication with CPU board C1-C4 Load cells...
- Page 136 11. Machine 01201055 1100 INSTRUCTION operation Notice Date Page HANDBOOK Fault-finding, weighing equipment Error message on display : Weight-totalling board Weight, in kg : 999,0 or -999,9 Probable cause : The weighing equipment is overloaded/ "underloaded", i.e. the load cells are sending a signal which is too high/low to the scale unit.
- Page 137 01201055 11. Machine 1100 INSTRUCTION Notice operation Date Page HANDBOOK • If more than one load cell is faulty, the faulty cells can be identified using a multimeter on the scale unit weight-totalling board to check each cell in turn, as follows : - Remove the four screws on the scale unit cover.
- Page 138 11. Machine 1100 01201055 INSTRUCTION operation Notice Date Page HANDBOOK Error message on display : Failed. Press SELECT. Possible causes : Dead load selector or calibration switch incorrectly set. An incorrect calibration weight has been used for calibration. Fault-finding procedure : •...
- Page 139 11. Machine 1100 01201055 INSTRUCTION operation Notice Date Page HANDBOOK Information in display : Function no allowed. Probable cause : A function has been selected in the program which cannot be carried out. Fault-finding procedure : • Check that the function in question is switched on under "Settings". •...
-
Page 140: Haccp Option
11. Machine 01201055 0401 INSTRUCTION operation Notice Date Page HANDBOOK HACCP option (Hazards Analysis Critical Control Points) Traceability for quality control : As a quality control option, all washer- extractors can be equipped for traceability to comply with HACCP method. HACCP (Hazards Analysis Critical Control Points) is a very well known quality control method used in catering industry. - Page 141 11. Machine 0401 01201055 INSTRUCTION operation Notice Date Page HANDBOOK A- Open the transparent cover with the key B- Delicately raise the needle (1) C- Unscrew the central nut (2) D- Remove the old disk (3) E- Put the new disk and center it carefully on the shouldered axis F- Slide the edge of the disk under the three peripheral pin (4)
- Page 142 11. Machine 0401 01201055 INSTRUCTION operation Notice Date Page HANDBOOK This page ist left blank on purpose.
- Page 143 0499 01201055 INSTRUCTION 12. Safety Notice Date Page HANDBOOK Safety Restarting the machine After any stoppage of the machine, either due to power failure, emergency stop, motor safety, the machine can only be restarted after having pressed key "ON". Outer doors All of the different parts of the machine stop working automatically as soon as one of the doors is opened.
-
Page 144: Safety Safety
01201055 0499 INSTRUCTION 12. Safety Notice Date Page HANDBOOK Drain A 'hold to run" switch allows the manual opening of the drain to empty the machine if needed (open the loading side casing to get to it). Accessibility All of the casings can be dismantled by means of a specially designed tool. Safety Gas heating The gas burners are ignited and the flamme controlled by an electronic conrol box which en-... -
Page 145: 13. Maintenance
01201055 1298 INSTRUCTION 13. Maintenance Notice Date Page HANDBOOK Operating incidents In order to limit the risk of failure in the electronic controls of the programming unit of the ma- chine, the machine should be earthed. Should interferences happen, the first thing to be checked is the earthing of the machine. - Page 146 01201055 1298 INSTRUCTION 13. Maintenance Notice Date Page HANDBOOK Error/Function Cause Action NTC HIGH TEMP. Temperature sensor indicating a - This suggests short-circuit in sensor or wiring. - Check the wiring temperature temperature above highest sensor and replace as appropri- allowable value.
- Page 147 01201055 1298 INSTRUCTION 13. Maintenance Notice Date Page HANDBOOK Error/Function Cause Action NOT DRAINED The water level is higher than - Programmed drain time too short. - Increase drain time. the EMPTY level after drain - Clean or replace level tube. sequence.
- Page 148 01201055 0700 INSTRUCTION 13. Maintenance Notice Date Page HANDBOOK Operating incidents Cause Action TANGLING OF THE LINEN - Bad programming options can be responsible of - Avoid mechanical action with The mechanical action during this matter : no water. washing can lead to the tangling - too long washing cycle - Avoid fillings and drain at no of large pieces such as bed...
-
Page 149: 14. Preventive Maintenance
0401 01201055 INSTRUCTION 14. Preventive maintenance Notice Date Page HANDBOOK CAUTION Complete the washing cycle, unload the machine and shut off the power supplies (water, gas, electricity, steam) before any maintenance or repair intervention is carried out. 4-17 D0629 Maintenance Daily Check that the "emergency stop button(s)"... - Page 150 01201055 0102 INSTRUCTION 14. Preventive maintenance Notice Date Page HANDBOOK Monthly Clean the connection and the water level pipe on the drain valve (do not blow i the tube towards the CPU). Grease the drum bearings (2 greasing point on each bearing). Use the right pump and grease by slow and not brutal injections.
- Page 151 01201055 0102 INSTRUCTION 14. Preventive maintenance Notice Date Page HANDBOOK CAUTION To ensure that your machine gives the very best service, please take care that maintenance is carried strict accordance with the instruc- tions above mentioned. Frictional electricity Some textiles may generate frictional electricity causing damages when calendering.
- Page 152 1298 01201055 INSTRUCTION 14. Preventive maintenance Notice Date Page HANDBOOK t0130gb L U B R I C A T I O N T A B L E Rolling Rolling Assembly Bare gears Flange joints Reducers with Reducers with Circuits and bearings bearings paste...
- Page 153 01201055 0499 INSTRUCTION 15. Electric diagrams Notice Date Page HANDBOOK 31100331...
- Page 154 01201055 0499 INSTRUCTION 15. Electric diagrams Notice Date Page HANDBOOK POWER CIRCUIT All washer-extractor Diagram no. 31100331 Frequency converter Interference filter Main switch Motor breaker Motion contactor Heating contactor R1-R2-R7-R8-R13-R14 Heating element (230) R3-R9-R15 Heating element (340) R4-R10-R16 Heating element (470) R5-R6-R11-R12-R17-R18 Heating element (670) Braking resistor Motion motor...
- Page 155 1100 01201055 INSTRUCTION 15. Electric diagrams Notice Date Page HANDBOOK 31100332-1...
- Page 156 01201055 1100 INSTRUCTION 15. Electric diagrams Notice Date Page HANDBOOK POWER CIRCUIT - PROGRAMMER OUTPUTS All washer-extractor barrier types Diagram no. 31100332-1 Ignitor of gas exchanger Possible unloading indicator Unloading door lock relay Loading door lock relay Motion contactor Haeting contactor Primary breaker Secondary breaker Loading side emergency stop pushbutton...
- Page 157 1100 01201055 INSTRUCTION 15. Electric diagrams Notice Date Page HANDBOOK Y1’ 31100332-2...
-
Page 158: Electric Diagrams Electric Diagrams
01201055 1100 INSTRUCTION 15. Electric diagrams Notice Date Page HANDBOOK CONTROL CIRCUIT - PROGRAMMER OUTPUTS All washer-extractor barrier types Diagram no. 31100332-2 Manual drain switch control (optional) Waters connector Unloading door lock connector Products connector Drain connector Unloading door lock Unloading door lock (670) Recycling water drain electrovalve (optional) Detergents container rinsing electrovalve... - Page 159 01201055 0700 INSTRUCTION 15. Electric diagrams Notice Date Page HANDBOOK 24 V DC 230 V 50 Hz 31100333-1 PHASE X6/2-1 (I/O 2) PHASE & X6/2-2 (I/O 2) 230 V PHASE 230 V X1 CPU X2 CPU X3 CPU X3 CPU +12 V NTC 1 31100333-2...
- Page 160 01201055 0700 INSTRUCTION 15. Electric diagrams Notice Date Page HANDBOOK CONTROL CIRCUIT - PROGRAMMER INPUTS/OUTPUTS All washer-extractor barrier types Diagram no. 31100333-1 & 2 Frequency converter interference filter Voltage indicator Loading door lock relay Unloading door lock relay NTC 1 Temperature probe Loading side emergency stop pushbutton Unloading side emergency stop pushbutton...
- Page 161 1099 01201055 INSTRUCTION 15. Electric diagrams Notice Date Page HANDBOOK 31100341...
- Page 162 0499 01201055 INSTRUCTION 15. Electric diagrams Notice Date Page HANDBOOK INPUTS / OUTPUTS CARD No. 2 (OPTIONAL) All washer-extractor Diagram no. 31100341 Frequency converter failure safty contact (if necessary) X5 I/O 2 Shunt connector X8 I/O 2 Liquid products no. 13 electrovalve connector X9 I/O 2 Liquid products no.
- Page 163 01201055 1100 INSTRUCTION 15. Electric diagrams Notice Date Page HANDBOOK 31101334-1...
- Page 164 01201055 1100 INSTRUCTION 15. Electric diagrams Notice Date Page HANDBOOK POWER CIRCUIT - PROGRAMMER OUTPUTS All washer-extractor standard types Diagram no. 31101334-1 Ignitor of gas exchanger Unloading door lock relay Loading door lock relay Motion contactor Haeting contactor Primary breaker Secondary breaker Loading side emergency stop pushbutton Loading side door switch...
- Page 165 01201055 0499 INSTRUCTION 15. Electric diagrams Notice Date Page HANDBOOK 31101334-2...
- Page 166 01201055 0499 INSTRUCTION 15. Electric diagrams Notice Date Page HANDBOOK CONTROL CIRCUIT - PROGRAMMER OUTPUTS All washer-extractor standard types Diagram no. 31101334-2 Manual drain switch control (optional) Waters connector Unloading door lock connector Products connector Drain connector Recycling water drain electrovalve (optional) Detergents container rinsing electrovalve Soft cold water electrovalve (optional) Hard cold water electrovalve...
- Page 167 01201055 0700 INSTRUCTION 15. Electric diagrams Notice Date Page HANDBOOK 24 V DC 230 V 50 Hz 31100333-1 PHASE X6/2-1 (I/O 2) PHASE & X6/2-2 (I/O 2) 230 V PHASE 230 V X3 CPU X1 CPU X2 CPU X3 CPU +12 V NTC 1 31101340...
- Page 168 01201055 0700 INSTRUCTION 15. Electric diagrams Notice Date Page HANDBOOK CONTROL CIRCUIT - PROGRAMMER INPUTS/OUTPUTS All washer-extractor standard types Diagram no. 31100333-1 & no. 31101340 Frequency converter interference filter Voltage indicator Loading door lock relay Unloading door lock relay NTC 1 Temperature probe Loading side emergency stop pushbutton Loading side cage positioning puschbutton...
- Page 169 01201055 0301 INSTRUCTION 15. Electric diagrams Notice Date Page HANDBOOK 31101285...
- Page 170 01201055 0500 INSTRUCTION 15. Electric diagrams Notice Date Page HANDBOOK GAS HEATING - CONNECTING DIAGRAM All washer-extractor Diagram no. 31101285 Ignitor and checking box Products of combustion pressure switch (do not change the adjustments) Water level detector Ignitor electrode Checking electrode Safety heating gas burner indicator Heating indicator On Circulating pump ipso...
- Page 171 01201055 0999 INSTRUCTION 15. Electric diagrams Notice Date Page HANDBOOK INTERFACE BOARD "ALCOPO" All washer-extractor Diagram no. 71082374 71082374...
-
Page 172: 16. Appendices
01201055 1199 INSTRUCTION 16. Appendices Notice Date Page HANDBOOK Conversion of measurement units To following is a list of correspondences of the main frequently used units, to avoid the need to use measurement unit conversion tables. bar : 1 bar = 100 000 Pa 1 kg/cm²... -
Page 173: Washing Symbols
01201055 0102 INSTRUCTION 16. Appendices Notice Date Page HANDBOOK Washing symbols To overcome language barriers, the following are symbols used internationally to give you guidance and recommendations when washing different textiles. Washing Symbol Max. washing Cycle Load Spin temperature in °C/°F 95/203 normal normal... -
Page 174: Gas Exchanger (25 Kw)
01201055 0800 INSTRUCTION 16. Appendices Notice Date Page HANDBOOK Gas exchanger old version of 25 kW Machine type Units 230/340 Length of exchanger Dimension of output exchanger Dimension of evacuation pipe Evacuation of burn gas Ø 125 Exchanger bottom output Ø... - Page 175 01201055 0800 INSTRUCTION 16. Appendices Notice Date Page HANDBOOK Evacuation duct It is recommended that a separate smoothwalled evacuation duct should be connected to each machine, providing the least possible resistance to air. Check that the shaft flow is at least twice the capacity of the gas exchanger draught accelerator.
- Page 176 01201055 0800 INSTRUCTION 16. Appendices Notice Date Page HANDBOOK TABLE OF CORRESPONDENCES - Washer-Extractor 230 Category Type Working Ø of Ventilation Pressure at Heat Consumption Consumption of gas supply injectors plate injectors emission Mn in Vn in index pressure MJ/m³ in mm position in mm H...
- Page 177 01201055 0800 INSTRUCTION 16. Appendices Notice Date Page HANDBOOK TABLE OF CORRESPONDENCES - Washer-Extractor 470 Category Type Working Ø of Ventilation Pressure at Heat Consumption Consumption of gas supply injectors plate injectors emission Mn in Vn in index pressure MJ/m³ in mm position in mm H...
- Page 178 01201055 0800 INSTRUCTION 16. Appendices Notice Date Page HANDBOOK D0436 Note : G20 (H) = natural gas, Lacq type (20 mbar) G25 (L) = natural gas, Groningue type (20 or 25 mbar) G30 = butane gas (28/30, 37, 50 mbar) G31 = propane gas (28/30, 37, 50 mbar)
Need help?
Do you have a question about the WS3 230-340-470-670 H and is the answer not in the manual?
Questions and answers