Table of Contents
Advertisement
SHERWOOD INDUSTRIES IS AN ENVIRONMENTALLY RESPONSIBLE COMPANY. THIS MANUAL IS PRINTED ON RECYCLED PAPER.
PLEASE KEEP THESE INSTRUCTIONS FOR FUTURE REFERENCE
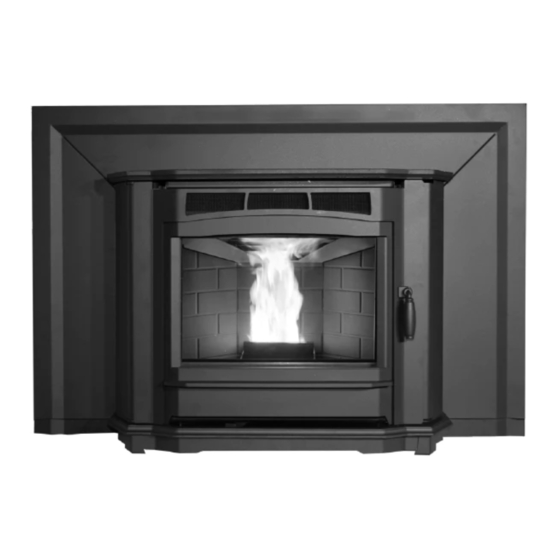
PELLET STOVE
Milan
Fireplace Insert
TECHNICAL MANUAL
Contact your building or fire officials about restrictions and installation
inspection requirements in your area.
PLEASE READ THIS ENTIRE MANUAL BEFORE INSTALLATION AND USE
OF THIS PELLET BURNING ROOM HEATER. FAILURE TO FOLLOW THESE
INSTRUCTIONS COULD RESULT IN PROPERTY DAMAGE, BODILY INJURY, OR
EVEN DEATH.
50-1719
Advertisement
Table of Contents

Related Manuals for Enviro Milan


Summary of Contents for Enviro Milan
- Page 1 SHERWOOD INDUSTRIES IS AN ENVIRONMENTALLY RESPONSIBLE COMPANY. THIS MANUAL IS PRINTED ON RECYCLED PAPER. PLEASE KEEP THESE INSTRUCTIONS FOR FUTURE REFERENCE PELLET STOVE Milan Fireplace Insert TECHNICAL MANUAL Contact your building or fire officials about restrictions and installation inspection requirements in your area.
-
Page 2: Table Of Contents
Table of Contents Safety Warnings & Recommendations...........3 Automatic Safety Features............4 Specifications..................5 Rating Label................5 Rating Label Location...............5 Dimensions................6 Installation..................7 Clearances to Combustibles............7 Removing Pellet Stove From Pallet..........7 Thermostat Installation.............7 Masonry Fireplace Installation............8 Positive Flue Connection without a Full Reline (USA Only)....9 Adjusting Hopper Height............10 Installation of Cast Skirt Option..........10 Surround Panel Installation............10... -
Page 3: Safety Warnings & Recommendations
To prevent the possibility of a fire, ensure that the appliance is properly installed by adhering to the installation instructions. An Enviro dealer will be happy to assist you in obtaining information with regards to your local building codes and installation restrictions. -
Page 4: Automatic Safety Features
If this power cord should become damaged, a replacement power cord must be purchased from the manufacturer or a qualified Enviro dealer. Be careful that the electrical cord is not trapped under the appliance and that it is clear of any hot surfaces or sharp edges. This unit’s maximum power requirement is 500 watts. -
Page 5: Specifications
Specifications ATING ABEL ATING ABEL OCATION The rating label is located on the hopper top behind the surround panel. -
Page 6: Dimensions
" (510mm) " (383mm) " (226mm) 44" (1118mm) " (770mm) " " (785mm) (382mm) 2" (51mm) 30" (762mm) " (500mm) " (756mm) Figure 2: Milan Dimensions. " (641mm) " (812mm) 44" (1118mm) Figure 3: Dimensions of Milan with Optional Skirt. -
Page 7: Installation
ALLET Use a flathead screwdriver or ” socket to remove the four (4) screws that secure the Milan to the pallet. Two (2) of the screws are shown in Figure 4 and the other two (2) are in the same location but on the opposite side;... -
Page 8: Masonry Fireplace Installation
Installation ASONRY IREPLACE NSTALLATION Rain Cap If installing the Milan with a skirt the Steel Plate or Flashing skirt must be installed before the installation. A non-combustible hearth pad must Flexible or Rigid 3" Stainless Steel Liner cover combustible flooring underneath, as well as 6”... -
Page 9: Positive Flue Connection Without A Full Reline (Usa Only)
1. If installing the Milan with a skirt, the skirt must be installed before the installation. 2. Install the hearth pad. The floor 6” (150 mm) in front of the unit and 6” (150 mm) to each side of the unit must be protected with a non-combustible hearth pad. -
Page 10: Adjusting Hopper Height
2. Slide the surround panel behind the cast top and line up the two (2) hooks on either side on the surround panel with the slots on either side of the Milan. Wiggle the surround to ensure the surround panel to the back of the surround pannel. -
Page 11: Slider/Damper Setting
Installation LIDER AMPER ETTING This is used to regulate the airflow through the pellet stove. THE SLIDER / DAMPER MUST BE SET AT TIME OF INSTALLATION. A Qualified Service Technician or Installer must set the Slider Damper. The slider damper is located behind the cast doors and under the firebox. -
Page 12: Troubleshooting
Troubleshooting DO NOT: ● Service the stove with wet hands. The stove is an electrical appliance, which may pose a shock hazard if handled improperly. Only qualified technicians should deal with possible internal electrical failures. ● Do not remove from the firebox any screws without penetrating oil lubrication. ●... - Page 13 Troubleshooting üCheck the exhaust blower voltage across the blower wires (>=114V on #5 setting and >= 82V on #1 setting). – Replace the Circuit Board if the Voltage reading is less than 82V. with a line voltage >115V üCheck vacuum levels in the exhaust channel by bypassing the vacuum switch, then remove the vacuum hose from vacuum switch.
- Page 14 Troubleshooting Auger light flashes but auger motor does not turn at all. üIf the auger gear box does not turn but the motor’s armature does try to spin then the auger is jammed. – Try to break apart jam by poking at the jam through the drop tube. If this fails then empty the hopper and remove the auger cover **remember to re-seal the cover after installation** üCheck the fuse on the motherboard;...
-
Page 15: Wiring Diagram
Wiring Diagram Orange Daughter Board Vacuum Orange Switch Connect Thermostat Here Blue Combustion White Blower Brown F (49 Exhaust Power Temperature Cord Ground Sensor Thermostat Brown Selector Pins Black 115V 115V White Black White Black 220V 220V Blue Brown Common Mother Board Ignitor Black... -
Page 16: Parts List
Parts List Reference Part Description Number Number 120 °F (49 °C) Ceramic Fan Temperature Sensor EC-001 Domestic Power Cord - 115V EC-042 Heyco Strain Relief EC-044 Auger Motor - 115V EF-001 Convection Blower - 115V EF-002 Convection Blower Impeller EF-004 Convection Blower Insulator Gasket EF-006 High Limit Temp Sensor 200 °F (93 °C) Manual Reset... - Page 17 Inner Door Handle 50-1467 Glass With Tape 50-1468 Inner Door Hinge 50-1530 Wiring Harness 50-1550 Milan Domestic Owner’s Manual - 115V 50-1718 Milan Domestic Technical Manual - 115V 50-1719 Milan Cast Top (Hopper Lid) 50-1720 Milan Cast Bottom 50-1721 Milan Cast Door Handle...
-
Page 18: Parts Diagram - Components
Parts Diagram - Components Milan - Components August 2007... -
Page 19: Parts Diagram - Parts
Parts Diagram - Parts... -
Page 20: Warranty
Industries, our commitment to the highest level of quality and customer service is the most important thing we do. Each Enviro stove is built on a tradition of using only the finest materials and is backed by our Exclusive Lifetime Limited Warranty to the original purchaser. With Enviro, you’re not just buying a stove, you’re buying a company with years of unequalled performance and quality. - Page 21 Limited Warranty on this stove. If unsure as to the extent of this Limited Warranty, contact your authorized Enviro dealer before installation. 10. Sherwood Industries Ltd. will not be responsible for inadequate performance caused by environmental conditions.
- Page 22 If the stove is used for commercial purposes, it is excluded from the Limited Warranty. 24. No dealer, distributor, or similar person has the authority to represent or warrant Enviro products beyond the terms contained within the Limited Warranty. Sherwood Industries Ltd. assumes no liability for such warranties or representations.
-
Page 23: Installation Data Sheet
SERIAL NUMBER:___________________________ _________________________________________ DATE OF PURCHASE: _____________ (dd/mm/yyyy) DATE OF INSTALLATION:___________ ADDRESS: (dd/mm/yyyy) MAGNEHELIC AT INSTALL:___________________ _________________________________________ INSTALLER’S SIGNATURE: _________________________________________ _________________________________________ _________________________________________ PHONE:___________________________________ MANUFACTURED BY: SHERWOOD INDUSTRIES LTD. 6782 OLDFIELD RD. SAANICHTON, BC, CANADA V8M 2A3 www.enviro.com October 16, 2009 C-11921...
Need help?
Do you have a question about the Milan and is the answer not in the manual?
Questions and answers