Table of Contents
Advertisement
Quick Links
Advertisement
Table of Contents

Summary of Contents for Datavideo MCU-100
-
Page 2: Table Of Contents
Disclaimer of Product and Services The information offered in this instruction manual is intended as a guide only. At all times, Datavideo Technologies will try to give correct, complete and suitable information. However, Datavideo Technologies cannot exclude that some information in this manual, from time to time, may not be correct or may be incomplete. -
Page 3: Warnings And Precautions
This product should only be operated from the type of power source indicated on the marking label of the AC adapter. If you are not sure of the type of power available, consult your Datavideo dealer or your local power company. -
Page 4: Warranty
Certain parts with limited lifetime expectancy such as LCD Panels, DVD Drives, Hard Drives are only covered for the first 10,000 hours, or 1 year (whichever comes first). Any second year warranty claims must be made to your local Datavideo office or one of its authorized Distributors before the extended warranty expires. -
Page 5: Introduction
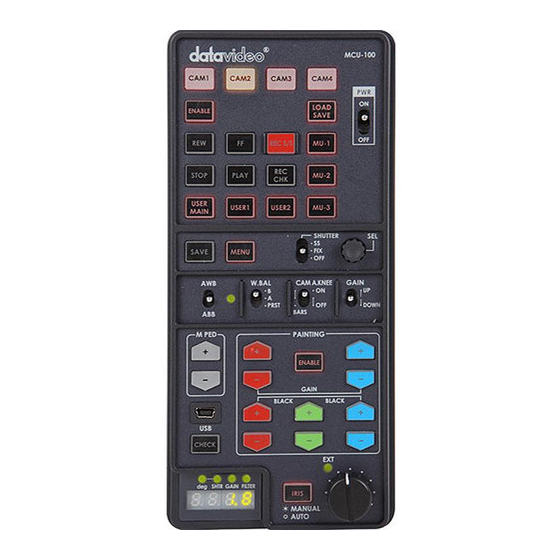
Introduction The Datavideo MCU-100 Controller can be used to remotely set up, from a gallery or OB Van, Panasonic P2 cameras such as the AG-HPX255, AG-HPX371 or AG-HPX600. The MCU-100 can be connected with up to four Panasonic cameras allowing settings from one camera to be aligned with the other cameras quickly. -
Page 6: Example Mcu-100 Set Up
Example MCU-100 Set Up... -
Page 7: Connections And Controls
Connections and Controls MCU-100 Keyboard MCU-100 Front Panel... - Page 8 AD-1 Camera Control Adaptor This unit allows you to operate the functions of the camera up to 300m away with the MCU-100 unit. The AD-1 adaptor connects to the MCU-100 via RJ-45 cabling to the chosen Panasonic camera. This adaptor changes the RJ-45 connection to a Panasonic CAM/BS cable and multi-pin connector.
-
Page 9: Mcu-100 Keyboard Guide
MCU-100 settings are stored into the chosen camera. If this function is disabled - the button is back lit green; any chosen MCU-100 settings will not be stored in the chosen camera. The current camera/MCU-100 settings will be reset to defaults when the power of the unit or the camera is turned off. - Page 10 SEL - Select dial The select dial is used for two functions, to navigate the menus or to control the shutter speed. When the MENU button is active and back lit orange. The select dial is turned to navigate through the camera’s menu options. Pressing in the same dial, like a button, confirms the current selection or value shown.
- Page 11 CHECK button is pressed. If the CHECK button is pressed and held down for over two seconds the MCU-100 unit will switch in to LOCK mode. Please refer to page 12 for more details on modes of operation.
- Page 12 When the Iris function is accessed in this way, if the MCU-100 unit is left idle for 3 seconds or more then the unit will automatically return to full Lock mode.
-
Page 13: How To Store Selected Camera Set Ups
How to copy settings set by MCU-100 from one camera to another When MCU-100 is used to control more than one camera, it is possible to copy the settings set by the unit on one camera to another via the Memory Stores functions of the unit. - Page 14 How to save / load the camcorders’ settings to / from a PC It is possible to save the current settings on all four cameras from MCU-100 to a PC for later use. Also any previously saved MCU-100 settings stored on a PC can also be loaded back to the MCU-100 unit. This can be handy if multiple users have access to the equipment and you need a quick way to get back to your preferred settings.
-
Page 15: Firmware Update Procedure
Firmware update procedure From time to time Datavideo may release new firmware to either add new features or to fix reported bugs in the current MCU-100 firmware. Customers can update the firmware themselves if they wish or they can contact their local dealer or reseller for assistance should they prefer this method. -
Page 16: Specifications
Remove the USB Cable and then connect the AD-1 to the camera’s remote port to test the new firmware. Note: It is best to update the firmware of the AD-1 unit(s) at the same time as the MCU-100. Specifications Power Consumption DC 12V / 0.5A ( 6W ) - Page 17 Notes...


Need help?
Do you have a question about the MCU-100 and is the answer not in the manual?
Questions and answers