Table of Contents
Advertisement
Quick Links
INTRODUCTION ................................................................ .......................................................... 1
FEATURES .................................................................................................................... 2
ABOUT THIS MANUAL ................................................................ .................................. 5
FRONT PANEL ................................................................ .............................................. 6
TAKING CARE OF YOUR DISKS ................................................................ ................... 8
REAR PANEL ................................................................ ................................................. 9
SETTING UP THE S3000XL .......................................................................................... 11
CONNECTIONS ................................................................ .............................................. 11
LOADING THE DEMO FLOPPY DISKS ................................................................ .......... 12
MOUNTING THE S3000XL ................................................................ ............................. 13
GETTING AROUND THE S3000XL ................................................................ ................ 14
OPERATING MODES ................................................................ ....................... 14
SOFT KEYS ................................................................ ..................................... 14
SELECTING PARAMETERS AND ENTERING DATA ........................................ 15
MARK AND JUMP KEYS ................................................................ .................. 16
NAMING FILES - THE NAME KEY ................................................................ .... 17
THE ENT/PLAY KEY ................................................................ ........................ 17
LCD CONTRAST ................................................................ ............................................ 17
RECORD LEVEL, MAIN VOLUME, HEADPHONE OUTPUT ............................................ 18
HOW THE S3000XL WORKS ................................................................ ........................ 19
S3000XL FLOWCHART ................................................................ ................................. 20
SINGLE MODE ........................................................................................................................... 23
SELECTING PROGRAMS ................................................................ .............................. 23
VIEWING PROGRAMS ................................................................ .................................. 24
SETTING PROGRAM LEVELS, PAN, FX SENDS .......................................................... 24
SETTING PROGRAMS' MIDI PARAMETERS ................................................................ . 25
SETTING PROGRAM LOUDNESS AND VELOCITY ....................................................... 26
LOADING FROM FLOPPY DISK ................................................................ .................... 28
LOADING FROM HARD DISK ................................................................ ........................ 28
DELETING PROGRAMS ................................................................ ................................ 30
RENUMBERING PROGRAMS ................................................................ ........................ 32
USING THE S3000XL IN 'OLD AKAI' MODE! ................................................................ . 33
USING SELECT PROG - PROGRAMS WITH THE SAME NUMBER .................. 33
LAYERING PROGRAMS ................................................................ ................... 33
CREATING KEYBOARD SPLITS ...................................................................... 33
USING RENUMBERING TO CREATE MULTI-TIMBRAL SETUPS ..................... 34
SINGLE VS MULTI ................................................................ ........................... 35
MULTI MODE - COMBINING SEVERAL PROGRAMS ................................................................. 37
ASSIGNING PROGRAMS TO PARTS ............................................................................ 38
SETTING A PART'S MIDI CHANNEL ................................................................ .............. 38
MIXING THE PARTS ................................................................ ...................................... 38
SENDING PARTS TO THE INTERNAL EFFECTS ........................................................... 38
ASSIGNING PARTS TO THE INDIVIDUAL OUTPUTS .................................................... 39
TUNING AND TRANSPOSING PARTS ................................................................ ........... 39
SETTING A PART'S LOW AND HIGH KEYRANGES ...................................................... 39
SETTING A PART'S PRIORITY ................................................................ ...................... 40
INITIALISING A PART ................................................................ .................................... 40
SETTING UP A MULTI ................................................................ ................................... 41
MODIFYING THE MULTI ................................................................................................ 42
NAMING A MULTI ................................................................ .......................................... 43
SAVING A MULTI ................................................................ .......................................... 43
LOADING A MULTI ................................................................ ........................................ 43
RENUMBERING PROGRAMS ................................................................ ........................ 44
USING MULTI MODE FOR LAYERING PROGRAMS ...................................................... 47
USING MULTI MODE TO SET KEYBOARD SPLITS ...................................................... 48
PROGRAM EDITING ................................................................................................................... 50
WHAT IS A KEYGROUP? ................................................................ .............................. 51
KEYGROUP ZONES ................................................................ ...................................... 52
OVERLAPPING AND CROSSFADING KEYGROUPS ..................................................... 53
ASSIGNABLE PROGRAM MODULATION ................................................................ ...... 54
Advertisement
Table of Contents

Related Manuals for Akai S3000XL


Summary of Contents for Akai S3000XL
-
Page 1: Table Of Contents
LOADING FROM HARD DISK ..................28 DELETING PROGRAMS ....................30 RENUMBERING PROGRAMS ..................32 USING THE S3000XL IN ‘OLD AKAI’ MODE! ..............33 USING SELECT PROG - PROGRAMS WITH THE SAME NUMBER ....33 LAYERING PROGRAMS ................... 33 CREATING KEYBOARD SPLITS .............. - Page 2 THE MAIN RECORD PAGE .................... 120 NAMING SAMPLES FOR RECORDING ................. 120 ADJUSTING THE RECORDING AND THRESHOLD LEVELS .......... 122 RECORDING ON THE S3000XL ..................122 DIGITAL RECORDING ....................123 EDIT SAMPLE ..........................125 NAMING SAMPLES - COPYING AND RENAMING ............127 DELETING SAMPLES ..............
- Page 3 CROSSFADING ....................155 MIXING AND LAYERING SAMPLES ..............155 SETTING DIGITAL FADES................157 EFFECTS MODE ......................... 159 ORGANISATION OF EFFECTS FILES ................162 ASSIGNING EFFECTS TO SINGLE PROGRAMS ............163 ASSIGNING EFFECTS TO MULTI PARTS ..............165 ASSIGNING EFFECTS TO INDIVIDUAL KEYGROUPS ..........
- Page 4 HARD DISK CONTROL ....................228 IMPORTING SOUNDS FROM OTHER MANUFACTURER’S CD-ROMS......229 GLOBAL MODE .......................... 231 TUNING THE S3000XL ....................231 SETTING THE MASTER OUTPUT LEVEL ..............231 MIDI FUNCTIONS ......................232 MIDI FILTER ..................... 232 PPM PAGE - MONITORING MIDI ..............
- Page 5 APPENDIX 1 ..........................279 CONNECTING AN EXTERNAL HARD DISK DRIVE............279 NOTES ON USING HARD DISK DRIVES ................ 279 SCSI CABLES ....................279 TERMINATION ....................279 SCSI CABLE LENGTH ..................280 APPENDIX 2 ..........................281 DATA COMPATIBILITY ISSUES ..............
-
Page 7: Introduction
ROM. The ability to read CD ROMs made for other manufacturer's samplers gives access to an even further range of sounds. All this adds up to a price breakthrough in sampling technology - the new Akai S3000XL. S3000XL Operator’s Manual... -
Page 8: Features
Single trigger playback to emulate old monophonic synths and solo instruments’ playing styles. • Portamento Polyphonic and monophonic portamento. • Sound library Fully compatible with Akai S900, S950, S1000, S1100, S2800, S3000, S3200, S2000 and S3200XL samplers. Page 2 S3000XL Operator’s Manual... - Page 9 This digital audio output can be used to mix down digitally to DAT or any other digital recorder such as DCC, MiniDisk or a hard disk recorder such as the Akai DR4d, DR8 or even the S3000XL’s disk recorder. With the optional EB16 multi-effects processor installed, you may add four channels of effects processing to the mixdown.
- Page 10 Effect select (large hall, small hall, large room, small room, reverse, gated, etc.), decay time, HF damping, LF damping, pre-delay, diffusion. A multi-effects channel may also be routed to its ‘neighbouring’ reverb channel for dual reverb multi-effects. Page 4 S3000XL Operator’s Manual...
-
Page 11: About This Manual
S3000XL. Even if you’re a seasoned programmer, we hope that there is information in this manual that you find useful.. -
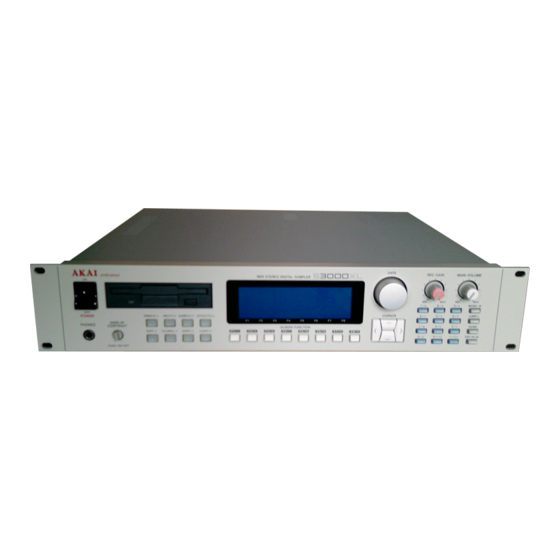
Page 12: Front Panel
The MAIN VOLUME control sets the main output level of the L/R stereo outputs (this control does not affect the level of the signal appearing at the individual outputs or digital output). POWER SWITCH Applies power to the S3000XL. Page 6 S3000XL Operator’s Manual... - Page 13 ACTIVITY LED will be lit. It is important to remember that, unlike a synthesiser, the S3000XL has no means of storing sounds in an internal memory. As a result, it is vital that you save your work to disk before turning the power off otherwise you will lose your work and, unless previously saved, it will be gone for ever.
-
Page 14: Taking Care Of Your Disks
10 Even if you are using a hard disk of any sort, please make sure you have backed up your work to floppy disks. It can be time consuming but it will be worth it if you ever have a problem with your hard disk! Page 8 S3000XL Operator’s Manual... -
Page 15: Rear Panel
EQ’ing, adding effects, etc.. NOTE: In the case of you only connecting the L/MONO outpput, the S3000XL only outputs the left channel signal and the left/right stereo signals are not mixed at this output. - Page 16 MIDI IN signal ‘thru’ to other modules or MIDI devices that may be connected. The OUT is normally only used to transmit MIDI System Exclusive data to another Akai sampler or to a computer. POWER CONNECTION This should be connected to an AC power source.
-
Page 17: Setting Up The S3000Xl
Now turn on the S3000XL. You will see a message in the LCD informing you of what is going After 15 seconds or so, your S3000XL is ready for use. Turn the volume up on the sampler, amplifier and/or mixer. -
Page 18: Loading The Demo Floppy Disks
S3000XL. As long as you don’t press the SAVE key and accidentally overwrite your floppy disk or hard disk volume, you can’t damage your sounds permanently or come to any harm (you can’t damage a CD-ROM as... -
Page 19: Mounting The S3000Xl
If you are using the S3000XL with a hard disk device of any kind, the disk drive MUST be mounted horizontally. If the disk drive is at an angle, even a slight one, you may have unreliability problems and even data corruption. -
Page 20: Getting Around The S3000Xl
OPERATING MODES The S3000XL has various modes in which it works and these are selected using the eight large mode keys found beneath the floppy disk drive. Each key is illuminated to indicate the sampler’s current status. -
Page 21: Selecting Parameters And Entering Data
DATA encoder selects and stores it into the S3000XL’s memory. Our sound programmers at Akai usually use a combination of the numeric keypad and the DATA WHEEL for speedy input of parameter values. -
Page 22: Mark And Jump Keys
Pressing the MARK/# button when the cursor is on a field will cause the S3000XL to remember the position of the cursor, and pressing JUMP/. will take the cursor back to the MARK(ed) position from any other page. Pressing JUMP/. -
Page 23: Naming Files - The Name Key
(when in number mode, they enter the “+” and “-” characters), and the MARK/# and JUMP/. keys enter “#” and “.” respectively. The last button, ENT/PLAY, enters and confirms the name and the S3000XL prompts you to either copy or rename the item. -
Page 24: Record Level, Main Volume, Headphone Output
MAIN VOLUME Input level for sampling is regulated using the RECORD LEVEL control and the S3000XL’s overall output level is controlled, not surprisingly, by the MAIN VOLUME control. This also governs the level of the sound appearing at the HEADPHONE OUTPUT. -
Page 25: How The S3000Xl Works
MODULATION known as APM for short) in EDIT PROGRAM. Using this, any modulation source may be routed to virtually any control input. In this way, the S3000XL is a powerful synthesiser as well, except that you may use almost any sampled sound (of your own or from a sound library) as the basis of your own powerful and expressive sounds. -
Page 26: S3000Xl Flowchart
Once you are happy with everything, the whole thing may be saved to disk for recall at a later date. One of the beauties of the Akai samplers is that there are no restrictions on what you do with samples - any sample can be placed into any keygroup in any program. One sample may be placed into a variety of different programs, each of which impose different envelope or filter settings to create a wide range of possibilities from very little. - Page 27 PANNING LEVEL FILTER TUNE SAMPLE 4 KG PITCH VEL SW/XFD MASTER PROGRAM OUTPUT ENV 2 ENV 1 KEYSPAN ENVELOPE TEMPLATES MODULATION SOURCES ENV 1 ENV 2 LFO 1 LFO 2 MOD.WHL P.BEND AFTERTOUCH VELOCITY EXT.MIDI S3000XL Operator’s Manual Page 21...
- Page 28 LEVEL FX BUSS PRIORITY OUTPUT ASSIGN 4-CHANNEL EFFECTS PROCESSOR MULTI-EFFECTS CHANNEL x 2 DISTORTION/EQ MOD/DELAY EFFECTS REVERB CHORUS FLANGE PHASE DISTORTION RING MOD DELAY REVERB PITCH SHIFT PAN/FMOD REVERB ONLY CHANNEL x 2 REVERB REVERB Page 22 S3000XL Operator’s Manual...
-
Page 29: Single Mode
Akai samplers can be used without tedious re-programming or conversion. NOTES FOR EXISTING AKAI SAMPLER USERS If you have used an Akai S1000, S1100 or any of the S3000 series samplers and are familiar with the concept of several programs sharing the same program number, you may... -
Page 30: Viewing Programs
One useful feature of the S3000XL is that it is possible to be playing one program whilst another is being selected. For example, whilst holding down a low string note you could select, say, a brass sound. -
Page 31: Setting Programs' Midi Parameters
This parameter ignores each programs keygroup ranges and simply imposes a range on the whole program. In this way, you can quickly set up very S3000XL Operator’s Manual Page 25... -
Page 32: Setting Program Loudness And Velocity
C4 (with a +12 setting) - it is not playing the samples on C3 an octave higher. NOTE: It must be said that this page is really an inheritance from earlier Akai samplers when using multi-timbral setups. We strongly recommend that for such purposes, you use the MULTI mode but retaining these functions ensures compatibility with data created on earlier models. - Page 33 NOTE: You will note that at a setting of 99, the program is at maximum level but you will not have any velocity sensitivity. This sets the program’s sensitivity to velocity. As mentioned, with set to 99, this parameter will have no effect. S3000XL Operator’s Manual Page 27...
-
Page 34: Loading From Floppy Disk
LOADING FROM FLOPPY DISK The next key along, F5, gives you access to some basic disk functions for loading sounds into the S3000XL. Pressing in the SELECT PROG mode gives you this screen: Here, you have a choice of two options: loading a particular program and its associated... - Page 35 NOTE: There is more to using a hard disk than that, unfortunately, such as matching SCSI ID’s, formatting, etc.. For details on using the S3000XL with a hard disk, please refer to the section HARD DISK CONTROL in the DISK section.
-
Page 36: Deleting Programs
This, of course, is the most drastic of these three options. If you answer GO and YES to the questions regarding released samples, then all programs, (except for an S3000XL generated program - TEST PROGRAM) and samples will be deleted. Deleting samples and rearranging memory space may take a little time, so be patient while this takes place. - Page 37 If the programs and samples in memory have not been saved to disk, deleting programs and/or samples at this point will be fatal - YOU WILL NOT BE ABLE TO RETRIEVE THEM. Please be careful. S3000XL Operator’s Manual Page 31...
-
Page 38: Renumbering Programs
However, to match S3000XL programs with the patch numbers on your synthesiser, you may want to renumber the programs, so that selecting a brass sound on the S3000XL will call up a similar (or complementary) patch on a remote synthesiser module. To do this, press the key. -
Page 39: Using The S3000Xl In 'Old Akai' Mode
If you have used Akai samplers before, you may well wish to continue working in this way but, if you are new to our samplers (welcome!), you may prefer to skip this section and refer to the section that explains MULTI mode and all it advantages. -
Page 40: Using Renumbering To Create Multi-Timbral Setups
Using the S3000XL live, you may have several multi-timbral setups in memory at any time (memory allowing, of course!). In this way, you may have sets of programs for each song... -
Page 41: Single Vs Multi
As mentioned, you may avhieve similar results in the MULTI mode where you can create multi-timbral setups, key splits, layered programs (and combinations of these) very quickly and easily. The advantages MULTI has over the ‘old Akai’ methods are •... - Page 42 The big advantage is that you may load older sound library material and use it with no conversion process or editing required. As mentioned, whether you choose to convert older Akai sound data into S3000XL ‘format’ using the MULTI mode is up to you depending on your application.
-
Page 43: Multi Mode - Combining Several Programs
MIDI channels whilst others share the same channels for layering and/or key splits and some parts may be routed to the internal effects processor in the S3000XL whilst others are sent out via the individual outputs for processing on the mixing console. -
Page 44: Assigning Programs To Parts
This will turn off all four effects channels so that you can hear the program(s) in isolation. These are the most commonly used MULTI parameters. Less commonly used ones are accessed via the soft keys. Page 38 S3000XL Operator’s Manual... -
Page 45: Assigning Parts To The Individual Outputs
MIDI channel and then set an appropriate keysplit (i.e. Part 1: C0-B2 and Part 2: C3-G8). More details on setting up key splits is given later in this section. S3000XL Operator’s Manual Page 39... -
Page 46: Setting A Part's Priority
(any filed will do) and press F6 ( ) in any of the MULTI pages. This will reset all the parameters described above to their default values and will clear the program name field, leaving it blank. Page 40 S3000XL Operator’s Manual... -
Page 47: Setting Up A Multi
This is showing us that the multi currently in memory is called MULTI FILE 1, the default name given to a multi when you power up the S3000XL (you can rename it to something more suitable as we shall see later). It is also showing us that PART 1 has the default TEST PROGRAM assigned to it. -
Page 48: Modifying The Multi
MODIFYING THE MULTI The beauty of the S3000XL’s MULTI mode is that, as the sequencer is playing back your sequence, you can interact with the parts, assigning different programs to parts ‘on the fly’... -
Page 49: Naming A Multi
Now move the cursor to the multi-file stored on the floppy disk/hard disk volume and press F8 and/or F7. This will load the selected multi and any programs associated with it plus the samples used in those programs. S3000XL Operator’s Manual Page 43... -
Page 50: Renumbering Programs
CURSOR UP/DOWN keys to select the program you wish to renumber, set the new number using the DATA wheel or the numeric keypad and press . Only that program will be renumbered. Page 44 S3000XL Operator’s Manual... - Page 51 Once you are happy with the result of your renumbering, press F7 to return you to the main MULTI screen display. If you change your mind and do not wish to renumber any programs, simply press without pressing F3, F4, F5 or F6. S3000XL Operator’s Manual Page 45...
- Page 52 You will note that the above does not apply when setting up a multi-timbral set of programs in the SINGLE mode (i.e. using the ‘old Akai’ method). In SINGLE mode, as you select new programs and renumber them, so the program’s parameters will be used.
-
Page 53: Using Multi Mode For Layering Programs
In the case of layering three sounds, polyphony will be cut to around ten voices. If you’re mad enough to try layering 16 programs, polyphony will be reduced to one voice! S3000XL Operator’s Manual Page 47... -
Page 54: Using Multi Mode To Set Keyboard Splits
MIDI channel and LO/HI key ranges as PART 2, detune it and pan it hard left and hard right to create a pseudo stereo detuned synth bass sound in the bottom octaves. The possibilities are almost endless (up to the 16 part limit in fact)! Page 48 S3000XL Operator’s Manual... - Page 55 COMBINING THESE TECHNIQUES The S3000XL’s MULTI mode is so flexible that it can accommodate all of these techniques simultaneously. For example, PARTs 1, 2 and 3 could have layered programs on one MIDI channel whilst 4, 5 and 6 have parts on separate channels.
-
Page 56: Program Editing
With 2 low frequency oscillators (LFOs), ADSR and multi-stage envelope generators, resonant filters, panning and more, the S3000XL can radically transform any sound offering the creative musician and programmer endless possibilities. In short, what it means is that as well as owning a superb sampler, you also have a very excellent and versatile analogue style synthesiser. -
Page 57: What Is A Keygroup
The simplest program you can have is with one keygroup in it that spans the entire MIDI range on C0-G8. The TEST PROGRAM that always boots up into the S3000XL is just such a program. I.e: KEYGROUP 1 Perhaps the next level up is to have a program with two keygroups. -
Page 58: Keygroup Zones
The ultimate program, would be for each key to have its own keygroup with each keygroup containing four samples using a four way velocity switch! Page 52 S3000XL Operator’s Manual... -
Page 59: Overlapping And Crossfading Keygroups
If you have already owned an Akai sampler, then you will probably be familiar with a lot of what we have just seen but, if this is your first time with an Akai sampler, it is worth taking the time to get a fairly good understanding of these principles and the concept of keygroups if you are going to get the best out your sampler. -
Page 60: Assignable Program Modulation
Gamelan orchestra but, when the need arises to create that special sound or when your synthesiser just isn’t up to it, the S3000XL will oblige you willingly - in fact, you may get so used to the S3000XL’s versatility as a synthesiser that some of your current... - Page 61 GLOBAL - MIDI page. This can be BREATH (cntl#2), FOOT (cntl#04) or VOLUME (cntl#07). Using a MIDI merger on your keyboard would allow you to merge a breath controller with your keyboard and users of the Akai S3000XL Operator’s Manual...
- Page 62 - if you are not into programming you can largely forget about it and just use the defaults. Similarly, if you do not like synthesisers and prefer instead to use the S3000XL for the reproduction of high quality samples of acoustic instruments again, you need not concern yourself with these functions.
- Page 63 EDIT PROGRAM - SINGLE NOTES ABOUT ASSIGNABLE PROGRAM MODULATION 1. When loading S1000 or S1100 library disks (which do not have APM), the S3000XL loads the assignments of the S1000/S1100 - i.e. the fixed assignments. Again, as a result, you need not worry about having to set these assignments yourself. On library disks developed for the S3000XL, you will see the assignments made by our sound programmers.
-
Page 64: Edit Single
EDIT PROGRAM - SINGLE EDIT SINGLE EDIT SINGLE is used to create programs. In the S3000XL, we always use another program as the basis for a new one. There are several ways you can work this. You can use an existing program from your sound library that closely resembles the one you wish to create. -
Page 65: Naming Programs - Copying And Renaming
Should you press this by mistake, you will see that the boxed area in the lower right of the screen still retains the new name you entered so press NAME immediately followed by ENT and make your choice again. S3000XL Operator’s Manual Page 59... -
Page 66: Deleting Programs
F7 - YES but if you need to keep them, press F8 - NO. NOTE: Deleting samples and programs is ultimately destructive. Please ensure that you have saved them to disk before deleting in case you want to come back to them at a later date. Page 60 S3000XL Operator’s Manual... - Page 67 You will find it useful too, when playing leadlines of any kind. Owners of the Akai EWI wind synthesiser will find this function invaluable in obtaining better expression and phrasing.
- Page 68 OFF, you will be able to monitor any other programs that share the same number. NOTE: This function is only really of relevance of you are using the ‘old Akai’ method to sequence programs sharing the same program number.
- Page 69 We will now look at the functions of these pages. We will skip for the moment and look at the function of first as these affect the program as a whole. S3000XL Operator’s Manual Page 63...
-
Page 70: Midi Page
The notes which will be stolen are determined by this parameter - either the OLDEST note will stop playing when a note is stolen or the QUIETEST one. Page 64 S3000XL Operator’s Manual... - Page 71 MULTI’s parameters. However, if you are using the ‘old Akai’ method for multi-timbral sequencing, you will want to set the parameters shown above (although they may be more easily set in the SINGLE mode on the MIDI page).
-
Page 72: Output Levels Page
OUTPUT LEVELS page where you can control the audio output of the program from the S3000XL. You will receive this screen display: At the top right of the screen is the currently selected program name - in EDIT SINGLE, this may be changed and another selected for editing by scrolling with the DATA control. - Page 73 By layering two programs and setting opposite values (i.e. + 50 on one program and - 50 on the other), you may use this function to crossfade between them using pressure. As an example, you S3000XL Operator’s Manual Page 67...
- Page 74 NOTE 1: You will note that if the parameter is set to full (i.e. 99) the output level of the S3000XL is at maximum and so you will not hear any effect if one or more modulation sources are applied.
-
Page 75: Pan Page
‘zipper noise’. Please be aware of this when setting pan modulation. As with all control inputs on the S3000XL, any combination of controllers can be mixed together. Here are a few suggestions: Bend Use this instead of modwheel perhaps. - Page 76 Layering two programs and setting the modulation amounts to opposite values can also yield some interesting panning effects. Page 70 S3000XL Operator’s Manual...
-
Page 77: The Tune Page
Those, then, are the master pages for the program where you can set parameters that affect the program as a whole. In any of the pages described, you may always directly access another from the soft keys. S3000XL Operator’s Manual Page 71... -
Page 78: Modulation Pages
The pitch bend on the S3000XL allows you to set a different range for bend up and down as well as use pressure and a special mode is also available to make it more flexible. The... - Page 79 The pitchbend options on the S3000XL allow some very interesting performance techniques. By setting the pitch to UP: 2 and DOWN:12, with a heavy metal guitar sample, you can emulate string bending up and an octave ‘whammy bar dive bomb’...
-
Page 80: Lfo1
LFO is assigned to be random but the speed of modulation will change randomly. This selects whether the LFO’s (all 32 of them!) are synchronised or not. With ON, all the LFO’s are not synchronised and so give a Page 74 S3000XL Operator’s Manual... - Page 81 • Applying a slow LFO2 to speed will give a gradual speed up and slow down of LFO1 rate. This can be used for special effects, especially in synth sounds - for example, S3000XL Operator’s Manual Page 75...
- Page 82 This allows you to use note-on velocity to introduce LFO1 modulation. With a positive value set here, playing a note hard will introduce a level of modulation which may be augmented using the modwheel or pressure. Page 76 S3000XL Operator’s Manual...
-
Page 83: Setting Lfo1 Modulation Depth
LFO1 parameter in the PTCH page to 00 unless you really want the sound of an American police siren! Once you have set the LFO1 parameters, you may return to the main program edit page by pressing S3000XL Operator’s Manual Page 77... -
Page 84: Lfo2
Like LFO1’s RANDOM waveform, it can be used to create the classic ‘sample and hold’ effect found on analogue synthesisers. However, the random waveform provided by LFO2 has some other possibilities. Page 78 S3000XL Operator’s Manual... - Page 85 This sets the delay between a note-on occurring and the effect being introduced. At 00 the effect will be instantaneous and at 99 the effect will take some 5 or 6 seconds to be introduced. I.e. NOTE ON S3000XL Operator’s Manual Page 79...
- Page 86 LFO2 to slightly modulate LFO1 thereby affecting the vibrato very subtly so as to eliminate the inherent ‘cyclicness’ of LFO modulation. No doubt you will find variations of your own. Page 80 S3000XL Operator’s Manual...
-
Page 87: Setting Up The Soft Pedal
Pressing will display this screen: This final page in the modulation section allows you to set the response of the S3000XL to the soft pedal (MIDI controller 67). This can be very useful in obtaining better expression for piano sounds. The parameters are very simple and are as follows. -
Page 88: Portamento
This may be useful when you wish to play a sound normally but only apply portamento to a few notes. For example, when playing a trombone sample, you may play normally and then switch Page 82 S3000XL Operator’s Manual... - Page 89 For example: 1 sec 2 secs 4 secs 8 secs 16 secs When RATE is selected You may use these two portamento modes to create a range of different musical effects. S3000XL Operator’s Manual Page 83...
- Page 90 Of course, you may stack more than two programs on top of each other in the multi. Alternatively, you may layer programs in this way and set different portamento rates for each one so that they all slide around at different speeds! Page 84 S3000XL Operator’s Manual...
-
Page 91: Keygroup Parameters - Creating Keygroups
3-6, assign those keygroups to, say, Mute Group 1. All other keygroups will be unaffected but all those in mute group 1 will be mutually exclusive - that is, if one is sounding when another is played, it will be cut. S3000XL Operator’s Manual Page 85... - Page 92 SNARE DRUM ROLL WITH MUTE GROUP OFF In this example, each snare hit is allowed to decay naturally. SNARE DRUM ROLL WITH MUTE GROUP ON In this example, each hit is cut short by the next one. Page 86 S3000XL Operator’s Manual...
- Page 93 TIP: A very quick way of selecting keygroups on the S3000XL is to press and hold the EDIT key and play a note on the keygroup. This will select that note’s keygroup. For example, in a program with five keygroups spanning C0-B1, C2-B2, C3-B3, C4-B4, C5-G8, playing G3 will select keygroup 3 - i.e.
-
Page 94: Mapping Out Your Keygroups - Setting Keyspan
ALL notes equally. Pay attention because you could seriously affect your program’s keyspan with one slip. You will note that this does not apply when inputting notes from the keyboard and is on. Page 88 S3000XL Operator’s Manual... - Page 95 To exit this page and to access other pages, press - this will give you access to other keygroup functions - or press to return you to the main PROGRAM EDIT page and the master program functions. S3000XL Operator’s Manual Page 89...
-
Page 96: Assigning Samples To Keygroups And Zones - Smp1
96), you will actually be playing two voices out of the possible 32. With such generous polyphony, this shouldn’t be a problem unless you are driving the S3000XL particularly hard. Another way to use the zones is for stereo samples and for layering sounds. For example: This shows the assignment for a stereo piano sample. - Page 97 This shows the sample(s) currently assigned to the zone(s). If a sample name is assigned but it does not exist in the S3000XL’s memory, a “?” will appear alongside it to indicate that it is missing. To assign a sample, simply move the cursor to this field and scroll through the available samples in memory with the DATA control.
- Page 98 EDIT PROGRAM. Other non-pitched samples such as sound effects, breakbeats, drum loops, etc., can be treated the same way. As mentioned before, there is a small box to the left of the screen that displays graphically the status of the four zones’ velocity ranges Page 92 S3000XL Operator’s Manual...
-
Page 99: Smp2
LEVELS page, you may still route individual keygroups to separate outputs. This may be useful in a drum program where things like toms, cymbals and some percussion appear at the S3000XL’s stereo outputs whilst important drums like bass drum and snare are assigned to appear at individual outputs. - Page 100 TO END is the same as the PLAY TO SAMPLE END selection in the MORE page in SAMPLE EDIT. The ability to reset the playback parameters of a sample allows you a lot of flexibility - the same sample can be used in different ways in different programs. Page 94 S3000XL Operator’s Manual...
-
Page 101: Smp3
In all of the sample pages, you may select between them via the three SMP soft keys. To return to the keygroup screen to access the other keygroup functions, press and to return to the main PROGRAM EDIT screen to access the ‘global’ program functions, press S3000XL Operator’s Manual Page 95... -
Page 102: The Filters
From this page press the key to take you to the filter page: The S3000XL is equipped with 12dB/octave lowpass resonant filters as found on many analogue synthesisers. As well as using them for the tonal modification of acoustic samples, they also allow you to totally transform a sound. - Page 103 S3000XL, especially with certain sounds. As a result, take care to watch levels. The distortion produced by digital circuitry is not as pleasant as that produced by the old synths (unfortunately!!) so we can’t expect the pleasant overdriven...
- Page 104 This and the other “!” controllers allow you to control the opening and closing of filter cutoff at the point of note on. They don’t have any effect if these controllers change through the course of the note but only when the note is pressed. Page 98 S3000XL Operator’s Manual...
-
Page 105: Env1 - Shaping Amplitude
The other parameters are: This calls up a series of preset envelope templates that have been set within the software of the S3000XL. You can use these to get close to the type of envelope you are after and then maybe fine tune them afterwards if needs be. - Page 106 Note On velocity. Though some keyboards do not accept or transmit this, assuming a mean value of 64, all AKAI keyboards provide a full implementation of this function. The speed with which the key is released can be used here to affect the release rate (positive values mean that a fast release lengthens the release rate, and vice versa).
-
Page 107: Env2 - Shaping The Filter
This will set how much key position will affect both rate 2 and rate 4. This sets how much velocity will control the modulation output of ENV2. This parameter can be used very effectively in regulating dynamics through key velocity. All parameters’ ranges are +/-50. S3000XL Operator’s Manual Page 101... -
Page 108: Using The Filter And Envelope Generators
S3000XL’s filter and envelope section. The only difference here, however, is that instead of relying on a handful of waveforms, any sampled sound may be used as the source. -
Page 109: The Second Filters
EDIT PROGRAM - SINGLE THE SECOND FILTERS If the IB304F filter bank is installed in your S3000XL, the second bank of filters is accessed by pressing . This will display the following screen: NOTE: If the IB304F is not installed, pressing... - Page 110 The fields on the FILTER 2 page are as follows: The parameters across the top of the page follow the usual convention and allow you to select the keygroup for editing, select whether you wish to edit just one keygroup or all Page 104 S3000XL Operator’s Manual...
- Page 111 NOTE 2: The setting of this parameter relates to both the second filter and tone section. This allows you to switch in a -6dB pad. This is included to overcome the possibility of distortion should the resonance be set quite high, boosting the sound into overload. S3000XL Operator’s Manual Page 105...
- Page 112 This and the other "!" controllers allow you to control the opening and closing of filter cutoff at the point of note on. They don’t have any effect if these controllers change through the course of the note but only when the note is pressed. Page 106 S3000XL Operator’s Manual...
-
Page 113: Creating 24Db/8Ve 4-Pole Lowpass Filter
However, it must be said that for certain sounds, a 24dB/Octave, 4-pole filter is better. On the S3000XL, it is possible to create a 4-pole filter with a 24dB/Octave cutoff slope when the IB304F is installed. To do this, select LOWPASS as the filter type in FILTER 2 and set FILTER 2’s parameters identically to FILTER 1. - Page 114 Watch out for distortion, however, with such high resonance settings. When using high resonance settings, you may find it necessary to switch in the -6dB pad in the field - you may even need to back the programs output level off as well. Page 108 S3000XL Operator’s Manual...
-
Page 115: The Tone Page
EDIT PROGRAM - SINGLE THE TONE PAGE If the IB304F is fitted, the S3000XL also features a simple tone control which is accessed via F8 - . Pressing this will display this screen: The TONE section can best be described as ‘spectral tilt’. If you imagine a see-saw, the... - Page 116 FILTER 2 page. The converse is also true - switching them on of off in the FILTER 2 page will have the same effect in the TONE page. Page 110 S3000XL Operator’s Manual...
-
Page 117: Env3
NOTE: The descriptions of FILTER 2, the TONE page and ENV3 are only relevant if the optional IB304F filter bank LSI is installed in the S3000XL. If you are interested in more advanced and dramatic tonal processing, the IB304F is highly recommended. -
Page 118: Keygroup Pitch/Amplitude Modulation
ENV2 is selected as the default again as means of ensuring compatibility between the older samplers and the S3000XL. Feel free to route anything you like to this field. Some suggestions are: This is another freely assignable modulation field that... - Page 119 Many possibilities exist. Env1 Use this to create pitch sweeps that vary according to the sounds overall level. ! Modwheel Use this and the other “!” controllers to affect pitch at the point of note-on. S3000XL Operator’s Manual Page 113...
-
Page 120: Edit Multi
You would then need to return to MULTI and check it there. Of course, if the sound is still not quite right, you must repeat the whole process again. Not so on the S3000XL - simply select the appropriate part and press EDIT to adjust the sound within the context of the multi until it’s just right. -
Page 121: Screen Differences In Edit Multi
MULTI parameters set within each part of the multi-file. Apart from these differences, however, EDIT SINGLE and EDIT MULTI are identical so please refer to EDIT SINGLE for more information on editing the other program parameters. S3000XL Operator’s Manual Page 115... -
Page 122: Sample Mode
40kHz. A bass drum, however, which has very few upper harmonics, could feasibly be sampled at 20kHz. The S3000XL samples at 44.1kHz, the same as compact disc so you can be sure you are getting CD quality sound from your sampler. - Page 123 On the S3000XL we have four velocity zones that allow us to use playing technique to switch between these different samples so that you could, for example, use velocity to switch between a slow legato viola and an aggressively bowed viola.
-
Page 124: Record Mode
STEREO is selected and you are using INPUT LEVEL to start recording (see below - . When MONO is selected, this field defaults to LEFT but, when STEREO is selected you may set which input channel you want to trigger recording. Page 118 S3000XL Operator’s Manual... - Page 125 This is used when monitoring the signal you are sampling through a mixer. NOTE: If you are sampling from a mixer it is possible to get ‘feedback’ if the S3000XL is also connected to that mixer, set to ON and its channels are open..
-
Page 126: The Main Record Page
C4 is selected. Before you can do any recording, you must name the sample you are about to record. If you have just switched the S3000XL on with no disk in it, you will have the four synth waveforms in there. Use one of these as the basis of your new sample. - Page 127 F7 should be showing ) and, of course, the controller should be on the same MIDI channel as the S3000XL. This sets the length of time you will record for. The page also shows what percentage of memory is free, the current sample rate (44100) and the size (expressed as a percentage of available memory) of the sample you are about to make.
-
Page 128: Adjusting The Recording And Threshold Levels
After the recording has finished, the monitoring of the incoming signal through the S3000XL is now automatically switched off allowing you to play the new sample directly from the keyboard or the front panel ENT/PLAY key. To switch the monitoring back on again, press - METER ON. -
Page 129: Digital Recording
44.1kHz”. If there is some problem with the digital audio signal, you will receive the following display: This indicates that the digital audio signal is not getting to the S3000XL. Please check your connections carefully - it could be that the cable has become disconnected. Also, check that the DAT machine or CD player is switched on. - Page 130 This indicates that the S3000XL is recording digitally. As with analogue recording, the display fills with the incoming sound’s waveform. NOTE: The S3000XL has difficulty recording at 48kHz (i.e. from a DAT machine). You will receive the following warning if you try to record at 48kHz: It is advisable not to record at 48kHz.
-
Page 131: Edit Sample
The field allows you to select whether your editing will be in MONO or STEREO. This may be set here and in other pages if you wish. S3000XL Operator’s Manual Page 125... - Page 132 This offers a set of further editing functions where you may perform ‘sectional’ editing (that is, remove sections from samples), join, splice, mix, tune and reverse samples and set fades. This allows you to delete samples from memory. We will come to these in a moment. Page 126 S3000XL Operator’s Manual...
-
Page 133: Naming Samples - Copying And Renaming
Should you press this by mistake, you will see that the boxed area to left of the screen still retains the new name you entered so press NAME immediately followed by ENT and make your choice again. S3000XL Operator’s Manual Page 127... -
Page 134: Deleting Samples
F7 or F8 accordingly. NOTE: Deleting samples is destructive. Please ensure that you have saved them to disk before deleting in case you want to come back to them at a later date. Page 128 S3000XL Operator’s Manual... -
Page 135: Trimming Samples
You can check if there is a delay by playing the sample a few octaves down as this will exaggerate any delay that may exist. S3000XL Operator’s Manual Page 129... - Page 136 (or end) point out of the loop. Once you have set the start and end points, press F8 - - to discard the unwanted audio either side of the start and end point. You will receive this screen display: Page 130 S3000XL Operator’s Manual...
- Page 137 It is possible to zoom in on the waveform using the key. Repeatedly pressing this will enlarge the waveform display until you are looking at individual samples that are an inch wide! The display centres around the start point. Of S3000XL Operator’s Manual Page 131...
- Page 138 Of course, if there is ‘dead space’ either side of the sample, these should be removed before looping but it is felt that looping first and trimming later is safest. Page 132 S3000XL Operator’s Manual...
-
Page 139: Looping
EDIT SAMPLE LOOPING Looping is one of the trickiest areas of sampling but not impossible and the S3000XL makes it as easy as it can with some functions to help you make good loops. In either the SLCT page or the TRIM page, press the key to access the looping page. -
Page 140: Loop Auto Find And Crossfade Looping
Repeated pressing of this will make the S3000XL try and try again and you must judge if the loop is acceptable or not. The key is invaluable in creating loops. What this function does is to crossfade a portion of the... - Page 141 NOTE: The crossfade function is destructive and will affect your sample permanently. Be sure to have saved your work before performing a crossfade in case you donÕt like the results or you make a mistake. S3000XL Operator’s Manual Page 135...
-
Page 142: Making A Good Loop
Of course, there may well still be some glitches but this can be overcome using the crossfade key. Pressing that in this case may create something like the following: Here, the crossfade function has smoothed the whole thing out to create a more uniform amplitude. Page 136 S3000XL Operator’s Manual... - Page 143 NOTE: Sometimes when crossfading, because part of the area chosen for crossfade may be slightly out of phase with the loop area, you may sometimes get a dip in level where they cancel each other out. This is not a fault of the S3000XL but something that cannot be avoided.
-
Page 144: Level Normalisation
Setting, for example, a rescale value of +15dB to bring the level up to maximum will also boost the noise level by 15dB. Please bear this in mind when using these functions. Page 138 S3000XL Operator’s Manual... -
Page 145: Dsp Functions - Timestretch, Re-Sampling And Eq
S3000XL works by making a copy of the original. It is necessary to make a copy for two reasons - firstly, the S3000XL needs the original data to get the data to insert. Secondly, in the event of a stretch going wrong, you still have the original to revert to. - Page 146 There are many possibilities which you will no doubt discover for yourself. Let us now examine how to operate the Timestretch function on the S3000XL. Pressing will give this screen: This enables you to lengthen or shorten a sample or a selected part of a sample from 25% of its original length to 2000% (twenty times) without changing its pitch.
- Page 147 Remember that to perform any of these operations, you will need to have enough free memory. This sets a level of intelligence for the S3000XL to work with when performing an intelligent timestretch. It sets the number of decisions it will make as it works its way through the sample. With lower values set here, it will not make so many examinations of the sound.
-
Page 148: Performing A Timestretch
When the processing is finished, you can play back the original from the ENT/PLAY key or the stretched version from the key. If you are happy with the sound of the stretched sample, you can proceed to edit, trim and loop it, just as if it was a freshly-recorded sample. Page 142 S3000XL Operator’s Manual... -
Page 149: Re-Sampling
This is done automatically for you and this field is not accessible. S3000XL Operator’s Manual Page 143... -
Page 150: Performing A Re-Sample
S3000XL as possible. Even with 32 Megabytes of RAM installed, there will be occasions where you need to squeeze that little bit more out of the samplers internal memory. - Page 151 EDIT SAMPLE The S3000XL is also equipped with an EQ (equalisation) DSP function. This allows you to add EQ, affecting the tone of the sample. Pressing in any of the DSP pages will give this screen display: In the EQ, you may select from four different EQ types and apply cut and boost of gain at specific frequencies.
- Page 152 (i.e. if you set a gain boost of +24dB, set a volume cut of -24dB to compensate). When cutting frequencies, you may like to use the control to boost overall level slightly (although this may also be accomplished by re-normalising the sound). Page 146 S3000XL Operator’s Manual...
-
Page 153: Eq'ing A Sample
If you need to EQ more than one frequency, select the source sample and set the EQ for that and process it. When that’s done, select the EQ’d sample as the source sample, set the next frequency you want. Repeat the process again on the second EQ’d sample. S3000XL Operator’s Manual Page 147... -
Page 154: Further Editing Functions
PLAY TO SAMPLE END is useful for triggering sampled drums either from a keyboard or sequencer or by drum trigger units such as the ME35T and the like. Like the previous setting, no loops are Page 148 S3000XL Operator’s Manual... - Page 155 HOLD loop. This function is useful when you have a small, short, single cycle loop that has latched onto some strange, discordant aspect of the sound and is slightly out of tune with the rest of it. S3000XL Operator’s Manual Page 149...
-
Page 156: Reversing Samples
Pressing it again will reverse the sample back to its original form. Note that any loop points you have set will stay in the same absolute positions, and will not be reversed with the sample. Page 150 S3000XL Operator’s Manual... -
Page 157: Sectional Editing
Here you are presented with four choices. These offer three distinctly different edits depending on what it is you want to achieve. They are: This will exit this screen and return you to the main SECTIONAL edit screen without having any effect on the sample. S3000XL Operator’s Manual Page 151... - Page 158 If you change your mind, press Whilst the S3000XL is processing the data, you will receive a ‘busy’ prompt. After a few seconds, the new sample will be shown which may be played in the usual way.
- Page 159 EDIT SAMPLE As with TRIM, the S3000XL is very considerate and won’t let you ruin good loops and if you move the start or end points into any loop zone (shown above the waveform) you will receive the warnings: In this case, whatever editing action you perform will be ignored.
-
Page 160: The Join Page
(you should press GO or ABORT as necessary). After a few seconds (depending on the length of the samples), you can hear the fruits of your labours by pressing the ENT/PLAY key. Page 154 S3000XL Operator’s Manual... -
Page 161: Crossfading
MORE page. NOTE 3: It goes without saying that you need to have sufficient memory available to create these new spliced or mixed samples. You will be reminded by the prompts if you haven’t! S3000XL Operator’s Manual Page 155... - Page 162 The type of sounds created here can be long evolving sounds which may find a place in soundtrack work as they can be very dramatic. Page 156 S3000XL Operator’s Manual...
-
Page 163: Setting Digital Fades
S3000XL Operator’s Manual Page 157... - Page 164 IMPORTANT NOTE ABOUT SETTING START AND END POINTS: The start and end points are temporary whilst in the FADE page They are not stored anywhere. If you leave FADE or select another sample, these will be lost and you will have to set them again. Page 158 S3000XL Operator’s Manual...
-
Page 165: Effects Mode
EFFECTS EFFECTS MODE If the EB16 is not installed in your S3000XL, you will see this message when you press EFFECTS: Please contact your local Akai dealer regarding this option. S3000XL Operator’s Manual Page 159... - Page 166 EFFECTS With the EB16 installed, the EFFECTS key gives access to the S3000XL’s internal effects. The S3000XL’s effects processor is a 4 channel effects processor. Two channels (FX1 and FX2) offer multi effects that include distortion, ring modulation, EQ, modulation effects such as flanging, chorus and phasing, stereo pitch shift, autopanning, rotary speaker simulations plus delay/echo and reverb.
- Page 167 NOTE: A single program, part or keygroup cannot be sent to more than one effects channel. In this way, the S3000XL becomes almost a complete studio in one box and you could mix down a complete multi-timbral musical performance through the stereo outputs. You can also mix down digitally through the S3000XL’s digital output to DAT or any other...
-
Page 168: Organisation Of Effects Files
REVERB 1 REVERB 50 Unlike most other sound modules, the S3000XL makes no distinction between effects in SINGLE mode or MULTI mode. This means that effects used with sounds in SINGLE mode can just as easily be used the same in MULTI mode. For example, if effect preset #23 sounds good with a string sound in SINGLE, when in the MULTI mode, route that same string part to a suitable effects channel and select effect #23 for that channel. -
Page 169: Assigning Effects To Single Programs
You may find the MIX page slightly easier to use, especially when setting effects for several programs at once. Also, if you are using the ‘old Akai’ method for creating multi-timbral setups, the MIX page is probably the best place to select your effects routings. - Page 170 5 but you renumber this to program 7 and a strings program to program 5, the guitar sound will use the effects selection for program 7 whilst your string section will turn into the violinists from hell!! Page 164 S3000XL Operator’s Manual...
-
Page 171: Assigning Effects To Multi Parts
For example, let’s say that instead of having the internal effects on the S3000XL, you have assigned each part to its own channel on a mixer. The first thing you would do is patch in the first multi effects processor to AUX 1 on the mixer. - Page 172 SINGLE mode. Disappointment all round! On the S3000XL, you do not have this limitation. In this case, let’s imagine the same scenario - you have a guitar program in SINGLE mode to which you have added an effect that offers distortion, EQ, chorus, delay and reverb (let’s say it’s effect #10) that you want...
-
Page 173: Assigning Effects To Individual Keygroups
To set this, select the keygroup in the field (or press and hold the EDIT key and play the appropriate note) and route that keygroup as appropriate and set a suitable level. S3000XL Operator’s Manual Page 167... -
Page 174: Processing External Sound Sources Through The Effects
In this example, an Akai DR8 8-track digital audio recorder/editor is feeding its eight tracks into the mixer providing the ‘non-MIDIable’ parts such as vocals, guitar, etc.. It is also running timecode to a sequencer which, in turn, is ‘playing’ the S3000XL ‘live’ in the mix. Page 168... -
Page 175: Routing External Sounds Through The Effects
EFFECTS The mixer’s aux sends are also being fed to the S3000XL’s inputs so that tracks from the DR8 may be processed through the S3000XL. The S3000XL’s individual outputs are being used here but you could just as easily use the L/R outputs if you are short of mixer channels and set the balance of the programs within the S3000XL. -
Page 176: Chaining Effects
This allows you to send one sound (internal or external to two reverbs. FX1 DIST/EQ The output of the distortion/EQ section of FX1 will be fed to RV3: MOD/ECHO L/R outs PATH DIST/EQ PATH CONTROL PATH L/R outs REVERB L/R outs RV3 REVERB Page 170 S3000XL Operator’s Manual... - Page 177 The same may be done with RV4 using FX2. The choices are identical to those described above for RV3 except that RV4 takes as its input FX2. Please refer to the above description for details. NOTE: RV4 cannot take as its input FX1. S3000XL Operator’s Manual Page 171...
-
Page 178: Muting Effects
When these are pressed, they will show according to which key you pressed. Press the appropriate soft key again to un-mute the effects channel. Page 172 S3000XL Operator’s Manual... -
Page 179: Effects Edit
However, if for the purposes of the guitar sound, you add distortion and EQ and change the chorus to a flange setting, if there is another program in memory that uses that effect preset (for example, a strings program), it too will be affected. S3000XL Operator’s Manual Page 173... -
Page 180: Distortion/Ring Modulation
This is useful when you want to switch this section of the effects out but don’t want to upset the control settings. Page 174 S3000XL Operator’s Manual... - Page 181 MID2 and HIGH. For Khz frequencies, the field is expressed as n k n Hz. For example, a setting of 6k3Hz represents a setting of 6.3kHz. You will note that the values for these fields cannot be set using the numeric keypad. Only the DATA control may be used. S3000XL Operator’s Manual Page 175...
- Page 182 You may also ‘flatten’ the EQ (i.e. set the parameters so that there is no EQ applied) by setting the LOW and HIGH bands to 500Hz and 00dB and the two MID sections’ level to (the mid bands’ frequencies have no effect when is set). Page 176 S3000XL Operator’s Manual...
-
Page 183: Modulation Effects
(the CHORUS effect is more complex and is described in detail on the next page). DELAY R Audio in DELAY L These effects are chosen in the field and are as follows: S3000XL Operator’s Manual Page 177... - Page 184 LFO. This can sometimes produce a very ‘cyclic’, repetitive sound. The S3000XL’s chorus, however, actually uses four delay lines each modulated at different phase angles of the LFO’s output to produce a very broad stereo effect with little or no ‘cyclicness’.
-
Page 185: Rotary Speaker Effects
S3000XL simply toggles between SPEED1 and SPEED2. This sets the second of the rotary speaker effect speeds. - Page 186 NOTE 3: You will find that the rotary speaker effect is best created with no ‘straight’ signal. You should use the DIRECT SIGNAL: ON/OFF function in the FX OUTPUT pages to turn off the straight signal. Preset rotary speaker effects have DIRECT SIGNAL set to OFF. Page 180 S3000XL Operator’s Manual...
- Page 187 EFFECTS EDIT TIP: You may find the sound of a rotary speaker is enhanced using just a hint of distortion in the distortion section to re-create the overdrive effect commonly found on rock organ sounds. S3000XL Operator’s Manual Page 181...
-
Page 188: Autopan And Frequency Modulation Effects
NOTE: Because the stereo mod section passes through the echo section, any stereo mod effects you create here will be ‘monofied’ when mono delay effects are selected. As a result, you cannot effectively use autopan with mono echo. Page 182 S3000XL Operator’s Manual... -
Page 189: Stereo Pitch Shift Effects
After a delay, it is fed back again after the delay and shifted again. The amount of feedback and the delay time for each channel is separately variable and this gives rise to all sorts of weird and wonderful arpeggio effects. S3000XL Operator’s Manual Page 183... - Page 190 NOTE: You will please note that when PITCH SHIFT+FBK is selected, this uses the delay line normally used for echo effects. In other words, the echo effects described later in this section are not available when PITCH SHIFT+FBK is selected. Page 184 S3000XL Operator’s Manual...
-
Page 191: Bypassing The Modulation Effects
The final selection in the modulation effects section is not an effect as such but bypasses the modulation section completely, thereby switching it out of the effect chain: Although you may move the cursor to the fields and set values, they will have no effect in this BYPASS screen. S3000XL Operator’s Manual Page 185... -
Page 192: Delay And Echo Effects
This is a ‘pseudo-stereo’ delay effect that uses the two delay lines the feedback path of which crosses over: DELAY RIGHT LEFT IN DELAY LEFT RIGHT IN This gives rise to many interesting panning echo effects. Page 186 S3000XL Operator’s Manual... - Page 193 When in any of the MONO modes of echo, the whole memory is used to create long delays. In the XOVER and STEREO modes, however, the pool of memory is split between the two channels and so such long delay times cannot be set. S3000XL Operator’s Manual Page 187...
-
Page 194: Mono Delay/Echo Effects
Please note that because the stereo mod section passes through the echo section, any stereo mod effects you create will be ‘monofied’ when mono delay effects are selected. To enjoy stereo modulation effects with echo, please choose the stereo delay option (see below). Page 188 S3000XL Operator’s Manual... -
Page 195: Ping Pong Echo Effects
500mS, the third after 625mS, etc. (depending on the amount of feedback). I.e. LEFT 125mS 625mS 1.125Sec RIGHT 500mS 1Sec 1.5Sec parameter is set to ±50, the closer the first echo will The closer the be to the value set in the parameter. S3000XL Operator’s Manual Page 189... -
Page 196: Crossover Delay
XOVER effect, the maximum delay time you can set is halved. With XOVER L&R selected, the control allows many interesting ‘syncopated’ delays to be created that pan across the stero field. Page 190 S3000XL Operator’s Manual... -
Page 197: Stereo Delay/Echo Effects
NOTE: The maximum delay times for each of the two delay lines is half that of the MONO delay times we have seen so far. S3000XL Operator’s Manual Page 191... -
Page 198: Reverb Effects
- this is called the PRE-DELAY time and the larger the acoustic environment, the longer the pre-delay time (usually!). Graphically, reverb ‘looks’ a bit like this: PRE-DELAY DECAY TIME SOUND REVERBERATION Page 192 S3000XL Operator’s Manual... - Page 199 This has the effect of making the reverb less ‘boomy’ and can be effective on bass instruments that you may be feeding through the reverb as it helps to ‘separate’ the reverb from the main sound thereby making the source sound more distinct. S3000XL Operator’s Manual Page 193...
- Page 200 (for example, gated on the bass drum, large hall on the snare, medium hall on the toms, small room on selected percussion, etc.) although in a multi-timbral setup this will use up all available effects channels. Page 194 S3000XL Operator’s Manual...
-
Page 201: Reverse Reverb
In this effect, the reverb decay of the sound is read out backwards. The parameters are: This sets the time before the reverse reverb will start sounding. This sets the length of the reverse reverb. This has the effect of making the reverse sound more or less ‘grainy’ and ‘echoey’. S3000XL Operator’s Manual Page 195... -
Page 202: Gated Reverb
‘space’ around it but the reverb doesn’t hang over into the next beat. The S3000XL’s multi-effect processor offers two variations on this effect. With GATED selected, the screen looks like this: The first ‘gated’... - Page 203 Try it on other percussion sounds such as congas or try it on rhythmic guitar parts or arpeggiated sequencer parts, etc.. Try it also with highly rhythmic keyboard parts. Generally, try to set the TIME control so that the sound has its own distinctive ambient space around it. S3000XL Operator’s Manual Page 197...
-
Page 204: Effects Output Section
In this case, set to 00 - this will give you the full effect of the chorus but will ‘monofy’ the effect so that it doesn’t occupy a wide image in the stereo mix. Page 198 S3000XL Operator’s Manual... -
Page 205: Effects Direction
The S3000XL’s effects processor allows you to set the path of the effects with one simple control, the . You may have mod/echo followed by reverb; you may have reverb followed by mod/echo or you may have mod/echo and reverb in parallel. - Page 206 NOTE: Of course, the PATH CONTROL & OUTPUTS screen only applies to the multi- effects channels FX1 and FX2. When editing RV3 or RV4, the OUTPUT screen looks like this: You only have access to the level and pan/balance of the reverb, of course. Page 200 S3000XL Operator’s Manual...
-
Page 207: Soloing The Current Effect
Every page has this function so you may solo the current effect channel at any time. When pressed, it will show the current effects channel (i.e. FX1, FX2, RV3, RV4) depending on which one you are editing. Press it again to hear the other channels. S3000XL Operator’s Manual Page 201... -
Page 208: Copying Effects
4 LARGE HALL to preset 7 to work on it there. Without changing anything in the FX FROM or TO fields, simply move the cursor to the REVERB TO field, select preset 7 and press Page 202 S3000XL Operator’s Manual... - Page 209 It may be quicker in the long run! However, if there is just the occasional effect and/or reverb from another effects file that want to copy between effects files, we hope the copying to clip method satisfies your needs. S3000XL Operator’s Manual Page 203...
-
Page 210: Save Mode
DATA wheel. SELECTING THE HARD DISK PARTITION When a hard disk is formatted on the S3000XL, it is divided into sections called partitions (see later for details on formatting disks). This makes disk management slightly easier. - Page 211 If you do have programs in memory for selection via the sequencer’s MIDI program change, use SAVE ENTIRE VOLUME. S3000XL Operator’s Manual Page 205...
-
Page 212: Saving To Floppy Disk
MF2DD or MF2HD disk. If you try to save an entire volume with many programs and samples, you will have to use more than one disk. However, the S3000XL will prompt you accordingly, prompting you to insert new disks as necessary. -
Page 213: Saving To Hard Disk
You will also receive this message if you try to save to a CD-ROM which, of course, is a read-only medium. S3000XL Operator’s Manual Page 207... - Page 214 SAVE NOTE: You will also receive this message when you select under the same circumstances. Setting SCSI ID’s, etc., is discussed later in this section. Page 208 S3000XL Operator’s Manual...
-
Page 215: Renaming Files
Once set, you may turn this on and off freely in the field. On receipt of a Program Change message, the S3000XL will scan all the hard disk volumes for a number set in this page which corresponds to the Program Change number in the MIDI message. -
Page 216: Deleting Items From Disk
NOTE: In order to delete a file or files from a floppy disk, removable cartridge or Magneto Optical disk, write-protection must be off, of course. At any time, press F1 - SAVE - to return to the main SAVE screen. Page 210 S3000XL Operator’s Manual... -
Page 217: Hard Disk Control
NOTE: If your external drive’s ID is something other than 5 and uses a IkBytes/sector disk, you may set the appropriate settings here and, by saving the operating system to floppy disk and powering up with it in the drive, the S3000XL will default to the SCSI ID and sector size of your drive. -
Page 218: Formatting A Floppy Disk
SAVE FORMATTING A FLOPPY DISK Before a floppy disk can be used with the S3000XL, it must be formatted. To format a floppy disk, insert the disk in the drive, and press . You will see this screen display: There are two types of floppy disk available - DD (double density) or HD (high density). The higher capacity HD disks are recommended. - Page 219 S1000 or S1100 (please see below - NOTES ON USING S1000 AND S1100 SOUND LIBRARY). Usually, you must use to format a new disk for use in the S3000XL. Trying on an un-formatted disk will display the prompt: You should use S3000XL Operator’s Manual...
-
Page 220: Formatting A Hard Disk
Arranging is a faster operation than a full format (it simply initialises directories into a format suitable for use by the S3000XL). Make sure that there is no data which is only stored on the hard disk which you want to keep. -
Page 221: Notes On Using Existing S1000/S1100 Sound Library
NOTES ON USING EXISTING S1000/S1100 SOUND LIBRARY The S3000XL allows 510 items to be saved on a floppy or hard disk. On the S1000 and S1100, 64 items could be stored on floppy and 100 on a hard disk volume. As a result, the whole format of the directories is completely different. -
Page 222: Load Mode
LOAD LOAD MODE The LOAD mode allows you to load data into the S3000XL. The main LOAD page looks something like this: A list of all files (programs, samples and drum settings) will be displayed on the right side of the page. Programs have a ‘P’ beside their name, samples have an ‘S’, and drum input settings have a ‘D’. -
Page 223: Selecting The Hard Disk Volume
This will load any operating system that may be on the disk. MULTI+PROGS+SAMPS This will load the selected multi plus its associated programs and their associated samples. It will also load the effects file (if the optional EB16 multi-effects processor is fitted). S3000XL Operator’s Manual Page 217... - Page 224 . If you do have programs in memory for selection via the sequencer’s MIDI program change, use LOADENTIRE VOLUME. Page 218 S3000XL Operator’s Manual...
-
Page 225: Loading From Floppy Disk
If no floppy disk is in the drive, you will be prompted: If the disk is un-formatted (or has become seriously damaged in some way) the S3200 will tell you: You should format the disk (see SAVE - FORMATTING). S3000XL Operator’s Manual Page 219... -
Page 226: Loading From Hard Disk
You should make the appropriate NO or YES response. Pressing will load the chosen file(s) into memory without deleting anything first. As the disk is being loaded you will receive something like the following display to keep you aware of progress: Page 220 S3000XL Operator’s Manual... - Page 227 If the disk is un-formatted (or has become seriously damaged in some way) the S3000XL will tell you:...
-
Page 228: Loading S900/S950 Samples And Programs
S1000/S1100 formatted disk should you wish to do so. AUTO LOADING FROM DISK If you turn on the S3000XL with a floppy disk in the drive, the contents of the disk will be loaded into memory. If the disk contains a copy of the operating system and this operating system is the same or a higher version number than the ROM version, this will be loaded. -
Page 229: Searching For Files - Using The Find Function
When using the FIND function, it is not necessary to name the whole file. For example, if you want to search for a bass sound, simply type in BASS - the S3000XL will search the selected partition for ALL files that have those letters in them. In this example, you may... - Page 230 LOAD Once you become familiar with the FIND function, you will find it an invaluable aid to quickly searching for and loading sounds. NOTE: The FIND function does not work with floppy disks. Page 224 S3000XL Operator’s Manual...
-
Page 231: Using The Tag Directory System
LOAD USING THE TAG DIRECTORY SYSTEM On the S3000XL, it is possible to ‘tag’ files. This is much the same as placing it in a special sub-directory. In this way, certain files in a partition can be categorised according to type or any other category you wish. For example, you may have a situation where all basses from all volumes in a partition have been tagged BASS and all strings tagged ORCHESTRAL. -
Page 232: Naming Tags
NAMING TAGS You may also name a tag simply by pressing NAME, typing in a suitable name followed by ENT. It is worth giving your tags useful names to avoid confusion at a later date. Page 226 S3000XL Operator’s Manual... -
Page 233: Notes On Using The Tagging System
Similarly for bass. In a rock track, you would probably use your BASS tag that contains electric basses but, in a dance track, you may head straight for the SYNTH BASS tag so as to only be presented with synth basses and not be distracted by electric or acoustic basses. S3000XL Operator’s Manual Page 227... -
Page 234: Hard Disk Control
NOTE: If your external drive’s ID is something other than 5 and uses a IkBytes/sector disk, you may set the appropriate settings here and, by saving the operating system to floppy disk and powering up with it in the drive, the S3000XL will default to the SCSI ID and sector size of your drive. -
Page 235: Importing Sounds From Other Manufacturer's Cd-Roms
LOAD IMPORTING SOUNDS FROM OTHER MANUFACTURER’S CD-ROMS On the S3000XL, as well as having access to a vast range of Akai sound library, you may also import sounds from CD-ROMs made for certain samplers made by other manufacturers thereby giving you access to even more sounds. This is done in the SCSI page. - Page 236 Layered programs using several ‘presets’ or those made using several ‘patches’ will be loaded as a single ‘preset’ or ‘patch’ into the S3000XL. In this case, load all the single ‘elements’ (i.e. presets or patches) and layer them in the MULTI mode.
-
Page 237: Global Mode
The first of these is TUNE where you may set the master tuning for the module as well as set its output level: The S3000XL can be transposed by up to ±9 semitones and fine tuned by up to ±50 cents (one semitone) to enable easy playing in difficult keys and to match tuning with other instruments. -
Page 238: Midi Functions
MIDI channel used when in SINGLE mode and in SAMPLE mode (in MULTI mode, the S3000XL responds to all 16 MIDI channels and each part has its own channel). This parameter is shown in the SINGLE mode for your information. -
Page 239: Ppm Page - Monitoring Midi
For example, if a part isn’t sounding, you can check if the S3000XL is receiving MIDI on its channel. If it is, then it may be some other problem such as wrong output assignment, channel fader on the mixer not open, the sound hasn’t loaded, etc.. -
Page 240: Transmit Test Page - Setting The Ent/Play Key
If the information is not displayed on this monitor, the information is not reaching the S3000XL. Check your connections or the output channel of the transmitting equipment. If the information appears to be correct, but no sound or unexpected sounds are being produced, then the fault may lie in the MIDI setting of the program(s). -
Page 241: Midi Sample Dumps
Samples can be transferred between the S3000XL and other samplers via MIDI and this is done in the EXCL page: To perform a MIDI data dump, you must make a MIDI loop (MIDI OUT of the S3000XL connected to MIDI IN of the other sampler, and vice versa). This is necessary because of the way in which MIDI sample dumps are performed (in computer terms, a handshake protocol with error detection/correction). -
Page 242: Performing A Midi Sample Dump
A new soft key, ABORT, will appear. Press this if you want to terminate the transmission prematurely. There is no receive key on the S3000XL as reception of bulk data will automatically take place once a remote device initiates the dump protocol. -
Page 243: Midi Via Scsi
The final soft key in this mode, F7, calls up the SCSI screen: On this page you can enable or disable MIDI bulk data transmission along a SCSI buss, rather than the MIDI connections, and set the SCSI IDs for both the S3000XL ) and the other SCSI device ( ). -
Page 244: Me35T Drum Settings
Since this is a manual for the S3000XL, full details of the operation of the ME35T will not be given here. Refer to the ME35T manual for operational details. However, note that to set up the MIDI Exclusive channel on the ME35T, the MIDI CHAN and MIDI NOTE keys on the ME35T should be pressed simultaneously. - Page 245 . You may exit the DRUM mode by pressing the GLOBAL mode select key again - this will return you to the main GLOBAL page. Once you have set the ME-35T settings, they can be saved to floppy disk in the SAVE mode and subsequently loaded in the LOAD mode. S3000XL Operator’s Manual Page 239...
-
Page 246: Dat Back-Up And Restore
NOTE: The selection made here also affects the format of the audio as it appears in real- time at the digital audio output (i.e. the digital ‘clone’ of the main L/R outputs). Page 240 S3000XL Operator’s Manual... -
Page 247: Performing A Dat Back Up
This too is simple. Find the point on the DAT where your backup is, press on the S3000XL and PLAY on your DAT - the contents of the S3000XL’s memory or hard disk will be restored. Please note that when performing a restore, it is not possible to do a partial restore - i.e. -
Page 248: Standard Midi File - Midi Song File Play
MIDI sequence files. Of course, you cannot edit these sequence files but this function allows you to use the S3000XL as a sequence data filer so that, if you are playing live and require backing tracks or whatever, you can do so without the inconvenience of taking your sequencer with you. -
Page 249: Loading Standard Midi Files
In the MIDI SONG PLAY screen, pressing F2 - - will display this screen: The S3000XL will read the floppy disk and list the song files that it contains. NOTE: As the title of this page implies, files must be on a DOS format floppy disk. SMF’s on floppy disks other that DOS format cannot be read. -
Page 250: Using The Smf Function
USING THE SMF FUNCTION To use SMF data on the S3000XL, follow the procedure below. One of the disks supplied with the sampler contains a demo sequence - you can use this to check out the SMF functions. -
Page 251: Hard Disk Recording
GLOBAL HARD DISK RECORDING The S3000XL is capable of recording audio to a hard disk. You may record audio whilst sequencing ordinary programs and samples allowing you to effectively overdub onto disk. This may be useful for laying down vocal parts or guitar, saxophone solos and the like over sequenced backing tracks. -
Page 252: Formatting The Hard Disk For Disk Recording
Before you can use the disk record functions, it is necessary to format your hard disk. The S3000XL allows you to allocate a certain part of your hard disk for sound library and a certain part for disk recordings. In this way, you may conveniently have takes and sound library on one disk which is particularly useful if you plan to use the disk record functions to ‘spin in’... - Page 253 There are some important things to note when using the disk record functions, however. In order to achieve the disk record functions, the process uses 6 of the S3000XL’s voices reducing polyphony in this case to 26 voices when recording to or playing back from disk.
- Page 254 It is assumed you have a basic working knowledge of the S3000XL by now. If you are at all unsure about certain functions, please refer to the appropriate section in this manual for more information.
- Page 255 This shows how much space is left on the disk for recording. This shows how many takes are on disk. When you use the disk record functions for the first time or use a freshly formatted disk, this field will show 0. S3000XL Operator’s Manual Page 249...
- Page 256 There are two - 512Bytes per sector and 1kByte per sector. Both offer the same storage, they just have different sector sizes. The S3000XL can use both and this is selected in this field. The default is 512b.
-
Page 257: Creating New Takes
You may delete takes from within the DD page. This is done by pressing F8 - . The display will prompt you: Pressing YES will delete the take from disk. Pressing EXIT will cancel the deletion. Be very careful using this feature as deleted takes cannot be retrieved. S3000XL Operator’s Manual Page 251... - Page 258 This allows you to route the take to one of the four effects channels FX1, FX2, RV3 or RV4 if the optional EB16 effects board is installed. This allows you to set the send level of the take to the effects channel selected in the field. Page 252 S3000XL Operator’s Manual...
- Page 259 (for example, when sequencing programs in the S3000XL). The DELAY field is of use in that you can set the S3000XL to start recording after a certain delay when it receives a MIDI note-on.
- Page 260 This takes you to the take editing display Shows the currently active page Takes you directly to the record page for recording new takes Takes you to the BACK-UP LOAD page where you may restore takes backed up to DAT. Page 254 S3000XL Operator’s Manual...
-
Page 261: Recording A Take
. You will receive this screen display: Here, the S3000XL is either waiting for a MIDI NOTE or a SONG START command or for the input level to exceed the threshold level. This all depends on the type of START you have selected in . - Page 262 When recording digitally, the bottom line of the display shows: and the screen draws the incoming waveform envelope as it is being recorded. Once a recording has been made, you may use the ENT/PLAY key to play it back. Page 256 S3000XL Operator’s Manual...
- Page 263 Takes you back to the RECORD SET-UP page Turns the audio meter on Turns the audio meter off This puts the S3000XL into a ‘record ready’ state awaiting the arrival of a suitable record start command depending on the setting of the START field in S3000XL Operator’s Manual...
-
Page 264: Editing A Recording
ZOOM keys to set a value close to this in the field and press the ENT/PLAY key. You may quickly switch between the start and end fields by pressing the key. Page 258 S3000XL Operator’s Manual... -
Page 265: Playing A Take In The Edit Page
Again, use the ENT/PLAY key to hear the result of your edit. Of course, in the case of a very long take, it is very S3000XL Operator’s Manual Page 259... - Page 266 It is unlikely that such an edit will be particularly precise but you can zoom in for more precise editing. The same thing can be done when editing the END point. Page 260 S3000XL Operator’s Manual...
-
Page 267: Playing Takes
GLOBAL PLAYING TAKES There are a number of ways you can play a take within the S3000XL’s DD functions: You can play a take in ANY page using the ENT/PLAY key You can assign a series of takes to a SONG for sequential playback or for triggering from MIDI You can play ‘raw’... - Page 268 Takes you directly to the record page for recording new takes Takes you to the BACK-UP SAVE page where you may archive takes to DAT via the digital audio interface. This primes the take for immediate playback from within this page Page 262 S3000XL Operator’s Manual...
-
Page 269: Using The Play Page
PLAY page as you wish and these are automatically saved as soon as you leave this page. If the take does not play back successfully, the reason is probably that the S3000XL has not received the appropriate start command as set in the field. -
Page 270: Editing A Take For Synchronised Playback
100% stable so if you are running a sequencer synchronised to code on tape and also running takes from the S3000XL’s disk, you may find that takes will wander slightly out of sync, especially if that are long recordings. -
Page 271: Using The Song Mode
PAN - This sets the pan position of the take if it is a mono recording or sets the left/right balance if it is a stereo recording. FADE IN - This sets the fade in time for the take and is variable up to 9999mS (10 seconds) S3000XL Operator’s Manual Page 265... - Page 272 You will have to excuse the somewhat cryptic and abbreviated nature of these field descriptions on the S3000XL’s screen but it was felt better to design the screen this way and have all these useful functions available within one page rather than you having to keep switching back and forth between various pages when trying to compile your takes - this would have been highly inconvenient as you can imagine.
- Page 273 You will also want to refer to the section USING THE KEYPAD TO GET AROUND THE SONG which appears later in this section. For the time being, practice the above until it becomes a natural process. S3000XL Operator’s Manual Page 267...
-
Page 274: Triggering Takes From Midi
This powerful function of the S3000XL’s disk recording capabilities allows you to simultaneously playback audio from the hard disk whilst sequencing programs in the S3000XL. To set a up a list of takes for MIDI triggering, press the SONG key (F2 in all disk record pages) to get the following screen: This shows a blank, empty song or take list. - Page 275 MIDI. You only need to select it once and, when the S3000XL receives the appropriate note, that take will play. You will note that, when triggering takes from MIDI, the repeat field has no function - this is for use when running takes sequentially in a song (see below).
- Page 276 S3000XL front panel using F8 - STOP. Because the S3000XL can only play one take at a time, crossfading between takes is not possible. Also, if one take is playing while another is triggered, the new take will take priority although please note that there will be a short gap between the one take finishing and the next take starting.
-
Page 277: Using The Song Mode To Chain Takes
The simplest method of using the song mode is to ‘top and tail’ an entire recording (i.e. record an entire song into the S3000XL and edit its start and end points) and have it play back from within the SONG mode. At a more advanced level, you could use the SONG mode to play back a whole series of entire songs recorded and edited this way and the SONG mode can be a convenient method of sequencing the tracks on an album. -
Page 278: Using The Numeric Keypad In The Song Mode
Please note, however, that, with the exception of the ENT/PLAY key, these keypad shortcuts ONLY WORK WHEN THE CURSOR IS ON THE SCROLL BAR. Using them when the cursor is on a parameter field in the S.ED page will cause them to input a numeric value. Page 272 S3000XL Operator’s Manual... -
Page 279: Block Editing In Song Mode
TAKE 3 once - and you wish to insert this just before the BREAK in your extended mix. Move the cursor to TAKE 1 and press . Press 2 on the numeric keypad to take you to TAKE 3 and press S3000XL Operator’s Manual Page 273... - Page 280 NOTE: It is only possible to mark contiguous steps as a block - you cannot mark a series of steps, skip a few and then mark another few steps as one block. Naturally, this block editing function can be used to delete blocks of steps as well. Page 274 S3000XL Operator’s Manual...
-
Page 281: Naming Songs
If you saved the song as ENTIRE VOLUME or MULTI+P+S, you will probably want to load it using this selection so that any programs, samples, multis and effects that may be associated with this song are also loaded. S3000XL Operator’s Manual Page 275... -
Page 282: Backing Up Takes To Dat
(i.e. a single take or all takes are being backed up), you will receive the following display: This shows the current take being backed up. At any time, you may abort the procedure by pressing F8 - Page 276 S3000XL Operator’s Manual... -
Page 283: Restoring Takes Back From Dat To Disk
Please check your connections and also please check the settings of the digital interface in the DIGI page of REC1 in EDIT SAMPLE. You may press F8 - ABORT - to exit this screen. S3000XL Operator’s Manual Page 277... - Page 284 The DAT restore function is, actually, just another way of recording and this ‘confidence monitoring’ keeps you informed of progress during the DAT restore process. At any time, you may press F-8 STOP to abort the restore. Page 278 S3000XL Operator’s Manual...
-
Page 285: Appendix 1
SCSI devices when you buy them. The S3000XL’s SCSI interface is terminated. It is most likely that the S3000XL will be at one end of the chain and so must be left terminated. Any disks in between the S3000XL and the last SCSI device in the chain must be un-terminated (this can be done by physically removing the resistors or sometimes via a DIP switch on the back of the unit - please check the unit’s... -
Page 286: Scsi Cable Length
SCSI chains that are longer than the specified length may cause data errors and possibly corruption of data. S2000 Hard disk 6 metres total MO drive CD-ROM Page 280 S3000XL Operator’s Manual... -
Page 287: Appendix 2
S3000XL is converting the 12-bit samples from the S900/S950 format into 16-bit sample data the S3000XL can use. An S1000/S1100 disk can be read with no problems but when you save it to an S3000XL disk, there are a few things you should be aware of. -
Page 288: Effects Files
The S900 or S950 cannot read S3000XL sound data. If you have an S3000 (or 2800 or 3200), you will be able to use S3000XL sample and program data with no special software required (although it is advisable to have the latest software version for best results). -
Page 289: Appendix 3
Remove the top of the case by undoing the two large screws either side of the case and the smaller screw in the centre of the top of the rear panel. Looking inside the S3000XL, you will see something like this:... - Page 290 The SIMMs may come with a special wrist strap to discharge static electricity. We suggest you attach the strap to the S3000XL’s case. If a wrist strap or any other such accessory is not supplied, try discharging any static by touching an earthed metal object before handling the boards.
-
Page 291: Appendix 4
This allows you to keep your favourite sounds in FlashROM and have them available automatically when you switch the S3000XL on. In this way, you get all the benefits of a sampler where you can record your own samples and make your own programs with the advantage that these sounds are available without lengthy loading times much like a modern synthesiser. -
Page 292: Applications
‘bread an butter’ sounds in a song and used your sampler for your own samples, you could use the S3000XL/S3200XL’s FlashROM instead of (or as well as) your synth to provide the ‘stock’ sounds thereby freeing up more of your RAM for your samples. -
Page 293: How The Flashrom Works
(8Mbytes) (8Mbytes) The above diagram shows the signal flow of data in the S3000XL/S3200XL. You record a sample (or load some sounds from disk or CD-ROM) into RAM, you edit them as appropriate, all the time playing them over MIDI. Without the FlashROM board(s), you would then normally save them to disk. -
Page 294: Saving Data To The Flashrom
In this, the first FlashROM volume, you may save an operating system and this will boot up automatically when you switch on the S3000XL/S3200XL. This has the tremendous advantage that if you receive a software upgrade in the future, it may be saved to FlashROM and... - Page 295 NOTE: In order to autoload an operating system and/or sound data from the FlashROM, you will need to have a new ROM chip installed installed in the S3000XL. The ROM shipped with with Version 1.00 machines knows nothing about the FlashROM and so will not look for this on power up and so cannot perform an autoload of any description.
- Page 296 As mentioned on the previous page, assuming you have the correct ROM chip installed, on power up, the S3000XL looks for a valid operating system in the BOOT SYSTEM volume. Once the o/s has been loaded from the BOOT SYSTEM volume, it will then go off to see if any sound data is stored in one or more of the AUTOLOAD 1-10 volumes.
-
Page 297: What To Do Next
BOOT SYSTEM volume and to have sound data saved to one or more of the AUTOLOAD volumes so that you simply need to switch on the S3000XL and have it boot the operating system and your chosen sounds. -
Page 298: Using The Flashrom As A Fast Hard Disk
However..You should bear in mind that if you have a lot of RAM installed in the S3000XL, it could be that the amount of data you have loaded into RAM exceeds the 8Mbyte capacity of the FlashROM you have installed and so you won’t be able to save all of the sounds you... -
Page 299: Editing Sounds On The Flashrom
If you create a new sample, this will be created in RAM but if you choose to overwrite the original sample, you will receive the above prompt. S3000XL Operator’s Manual Page 293... -
Page 300: Copying A Flashrom Sample To Ram
If you select to load a single program or multi or effects file, the COPY TO RAM? prompt will not appear. Alternatively, if you know where the original sample is on disk, you may prefer just to load it straight from disk, bypassing the procedure described above. Page 294 S3000XL Operator’s Manual... -
Page 301: Formatting And Arranging The Flashrom
Confused? Please see the following diagram! 1Meg used 1Meg used 1Meg gap 2Meg used 2Meg used 2Meg used 1Meg gap 2Meg used 3Meg free 1Meg free BEFORE AFTER ARRANGE ARRANGE S3000XL Operator’s Manual Page 295... - Page 302 NOTE: If you delete a lot of programs from FlashROM, ARRANGE is not strictly necessary as these take up such little space. It’s when you delete large sample data that this fragmentation problem will arise. Page 296 S3000XL Operator’s Manual...
-
Page 303: Saving Flashrom Data Back To Disk
GLOBAL - DAT BACKUP pages. To do this, simply select to do a MEMORY backup. I.e.: A DAT backup is performed by pressing SAVE. A DAT restore is performed by pressing LOAD. Please refer to the main S3000XL.S3200XL operator’s manual for more details. IMPORTANT NOTES ABOUT RESTORE: The contents of the a memory DAT backup cannot be restored to the FlashROM. -
Page 304: Installing The Flashrom
No special setup or modification is required. To install the board, first, DISCONNECT THE MAINS. Switching the S3000XL off is not enough and you risk electric shock if the mains lead is not disconnected from the mains outlet. - Page 305 APPENDIX 4 Now power up the S3000XL with the Version 1.50 floppy disk in the drive. Once the boot up from floppy is complete, you will see the message: This will confirm that the FlashROM board has been ‘seen’ by the S3000XL. If two FMX008 boards are installed, the message will tell you “8MW fitted”.
- Page 306 • Unless you have disconnected the S3000XL’s mains lead from the mains outlet, you run the risk of damaging the FMX008, the S3000XL or any other equipment that may be connected to the S3000XL. •...
-
Page 307: Appendix 5
(formerly Celeste (Detune) Depth) Effects 5 depth (formerly Phaser Depth) Data increment Data decrement Non-Registered Parameter Number LSB Non-Registered Parameter Number MSB Registered Parameter Number LSB Registered Parameter Number MSB 102-119 Undefined 120-127 Reserved for Channel Mode messages S3000XL Operator’s Manual Page 301... - Page 309 FILTER 96 AT point 134 Filter 2 modulation 106 Auto looping 134 , 137 Filter 2 resonance 105 Crossfade length 134 Filter 2 types 103 - 104 , 105 Crossfade looping 134 , 137 Modulation 98 S3000XL Operator’s Manual Page i...
- Page 310 HARD DISK RECORDING 245 - 278 Rotary speaker 179 Applications 245 Multi-effects 173 Chaining takes 271 - 274 OUTPUT 198 Copying takes 251 Levels/Pan 198 Creating takes 251 Path control 199 DAT backup 276 REVERB 192 DAT restore 277 Page ii S3000XL Operator’s Manual...
- Page 311 Triggering takes 263 , 264 , 265 , 268 MODE KEYS 6 Mounting the S3000XL 13 HARD DISK RECORDING See GLOBAL MULTI 37 How the S3000XL works 19 Assigning programs to outputs 39 Assigning programs to parts 38 HI/LOW keyranges 39 IB304F 103...
- Page 312 Load from hard disk 28 MIDI 10 Loudness/Velocity 26 Power connection 10 MIDI parameters 25 SCSI 9 Old Akai SELECT PROG mode 23 , 33 RECORD See SAMPLE Keyboard splits 33 RECORD LEVEL 6 , 18 Layering programs 33 Renumbering programs 32 , 44...
- Page 313 Loop 149 Multi part 39 Program 71 S3000XL 231 Sample 148 Zones 93 Velocity sensitivity 26 , 67 VIBRATO See LFO1 ZONE See KEYGROUP Zoom In/Out 131 , 133 , 134 , 151 , 157 , S3000XL Operator’s Manual Page v...
Need help?
Do you have a question about the S3000XL and is the answer not in the manual?
Questions and answers