Table of Contents
Advertisement
Quick Links
Advertisement
Table of Contents

Related Manuals for Lorex LIVE View LW2004 series


Summary of Contents for Lorex LIVE View LW2004 series
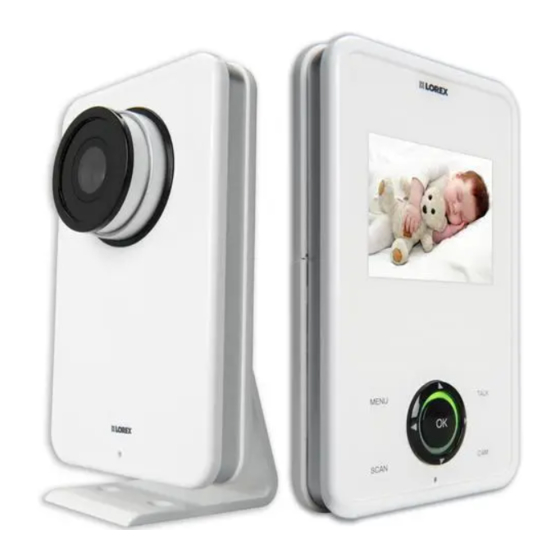
- Page 2 Welcome! Thank you for purchasing the Lorex LIVE View video monitor. Before you start... Please make sure to charge the handheld monitor before use. See the quick start guide or "Getting Started” on page 7 for instructions. Contents Make sure you have the following: •...
-
Page 3: Safety Instructions
Safety Instructions WARNING This baby monitor is compliant with all relevant standards regarding electromagnetic fields and is, when handled as described in the User’s Guide, safe to use. Therefore, always read the instructions in this User’s Guide carefully before using the device. - Page 4 To Avoid Injury to Children/Infants: We advise you to take the following precautions to avoid possible injury to infants: • DO NOT place baby audio and video camera monitors too close to cribs, bassinets, play yards, and other safe sleep environments for infants.
-
Page 5: Table Of Contents
TABLE OF CONTENTS 1. Handheld Monitor Overview ..... . 1 2. Camera Overview ....... 5 3. -
Page 7: Handheld Monitor Overview
1. HANDHELD MONITOR OVERVIEW Expanded View 1. Display: Displays video from the camera(s). 2. Up button / Increase volume: Press to increase volume. Press to scroll up in menus. 3. Menu button: Press to open / close the menu. 4. Left button / Decrease brightness: Press to decrease the brightness of the display. - Page 8 Handheld Monitor Overview 8. Ok button: Press to select menu options. Press to save setting changes and exit the current menu screen. 9. Talk button: Press and hold to activate the intercom on the selected camera. 10.Right button / Increase brightness: Press to increase the brightness of the display.
- Page 9 Handheld Monitor Overview Monitor icons overview Talk function Battery life indicator Camera signal strength Key lock indicator Volume Channel scan Audio Activated Alerts Channel number Reading the battery life indicator Full battery Low battery The battery life indicator fills up when the monitor is charging and flashes when the battery is low.
- Page 10 Handheld Monitor Overview Reading the audio level indicator • Wheel glows to display the No / quiet sound sound level from selected camera. • Green indicates no / quiet sound. Red expands as volume increases. Medium sound Loud sound Reading the signal strength indicator Low signal Medium signal Full signal No signal...
-
Page 11: Camera Overview
Camera Overview 2. CAMERA OVERVIEW 1. Power Indicator LED: Glows green to indicate camera power is on. 2. Infrared LEDs: Allow the camera to view in the dark. LEDs glow red when night vision is activated. 3. Camera lens 4. Microphone 5. - Page 12 Camera Overview 6. Page button: Press to page handheld monitor. Press and hold to connect camera to monitor when the pairing process is activated. See “Pairing Up Cameras” on page 18 for details. 7. AC adapter port: Plug in the camera power adapter here. 8.
-
Page 13: Getting Started
Getting Started 3. GETTING STARTED 3.1 INSTALLING THE HANDHELD MONITOR STAND NOTE: If a protective sleeve was included, attach it to your handheld monitor before installing the stand. 1. Screw the monitor stand into the stand mounting hole at the back of the handheld monitor. -
Page 14: Connecting The Handheld Monitor
Getting Started 3.2 CONNECTING THE HANDHELD MONITOR Power button Power adapter Power outlet AC adapter port It is recommended to charge your monitor for 6 hours before initial use. 1. Connect the power adapter to the AC adapter port on top of the monitor. -
Page 15: Setting Up The Camera
Getting Started 3.3 SETTING UP THE CAMERA NOTE: If a protective sleeve was included, attach it to the camera before installing the stand. Power adapter Power Outlet AC adapter port 1. Screw the camera stand into the stand mounting hole at the back of the camera. -
Page 16: Using The Handheld Monitor
Using The Handheld Monitor 4. USING THE HANDHELD MONITOR 4.1 SELECTING THE CAMERA By default, the included camera is paired to channel 1. If you have added additional cameras, press the CAM button to manually switch between camera channels, or press the SCAN button to automatically switch between connected cameras. -
Page 17: Adjusting Volume
Using The Handheld Monitor Scan View Scan View allows you to monitor multiple cameras in full screen. By default, Scan View automatically switches cameras every 5 seconds. To enable Scan View: Press the SCAN button while viewing. To return to full screen view, press the SCAN button again. -
Page 18: Talk Function
Using The Handheld Monitor 4.4 TALK FUNCTION Press and hold the TALK button. Your voice will be heard on the selected camera and a talk icon ( ) is shown. NOTE: To listen to audio from the camera, you must release the TALK button. -
Page 19: Navigating The Menu
Using The Handheld Monitor 4.6 NAVIGATING THE MENU To open the monitor menu, press the MENU button. MENU button OK button Use the buttons to switch between menu options, and press OK to select menu options or save changes to your settings. Press without MENU to exit a menu or submenu saving your changes. -
Page 20: Menu Options
Using The Handheld Monitor 4.7 MENU OPTIONS Enable Sound Activated Alerts and adjust volume sensitivity for Sound Activated Alerts. Adjust the length of time the monitor shows a camera before switching to the next camera in Scan View. Add a new camera to the monitor or change the order of connected cameras. -
Page 21: Voice Trigger (Audio Activated Alerts)
Using The Handheld Monitor 4.8 VOICE TRIGGER (AUDIO ACTIVATED ALERTS) In Voice Trigger mode, the monitor goes into standby. When sound is detected by the camera at the preset audio level, the monitor's screen instantly turns on. This conserves battery power, and alerts you only when needed. -
Page 22: Sleep Mode (Audio Only Mode)
Using The Handheld Monitor 4.9 SLEEP MODE (AUDIO ONLY MODE) Sleep Mode allows the monitor display to be turned off while continuing audio monitoring. This is also a great way to conserve battery life. Press VIDEO button to To enter Sleep Mode: enter / exit Sleep Mode Press the VIDEO button at the top of the monitor. -
Page 23: Key Lock
Using The Handheld Monitor 4.11 KEY LOCK Key Lock prevents any of the buttons on the monitor from being pressed by accident. To activate / deactivate Key Lock: Press and hold the OK button for 3 Key Lock icon seconds. When Key Lock is active, a lock icon appears on the monitor. -
Page 24: Pairing Up Cameras
Pairing Up Cameras 5. PAIRING UP CAMERAS The camera(s) included have already been paired up with the monitor. If for any reason your monitor and camera are not paired up, OR if you have purchased additional add-on cameras (model # LW2004AC1), follow the steps below. - Page 25 Pairing Up Cameras 5. Select the channel you wish to pair up the camera to by pressing the buttons. 6. Press OK. The monitor displays a "PAIRING" message on the screen. 7. Press and hold the PAGE button on the side of the camera. The monitor displays "Device Found"...
-
Page 26: Help
Help 6. HELP No video displayed on the monitor • Ensure the camera(s) is plugged into a power outlet and is powered on. • Ensure the monitor is powered on. 1. If the power LED is off: • Press and hold the Power button on the top of the monitor for 3 seconds to power on the monitor. - Page 27 Help Feedback / squealing noise coming from the monitor • Your camera and monitor may be too close to each other. Move them further apart. • For optimal performance, avoid placing the monitor and camera near televisions, computers, cordless/mobile phones, or other electrical equipment.
-
Page 28: Cleaning And Disposal
Cleaning and Disposal 7. CLEANING AND DISPOSAL 7.1 CLEANING Clean the monitor and camera with a slightly damp cloth or an anti-static cloth. Never use cleaning agents or abrasive solvents. • Do not clean any part of the product with cleaners with thinners or other solvents and chemicals. -
Page 29: Notices
(2) l'utilisateur de l'appareil doit accepter tout brouillage radioélectrique subi, même si le brouillage est susceptible d'en compromettre le fonctionnement. The Lorex Live View Handheld Video Monitor model LW2004 is in compliance with the essential requirements and other relevant provisions of Directive 1999/5/EC. -
Page 30: Technical Specifications
Technical Specifications 9. TECHNICAL SPECIFICATIONS Camera Frequency 2.4 to 2.4835 GHz Up to 450 ft. / 135m outdoors* / Maximum Range Up to 150 ft. / 46m indoors* *Based on unobstructed line of sight. Actual range will vary depending on surroundings. Image Sensor Color CMOS Lens... -
Page 31: Mounting The Camera On Awall / Ceiling
Mounting The Camera On A Wall / Ceiling 10. MOUNTING THE CAMERA ON A WALL / CEILING The camera comes with a versatile stand that can be placed on a flat surface, such as a table or dresser, or can be permanently mounted to a wall or ceiling. - Page 32 Mounting The Camera On A Wall / Ceiling 2. Place the camera stand against the wall or ceiling (you should keep the camera separate from the stand while doing this and attach it later) as shown below. Wall mount Ceiling mount 2.
-
Page 33: Replacing The Monitor Battery
Replacing The Monitor Battery 11. REPLACING THE MONITOR BATTERY NOTE: The monitor battery has been pre-installed for your convenience. Replacement batteries are available at www.lorextechnology.com Changing the monitor battery: NOTE: Unplug the monitor power Metallic adapter before changing the contact points battery. -
Page 34: Battery Saving Tips
Battery Saving Tips 12. BATTERY SAVING TIPS Follow the tips below to improve the life and longevity of your battery. • Turn down the screen brightness on the handheld monitor. Press while viewing to adjust the brightness. • Use Sleep Mode to turn off the screen and monitor audio only. Press the VIDEO button to activate/deactivate sleep mode.
Need help?
Do you have a question about the LIVE View LW2004 series and is the answer not in the manual?
Questions and answers