Lorex LW2400 User Manual
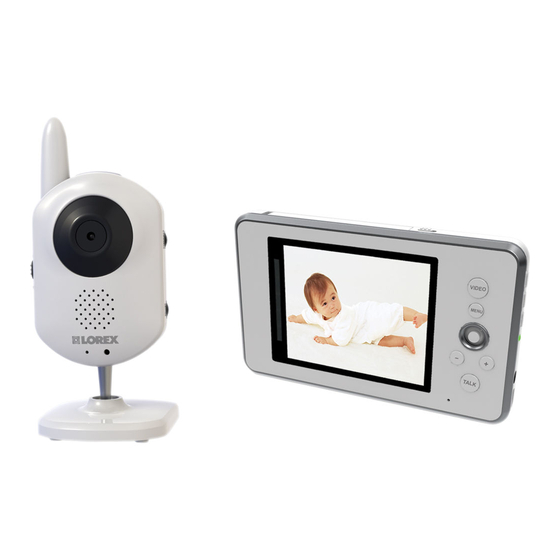
Wireless video monitor
Hide thumbs
Also See for LW2400:
- User manual (60 pages) ,
- Quick start manual (2 pages) ,
- Quick start manual (2 pages)

Related Manuals for Lorex LW2400


Summary of Contents for Lorex LW2400
- Page 1 WIRELESS VIDEO MONITOR USER’S GUIDE ENGLISH VERSION 1.0 www.lorextechnology.com LW2400...
- Page 3 Welcome! Thank you for purchasing the Lorex LIVE video monitor. This user’s guide refers to the following models: • LW2400 Contents Before you start, make sure you have the contents listed below. • 1x Video monitor • 1x Camera • 1x Video monitor power adapter •...
-
Page 4: Safety Instructions
Safety Instructions WARNING This video monitor is compliant with all relevant standards regarding electromagnetic fields and is, when handled as described in the User’s Guide, safe to use. Therefore, always read the instructions in this user’s guide carefully before using the device. •... -
Page 5: Using The Cable Clips
Using this product as a baby monitor If you intend to use this wireless video monitor as a baby monitor, we advise you to take the following precautions to avoid possible injury to infants: • DO NOT place baby audio and video camera monitors too close to cribs, bassinets, play yards, and other safe sleep environments for infants. -
Page 7: Table Of Contents
Table of Contents Video monitor overview ......... . 1 Monitor display icons . - Page 8 Connecting to Skype on a Mac ..........24 Step 1 of 6: Installing the camera driver for Mac OS .
-
Page 9: Video Monitor Overview
Video monitor overview Video monitor overview Antenna Unlock Switch Slide the switch to release the monitor antenna. Video Button Press the Video button to Menu Button turn off the screen until the Video button is pressed Press to access the monitor menu again. -
Page 10: Using The Joystick To Navigate Menus
Video monitor overview Speaker Plays sound received from the camera(s). Kickstand Using the joystick to navigate menus The joystick allows you to navigate through the video monitor menus. Menu Navigation Step 1: Press the Menu button on the video monitor. Step 2: Move the joystick up, down, left, or right to navigate through the menus. -
Page 11: Monitor Display Icons
Video monitor overview Monitor display icons Icon Meaning No signal between the camera and video monitor. Full signal between the camera and video monitor. Timer is enabled. The video monitor audio is muted. The camera night light is on. Talk function is enabled. You can now speak into the video monitor to talk to the camera. -
Page 12: Camera Overview
Camera overview Camera overview Night Light Button Infrared LEDS Press to activate the Infrared (IR) LEDs that allow camera’s night light. you to see in the dark. Temperature Sensor Speaker Detects the room’s ambient The speaker allows you to temperature. hear the person speaking into the video monitor. -
Page 13: Getting Started
Getting started Getting started Step 1 of 2: Powering on the camera Connect the power adapter to the DC5V port on the camera. Connect the other end to a power outlet. Slide the power switch to the ON position. Slide the power switch to the ON position ATTENTION •... -
Page 14: Step 2 Of 2: Powering On The Video Monitor
Getting started Step 2 of 2: Powering on the video monitor Connect the power adapter to a power outlet and to the DC5V port on the video monitor. The video monitor’s charging LED indicator glows red to indicate charging is in progress. The charging LED glows green when the video monitor is fully charged. -
Page 15: Camera Setup
Getting started Camera setup Adjusting the camera Night Light Button sensitivity Press the Night Light button to turn the camera The camera’s Sensitivity dial allows you night light on or off. to adjust the microphone sensitivity level for triggering an alert on the video monitor. -
Page 16: Reading The Power Indicator Led
Getting started Reading the power indicator LED The power indicator LED glows green when the monitor is powered on. When the battery is low, the power LED blinks. Power LED Sequence view In Sequence view, the monitor switches between paired cameras every six seconds. For example, the monitor displays channel 1 for six seconds, then channel 2 for six seconds and so on. -
Page 17: Using The Talk Function
Getting started To view multiple cameras in Quad view: • Press the SEQ/Quad button twice on the video monitor. To exit Quad view: • Press the SEQ/Quad button, and then press CAM to exit Sequence view and return to single-camera view. SEQ/Quad button Video monitor displays up to 4 video images in Quad view... -
Page 18: Music
Getting started Music The music feature allows the camera to play pre-loaded tunes. Next tune Play/stop music To use the music feature: • Press the button to begin playing a tune on the camera and video monitor. • Press the button again to stop the tune. -
Page 19: Turning The Video Monitor Screen On/Off
Getting started Turning the video monitor screen on/off You can turn off the video monitor screen while still listening to audio from the camera. For example, you can monitor audio from a baby’s room while you sleep and turn off the video monitor screen to conserve power. -
Page 20: Configuring Your Video Monitor
Configuring your video monitor Configuring your video monitor Using the joystick to navigate menus The joystick allows you to navigate through the video monitor menus. Menu Navigation Step 1: Press the Menu button on the video monitor. Step 2: Move the joystick up, down, left, or right to navigate through the menus. -
Page 21: Changing The Date And Time
Configuring your video monitor Changing the date and time To adjust the video monitor’s date and time: Press the Menu button on the video monitor. Select Settings ( ) and then press the OK 2011-02-14 button. 09:54:30 Select Date & Time and then press the OK button. -
Page 22: Adjusting The Screen Brightness
Configuring your video monitor Adjusting the screen brightness To adjust screen brightness: Press the Menu button on the video monitor. Select Settings ( ) and then press the OK button. Select Brightness and then press the OK button. Press left and right on the joystick to adjust the screen brightness. -
Page 23: Adjusting The Temperature Unit Of Measurement
Configuring your video monitor Adjusting the temperature unit of measurement The camera has a built-in temperature sensor. You can change the video monitor to display temperature in Fahrenheit (F) or Celsius (C). To change the unit of measurement: Press the Menu button on the video monitor. Select Settings ( ) and press the OK button. -
Page 24: Restoring Default Settings
Configuring your video monitor Restoring default settings Restoring your video monitor settings returns any setting changes to factory default settings To restore the video monitor factory defaults: Press the Menu button on the video monitor. Select Settings ( ) and then press the OK button. -
Page 25: Viewing Your Camera Remotely Using Skype
Viewing your camera remotely using Skype Viewing your camera remotely using Skype Connecting to your video monitor through Skype is a convenient and free* method to view your camera from anywhere with an Internet connection. NOTE: When remotely connecting to your video monitor using Skype, audio monitoring is disabled. -
Page 26: Connecting To Skype On A Pc
To install the camera drivers: Insert the software CD into your computer. An Autoplay window opens. Click Run Lorex.exe. Lorex.exe Click the USB Driver button, and then click USB Driver. The driver appears on your desktop. -
Page 27: Step 2 Of 6: Connecting The Video Monitor To The Pc
In order to connect to your video monitor using Skype, you will need two accounts---one for the camera (e.g Lorex Camera) and one for yourself (e.g. Tom Smith). NOTE: The Skype illustrations and instructions below serve as a guideline only. Skype may change their website / product interface without prior notice. - Page 28 Viewing your camera remotely using Skype Follow the on-screen instructions to create a new account. Upon login, the Setting up Skype wizard starts. Click Continue. Under Video, you will see an image from the camera. If no image appears, make sure the monitor is connected to the computer via the USB cable. Select Wireless Monitoring System if necessary Live video...
-
Page 29: Step 4 Of 6: Configuring Skype
Viewing your camera remotely using Skype Step 4 of 6: Configuring Skype Click on Tools>Options. Options Click the Calls button ( Click the Show advanced options button. Show advanced options Under Allow calls from..., select people in my Contact list only. This will prevent the device from accepting Skype calls from anyone who is not in the contact list for its account. -
Page 30: Step 5 Of 6: Send A Contact Request
Viewing your camera remotely using Skype Check Answer incoming calls automatically and Start my video automatically when I am in a call. Click Save. Save Step 5 of 6: Send a contact request Next, you have to send a friend request to your personal account (e.g. Tom Smith). Click the Add a contact button ( Add a contact Search for the name of your personal account (e.g. -
Page 31: Step 6 Of 6: Test The Connection
Viewing your camera remotely using Skype Click Send Request. Send contact request Step 6 of 6: Test the connection NOTE: This step requires you to log in to Skype from a different computer or compatible mobile device. Log in to your personal account (e.g. Tom Smith). A "new contact"... -
Page 32: Connecting To Skype On A Mac
Viewing your camera remotely using Skype From the contact list, right-click on your camera’s account name (e.g. Lorex Camera), and click Call. The video call begins automatically. Please allow around 15 to 25 seconds for the video connection to be established. -
Page 33: Step 3 Of 6: Creating A Skype Account
In order to connect to your video monitor using Skype, you will need two accounts—one for the camera (e.g. Lorex Camera) and one for yourself (e.g. Tom Smith). NOTE: The Skype illustrations and instructions below serve as a guideline only. Skype may change their website / product interface without prior notice. -
Page 34: Step 4 Of 6: Configuring Skype
Viewing your camera remotely using Skype Step 4 of 6: Configuring Skype Upon login, click Skype>Preferences. Select the Audio/Video tab. Calls tab Audio/Video tab Under Camera, select Wireless Monitoring System if it is not already selected. You will see live video from your camera if your device is connected. •... -
Page 35: Step 5 Of 6: Send A Contact Request
Viewing your camera remotely using Skype Select Answer automatically with video. Click Done. Select Answer automatically with video Select the Privacy tab. Under Allow calls from, select Contacts. This will prevent the device from accepting Skype calls from anyone who is not in the contact list for its account. Privacy tab Allow calls from Contacts... -
Page 36: Step 6 Of 6: Test The Connection
Viewing your camera remotely using Skype Under Add Contact, enter the Skype account name (e.g. Tom Smith) or email address for your personal Skype account. Click Find. Your personal Skype account should appear below the search bar. Enter the account name or email address for your personal Skype account Click Find... -
Page 37: If You Do Not Have A Skype Account
If you do not have a Skype account... Create your personal account first (e.g. Tom Smith), then create a second account for your camera (e.g. Lorex Camera). Create a personal account (i.e. Tom Smith): Go to www.skype.com, and click on Join Skype. -
Page 38: Changing The Camera View On Skype
Viewing your camera remotely using Skype My Skype Account Information "Camera" Skype account "Personal" Skype account (e.g. Lorex Camera) (e.g. Tom Smith) Skype Name: Skype Name: Password: Password: Email address used to register this Email address used to register this... -
Page 39: Viewing A Camera On Your Smart Phone Or Tablet
Viewing your camera remotely using Skype Viewing a camera on your smart phone or tablet You can remotely monitor your camera using Skype on supported smart phones or tablets. Supported apps & devices For the latest device compatibility list, visit www.lorextechnology.com iPhone / iPad / iPod touch Skype... -
Page 40: Viewing Your Camera On An Android Smartphone Or Tablet
Viewing your camera remotely using Skype Viewing your camera on iPad Skype for iPad Download and install the application from the App Store. NOTE: Skype for iPad is a free application, but it requires a valid iTunes account to download. Launch Skype and sign in using your personal account. - Page 41 Viewing your camera remotely using Skype Tap the name of the video monitor’s account, and tap Voice Call to connect to the camera. The video call connects automatically. Please allow 15 to 25 seconds for the call to connect. Voice call button NOTE: Video may appear pixelated immediately after connecting.
-
Page 42: Troubleshooting
Troubleshooting Troubleshooting Problem Possible Causes Solution No picture or sound • The monitor may be off. • Ensure that both the camera and on the monitor • The batteries on the video monitor are turned on. monitor may be low. •... -
Page 43: Troubleshooting (Continued)
Troubleshooting Troubleshooting (continued) Problem Possible Causes Solution Incorrect temperature • The camera may be under • Move the camera to an area away from reading direct sunlight. direct sunlight. • Temperature sensor is accurate within 3°F/1°C. • Temperature setting on LW2401AC2 accessory camera is permanently set to 68°F/20°C. -
Page 44: Frequently Asked Questions
Frequently asked questions Frequently asked questions Q: I have Skype. Why do I need to create a Skype account for the video monitor? A: The video monitor requires a Skype account so you can access the camera(s) from your personal Skype account. Setup the video monitor for Skype viewing (for instructions, see “Viewing your camera remotely using Skype”... - Page 45 Frequently asked questions Press the Menu button on the monitor, then select Pairing and press the OK button. Select an available channel, and press the OK button. NOTE: By default, the camera included with the system is paired to Channel 1. Press the PAIR button behind the camera within 30 seconds.
-
Page 46: Add-On Cameras And Accessories
Add-on cameras and accessories Add-on cameras and accessories The camera(s) included with your system depends on the model number of your device. The cameras and accessories shown below are all compatible with the video monitor system and are available from www.lorextechnology.com. The video monitor supports up to 4 cameras and can support a mix of compatible cameras. -
Page 47: Pan/Tilt Control (Requires Lw2451Ac1)
Add-on cameras and accessories Pan/tilt control (requires LW2451AC1) Select the channel the pan/tilt camera is connected to. Ensure you are in full-screen view. NOTE: You must be in full-screen view to adjust the angle. If the monitor is in Quad view (i.e. showing multiple cameras), press and then to return to full-screen view. -
Page 48: Pairing Cameras
Pairing cameras Pairing cameras The camera included with the video monitor has already been paired up with the video monitor. If for any reason your monitor and camera are not paired up, or you wish to add additional cameras, follow the directions below. To pair a camera to the video monitor: Place the camera and video monitor 12 inches apart. -
Page 49: Technical Specifications
Technical specifications Technical specifications Camera Specifications Frequency 2400~2483.5Mhz Maximum Range 450 ft. (138m) outdoor / 150 ft. (46m) indoor line of sight Image Sensor 1/5" CMOS sensor IR LED 8 Pcs. Power Adapter Voltage 5V 1A Dimensions 2.8in x 2.4in x 6.1in / 72mm x 62mm x 155mm Weight 0.25lbs / 0.10kg Video Monitor Specifications... -
Page 50: Cleaning And Disposal
Cleaning and disposal Cleaning and disposal Cleaning Clean the monitor and camera with a slightly damp cloth or an anti-static cloth. Never use cleaning agents or abrasive solvents. • Do not clean any part of the product with cleaners with thinners or other solvents and chemicals. -
Page 51: Notices
Notices Notices Warning: Any changes or modifications not expressly approved by the grantee of this device could void the user's authority to operate the device. FCC notice This device complies with Part 15, subpart C, of the FCC Rules. Operation is subject to the following two conditions: (1) this device may not cause harmful interference, and (2) this device must accept any interference received, including interference that may cause undesired operation. -
Page 52: Wall Mounting Your Camera
Wall mounting your camera Wall mounting your camera Determine the camera position that will give you the best view before permanently mounting the camera. Ensure the power cable is long enough to power the camera. ATTENTION • Keep cables and wires at least 3 feet (1 meter) away from infants or young children. - Page 53 Wall mounting your camera Place the mounting stand as shown over the screws and pull down to secure the stand in place. Camera Mounting Cable Clip Screws (x2) Screws (x6) Screw the camera into the mounting stand using the wall mounting hole at the back of the camera.
- Page 54 Wall mounting your camera...
- Page 56 LW2400 Version 1.0 www.lorextechnology.com Copyright © 2012 Lorex Technology Inc.
Need help?
Do you have a question about the LW2400 and is the answer not in the manual?
Questions and answers