
Related Manuals for Lorex Live SD3.5


Summary of Contents for Lorex Live SD3.5
- Page 1 WIRELESS VIDEO HOME MONITOR INSTRUCTION MANUAL ENGLISH VERSION 2.0 SD3.5 www.lorextechnology.com LW 2 401/ LW241 SE R IE S...
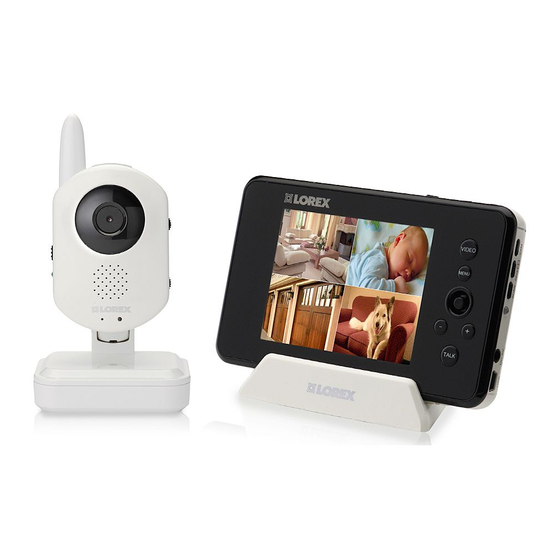
- Page 3 Welcome! Thank you for purchasing the Lorex LIVE wireless video monitor. Before you start, make sure you have the contents listed below. Contents • 1x Video Monitor • 1x Camera • 1x Charging cradle for the video monitor • 1x Power adapter for the camera •...
-
Page 4: Safety Instructions
Safety Instructions WARNING This video monitor is compliant with all relevant standards regarding electromagnetic fields and is, when handled as described in the User’s Guide, safe to use. Therefore, always read the instructions in this User’s Guide carefully before using the device. - Page 5 Using this product as a baby monitor If you intend to use this wireless video monitor as a baby monitor, we advise you to take the following precautions to avoid possible injury to infants: • DO NOT place baby audio and video camera monitors too close to cribs, bassinets, play yards and other safe sleep environments for infants.
-
Page 7: Table Of Contents
Table of Contents Overview ............1 Video Monitor Overview . - Page 8 Appendix A: Installing Camera Batteries ......35 Tech Specs ........... . 36 Mounting Template.
-
Page 9: Overview
Overview Overview Video Monitor Overview Auto Record Button Manual Record Button Antenna unlock switch Press to enable auto recording. Press to start manual Slide the switch to release the recording. receiver antenna. Video Button Menu Button Press the Video button to Press to access the monitor menu turn off the screen. -
Page 10: Using The Joystick To Navigate Menus
Overview Sequence/ Quad Button Cam Button Press the Sequence/Quad button Press the Cam button to to view video in quad mode (4 switch between channels 1-4. screen split view), or in sequence view. Scan Button Turns off the video monitor, Power Port and waits for a camera to Connect the power adapter... -
Page 11: Camera Overview
Overview Camera Overview LEDS Night Light button Infrared (IR) LEDs that allow Press to activate the you to see in the dark. camera’s night light. Speaker The speaker allows you to Temperature Sensor hear the person speaking Detects the room’s ambient into the video monitor. -
Page 12: Osd Overview
Overview OSD overview The video monitor displays the following icons during normal use. The table below summarizes the video monitor icons, and what they mean. Icon Meaning No signal between the camera and video monitor. Full signal between the camera and video monitor. Timer is enabled. -
Page 13: Basic Setup
Basic Setup Basic Setup Step 1 of 2: Powering on the camera Connect the power adapter to a power outlet, and to the camera. Slide the power switch to the ON position. Slide the power switch to the ON position OPTIONAL: To install batteries in the camera, see “Appendix A: Installing Camera Batteries”... -
Page 14: Testing Your Setup
Basic Setup Testing your setup It is recommended that you test your camera setup before permanent installation so that you get the best picture and sound quality from your video monitor. Test the camera and video monitor reception: Place the camera and video monitor in two different rooms. Have one person monitor the signal strength on the video monitor. -
Page 15: Adjusting Camera View
Basic Setup Adjusting camera view Adjust the camera to achieve the optimal viewing position. Table top adjustment Wall mount Adjustment Step 2: Fold camera base Step 1: Rotate Camera Fold the camera base Rotate the camera to the towards the back of the right. -
Page 16: Camera Setup
Basic Setup Camera Setup Night Light Button Press the Night Light button to turn on or off the camera night light. Adjust the camera sensitivity Adjust the sensitivity dial to the desired level. Adjust the camera volume Adjust the Volume dial to the desired level. -
Page 17: Video Monitor Setup
Basic Setup Video Monitor Setup Unlocking the video monitor antenna The video monitor has a built-in antenna that improves signal range. It is recommended that you extend antenna for optimal performance. To unlock the monitor antenna: • Slide the lock button to the right. Slide the Lock button to the right to release the antenna Reading the power indicator LED... -
Page 18: Pairing Cameras
Basic Setup Pairing Cameras The camera included with the video monitor has already been paired up with the video monitor. If for any reason your monitor and camera are not paired up, or you wish to add additional cameras, follow the directions below. To pair a camera to the video monitor: Place the camera and video monitor 12 inches apart. -
Page 19: Sequence View
Basic Setup Sequence View In sequence view, the monitor switches between up to 4 cameras every six seconds. For example, the monitor displays channel 1 for six seconds, then channel 2 for six seconds and so on. The monitor only switches to channels that are paired with a camera. To enable Sequence view: •... -
Page 20: Using The Talk Function
Basic Setup Using the talk function The talk function allows you to speak into the video monitor, while the camera outputs your voice. The camera also has a built-in mic, which allows the person to speak into the camera. Talk and listen Hello Hello (Two-way communication) -
Page 21: Turning The Video Monitor Screen On/Off
Basic Setup Using the Scan feature The Scan feature temporarily turns off the video monitor, and waits for a camera to detect a noise. Once one of the cameras detect sounds, the video monitor automatically turns on, and beeps to notify you. This feature is especially useful if you have multiple cameras, and only want to view the camera that detects a sound (i.e. -
Page 22: Recording
Recording Recording This system is capable of recording video on a microSD card. A microSD card is included so you can begin recording right away.Use the table below to help you estimate recording times on various sizes of microSD cards. microSD Card With movement With limited movement... -
Page 23: Manual Recording
Recording Manual Recording Manual recording allows you to record video by pressing the record button on the video monitor. Manual recording may be useful if you want to quickly record an event to your video monitor while you are watching it. NOTE: It is recommended to set the date and time before using the recording function. -
Page 24: Viewing Recorded Files On The Video Monitor
Recording Viewing recorded files on the video monitor There are two ways that you can view the recorded video files on the microSD memory card: through the video monitor, or on your computer. To view video files through the video monitor: Press the OK button on the video monitor (press down on the joystick). - Page 25 Recording Viewing video files on a PC Remove the memory card. Push the microSD card to eject Insert the microSD card into a memory card reader (not included). NOTE: If required, use the included SD card adapter to convert the microSD card to SD/HCSD memory card format.
-
Page 26: Configuring Your Video Monitor
Configuring your video monitor Configuring your video monitor Enabling the Auto Mute feature The Auto Mute feature eliminates white noise when monitoring a room. The Auto Mute feature works by muting the video monitor when the camera detects no audible noise. Once the camera detects a sound, the video monitor unmutes. -
Page 27: Changing The Date And Time
Configuring your video monitor Changing the date and time To adjust the video monitor’s date and time: Press the Menu button on the video monitor. Select Settings ( ) and then press the OK button. 2011-02-14 09:54:30 Select Date & Time and then press the OK button. -
Page 28: Adjusting The Screen Brightness
Configuring your video monitor Adjusting the screen brightness To adjust screen brightness: Press the Menu button on the video monitor. Select Settings ( ) and then press the OK button. Select Brightness and then press the OK button. Press left and right on the joystick to adjust the screen brightness. -
Page 29: Adjusting The Temperature Unit Of Measurement
Configuring your video monitor Adjusting the temperature unit of measurement The camera has a built-in temperature sensor.You can change the video monitor to display temperature in Fahrenheit (F) or Celsius (C). To change the unit of measurement: Press the Menu button on the video monitor. Select Settings ( ) and press the OK button. -
Page 30: Erasing The Memory Card
Configuring your video monitor Erasing the memory card Once you erase the memory card, the video will be deleted permanently. To erase the memory card: Press the Menu button on the video monitor. Select Settings ( ) and then press the OK button. -
Page 31: Viewing Your Camera Remotely Using Skype
Viewing your camera remotely using Skype Viewing your camera remotely using Skype Connecting to your video monitor through Skype is a convenient and free* method to view your camera from anywhere with an internet connection. NOTE: When remotely connecting to your video monitor using Skype, recording is disabled. How it works Your computer connects to the Skype server. -
Page 32: Connecting To Skype On A Pc
Viewing your camera remotely using Skype Connecting to Skype on a PC Step 1 of 5: Installing the camera driver You will need to install the camera drivers located on the software CD (included). To install the camera drivers: • Insert the software CD into the computer and follow the directions to install the USB driver. Step 2 of 5: Connecting the video monitor to the PC Turn on the camera first, then the video monitor. - Page 33 In order to connect to your video monitor using Skype, you will need two accounts---one for the camera (i.e. Lorex Camera) and one for yourself (i.e. Tom Smith). NOTE: The Skype illustrations and instructions below serve as a guideline only. Skype may change their website / product interface without prior notice.
- Page 34 Viewing your camera remotely using Skype Upon login, click the See my video button to confirm that Skype detects the camera. See my video Click the Close button to exit. Live video Close button NOTE: If you do not see the "See my video" button, click Tools>Options>Video Settings. Make sure you can see video in the window.
- Page 35 Viewing your camera remotely using Skype Click on Tools>Options. Options Click the Calls button ( Click the Show advanced options button. Show advanced options Select the "Answer incoming calls automatically" checkbox and the "Start my video automatically when I am in a call" check box. Click Save. Save...
- Page 36 Viewing your camera remotely using Skype Step 4 of 5: Send a contact request Next, you have to send a friend request to your personal account (i.e. Tom Smith). Click the Add a contact button ( Add a contact Search for the name of your personal account (i.e. Tom Smith), and then click the Add button. Click Send Request.
- Page 37 Click the Add to Contacts button to add the camera to your contact list. From the contact list, right-click on your camera’s account name (i.e. Lorex Camera), and click Call. • The video call begins automatically.
- Page 38 Viewing your camera remotely using Skype If you do not have a Skype account... Create your personal account first (i.e. Tom Smith), then create a second account for your camera (i.e. Lorex Camera). Create a personal account (i.e. Tom Smith): Go to www.skype.com...
-
Page 39: Changing The Camera View On Skype
Viewing your camera remotely using Skype My Skype Account Information "Camera" Skype account "Personal" Skype account (i.e. Lorex Camera) (i.e. Tom Smith) Skype Name: Skype Name: Password: Password: Email address used to register this Email address used to register this... -
Page 40: Viewing A Camera On Your Mobile Device
Viewing your camera remotely using Skype Viewing a camera on your mobile device You can remotely monitor your camera on Skype on supported mobile devices. Supported Devices • iPhone 4/ 3GS (iOS 4.0 and above) • iPod Touch (3rd generation and above) •... -
Page 41: Troubleshooting
Troubleshooting Troubleshooting Problem Possible Causes Solution No picture or sound • The monitor may be off. • Ensure that both the camera and on the Monitor • The batteries on the camera monitor are turned on. or video monitor may be low. •... - Page 42 Troubleshooting Troubleshooting (continued) Problem Possible Causes Solution Incorrect temperature • The camera may be under • Move the camera to an area away from reading direct sunlight. direct sunlight. Missing recorded • The Overwrite function may • Turn the overwrite feature off. For video files be turned on.
-
Page 43: Appendix A: Installing Camera Batteries
Remove battery cover from camera base. Installing a rechargeable battery pack To install an optional battery pack, order the battery from Lorex (part # ACC2401BATT) . Regular rechargeable batteries cannot be charged in the camera base. -
Page 44: Tech Specs
Tech Specs Tech Specs Camera Specifications Frequency 2400~2483.5Mhz Maximum Range 450 ft (138m) outdoor / 150 ft (46m) indoor line of sight Image Sensor 1/5" Cmos sensor IR LED 8 Pcs IR Leds Power Adapter Voltage 5V 1A Battery Voltage 4xAA alkaline battery or 3.7V Li-Polymer battery (not included) Battery Life... -
Page 45: Mounting Template
Mounting Template Mounting Template Use the mounting template to align mounting holes for your camera. - Page 46 Mounting Template...
-
Page 47: Notices
Notices Notices FCC Notice • Do not clean any part of the product with This device complies with Part 15, cleaners with thinners or other solvents and subpart C, of the FCC Rules. Operation chemicals. This may cause permanent is subject to the following two conditions: damage to the product which is not covered (1) this device may not cause by the Warranty. - Page 48 Notices...
- Page 50 Enhance your security with genuine Lorex products and accessories. Order whatever you need at www.lorextechnology.com or call 1-888-42-LOREX (1-888-425-6739) Special offer Coupon: MLLLLDCG-CM-OOJICORN Parking Lot Office Restaurant Drive Way LBC6050 LNZ4001 LDC6050 CVC6950B PROTECT EVERYTHING Home Home Office THAT MATTERS Add wired or wireless cameras to expand the “Envelope of Protection”...
Need help?
Do you have a question about the Live SD3.5 and is the answer not in the manual?
Questions and answers