
Summary of Contents for Better Outdoor Products Quick Series
- Page 1 ONLINE EDITION Operators Manual Quick Series Mowers ™ Better Outdoor Products, LLC West Point Business Park 2595 Viceroy Drive Winston-Salem, North Carolina 27103 866-290-7295 BetterOutdoorProducts.com...
-
Page 2: Introduction
You are responsible for operating the product properly and safely. This manual uses two other words to highlight You may contact Better Outdoor Products™ directly at information. Important calls attention to special service@betteroutdoorproducts.com for product and mechanical information and Note emphasizes general accessory information. -
Page 3: Table Of Contents
Table of Contents Introduction ................................2 Safety..................................6 Safety ..................................6 Safety Decals ................................8 Initial Setup................................10 Uncrating ................................10 Product Overv iew ..............................11 Controls ................................11 Ignition Switch ............................... 11 Choke................................... 11 Throttle Control ..............................11 Blade Engagement Control (PTO) .......................... 11 Motion Control Levers............................ - Page 4 Disengaging the Mower Blades (PTO) ........................15 The Safety Interlock System ........................... 15 Understanding the Safety Interlock System ......................15 Testing the Safety Interlock System ........................15 Wheel Drive System .............................. 15 Blade Drive System ............................... 15 Quick™ Adj ustments ............................. 16 Height of Cut .................................
- Page 5 Blade Engagement Interlock Switch (10081) ......................26 Battery (10126) ..............................26 Starter Solenoid (10127) ............................27 Fuse ..................................27 Hour Meter (10220) ............................... 27 Reverse Cable (10525) ............................28 Reverse Lever (10421) ............................28 Forward Cable (10425) ............................29 Forward Control Lever (10422)..........................29 Operator Presence/Brake Cable (10609) Handle (10206)..................
-
Page 6: Safety
Safety properly. Do not operate unless they are functioning Safety properly. Note: The addition of attachments made by other manufacturers that do not meet American National Operation Standards Institute certification will cause • Never run an engine in an enclosed area. noncompliance of this machine. - Page 7 Quick™ Mower Safety The following list contains safety information specific to extinguisher near your work area. Better Outdoor Products™ and other safety information • Wear personal eye protection when using compressed you must know. This product is capable of amputating air for cleaning purposes.
-
Page 8: Safety Decals
Safety Decals Safety decals and instructions are easily visible to the operator and are located near any area of potential danger. Replace any decal that is damaged or lost. BetterOutdoorProducts.com... - Page 9 BetterOutdoorProducts.com...
-
Page 10: Initial Setup
Initial Setup Uncrating 1. Open container and remove all packing material. 2. Using a 9/16 wrench, remove the four handlebar mounting bolts Figure 2. Figure 4 8. Depress the red operator presence/parking brake lever and remove machine from pallet Figure 5. Figure 2 3. -
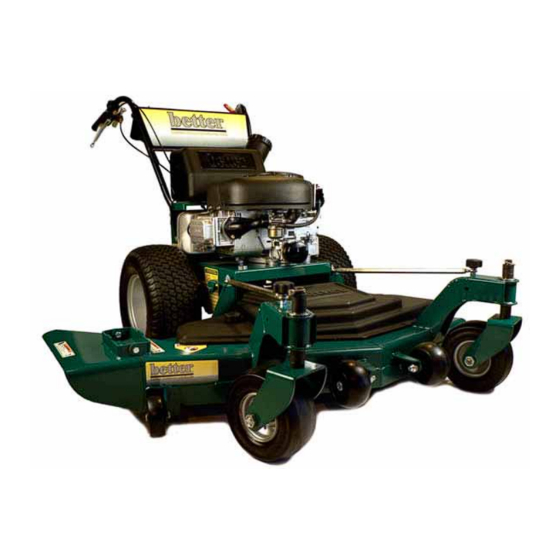
Page 11: Product Overview
Product Overview Controls Become familiar with all the controls (Figure 6) before you start the engine and operate the machine. Figure 6 1. Ignition Switch 2. Manual Choke (if equipped) 3. Throttle 4. PTO Control 5. Forward Motion Lever 6. Reverse Motion Lever 7. -
Page 12: Fuel Shut-Off Valve
Recommended Maintenance Schedule. Weight 366-380 pounds Attachments/Accessories A selection of Better Outdoor Products™ approved attachments and accessories are available for use with the machine to enhance and expand its capabilities. Contact Better Outdoor Products™ for information on approved accessories. -
Page 13: Operation
Operation Adding Fuel Use Unleaded Regular Gasoline suitable for automotive Gasoline is harmful or fatal if swallowed. Long-term use (85 octane minimum). exposure to vapors can cause serious injury and illness. • Avoid prolonged breathing of vapors. Important: Never use methanol, gasoline containing •... -
Page 14: Think Safety First
Think Safety First • Use caution when making turns. Carefully read all the safety instructions and decals in • Slow the machine down before making sharp turns. the safety section. Knowing this information could help you or any bystanders avoid injury. Moving Forward The use of protective equipment for eyes, hearing, feet and head is recommended. -
Page 15: Side Discharging Or Mulching The Grass
The safety interlock system is designed to stop the Note: If the safety system does not operate as described engine if you release the operator presence lever with below, contact Better Outdoor Products™ immediately. the mower blades engaged. Testing the Safety Interlock System... -
Page 16: Quick™ Adjustments
Quick™ Adjustments Height of Cut Figure 9 4. Add/remove spacers to the bottom side of the 1. Support front of deck with a jack stand Figure 7. fork for desired height of cut. See table below. 5. Install in reverse order and repeat on other fork. 6. -
Page 17: Forward Cable(10425)
Forward Cable(10425) After several hours of operation the drive cables will set at a longer length. Cables may need re-adjustment to obtain maximum forward/reverse speed. 1. Locate the forward drive cable adjuster by following cable from drive control to adjuster Figure 11. -
Page 18: Belt Guard Cover
Belt Guard Cover 1. Remove caster arm reinforcement strut knobs and rotate struts to the side Figure 14. 36” and 44” Models 32” Models Figure 14 2. Remove belt cover knobs and remove cover. 3. Reinstall in reverse order. BetterOutdoorProducts.com... -
Page 19: Maintenance
Maintenance Servicing the Engine Oil Check the engine oil level daily when in use. Change the engine oil as follows: • After the first 8 operating hours • After every 50 operating hours Note: Change the oil more frequently when the operating conditions are extremely dusty or sandy. -
Page 20: Changing The Oil Filter (100Hrs)
Note: Dispose of the used oil at a recycling center. Removing the Spark Plug(s) Slowly pour approximately 80% of the specified oil into Disengage the PTO. the filler tube. Stop the engine, remove the key, and wait for all moving Check the oil level;... -
Page 21: Installing The Spark Plug(S)
Check the gap between the center and side electrode (Figure 20). Bend the side electrode (Figure 20) if the gap is not correct. Installing the Spark Plug(s) Install the spark plug(s) and the metal washer(s). Ensure that the air gap is set correctly. Tighten the spark plug(s) to 16 ft-lb (22 N-m). -
Page 22: Caster Fork (25 Hrs.)
Figure 23 Figure 24 Caster Fork (25 hrs.) 1. Remove caster forks (refer to height of cut adjustment). 2. Using a fine grit sand paper clean any rust or dirt from caster fork shafts and caster bearings. 3. Using a light lubricant (WD-40™), lubricate clean shafts. -
Page 23: Transaxle
Figure 25a) 4. Slowly pour distilled water into each battery cell until Better Outdoor Products™ uses Tuff Torq K-46™ the electrolyte level is up to the Upper line (item 2 transaxles in all of our Quick™ mowers. Since the K- Figure 25a) on the battery case. -
Page 24: Troubleshooting
Troubleshooting Problem Possible Cause Corrective Action Engine will not start, starts hard, 1. Fuel tank is empty. 1. Fill fuel tank with gasoline. or fails to keep running. 2. Choke is not on. 2. Move the choke lever to choke 3. -
Page 25: Repair
Repair 2. Using a ½ wrench and a ½ socket, remove both bolts holding interlock bracket to transaxle Before replacing any part, ALWAYS remove battery Figure 29. ground cables and insulate terminals. Ignition Switch Electric Start (10286) Manual Start (10333) 1. -
Page 26: Blade Engagement Interlock Switch (10081)
Blade Engagement Interlock Switch (10081) 1. This switch is included as a component of the blade engagement control cable. 2. Please refer to Blade Engagement control replacement. Battery (10126) Battery electrolyte contains sulfuric acid which is a deadly poison and causes severe burns. Do not drink electrolyte and avoid contact with skin, eyes or clothing. -
Page 27: Starter Solenoid (10127)
Starter Solenoid (10127) Fuse 1. Remove battery. Refer to Battery Replacement. 1. All electric start Quick™ mowers are equipped 2. Using a 3/8 wrench, remove the white trigger with an automotive type 10 amp fuse that is wire. located near the top of starter solenoid. 3. -
Page 28: Reverse Cable (10525)
Reverse Cable (10525) 1. Remove cotter pin. 2. Remove clevis pin (10523) from reverse control lever (10421) Figure 36. Figure 38 7. Install new cable in reverse order, making sure to seat both rubber boots on each end of cable. Reverse Lever (10421) 1. -
Page 29: Forward Cable (10425)
6. Remove hairpin cotter and washer Figure 45. Forward Cable (10425) 1. Remove reverse lever. 2. Remove clevis pin (10423) Figure 42. Figure 45 7. With a pair of pliers, collapse both tabs and carefully remove cable Figure 46. Figure 42 3. -
Page 30: Operator Presence/Brake Cable (10609) Handle (10206)
Operator Presence/Brake Cable (10609) Handle (10206) 1. Using a 13mm wrench, loosen the jam nut Figure 47. 2. Remove both socket head screws from the operator presence handle (10206) Figure 47. Figure 49 Blade Engagement Control Cable (10081) 1. Disconnect the wiring plug from the safety switch under the PTO control Figure 50. -
Page 31: Throttle Cable (10439) Kawasaki, (10115) Briggs And Stratton
4. Remove the belt guard cover (refer to Belt Guard Cover). 5. Remove cotter pin and release cable from bracket Figure 52. Figure 52 6. Disconnect the spring from the clutch engagement arm Figure 53. Figure 54 2. Unscrew throttle control knob counter-clockwise. 3. -
Page 32: Choke Cable (10440) Kawasaki Only
Choke Cable (10440) Kawasaki Only 1. Using a 5/16 socket, loosen cable clamp end Figure 56. Figure 58 3. Remove the belt from the center pulley and from the clutch. 4. Install new belt in reverse order making sure that Figure 56 it seats in both pulleys. -
Page 33: Transaxle Drive Belt (10049) All Models
Transaxle Drive Belt (10049) All Models 1. Remove the belt guard cover (refer to Belt Guard Cover). 2. Remove the deck drive belt (refer to Deck Drive Belt). 3. Using a 9/16 socket, remove idler tension spring retaining nut and washer. Remove spring from stud Figure 60. -
Page 34: Multi Disc Clutch (10579)
Note: Use high strength (Red) Loctite™ on the threads of clutch bolt when installing. Spindle (10323) 1. Support front of machine with jack stand Figure Figure 64 6. Remove 3 engine bolts shown in Figure 65. Figure 66 2. Secure blades so that they will not spin, and remove blade Figure 67. -
Page 35: Spindle Pulley (10251) (10252) (10483)
Figure 68 Figure 70 7. Using a 15/16 socket and 1 ¾ wrench, remove 5. Install new pulley in reverse order. the spindle pulley nut and remove pulley being Idler Spring Replacement (10029) Small careful not to damage it. (10326) Large 8. -
Page 36: Rear Wheel
3. Remove rear wheels, spacers (10065), and drive keys (10064). 4. Install new wheel in reverse order. Note: Be sure wheel drive keys are in place. All Models except Super Fox Figure 72 Super Fox 6. Replace spring and install in reverse order. Note: Grease idler arm after reinstalling. -
Page 37: Transaxle (10052)
3. Using a 7/16 wrench, remove the starter cable 8. Remove clutch (refer to Clutch Replacement). Figure 76. 9. Using a ½ wrench and ½ socket, remove the four bolts holding the engine to the power unit. 10. Lift engine slowly while turning it so the muffler clears heat shield (if equipped). -
Page 38: Wiring Schematics
Wiring Schematics BetterOutdoorProducts.com... - Page 39 BetterOutdoorProducts.com...
- Page 40 BetterOutdoorProducts.com...
-
Page 41: Accessories
Accessories Mulching Kit (ACC-0013) 36” models (ACC- 0014) 44” models Support front of machine with jack stand Figure Figure C 3. Secure with lock washer and knob. 4. Insert carriage bolt through hole in deck and through hole in mulching kit Figure D. Figure A 1. -
Page 42: Gator Blades (Acc-0002) 36" Models (Acc-0011) 44" Models
Gator Blades (ACC-0002) 36” models (ACC-0011) 44” models Note: Install Gator blades teeth up. Bolt Lock washer Flat washer Figure F Note: It is important to keep blades sharp for a good quality of cut. Support the front of machine with jack stand. Mulching Tips Secure blades so that they will not spin and Obtaining good results when mulching depends on a lot... -
Page 43: Headlight Kit (Acc-0003)
Headlight Kit (ACC-0003) Note: Your headlights will be on anytime your switch is in the on position. 1. Using a 9/16 wrench, install brackets by removing one handlebar bolt at a time Figure G. Figure I 4. Insert the headlight plug with the longest loose wire to the right headlight Figure J. -
Page 44: Step Saver (Acc-0020)
Step Saver (ACC-0020) 1. Using a 9/16 wrench, install hitch plates to existing bolts Figure L. Figure N 5. Attach Step Saver™ using the clevis pins and hairpin cotters Figure O. Figure L 2. Using a 7/16 wrench, install the support bracket to the handlebar with U-bolts. -
Page 45: Striping Roller (Acc-0009) 36" Models (Acc-0019) 44" Models
Striping Roller (ACC-0009) 36” models Grass Catcher (ACC-0001) (ACC-0019) 44” models 1. Using two 9/16 wrenches, remove chute Figure 1. Install mounting arms in existing holes in rear of frame Figure Q. Figure R Figure Q 2. Install by aligning the two pins on grass catcher to the holes that the chute was attached to 2. -
Page 46: Warranty
This warranty does not cover maintenance items such Proper maintenance of equipment purchased from as lubricants, filters, cleaning, tune-ups, brake and/or Better Outdoor Products™ is the Owner’s responsibility. clutch inspection, adjustments made as part of normal Follow the instructions in your Owner’s Manual for the maintenance, blade sharpening, set-up, abuse, misuse, proper maintenance schedule.
Need help?
Do you have a question about the Quick Series and is the answer not in the manual?
Questions and answers