
Related Manuals for Briggs & Stratton 2550 PSI


Summary of Contents for Briggs & Stratton 2550 PSI
- Page 1 2550 PSI Pressure Washer Operator’s Manual BRIGGS & STRATTON POWER PRODUCTS GROUP, LLC JEFFERSON, WISCONSIN, U.S.A. Manual No. 203767GS Revision - (04/18/2007)
- Page 2 Thank you for purchasing this quality-built Briggs & Stratton pressure washer. We are pleased that you’ve placed your confidence in the Briggs & Stratton brand. When operated and maintained according to the instructions in this manual, your Briggs & Stratton pressure washer will provide many years of dependable service. This manual contains safety information to make you aware of the hazards and risks associated with pressure washers and how to avoid them.
-
Page 3: Table Of Contents
Table of Contents Operator Safety ....... . . 2 Equipment Description......... 2 Safety Rules. -
Page 4: Operator Safety
SAVE THESE INSTRUCTIONS Operator Safety Safety Rules This is the safety alert symbol. It is used to alert you to potential personal injury hazards. Obey all Equipment Description safety messages that follow this symbol to avoid Read this manual carefully and become familiar possible injury or death. - Page 5 WARNING WARNING Running engine gives off carbon monoxide, an Fuel and its vapors are extremely flammable and odorless, colorless, poison gas. explosive. Breathing carbon monoxide can cause headache, Fire or explosion can cause severe burns or fatigue, dizziness, vomiting, confusion, seizures, death.
- Page 6 WARNING WARNING Starter cord kickback (rapid retraction) can result The high pressure stream of water that this in bodily injury. Kickback will pull hand and arm equipment produces can cut through skin and its toward engine faster than you can let go. underlying tissues, leading to serious injury and possible amputation.
- Page 7 WARNING NOTICE High pressure spray may damage fragile items including Starter and other rotating parts can entangle glass. hands, hair, clothing, or accessories. • DO NOT point spray gun at glass when using red 0° nozzle. • NEVER aim spray gun at plants. •...
-
Page 8: Assembly
Assembly Attach Handle and Accessory Tray 1. Place handle (A) onto handle supports (B) connected to Read entire operator’s manual before you attempt main unit. Make sure holes (C) in handle align with to assemble or operate your new pressure washer. holes (C) on handle supports. -
Page 9: Add Engine Oil
Add Engine Oil WARNING 1. Place pressure washer on a flat, level surface. 2. Clean area around oil fill and remove yellow oil fill Fuel and its vapors are extremely flammable and cap/dipstick. explosive. NOTE: See Oil Recommendations in Maintenance section. Fire or explosion can cause severe burns or Verify provided oil bottle is the correct viscosity for current death. -
Page 10: Connect Hose And Water Supply To Pump
Connect Hose and Water Supply to Pump 4. Run water through your garden hose for 30 seconds to clean out any debris. NOTICE IMPORTANT: DO NOT siphon standing water for the water DO NOT run the pump without the water supply connected supply. -
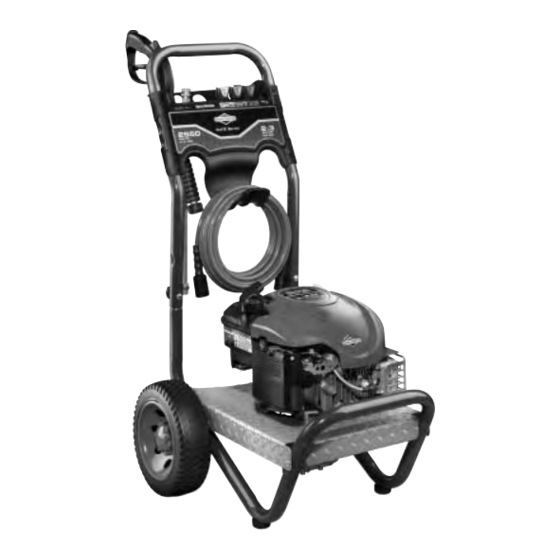
Page 11: Features And Controls
Features and Controls Read this Operator’s Manual and safety rules before operating your pressure washer. Compare the illustrations with your pressure washer, to familiarize yourself with the locations of various controls and adjustments. Save this manual for future reference. A - Spray Gun — Controls the application of water onto cleaning L - Engine Identification —... -
Page 12: Operation
Operation WARNING If you have any problems operating your pressure washer, Running engine gives off carbon monoxide, an please call the pressure washer helpline at (800) 743-4115. odorless, colorless, poison gas. Breathing carbon monoxide can cause headache, Pressure Washer Location fatigue, dizziness, vomiting, confusion, seizures, nausea, fainting or death. -
Page 13: How To Start Your Pressure Washer
How to Start Your Pressure Washer 10. Move choke lever (B) to “Choke” position. To start your pressure washer for the first time, follow these NOTE: For a warm engine, be sure the choke lever is in the instructions step-by-step. This starting information also “Run”... -
Page 14: How To Stop Your Pressure Washer
WARNING WARNING Starter cord kickback (rapid retraction) can result Contact with muffler area can result in serious in bodily injury. Kickback will pull hand and arm burns. toward engine faster than you can let go. Exhaust heat/gases can ignite combustibles, Broken bones, fractures, bruises, or sprains structures or damage fuel tank causing a fire. -
Page 15: How To Use Accessory Tray
General 15° Orange 0° Red 40° Yellow 1750 PSI 2200 PSI 2550 PSI 2.2 GPM 2.0 GPM 2.3 GPM 2. Place spray gun through hole on accessory tray on right side of unit. Follow these instructions to change ProjectPro® nozzles: 3. -
Page 16: Cleaning And Applying Detergent
3. Select desired ProjectPro® nozzle: • To apply detergent, applies project specific cleaners to help break down stubborn dirt and grime on a • For delicate rinse (lower pressure and higher flow), variety of surfaces, select black ProjectPro® for gentle cleaning of cars/trucks, boats, RV’s, patio furniture, lawn equipment, etc., select yellow cleaning detergent nozzle. -
Page 17: Pressure Washer Rinsing
Cleaning Detergent Siphoning Tube 5. Make sure garden hose is connected to water inlet. Check that high pressure hose is connected to spray If you used the detergent siphoning tube, you must flush it gun and pump. Turn on water. with clean water before stopping the engine. -
Page 18: Maintenance
Maintenance Maintenance Schedule Follow the hourly or calendar intervals, whichever occurs first. More frequent service is required when operating in adverse conditions noted below. Maintenance Schedule - Fill in Dates as You Complete Regular Service Maintenance Task Service Dates Service Dates Every 25 Every 50 Every 100... -
Page 19: Pressure Washer Maintenance
Before Each Use Check Detergent Siphoning Tube 1. Check engine oil level. Examine the filter on the detergent tube and clean if clogged. The tube should fit tightly on the barbed fitting. Examine the 2. Clean debris. tube for leaks or tears. Replace the filter or tube if either is 3. -
Page 20: Engine Maintenance
Engine Maintenance 6. Using a garden hose, remove additional debris by back flushing water through nozzle extension. Back flush WARNING between 30 to 60 seconds. Unintentional sparking can result in fire or electric shock. 7. Reinstall nozzle and in-line filter into nozzle extension. 8. - Page 21 Checking Oil Level 3. Clean area around oil fill, remove oil fill cap/dipstick. Wipe dipstick clean. Oil level should be checked prior to each use or at least every 5 hours of operation. Keep oil level maintained. 4. Tip your pressure washer to drain oil from oil fill into a suitable container making sure you tip your unit away 1.
- Page 22 Service Spark Plug Air Cooling System Change the spark plug every 100 hours of operation or once Over time debris may accumulate in cylinder cooling fins and each year, whichever comes first. This will help your engine cannot be observed without partial engine disassembly. For to start easier and run better.
-
Page 23: After Each Use
After Each Use 3. Disconnect hose from spray gun and high pressure outlet on pump. Drain water from hose, spray gun, and Water should not remain in the unit for long periods of time. nozzle extension. Use a rag to wipe off the hose. Sediments or minerals can deposit on pump parts and freeze 4. -
Page 24: Winter Storage
Winter Storage Change Engine Oil While engine is still warm, drain oil from crankcase. Refill NOTICE with recommended grade. See Changing Engine Oil in Engine You must protect your unit from freezing temperatures. Maintenance. • Failure to do so will permanently damage your pump and render Oil Cylinder Bore your unit inoperable. -
Page 25: Troubleshooting
Troubleshooting Problem Cause Correction 1. Low pressure nozzle installed. 1. Replace with high pressure nozzle. 2. Water inlet is blocked. 2. Clear inlet. 3. Inadequate water supply. 3. Provide adequate water flow. 4. Inlet hose is kinked or leaking. 4. Straighten inlet hose, patch leak. Pump has following problems: failure 5. -
Page 26: Warranties
Warranties As the small off-road engine owner, you should however be aware that B&S may deny you warranty coverage if your small off-road engine or a part has failed due to abuse, Emissions Control System Warranty neglect, improper maintenance or unapproved modifications. Briggs &... - Page 27 Emission Information 2. Length of Coverage B&S warrants to the initial owner and each subsequent Engines that are certified to meet the California Air purchaser that the Warranted Parts shall be free from Resources Board (CARB) Tier 2 Emission Standards must defects in materials and workmanship which caused the display information regarding the Emissions Durability failure of the Warranted Parts for a period of two years...
-
Page 28: Pressure Washer Owner Warranty
BRIGGS & STRATTON POWER PRODUCTS GROUP, LLC PRESSURE WASHER OWNER WARRANTY POLICY Effective December 1, 2005 replaces all undated Warranties and all Warranties dated before December 1, 2005 LIMITED WARRANTY Briggs & Stratton Power Products Group, LLC will repair or replace, free of charge, any part(s) of the pressure washer that is defective in material or workmanship or both. - Page 29 This Page Reserved.
-
Page 30: Specifications
Pressure Washer Product Specifications Max Outlet Pressure ... .2,550 PSI (175.8 BARS) Max Flow Rate ....2.3 GPM (8.7 liters/min) Water Supply Temperature .
Need help?
Do you have a question about the 2550 PSI and is the answer not in the manual?
Questions and answers