Table of Contents
Advertisement
Quick Links
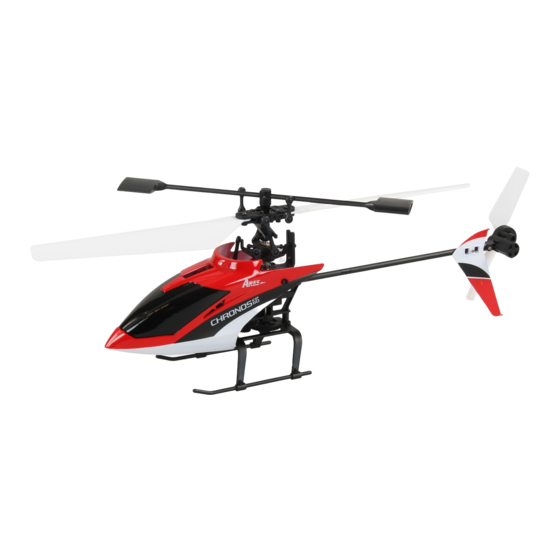
Instruction Manual
Specifications
Length:
Height:
Main Rotor Diameter:
Weight with Battery:
Main Motor:
Tail Motor:
Battery:
Charger:
Transmitter:
On-Board Electronics:
11.6 in (295mm)
4.3 in (110mm)
11.6 in (295mm)
3.2 oz (90g)
N40 (installed)
Micro-Coreless (installed)
500mAh 1S 3.7VLiPo (included)
1S 3.7V LiPo AC (included)
4-channel 2.4GHz (included)
4-in-1 receiver/2 ESCs/mixer/gyro and 2 servos (included)
Advertisement
Table of Contents

Related Manuals for Ares Chronos FP 110


Summary of Contents for Ares Chronos FP 110
- Page 1 Instruction Manual Specifications Length: 11.6 in (295mm) Height: 4.3 in (110mm) Main Rotor Diameter: 11.6 in (295mm) Weight with Battery: 3.2 oz (90g) Main Motor: N40 (installed) Tail Motor: Micro-Coreless (installed) Battery: 500mAh 1S 3.7VLiPo (included) Charger: 1S 3.7V LiPo AC (included) Transmitter: 4-channel 2.4GHz (included) On-Board Electronics:...
-
Page 2: Table Of Contents
Specifications ............................1 Introduction ............................. 3 Safety Precautions and Warnings ......................3 FCC Information ............................4 Chronos FP 110 RTF Contents ........................4 Required to Complete ..........................5 Before the First Flight Checklist ....................... 5 Flight Checklist ............................5 LiPo Battery Warnings and Usage Guidlines .................... 6 Charging the LiPo Battery ........................ -
Page 3: Introduction
And although the Chronos FP 110 is ready to fly right out the box, please take the time to read through this manual for more information on battery safety and charging, flight controls and more before proceeding with your first flight. -
Page 4: Fcc Information
Chronos FP 110 RTF Contents Item Description Not Available Separately ....Chronos FP 110 RTF Airframe AZSH1258MD2 ......... M4LPH 4-Channel Helicopter Transmitter, Mode 2 Not Available Separately ....AA Batteries (6pcs) AZSH1255 ........500mAh 1-Cell/1S 3.7V 15C LiPo Battery, JST Connector... -
Page 5: Required To Complete
Required to Complete The Chronos FP 110 RTF includes everything needed to fly right out of the box. There’s nothing extra to buy or provide! Before the First Flight Checklist PLEASE NOTE: This checklist is NOT intended to replace the content included in this instruction manual. -
Page 6: Lipo Battery Warnings And Usage Guidlines
And although the 500mAh 1-Cell/1S 3.7V 15C LiPo Battery (AZSH1255) included with the RTF version Chronos FP 110 is intended to be charged safely using the included 1-Cell/1S 3.7V LiPo, 0.5A 110-240V AC Charger (AZSH1254) you must read the following safety instructions and warnings before handling, charging or using the LiPo battery. -
Page 7: Charging The Lipo Battery
LiPo cells should not be discharged to below 3.0V each under load. In the case of the 1-Cell/1S 3.7V LiPo battery used to power the Chronos FP 110, you will not want to allow the battery to fall below 3.0V during flight. - Page 8 • When the battery is connected to the charger securely and with the proper polarity the LED indicator will glow solid red. The battery will be charging anytime the LED indicator is glowing solid red. • It will take approximately 1.0–1.5 hours to fully charge a mostly or fully discharged (not over-discharged) battery.
-
Page 9: Installing The Transmitter Batteries
NOTE: The transmitter is equipped with a low voltage battery alarm. If at any time the audible alarm is on it will be necessary to replace the AA batteries with new ones. Transmitter Details The Chronos FP 110 includes an M4LPH Micro 4-Channel Helicopter Transmitter equipped with 2.4GHz technology, dual rates, digital trims and an LCD screen. -
Page 10: Proportional Mix Trimmer Knob
Proportional Mix Trimmer Knob The knob located near the top left-hand corner of the transmitter is used to adjust the amount of ‘mixing’ between the main and tail motors. Please see the ‘Proportional Mix Trimmer Knob’ section of this manual for more information. Dual Rate Button The button located near the top right-hand corner of the transmitter is used to toggle between the ‘Dual Rates’... -
Page 11: Transmitter Dual Rates
NOTE: All Chronos FP 110 helicopters are test-flown at the factory. And during each test flight the position/setting for the proportional mix trimmer knob is typically adjusted to provide very good trim and performance overall. However, it is possible for the position of the knob to change during handling of the transmitter so it may be necessary to adjust the position/setting of the knob to achieve the best possible trim and performance. -
Page 12: Flight Controls And Trimming
Flight Controls and Trimming In the event you are not familiar with the controls of the Chronos FP 110 please take the time to familiarize yourself with them as follows and before proceeding with your first flight: The left-hand stick on the transmitter controls both the throttle (climb/descend) and rudder (yaw left/right) channels. - Page 13 The throttle trim lever (located immediately to the right of the left-hand/throttle stick) can be used to adjust the throttle control/channel output value for a given stick position. For example, raising the throttle trim will make it possible to maintain altitude with the helicopter when the left-hand/throttle stick is in a lower position.
- Page 14 Moving the left-hand stick to the right will turn (yaw) the nose of the helicopter to the right about the axis of the main shaft. This is accomplished by increasing the speed/RPMs of the tail rotor. The rudder trim lever (located immediately below the left-hand stick) can be used to help keep the nose of the helicopter from turning (yawing) to the left or right when ‘hovering’...
- Page 15 The right-hand stick controls both the elevator (pitch fore/aft) and aileron (roll) channels. Pushing the stick forward will pitch the nose of the helicopter downward, allowing it to be flown forward. This is accomplished by having the elevator (right-hand) servo pull the swashplate downward. Pulling the right-hand stick backward will pitch the tail of the helicopter downward, allowing it to be flown backward.
- Page 16 Moving the right-hand stick to the left will roll the helicopter to the left, allowing it to be flown to the left. This is accomplished by having the aileron (left-hand) servo pull the swashplate downward. Moving the right-hand stick to the right will roll the helicopter to the right, allowing it to be flown to the right.
-
Page 17: Installing And Removing The Lipo Flight Battery
Control Unit Initialization, Arming and Motor Control Test The Chronos FP 110 is equipped with a compact and advanced 4-in-1 control unit. The control unit is a lightweight combination of 2.4GHz receiver, two electronic speed controls (ESCs), a mixer and gyro. - Page 18 • Before each flight you must ALWAYS turn the transmitter on BEFORE connecting the LiPo flight battery to the control unit. Never connect the battery to the control unit before powering the transmitter on first. And after each flight you should always disconnect the battery from the control unit before turning the transmitter off.
- Page 19 • AFTER INSTALLING THE BATTERY IN THE MOUNT/HELICOPTER YOU MUST BE CAREFUL TO ENSURE PROPER POLARITY BEFORE CONNECTING IT TO THE 4-IN-1 CONTROL UNIT. By orienting/aligning the wire leads of the battery and control unit so they’re ‘red to red’ and ‘black to black’...
-
Page 20: Motor Control Test
flight. After confirming the control unit has initialized and armed properly the Chronos FP 110 is ready to fly. However, please review the following information/sections of the manual BEFORE proceeding with your first flight. -
Page 21: Selecting A Flying Area
Outdoor Flying Areas/Conditions When flying outdoors it’s best to fly the Chronos FP 110 at a local park, schoolyard or other area that’s large enough and free of people and obstructions. We also suggest flying over grass as it’s a much more ‘forgiving’... -
Page 22: Flying (General)
Flying (General) Now that you’ve selected a suitable flying area you’re ready to fly! And when making your first flights we suggest following these steps: • Slowly raise the left-hand/throttle stick to increase the speed of the main rotor blades and until the model begins to lift off. - Page 23 • When the helicopter is properly trimmed, maintain a stable hover and practice using the rudder, elevator and aileron controls to get a feel for how the helicopter responds to various control inputs. Remember to keep the control inputs as minimal as possible to prevent over-controlling the helicopter.
-
Page 24: Flying Outdoors
Hints and Tips • Although the Chronos FP 110 can be flown successfully in winds up to 5-7 mph we do not recommend that all pilots fly in the wind, especially first-time and low-time FP heli pilots. This is because more experience is typically required to maneuver/fly the helicopter successfully in the wing. -
Page 25: Transmitter And Receiver Binding/Linking
Transmitter and Receiver Binding/Linking Binding/linking is the process of programming the receiver to recognize the Globally Unique Identifier (GUID) code of a single specific transmitter. These steps outline the binding/linking process of the M4LPH 4-Channel Helicopter Transmitter (AZSH1258) and receiver/control unit: •... -
Page 26: Notes
Notes ________________________________________________________________________________ ________________________________________________________________________________ ________________________________________________________________________________ ________________________________________________________________________________ ________________________________________________________________________________ ________________________________________________________________________________ ________________________________________________________________________________ ________________________________________________________________________________ ________________________________________________________________________________ ________________________________________________________________________________ ________________________________________________________________________________ ________________________________________________________________________________ ________________________________________________________________________________ ________________________________________________________________________________ ________________________________________________________________________________ ________________________________________________________________________________ ________________________________________________________________________________ ________________________________________________________________________________ ________________________________________________________________________________ ________________________________________________________________________________ ________________________________________________________________________________ ________________________________________________________________________________ ________________________________________________________________________________ ________________________________________________________________________________ ________________________________________________________________________________ ________________________________________________________________________________ ________________________________________________________________________________ ________________________________________________________________________________ ________________________________________________________________________________ ________________________________________________________________________________ ________________________________________________________________________________ ________________________________________________________________________________ ________________________________________________________________________________ ________________________________________________________________________________ ________________________________________________________________________________ ________________________________________________________________________________ ________________________________________________________________________________ ________________________________________________________________________________ ________________________________________________________________________________ ________________________________________________________________________________ ________________________________________________________________________________ ________________________________________________________________________________... -
Page 27: Replacement Parts List
Flybar: Chronos FP 110 AZSH1261 Rotor Head Linkage Set: Chronos FP 110 AZSH1262 Main Rotor Blade Grip and Mixing Arm Set (1 pair): Chronos FP 110 AZSH1263 Main Rotor Blade Set (1 pair): Chronos FP 110 AZSH1264 Main Shaft with Rotor Head/Hub: Chronos FP 110... - Page 28 Exploded View # Description (Total Quantity Used) Included In Item # M1.7x6mm Screw (12) AZSH1269 or AZSH1273 Motor (1) AZSH1259 M1.4x2.5mm Screw (5) AZSH1264 or AZSH1270 Main Shaft Retaining Collar (1) AZSH1264 Main Shaft (1) AZSH1264 Feathering Spindle (1) AZSH1262 Swashplate Assembly (1) AZSH1267 Main Rotor Head/Hub (1)
-
Page 29: Exploded View
Exploded View... -
Page 30: Notes
Notes ________________________________________________________________________________ ________________________________________________________________________________ ________________________________________________________________________________ ________________________________________________________________________________ ________________________________________________________________________________ ________________________________________________________________________________ ________________________________________________________________________________ ________________________________________________________________________________ ________________________________________________________________________________ ________________________________________________________________________________ ________________________________________________________________________________ ________________________________________________________________________________ ________________________________________________________________________________ ________________________________________________________________________________ ________________________________________________________________________________ ________________________________________________________________________________ ________________________________________________________________________________ ________________________________________________________________________________ ________________________________________________________________________________ ________________________________________________________________________________ ________________________________________________________________________________ ________________________________________________________________________________ ________________________________________________________________________________ ________________________________________________________________________________ ________________________________________________________________________________ ________________________________________________________________________________ ________________________________________________________________________________ ________________________________________________________________________________ ________________________________________________________________________________ ________________________________________________________________________________ ________________________________________________________________________________ ________________________________________________________________________________ ________________________________________________________________________________ ________________________________________________________________________________ ________________________________________________________________________________ ________________________________________________________________________________ ________________________________________________________________________________ ________________________________________________________________________________ ________________________________________________________________________________ ________________________________________________________________________________ ________________________________________________________________________________ ________________________________________________________________________________... - Page 31 Notes _________________________________________________________________________________ _________________________________________________________________________________ _________________________________________________________________________________ _________________________________________________________________________________ _________________________________________________________________________________ _________________________________________________________________________________ _________________________________________________________________________________ _________________________________________________________________________________ _________________________________________________________________________________ _________________________________________________________________________________ _________________________________________________________________________________ _________________________________________________________________________________ _________________________________________________________________________________ _________________________________________________________________________________ _________________________________________________________________________________ _________________________________________________________________________________ _________________________________________________________________________________ _________________________________________________________________________________ _________________________________________________________________________________ _________________________________________________________________________________ _________________________________________________________________________________ _________________________________________________________________________________ _________________________________________________________________________________ _________________________________________________________________________________ _________________________________________________________________________________ _________________________________________________________________________________ _________________________________________________________________________________ _________________________________________________________________________________ _________________________________________________________________________________ _________________________________________________________________________________ _________________________________________________________________________________ _________________________________________________________________________________ _________________________________________________________________________________ _________________________________________________________________________________ _________________________________________________________________________________ _________________________________________________________________________________ _________________________________________________________________________________ _________________________________________________________________________________ _________________________________________________________________________________ _________________________________________________________________________________ _________________________________________________________________________________ _________________________________________________________________________________...
- Page 32 © 2013 Rev 06.30.13...
Need help?
Do you have a question about the Chronos FP 110 and is the answer not in the manual?
Questions and answers