Table of Contents
Advertisement
Quick Links
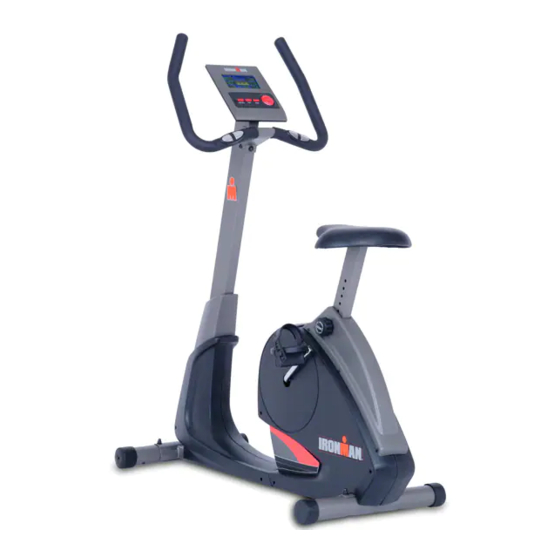
Owner's Manual
Ironman 350u Upright
Customer Service
1.800.750.IRON
1.800.750.4766
4009 Distribution Drive
Suite 250
Garland, TX 75041
www.ironmanfitness.com
CAUTION! Read all precautions
and instructions in this manual
before using this equipment.
SERIAL TAG IS LOCATED ON THE FRAME
Model Name: 350u
Date of Purchase:
Serial Number:
315-00
11/07 Rev 2
Advertisement
Table of Contents

Related Manuals for Ironman Fitness 350u


Summary of Contents for Ironman Fitness 350u
- Page 1 Owner’s Manual Ironman 350u Upright Customer Service 1.800.750.IRON 1.800.750.4766 4009 Distribution Drive Suite 250 Garland, TX 75041 www.ironmanfitness.com CAUTION! Read all precautions and instructions in this manual before using this equipment. SERIAL TAG IS LOCATED ON THE FRAME Model Name: 350u...
-
Page 2: Table Of Contents
Table of Contents Important Safety Information Assembly Console Instructions Monitoring Your Heart Rate Warm-Up Exercises Moving Instructions Parts List Exploded Views Warranty Information... -
Page 3: Important Safety Information
3. The unit should only be used on a level surface and is intended for indoor use only. The unit should not be placed in a garage, patio, or near water and should never be used while you are wet. Ironman Fitness recommends a mat be placed under the unit to protect floor or carpet and for easier cleaning. - Page 4 Important Safety Information Thank you for purchasing the Ironman Fitness 350u Upright Bike! The quality product you have chosen was designed to meet your needs for cardiovascular exercise. Before you start, please read the Owner’s Manual and become familiar with the operation of your new unit.
-
Page 5: Assembly
Assembly Getting Started - The Ironman 350u will require some assembly. Unpack the box in a clear area. Remove packing material. Do not dispose of packing material until assembly is complete and unit is working properly. Place the unit on a clean level surface for assembly. Make sure there is easy access to an electrical outlet. - Page 6 Assembly Figure 2 Step 1: Turn locking knob (26) counter-clockwise and pull out. Step 2: While pulling the locking knob (26) out, slide seat post (8) into main frame (3) until desired height is selected. Step 3: Release locking knob and turn clockwise to secure seat post (8).
- Page 7 Assembly Figure 3 Step 1: Attach seat (11) to seat post (8) using washers (22) and locknuts (21).
- Page 8 Assembly Figure 4 Step 1: Slide console tube collar (9) up the console tube. Connect wire harness (65) coming from the main frame to wire harness (37) from the console tube. Step 2: Slide the console tube (39) onto main frame (3) and secure using hex head screws (19), wash- ers (4), and locknuts (31).
- Page 9 Assembly Figure 5 Step 1: Attach the left pedal (35) to the left crank. The left pedal is marked with an "L". Turn the threads on the pedal counter-clockwise to secure it to the crank. Step 2: Attach the right pedal (34) to the right crank. The right pedal is marked with an "R". Turn the threads on the pedal clockwise to secure it to the crank.
- Page 10 (40) to pulse wires (29) and wire harness (37). Step 2: Secure the console to the console tube (39) using screws (43). Note: The screws are already pre- installed into the back of the console. You have completed assembly of your new 350u bike Congratulations!
-
Page 11: Console Instructions
Console Instructions The 350u's console is a single window LCD that displays RPM, SPEED, TIME, DISTANCE, CALORIES, PULSE, and HEART RATE. Power Modes Power On: Make sure the AC adapter is plugged into an outlet. Press any button to turn the console on. - Page 12 Console Instructions Start/Stop During Setup Mode: This button is used to begin workout. Press this button once all settings are confirmed During Workout: It is used to pause workout mode. All workout data is stored during pause mode. Enter (Press the dial) During Setup Mode: This button is used to select the desired setting you wish to change and to confirm the values entered (Time, Calories, Distance, Pulse, and Program).
-
Page 13: Program Instructions
Console Instructions RPM: Displays current training revolutions per minute. DISTANCE: If a target distance was not selected, distance will count up from 0.00 to maximum 99.90. When working out with a target distance, distance will count down from target to 0.0. When selecting target time, turn the dial clockwise to increase value, turn the dial counter-clockwise to decrease value, the distance will change in 0.1 mile increments and can range from 0.00 miles to 99.90 miles. - Page 14 Console Instructions Time will flash in the display. Turn the dial clockwise to increase value, turn the dial counter- clockwise to decrease value to set desired time. Press Enter to confirm selection. Repeat steps for distance, pulse, and calories. Press Start/Stop to begin exercising at any time. You can change the tension level at any time during your workout session by turning the selection dial.
-
Page 15: Program Profiles
Console Instructions ERROR CODES E1 (Error 1): Is displayed when console no longer receives a signal from the gearbox (motor). E2 (Error 2): Software malfunction. E3 (Error 3): Is displayed when the console detects a faulty gearbox (motor). PROGRAM PROFILES PROGRAM 1 MANUAL PROGRAM 4... -
Page 16: Monitoring Your Heart Rate
Monitoring Your Heart Rate Monitoring Your Heart Rate To obtain the greatest cardiovascular benefits from your exercise workout, it is important to work within your target heart rate zone. The American Heart Association (AHA) defines this target as 60%-75% percent of your maximum heart rate. Your maximum heart rate may be roughly calculated by subtracting your age from 220. -
Page 17: Target Heart Rate Zone
Monitoring Your Heart Rate TARGET HEART RATE ZONE 100% Serious athletic training range Cardiovascular conditioning range Fat burning range... -
Page 18: Warm-Up Exercises
Warm Up Exercises EXERCISE GUIDELINES WARNING! Before beginning this or any exercise program, you should consult your physician. This is especially important for individuals over the age of 35 or individuals with pre-existing health problems. Flexibility is a key to fitness. Stretch all major muscle groups at least two to three times per week after a 5 to 10 minute warmup. -
Page 19: Warm Up Exercises
Warm Up Exercises WARNING! Before beginning this or any exercise program, you should consult your physician. This is especially important for individuals over the age of 35 or individuals with pre-existing health problems. Wrist Extensor Extend your right arm in front of you with your palm up and your elbow straight. - Page 20 Warm Up Exercises WARNING! Before beginning this or any exercise program, you should consult your physician. This is especially important for individuals over the age of 35 or individuals with pre-existing health problems. Calf Stretch Face a solid structure such as a wall with your left foot ahead of your right, toes straight ahead.
-
Page 21: Moving Instructions
Moving Instructions CAUTION! TO REDUCE THE POSSIBILITY OF INJURY WHILE LIFTING, BEND YOUR LEGS AND KEEP YOUR BACK STRAIGHT. AS YOU LEAN THE UNIT, LIFT USING YOUR LEGS, NOT YOUR BACK. First, kneel down and grasp the rear support tube with both hands as shown in Figure 1. Next, with a firm grasp on rear support tube, stand up bringing the rear of the bike up in the air and tilt the unit until it rolls freely on the transport wheels. -
Page 22: Parts List
302-00455 M8 NYLON NUT (THICK) 220R/240R/640R/250R 306-01016 HANDLEBAR SLEEVE, 660R 306-00569 1" BALL PLUG TRI-6.0R/HT640R/HT640U 306-01013 PEDAL RIGHT, 660R 350U PARTS LIST REV. A Ref# Part # 306-01011 PEDAL STRAP, RIGHT, 660R 306-01010 LEFT PEDAL, 660R 306-01012 PEDAL STRAP, LEFT, 660R... -
Page 23: Exploded Views
Exploded View... -
Page 24: Warranty Information
Warranty Information PLEASE READ THESE WARRANTY TERMS AND CONDITIONS FULLY AND CAREFULLY BEFORE USING YOUR IRONMAN FITNESS EQUIPMENT. BY USING THE EQUIPMENT, YOU ARE CONSENTING TO BE BOUND BY THE FOLLOWING TERMS AND CONDITIONS. Frame: Lifetime Electronics and *Parts: 1 yr... - Page 25 Notes...
- Page 26 Notes...
- Page 27 Notes...
-
Page 28: Customer Service
Customer Service 1.800.750.IRON 1.800.750.4766 Ironman Fitness 4009 Distribution Drive Suite 250 Garland, TX 75041 www.ironmanfitness.com IRONMAN, IRONMAN TRIATHLON and M-DOT are registered trademarks of the World Triathlon Corporation. This product is licensed by the Ironman Triathlon.
Need help?
Do you have a question about the 350u and is the answer not in the manual?
Questions and answers