
Related Manuals for Ironman Fitness 120r


Summary of Contents for Ironman Fitness 120r
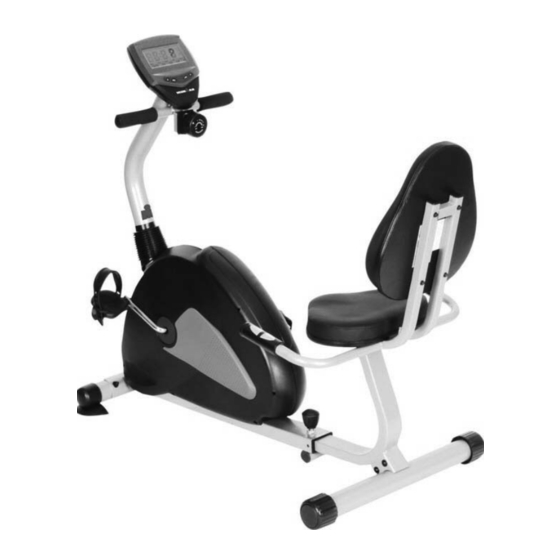
- Page 1 Owner’s Manual IRONMAN 120r RECUMBENT Customer Service 1.800.750.IRON 1.800.750.4766 Ironman Fitness 4009 Distribution Drive Suite 250 Garland, TX 75041 www.ironmanfitness.com 315-00049 07/05 Rev A 120r...
-
Page 2: Table Of Contents
Table of Contents Important Safety Information Before You Start Assembly Console Instructions Moving Instructions Monitoring Your Heart Rate Warm Up Exercises Exploded View Parts List Warranty 11-12... -
Page 3: Important Safety Information
3. The unit should only be used on a level surface and is intended for indoor use only. The unit should not be placed in a garage, patio. Ironman Fitness recommends a mat be placed under the unit to protect floor or car- pet and for easier cleaning. -
Page 4: Before You Start
Before You Start Thank you for purchasing the Ironman 120r Recumbent ! This quality product you have chosen was designed to meet your needs for cardiovascular exercise. Before you start, please read the Owner's Manual and become familiar with the operation of your new unit. -
Page 5: Assembly
Assembly INSTRUCTIONS FOR ASSEMBLY: Unpack the box in a clear area. Check to make sure all components are present and in good condition. Do not dispose of the packing material until the assembly is completed. Tools have been provided for you to use when assembling this product. - Page 6 Assembly FIGURE 1 Step 1: Loosen the adjustment knob (41) on the front frame (1). Slide the rear frame backward and secure with the adjust- ment knob (41). Step 2: Attach the rear stabilizer (3) onto the rear frame with screws (49) and washers (63).
- Page 7 Assembly FIGURE 4: Step 1: Thread the right pedal (39) onto the right side of the crank (8) as shown. Tighten the pedal securely. Select the right pedal strap which has “R” marked on the bottom side of the strap. Snap the three hole end onto the inside edge of the right pedal (39).
- Page 8 Attach Console (33) to Upright using four Screws. Note: The four Screws will already be installed into the back of Console(33) when you remove it from the box. You have completed Assembly of your New Ironman 120r Recumbent. Figure 7 CONGRATULATIONS!!!!!!
-
Page 9: Console Instructions
Console Overview CONSOLE BUTTONS: ENTER/RESET: Press to begin workout or change console settings. PULSE/RECOVERY: Press to run Pulse program. DOWN: Press to set or change TIME, DISTANCE or CALORIES. Press to set or change TIME, DISTANCE or CALORIES. GENERAL INFORMATION: 1. -
Page 10: Moving Instructions
Moving Instructions CAUTION! TO REDUCE THE POSSIBILITY OF INJURY WHILE LIFTING, BEND YOUR LEGS AND KEEP YOUR BACK STRAIGHT. AS YOU LEAN THE UNIT, LIFT USING YOUR LEGS, NOT YOUR BACK. First, kneel down and grasp the rear support tube with both hands as shown in Figure 1. Next, with a firm grasp on rear support tube stand up bringing the rear of the bike up in the air and tilt the unit until it rolls freely on the transport wheels. -
Page 11: Monitoring Your Heart Rate
Monitoring Your Heart Rate Monitoring Your Heart Rate To obtain the greatest cardiovascular benefits from your exercise workout, it is important to work within your target heart rate zone. The American Heart Association (AHA) defines this target as 60%-75% percent of your maximum heart rate. -
Page 12: Target Heart Rate Zone
Monitoring Your Heart Rate TARGET HEART RATE ZONE Serious athletic training range Cardiovascular conditioning range Fat burning range... -
Page 13: Warm Up Exercises
Warm Up Exercises EXERCISE GUIDELINES WARNING! Before beginning this or any exercise program, you should consult your physician. This is espe- cially important for individuals over the age of 35 or individuals with pre-existing health problems. Warming up prepares the body for the exercise by increasing circulation, supplying more oxygen to the mus- cles and raising body temperature. -
Page 14: Exploded View
Exploded View... -
Page 15: Parts List
Parts List Ironman 120r Recumbent Parts List Rev A Ref # Part # Description 323-00334 MAIN FRAME, 120R 323-00335 RAIL TUBE,120R 323-00336 REAR STABILIZER 60X600, 120R 323-00338 REAR FRAME, 120R 328-00059 SEAT PAD, 120R 328-00060 BACK PAD, 120R 311-00056 PULLEY 270MM, DCV/120E/R 330-00075 CRANK 1/2"... -
Page 16: Warranty
Product. To obtain warranty service, you must contact an Ironman authorized retailer, service technician or Ironman Fitness at our phone number located in this manual. Any parts determined to be defective must be returned to Ironman to obtain warranty service. You must prepay any shipping charges, export taxes, custom duties and taxes, or any other charges associated with transportation of the parts or Product. - Page 17 Customer Service 1.800.750.IRON 1.800.750.4766 Ironman Fitness 4009 Distribution Drive Suite 250 Garland, TX 75041 www.ironmanfitness.com Ironman and M-dot are registered trademarks of the World Triathlon Corp., used here by permission.
Need help?
Do you have a question about the 120r and is the answer not in the manual?
Questions and answers