Table of Contents
Advertisement
Quick Links
Advertisement
Table of Contents

Related Manuals for AG Neovo DS-55


Summary of Contents for AG Neovo DS-55
-
Page 2: Table Of Contents
Table of contents • Important Safety Instructions ………………………….1 – Safety precautions and maintenance………………....1 – Use………………………………………………………………4 – Installation Notes………………………………………………7 • Package Content ……………………………………………..9 – Unpacking……………………………………………………...9 – Accessories……………………………………………..10 – Overview……………………………………………………..11 • Setting Up the Display ……………………………………13 – Step1 : Putting the dual-sided display upside ……...13 –... -
Page 3: Important Safety Instructions
Important Safety Instructions Safety precautions and maintenance WARNING: Use of control, adjustments or procedures other than those specified in this documentation may result in exposure to shock, electrical hazards and/or mechanical hazards. Read and follow these instructions when connecting and using your display: Operation: •... - Page 4 Safety precautions and maintenance Maintenance: • To protect your display from possible damage, do not put excessive pressure on the display. • Unplug the display if you are not going to use it for an extensive period of time. • Unplug the display if you need to clean it with a slightly damp cloth. The screen may be wiped with a dry cloth when the power is off.
- Page 5 Safety precautions and maintenance Read and follow these instructions when connecting and using your display: • Unplug the display if you are not going to use it for an extensive period of time. • Unplug the display if you need to clean it with a slightly damp cloth. The screen may be wiped with a dry cloth when the power is off.
-
Page 6: Use
• Don’t turn the ventilation hole of Power Box upside down. As shown in the picture below. The ventilation hole of power box The ventilation hole of power box It is prohibited to It is prohibited to turn the place tilt ventilation hole of Power Box upside down. - Page 7 • When you install the display, please don’t use the “bottom side” I/O hole and open the I/O cover . As shown in the picture below. The “bottom side” I/O cover can’t be opened.
- Page 8 Remote Controller Precautions: • This product requires remote switch (ON/OFF) from Front Side ; the Back Side only has OSD function operated by remote controller. Front Side Back Side The Front Side have a product label. Disconnect devices: • For pluggable equipment, the socket-outlet shall be installed near the equipment and shall be easily accessible.
-
Page 9: Installation Notes
Installation Notes There have 8 mounting holes on the side of the display set (M4x15mm) - Page 10 Installation Notes Please make sure you have a solid installation. As shown in the picture. You can install the display set by screws x 8 (M4x15mm)
-
Page 11: Package Content
Package Content Unpacking • This product is packed in a carton, together with the standard accessories. • Due to the size and weight of this display it is recommended for two people to move it. • After opening the carton, ensure that the contents are complete and in good condition. -
Page 12: Accessories
Accessories PC Box x1 Dual-sided Display x1 with 24V&12V line) Remote Controller x1 Power Cord x1 (Battery : CR 2025 3V) -
Page 13: Overview
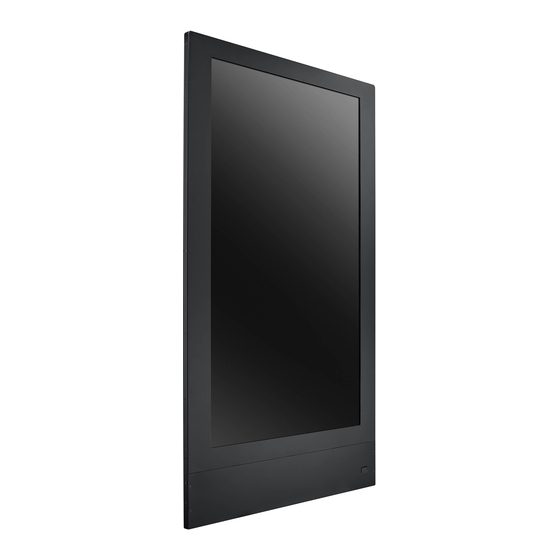
Over View Top View Diagonal View Front View Side View... - Page 14 Over View 1. Display (Dual-sided) 2. Display Set 3. Remote control sensor (Dual-sided) 4. Mounting hole x 8 (single side have 4) 5. I/O cover x 3...
-
Page 15: Setting Up The Display
Setting Up The Display Step1 : Putting the dual-sided display upside While the display put upside , the screw will be seen on the left. -
Page 16: Step2 : Remove The Three I/O Covers On The Sides
Step2 : Remove the three I/O covers on the sides Remove I/O cover screws x 3(M3x6mm) -
Page 17: Step3 : Remove The Downside Cover
Step3 : Remove the downside cover Tear down the downside cover. screws x 10(M3x6mm) -
Page 18: Step4 : Link Power Box To Dual-Sided Display
Step4 : Connect Power Box to Dual-sided Display 24V*1 Red line 12V*1 (10 pin) Yellow line (8 pin) Power Box Dual-sided Display... - Page 19 Step4 : Connect Power Box to Dual-sided Display Connect the 12V (8 pin) power line Connect the 24V (10 pin) power line 12V*1 24V*1 Yellow line Red line (8 pin) (10 pin)
-
Page 20: Step5 : Connect By Hdmi Connector
Step5 : Connect by HDMI connector Plug two HDMI cables into the cabinet. And ensure that all cable plugs are firmly fitted to the equipment jacks. HDMI HDMI... -
Page 21: Step6 : Reinstall The Downside Cover And I/O Covers
Step6 : Reinstall the downside cover and I/O covers Reinstall the downside cover. screws x 10(M6x30mm) Reinstall the other two I/O covers which are not use. -
Page 22: Step7 : Connect The Power Cord
Step7 : Connect the power cord Power Box AC in / switch Plug in the power cable and turn on the AC power switch. -
Page 23: Step8: Using The Remote Control
Step8: Using the Remote Control Descriptions Power Power on/Power off Menu Into OSD module Menu Right Menu Left Menu Up Menu Down Exit Menu/Exit selection... -
Page 24: Osd Setting Menu
OSD Setting Menu Press “MENU” into the OSD Setting Menu, and then press “UP” or “DOWN” to select the item, at last press “EXIT” to leave menu : Press MENU to select one of the following, and then press “RIGHT” Luminance or “LEFT”... - Page 25 Press “MENU” into the OSD Setting Menu, and then press “UP” or “DOWN” to select the item, at last press “EXIT” to leave menu : Press MENU to select one of the following, and then press “RIGHT” Color or “LEFT” to select the desired level, ---Color Temperature: Range: 6500K, 9300K, 11500K, User Define Default: : 9300K If you choose the User Define,...
- Page 26 Press “MENU” into the OSD Setting Menu, and then press “UP” or “DOWN” to select the item, at last press “EXIT” to leave menu : Press MENU to select one of the following, and then press “RIGHT” Settings or “LEFT” to select the desired level, ---Horizontal: 0~100 ;...
- Page 27 Press “MENU” into the OSD Setting Menu, and then press “UP” or “DOWN” to select the item, at last press “EXIT” to leave menu : Press MENU to select one of the following, and then press “UP” or Setup “DOWN” to select the item , ---Language: English / Español / Français / Deutsch / Italiano / Português / Русский...
-
Page 28: Trouble Shooting
Trouble shooting Symptom Possible Cause Remedy 1. The power cord is disconnected. 1. Plug in the power cord. 2. The main power switch on the back 2. Make sure the power No picture is of the display is not switched on. switch is switched on. -
Page 29: Specifications
Specifications Model name DS-55 Screen size 55 inch (diagonal) Resolution 1920 x1080 (Pixel) Display Area 1209.6(H) x 680.4(V) LCD Display 55” Contrast Ratio 3000:1 Brightness 450 nits View angle 178° (H); 178° (V) Color Gamut 72 (%) Surface Treatment Haze 11%,3H... -
Page 30: Product Dimensions
Product Dimensions A,B,C: I/O covers...
Need help?
Do you have a question about the DS-55 and is the answer not in the manual?
Questions and answers