Table of Contents
Advertisement
Quick Links
Advertisement
Table of Contents

Related Manuals for AG Neovo DW2401


Summary of Contents for AG Neovo DW2401
- Page 1 DW2401, DW2701 & DW3401 LCD Monitor User Manual www.agneovo.com...
-
Page 2: Table Of Contents
Contents TABLE OF CONTENTS SAFETY INFORMATION Federal Communications Commission (FCC) Notice (U.S. Only) ..............1 WEEE ................................1 Turkey RoHS ..............................2 Ukraine RoHS .............................. 2 PRECAUTIONS Notice ................................3 Cautions When Setting Up ........................... 3 Cautions When Using ........................... 4 Cleaning and Maintenance ........................... -
Page 3: Safety Information
SAFETY INFORMATION Federal Communications Commission (FCC) Notice (U.S. Only) This equipment has been tested and found to comply with the limits for a Class B digital device, pursuant to part 15 of the FCC Rules. These limits are designed to provide reasonable protection against harmful interference in a residential installation. -
Page 4: Turkey Rohs
SAFETY INFORMATION Turkey RoHS Türkiye Cumhuriyeti: EEE Yönetmeliğine Uygundur. Ukraine RoHS Обладнання відповідає вимогам Технічного регламенту щодо обмеження використання деяких небезпечних речовин в електричному та електронному обладнанні, затвердженого постановою Кабінету Міністрів України від 3 грудня 2008 № 1057. -
Page 5: Precautions
Precautions PRECAUTIONS PRECAUTIONS CAUTION RISK OF ELECTRIC SHOCK DO NOT OPEN Symbols used in this manual This icon indicates the existence of a potential hazard that could result in personal injury or damage to the product. This icon indicates important operating and servicing information. Notice •... -
Page 6: Cautions When Using
Users who have already mounted the monitor on the ceiling or any other horizontal surface overhead are strongly advised to contact AG Neovo for consultations and solutions to help ensure a most pleasurable and fulfilling monitor experience. -
Page 7: Cleaning And Maintenance
PRECAUTIONS Cleaning and Maintenance Do not attempt to service the LCD monitor yourself, refer to qualified service personnel. Opening or removing the covers may expose you to dangerous voltage or other risks. Notice for the LCD Monitor In order to maintain the stable luminous performance, it is recommended to use low brightness setting. Due to the lifespan of the lamp, it is normal that the brightness quality of the LCD monitor may decrease with time. -
Page 8: Notice For The Lcd Monitor
32-Cyan4 Gamma Curve Note: The report shows the calibration results of the AG Neovo monitor with the listed serial number. Note: • Use only the supplied power cord. • The above pictures are for reference only. Actual items may vary upon shipment. -
Page 9: Installation
PRODUCT DESCRIPTION 1.2 Installation 1.2.1 Installing the Stand 1. Take out the stand and base, and lock the stand with the hand screw that comes with the base. 2. Insert the assembled base into the corresponding bayonet of the rear shell, and gently align the tail end perpendicular to the surface of the rear shell, so that the lock of the bracket can be buckled on the quick release button of the rear shell. - Page 10 • Use the 75 x 75 mm (DW2401/DW2701) or 100 x 100 mm (DW3401) wall mount kit recommended by AG Neovo. All AG Neovo wall mount kits comply with VESA standard.
-
Page 11: Overview
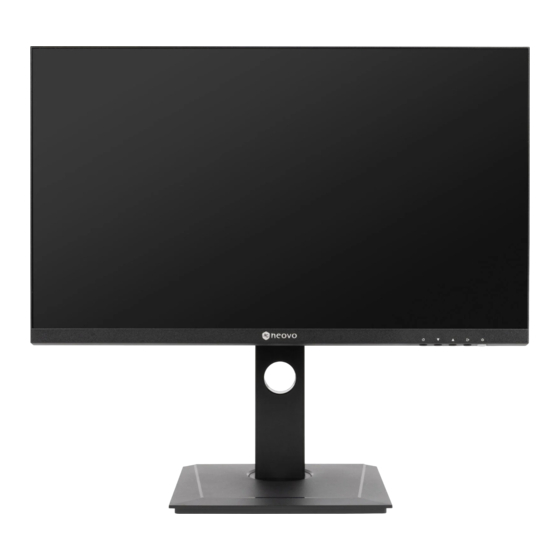
PRODUCT DESCRIPTION 1.3 Overview 1.3.1 Front View DW2401/DW2701 DW3401 1.3.2 Control Panel DW2401/DW2701 DW3401 Button Description Pops up the menu/Backs to the previous menu (in case of main menu, exits from Button the whole menu). • When the menu is activated, press this key to select the function. Button •... -
Page 12: Rear View
PRODUCT DESCRIPTION 1.3.3 Rear View DW2401/DW2701 DW3401 HDMI Type-C AUDIO OUT AC IN Type-C HDMI 2 HDMI 1 AUDIO OUT AC IN HDMI Connect HDMI signals input. DP IN: Connect DisplayPort signals input. Type-C IN: Connect Type-C signals input. AUDIO OUT: Connect audio signals output (3.5 mm Stereo Audio Jack). -
Page 13: Chapter 2: Making Connections
Chapter 2: Making Connections CHAPTER 2: MAKING CONNECTIONS 2.1 Making Connections DW2401 & DW2701 Type-C DW3401 Type-C HDMI 2 HDMI 1... - Page 14 MAKING CONNECTIONS • When charging connected device via USB Type-C Connector, check if the device is equipped with a USB Type-C Connector that supports charging function via USB PD (Power Delivery). • The connected device can be charged via USB Type-C connector even when the monitor is in standby mode.
-
Page 15: Chapter 4: On Screen Display Menu
Chapter 3: On Screen Display Menu CHAPTER 3: ON SCREEN DISPLAY MENU 3.1 OSD Menu Tree DW2401/DW2701 Main Menu Submenu Third menu Description Brightness 0-100 Adjust the luminance of the screen image. Adjust the difference between the black level Contrast 0-100 and the white level. - Page 16 ON SCREEN DISPLAY MENU Main Menu Submenu Third menu Description Red/Green/Blue/Cyan/Magenta/ Adjust the hue settings for the red, green, Yellow blue, cyan, magenta, or yellow color. Color Settings Adjust the colour saturation of the screen Saturation 0-100 image. Off/PIP Mode/PBP 2win 1:1/PBP Select PIP/PBP mode type or disable the PIP/PBP Mode 2Win 2:1/PBP 2Win 1:2...
- Page 17 ON SCREEN DISPLAY MENU Main Menu Submenu Third menu Description Input Signal Auto/DP/HDMI/Type-C Set the default input signal. Volume 0-100 Adjust the volume level of the built-in speaker. Mute Off/On Turn the audio speaker on or off. Select On: If the monitor cannot detect any input source signal, and the monitor will automatically turn off after 1 minute.
- Page 18 ON SCREEN DISPLAY MENU Main Menu Submenu Third menu Description Standard Mode Off/On Select On to use the default color settings. Select On to set the preset color settings for RTS/RPG Mode Off/On RTS(Real-Time Strategy)/RPG(Role-Playing Game)games games. Select On to set the preset color settings for FPS Arena Mode Off/On FPS(First-Person Shooter) games.
- Page 19 ON SCREEN DISPLAY MENU Main Menu Submenu Third menu Description English/简体中文/한국어/ /یبرعPortugues do Brasilazil/ Deutsch/Nederland/Suomi/ Français/Ελληνικά/Indonesia/ Language Select the OSD language. Italiano/日本語/Malaysia/Polskie/ Português/Pусский/Español/ ไทย/українська/Tiệng Việt/繁體 中文/Türkçe Set the length of time (in seconds) the OSD OSD Time Out 0-100 screen is displayed. When the time elapses, the OSD screen is automatically inactivated.
-
Page 20: Chapter 6: Appendix
Chapter 6: Appendix CHAPTER 4: APPENDIX 4.1 Warning Messages When any of these warning messages appear, check the following items. Warning Message Cause Solution The LCD monitor cannot detect the √ Check if the input source is input source signal. turned ON. -
Page 21: Troubleshooting
APPENDIX 4.2 Troubleshooting Problems Possible Cause and Solution • Check if the power is on. The power indicator light is not on • Check if the power cord is connected. • Check if the function of plug-and-play of the device is compatible with Impossible plug-and-play •... -
Page 22: Chapter 7: Specifications
Chapter 7: Specifications CHAPTER 5: SPECIFICATIONS 5.1 Display Specifications DW2401 DW2701 DW3401 LED-Backlit TFT LCD LED-Backlit TFT LCD LED-Backlit TFT LCD Panel (IPS Technology) (IPS Technology) (IPS Technology) Panel Size 23.8” 27” 34” sRGB 133% , NTSC 115% , sRGB 140% , NTSC 124% , sRGB 130% , NTSC 110% , Colour Gamut DCI-P3 105% , Adobe RGB... -
Page 23: Display Dimensions
DW3401 60° 817.0 (Outline dimension) 811.8 59.8 63.2 218.8 358.5 358.5 M4x9L AG Neovo Company Address: 5F-1, No. 3-1, Park Street, Nangang District, Taipei, 11503, Taiwan. Copyright © 2022 AG Neovo. All rights reserved. DW2401/DW2701/DW3401 Eprel registration number: 1271777/1271774/1271773 DW2410/DW2710/DW3410_UM_V010...
Need help?
Do you have a question about the DW2401 and is the answer not in the manual?
Questions and answers