Table of Contents
Advertisement
NOTICE: SAVE THESE INSTRUCTIONS
model(s):
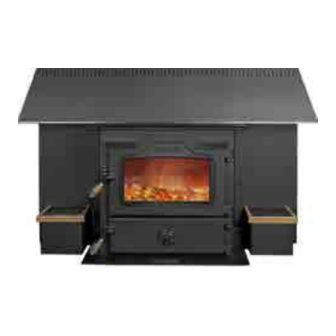
Magnafire Elite Coal Fireplace Insert
PlEASE rEAd ThIS ENTIrE mANuAl bEFOrE YOu INSTAll ANd uSE YOur NEw rOOm hEATEr. FAIlurE TO
FOllOw INSTruCTIONS mAY rESulT IN PrOPErTY dAmAgE, bOdIlY INjurY, Or EvEN dEATh.
lISTEd FOr uSE IN ThE u.S. ONlY. NOT SuITAblE FOr INSTAllATION IN mObIlE hOmES
IF ThIS FIrEPlACE INSErT IS NOT PrOPErlY INSTAllEd, A hOuSE FIrE mAY rESulT. FOr YOur SAFETY,
FOllOw INSTAllATION dIrECTIONS.
CONTACT lOCAl buIldINg Or FIrE OFFICIAlS AbOuT rESTrICTIONS ANd INSTAllATION INSPECTION
rEQuIrEmENTS IN YOur ArEA.
CONTACT YOur lOCAl AuThOrITY (SuCh AS muNICIPAl buIldINg dEPArTmENT, FIrE dEPArTmENT, FIrE
PrEvENTION burEAu, ETC.) TO dETErmINE ThE NEEd FOr A PErmIT.
CETTE guIdE d'uTIlISATION EST dISPONIblE EN FrANCAIS. ChEz vOTrE CONCESSIONNAIrE dE hArmAN®
hOmE hEATINg.
Installation & Operating manual
SAFETY NOTICE
SAvE ThESE INSTruCTIONS.
!
hOT SurFACES!
Glass and other surfaces are hot during
operation and cool down.
hot glass will cause burns.
• Do not touch glass until it is cooled
• NEVER allow children to touch glass
• Keep children away
• CAREFULLY SUPERVISE children in same room as
stove.
• Alert children and adults to hazards of high temperatures.
high temperatures may ignite clothing or other
flammable materials.
• Keep clothing, furniture, draperies and other flammable
materials away.
WARNING
3-90-70745R16_08/13
Advertisement
Table of Contents

Related Manuals for Harman Magnafire Elite Coal


Summary of Contents for Harman Magnafire Elite Coal
-
Page 1: Safety Notice
IN YOur ArEA. CONTACT YOur lOCAl AuThOrITY (SuCh AS muNICIPAl buIldINg dEPArTmENT, FIrE dEPArTmENT, FIrE PrEvENTION burEAu, ETC.) TO dETErmINE ThE NEEd FOr A PErmIT. CETTE guIdE d'uTIlISATION EST dISPONIblE EN FrANCAIS. ChEz vOTrE CONCESSIONNAIrE dE hArmAN® hOmE hEATINg. SAvE ThESE INSTruCTIONS. -
Page 3: Table Of Contents
Table Of Contents Safety Considerations Assembly & Installation venting & Chimneys wiring diagram grate System warnings & Special Instructions Operation & maintenance warranty Service & maintenance log = Contains updated information manufactured by: a Division of Hearth and Home Technolgies 352 Mountain House Road Halifax, PA 17032 www.harmanstoves.com... -
Page 4: Safety Considerations
SAFETY 1.1 KEEP ChIldrEN AwAY -- mAY CAuSE SErIOuS 1.3 CurINg PAINT burNS During the first few hours of burning, a blue smoke will be CAuTION: All SurFACES OF STOvE ArE hOT, dO observed rising from the painted surface of the stove. It is NOT TOuCh. KEEP ChIldrEN AwAY. SErIOuS burNS advisable to increase the amount of fresh air in the room during wIll rESulT IF TOuChEd. ThIS IS A hEAT PrOduCINg this breaking-in period. This may be achieved by opening APPlIANCE. -
Page 5: Assembly & Installation
ASSEmblY & INSTAllATION 2.1 PArTS INSPECTION 2. Positive connect method; Similarly, this method employs Upon receipt of your Harman® Insert, please be sure you the use of a stainless steel liner, however the liner is have all of the pieces. You should find the following: run the entire length of the chimney. It is not necessary 1. Ash Pan to seal around the venting at the damper, however the 2. Shaker Handle proper flashing must be used at the top of the chimney to 3. Manual and Warranty ensure that rain and Stainless Steel 4. Steel Flue Plate (see illustration in section 2.2) other elements do not Flex Pipe 5. Door Kit - Separate carton... - Page 6 ASSEmblY & INSTAllATION Align the holes in the wings with the holes in the insert Next, slide the insert into the fireplace making sure that the and begin inserting the screws. Note that there is a right front tab of the flue adapter is resting on top of the insert. This tab may now be used as a guide to help locate the wing and a left wing. connector base on the flue opening of the insert. Begin After the side wings are installed, the top wing can be sliding the insert in place while guiding the connector base installed. The tabs on the top wing slide behind the into its proper location. With the adapter close to centered bottom wing and the tabs on the bottom wing slide behind on the top of the insert body, the hooks at the back side of...
- Page 7 ASSEmblY & INSTAllATION Next, install the draft control onto the ash door. Thread The last step in assembly is the shaker handle. The shaker the bolt through the knob and install one of the nuts. Slip handle is mounted on the lower left front of the insert the remaining end of the bolt through the door and install with the two hex-head bolts and lock-washers already in the second nut. Adjust the nut locations so that the draft the shaker handle mount. If you removed the grates for control stops open at about 3/8" from the door surface, installation, make sure they are installed properly. Refer while still being able to close against the door. to the illustration below. Shaker Handle Shaker Handle Mount - welded to shaker bar Grates Grate Link The next step is to install the glass and trim. Start by placing Shaker Block the glass frame face-down on a flat surface. Be sure the (welded to stove glass itself has the gasketting installed on the shorter ends body) only. The non gasketed top and bottom allow for air-wash and secondary air. Lay the glass into the frame, Now lift the load door off of the stove and lay it down onto the glass Shaker Bar Weldment frame. Secure the frame to the door using (4) Flange-head bolts provided. While the door is still laying flat, install the top trim onto the door with (2) Hex-head bolts.
-
Page 8: Venting & Chimneys
vENTINg 3.1 TYPES OF ChImNEYS If your masonry chimney has not been used for some time, have it inspected by a qualified person (building inspector, fire The chimney is one of the most important, yet most neglected department personnel, etc.). If a listed or certified manufactured and misunderstood portion of any solid fuel burning installation. chimney is to be used, make certain it is installed in accordance We do not recommend that the stove be connected to a chimney with the manufacturer's instructions and all local and state codes. shared by other heating devices. (See Fig. F & G, note roof clearance.) ThE STOvE muST bE CONNECTEd TO ITS OwN TIlE- 3.2 COmmON ChImNEY PrOblEmS lINEd FluE. A mINImum FluE SIzE OF 8" X 8" IS In order to have a proper operating solid fuel heating system, NECESSArY FOr PrOPEr OPErATION ANd APPrOvEd the chimney must be capable of providing the draft required. - Page 9 vENTINg G. Elbow Restrictions - The flue pipe is connected to the 3.3 whAT TO dO whEN YOu hAvE A PrOblEm. chimney with too many elbows, reducing the draft the A. Smoke Puffs From Your Stove. chimney can provide. 1. Check the chimney draft. With a good fire burning, the H. Multiple Venting - No more than one device shall vent into chimney should supply .06 " updraft. the same chimney flue. 2. Check draft controls for proper operation. ThE mOST ImPOrTANT ThINg TO rEmEmbEr AbOuT 3. Check the chimney and be sure it is clean.
-
Page 10: Wiring Diagram
ElECTrICAl - wIrINg dIAgrAm 4.1 wArNINgS Turn off electric power at fuse box or circuit breaker panel before making any line voltage connections. Follow local electrical codes. Be sure to route power so that it doesn't come in contact with the stove. ImPOrTANT! All wIrINg ShOuld bE dONE IN ACCOrdANCE wITh lOCAl ANd STATE COdES. 3-90-70745R16_08/13... -
Page 11: 5.1 Grate System
5.1 grATE SYSTEm wArNINgS & SPECIAl INSTruCTIONS A. heavy-duty cast iron grate system - The functions of a 6.1 blower: grate system are to support the coal and at the same time Your Harman® insert is provided with a blower system. This provide air flow through the grates to the coal. Harman® system is not only designed to distribute heat throughout grates have a maximum amount of air flow to produce an your home but serves a critical need in the design system even burning fire. Another function is to remove the ash from of the insert. Extremely high heats are generated inside the the coal bed by grinding, breaking, or shaking them through insert and can do much damage to the heat exchanger and the grates. Harman® grates provide a variable amount of... -
Page 12: Operation & Maintenance
mAINTENANCE & OPErATION Section 7: PrEvENTIvE mAINTENANCE INSTruCTIONS Section 8: OPErATINg INSTruCTIONS 7.1 PErIOdIC ANd NOrmAl EvErYdAY mAINTENANCE 8.1 STArTINg A COAl FIrE grates- Keep ash drawer emptied. Failure to do this will Take about eight sheets of newspaper, crumble them into cause grates to warp. - Page 13 OPErATION 8.3 INCrEASINg hEAT FrOm A lOw FIrE Best results from shaking with Harman® grates will occur if short "choppy" strokes are used rather than long, even strokes. Every effort should be made not to let a coal fire burn too long so that the fire has started to die. This will cause the The amount of shaking is critical. Too little or too much, either reloading process to be much longer, and there is a good can result in the extinguishing of a fire due to blocked air flow. possibility of losing the fire. The proper amount normally occurs when red coals first start to drop through onto the bed of ashes. Do not shake or stir with a low fire. 8.5 drAFT CONTrOlS Open the draft control wide or open the The heat output of the coal is controlled by the primary draft ash cleanout door to get the maximum draft, but make sure control on the bottom door. Experience will dictate the proper you close the ash door as soon as a reasonable fire has settings for heat requirements.
- Page 14 SAFETY 8.7 SAFETY Whenever a loading door is opened, it should always be cracked slightly to allow oxygen to enter and burn any combustion gases that are present before fully opening. Failure to do this could result in sudden ignition of the unburned gases when the door is opened. A stove should never be filled with excess coal so that the flue gas exit is blocked or impeded in any way. Burning coal generates carbon monoxide. If the flue gas exit is blocked, the carbon monoxide can be forced out of the stove into the room, with possibly fatal consequences.
-
Page 15: Warranty
hearth & home Technologies lImITEd lIFETImE wArrANTY Hearth & Home Technologies, on behalf of its hearth brands (”HHT”), extends the following warranty for HHT gas, wood, pellet, coal and electric hearth appliances that are purchased from an HHT authorized dealer. wArrANTY COvErAgE: HHT warrants to the original owner of the HHT appliance at the site of installation, and to any transferee taking ownership of the appliance at the site of installation within two years following the date of original purchase, that the HHT appliance will be free from defects in materials and workmanship at the time of manufacture. After installation, if covered compo- nents manufactured by HHT are found to be defective in materials or workmanship during the applicable warranty period, HHT will, at its option, repair or replace the covered components. HHT, at its own discretion, may fully discharge all of its obligations under such warranties by replacing the product itself or refunding the verified purchase price of the product itself. The maximum amount recoverable under this warranty is limited to the purchase price of the product. This warranty is subject to conditions, exclusions and limitations as described below. wArrANTY PErIOd: Warranty coverage begins on the date of original purchase. In the case of new home construction, warranty coverage begins on the date of first occupancy of the dwelling or six months after the sale of the product by an independent, authorized HHT dealer/ distributor, whichever occurs earlier. The warranty shall commence no later than 24 months following the date of product shipment from HHT, regardless of the installation or occupancy date. The warranty period for parts and labor for covered components is produced in the following table. The term “Limited Lifetime” in the table below is defined as: 20 years from the beginning date of warranty coverage for gas appliances, and 10 years from the beginning date of warranty coverage for wood, pellet, and coal appliances. These time periods reflect the minimum expected useful lives of the designated components under normal operating conditions. Warranty Period HHT Manufactured Appliances and Venting Components Covered Parts Labor Wood Pellet Coal Electric Venting Wood All parts and material except as covered by Conditions, 1 Year... - Page 16 wArrANTY CONdITIONS: • This warranty only covers HHT appliances that are purchased through an HHT authorized dealer or distributor. A list of HHT authorized dealers is available on the HHT branded websites. • This warranty is only valid while the HHT appliance remains at the site of original installation. • This warranty is only valid in the country in which the HHT authorized dealer or distributor that sold the appliance resides. • Contact your installing dealer for warranty service. If the installing dealer is unable to provide necessary parts, contact the nearest HHT authorized dealer or supplier. Additional service fees may apply if you are seeking warranty service from a dealer other than the dealer from whom you originally purchased the product. • Check with your dealer in advance for any costs to you when arranging a warranty call. Travel and shipping charges for parts are not covered by this warranty. wArrANTY EXCluSIONS: This warranty does not cover the following: • Changes in surface finishes as a result of normal use. As a heating appliance, some changes in color of interior and exterior surface finishes may occur. This is not a flaw and is not covered under warranty. • Damage to printed, plated, or enameled surfaces caused by fingerprints, accidents, misuse, scratches, melted items, or other external sources and residues left on the plated surfaces from the use of abrasive cleaners or polishes. • Repair or replacement of parts that are subject to normal wear and tear during the warranty period. These parts include: paint, wood, pellet and coal gaskets, firebricks, grates, flame guides, batteries and the discoloration of glass. • Minor expansion, contraction, or movement of certain parts causing noise. These conditions are normal and com- plaints related to this noise are not covered by this warranty. • Damages resulting from: (1) failure to install, operate, or maintain the appliance in accordance with the installation instructions, operating instructions, and listing agent identification label furnished with the appliance; (2) failure to install the appliance in accordance with local building codes; (3) shipping or improper handling; (4) improper opera- tion, abuse, misuse, continued operation with damaged, corroded or failed components, accident, or improperly/ incorrectly performed repairs; (5) environmental conditions, inadequate ventilation, negative pressure, or drafting caused by tightly sealed constructions, insufficient make-up air supply, or handling devices such as exhaust fans or forced air furnaces or other such causes; (6) use of fuels other than those specified in the operating instructions; (7) installation or use of components not supplied with the appliance or any other components not expressly authorized and approved by HHT; (8) modification of the appliance not expressly authorized and approved by HHT in writing;...
-
Page 17: Service & Maintenance Log
Service & maintenance log Date Of Service Performed By Description Of Service 3-90-70745R16_08/13... - Page 18 Service & maintenance log Date Of Service Performed By Description Of Service 3-90-70745R16_08/13...
- Page 19 3-90-70745R16_08/13...
- Page 20 At Harman®, we build each product to a standard, not a price. (Signature of Boxer) Your premium quality hearth product designed and assembled by the experienced and skilled members at Harman® in Halifax, PA, USA. Proudly Printed On 100% Recycled Paper...
Need help?
Do you have a question about the Magnafire Elite Coal and is the answer not in the manual?
Questions and answers