Harman Accentra Installation & Operating Manual
Pellet insert
Hide thumbs
Also See for Accentra:
- Installation manual ,
- Installation & operating manual (44 pages) ,
- Owner's manual (32 pages)
Table of Contents
Advertisement
Installation & Operating manual
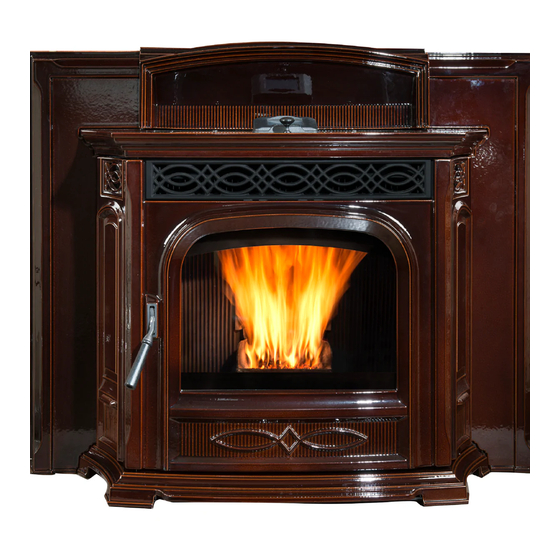
The harman Accentra Pellet Insert
This Fireplace insert may be installed into a masonry fireplace, an approved manufactured wood burning
fireplace (see page 25), Or, It may be built in to a wall or mantle system when using the optional zero clearance
cabinet (see page 26).
"Ce manuel est disponible en Français sur demande"
SAFETY NOTICE
PlEASE rEAd ThIS ENTIrE mANuAl bEFOrE YOu INSTAll ANd uSE YOur NEw rOOm hEATEr. FAIlurE
TO FOllOw INSTruCTIONS mAY rESulT IN PrOPErTY dAmAgE, bOdIlY INjurY, Or EvEN dEATh.
FOr uSE IN ThE u.S. ANd CANAdA. SuITAblE FOr INSTAllATION IN mObIlE hOmES
IF ThIS APPlIANCE IS NOT PrOPErlY INSTAllEd, A hOuSE FIrE mAY rESulT. FOr YOur SAFETY, FOllOw
INSTAllATION dIrECTIONS. dO NOT uSE mAkEShIFT COmPrOmISES.
CONTACT lOCAl buIldINg Or FIrE OFFICIAlS AbOuT rESTrICTIONS ANd INSTAllATION INSPECTION
rEQuIrEmENTS IN YOur ArEA.
CONTACT YOur lOCAl AuThOrITY (SuCh AS muNICIPAl buIldINg dEPArTmENT, FIrE dEPArTmENT, FIrE
PrEvENTION burEAu, ETC.) TO dETErmINE ThE NEEd FOr A PErmIT.
CETTE guIdE d'uTIlISATION EST dISPONIblE EN FrANCAIS. ChEz vOTrE CONCESSIONNAIrE dE hArmAN.
SAvE ThESE INSTruCTIONS.
3-90-00674R20_08/12
Advertisement
Table of Contents

Subscribe to Our Youtube Channel
Related Manuals for Harman Accentra


Summary of Contents for Harman Accentra
-
Page 1: Safety Notice
IN YOur ArEA. CONTACT YOur lOCAl AuThOrITY (SuCh AS muNICIPAl buIldINg dEPArTmENT, FIrE dEPArTmENT, FIrE PrEvENTION burEAu, ETC.) TO dETErmINE ThE NEEd FOr A PErmIT. CETTE guIdE d'uTIlISATION EST dISPONIblE EN FrANCAIS. ChEz vOTrE CONCESSIONNAIrE dE hArmAN. SAvE ThESE INSTruCTIONS. 3-90-00674R20_08/12... - Page 2 Harman Accentra Pellet Insert Label measures: 11" high X 6-3/4"wide Modèle : ACCENTRA INSERT Appareil de chauffage à granulés de bois Tested and Portland Listed By Oregon USA Serial No. de série: Test réalisés par OMNI-Test Laboratories, Inc. Report #/Rapport # 135-S-12-2 BARCODE LABEL Tested to/Testé...
-
Page 3: Table Of Contents
As with all Harman pellet stoves, maintenance is minimal and cleaning is easy. The Accentra Insert lets you burn close to a ton of pellets before ash removal is needed. And what is even better, the Harman Insert Track System lets you slide the Harman Accentra Pellet Insert insert out of the fireplace so that it can be cleaned or serviced without having to disconnect the venting system. - Page 4 Automatic Start up Starting First Fire Igniter Switch to "AuTO" (up position) Make sure the unit is plugged into a properly grounded, 120 VAC, 60 Hz electrical source. The power light should be the only light lit. Note: be sure there is no fuel or other combustibles See Note 7.
- Page 5 Automatic Ignition/Operation The Accentra Insert is more than just automatic ignition, it is also automatic temperature control. The automatic system will allow the fire size to be adjusted to match the heating needs and even put the fire out if necessary. If heat is needed after the fire is out, the Accentra Insert will automatically re-ignite and adjust the fire size to match the heating need.
- Page 6 manual Start up Starting First Fire Igniter Switch to "mANuAl" (down position) Make sure the unit is plugged into a 120 VAC, 60 HZ electrical source. The power light should be the only Fig. 6 light lit. NOTE: be sure there is no fuel or other combustibles in the ash pan prior to lighting.
-
Page 7: Automatic Operation
Ignition/Operation The Accentra Insert is capable of manual operation. This also allows the operator to manually control operation during an emergency (i.e. igniter failure, when using a 502H battery backup, or when using certain generators.) The unit can be switched between "AUTO" and "MANUAL" at any time during operation. -
Page 8: Esp Control
Fahrenheit. It also allows you to adjust the stove temperature DDM monitor supplied to vary the distribution blower setting, while in Stove Temp Mode, using the inner scale to Harman Dealers speed by turning the knob to the marked from 1 to 7. exclusively. - Page 9 Installation how to reduce the weight for Installation 1. Remove the top/lid assembly and side panels. • Note: removal of the cast hopper lid itself is NOT necessary or recommended. • Note: The hopper lid must be in the "OPEN" position bolts require a before the top/lid assembly can be lifted off or reinstalled 3/8"...
- Page 10 Installation removing the Center medallion • Lift up on the 2 bottom corners of the medallion until it is higher than the top of the flame guide. • Pull the bottom edge of the medallion front approximately 1 inch. • Pull downward on the corners of the medallion until the top is released from the 2 retainers that keep the top aligned when in place.
- Page 11 Installation beginning Installation 3" Outside Air starter collar ImPOrTANT: The mounting frame/surround assembly and flue piping is the most critical part of the installation and must be done correctly and installed securely. 1. Choose the chimney configuration that is best Notch suited for the installation.
- Page 12 • Cut the wire-ties looping the cord to the left • Re-route the cord along the top of the steel angle and down the right side. • Re-tie (not supplied by Harman) the wire through the notches provided in the mounting frame. Then down the right side rail.
- Page 13 Installation 7. If the room sensor is used as a return air sensor 8. Install the (4) 3/8-16 x 1" leveling bolts into the rather than a room thermostat/sensor, the black cable threaded holes in the bottom pan of the mounting shell. will not be used.
- Page 14 Installation * Floor protection must be used from hearth opening to 6" (152mm) in front of door glass and 6" (152mm) to each side of the stove body to protect combustibles from hot ashes. A minimum size will be 16.5" deep by 30"...
- Page 15 Installation 15. Install the cast side panels by sliding them down Connecting the ground from the wing to the over the lasered hinge pin. Note: Check for rotational stove body swing, but finish with them in the open position. The cast side panels may need adjustment after the stove •...
- Page 16 Installation 19. Inspect the silicone sponge gasket on the top edge Connecting the room Sensor of the hopper. Connecting the room sensor to the blue twisted wires • If it is okay, put the cast top/hopper lid assembly (see from the control board: Fig.
- Page 17 Installation 22. Slide the stove body into the mounting frame. Cast Side Panel Installation • Note: The two spring latches on the bottom • The stove body must be pulled out of the mounting right and left side of the body must be in the proper frame several inches to install the cast side panels.
- Page 18 Installation wiring log Set Option Always disconnect the power cord before the unit is pulled from the mounting frame. As you can see, the control board is easily accessible from the rear with the body pulled out of the frame, even if it is only pulled out several inches.
- Page 19 2. Close the hopper lid and front view door. Neither conditions. pellets or a fire are required for this test. The control board on the Accentra Insert is equipped 3. With the mode selector in the "OFF" position, turn with a low draft adjustment port. Located on the control the feed adjuster to "TEST".
- Page 20 When installing the Accentra in a mobile home several operate the Accentra Insert. Failure to do so may result requirements must be followed: in damage to property or personal injury and may void 1.
-
Page 21: Venting
4" Pl Vent Pipe: 14 ft. Vertical w/1-90 and 12 lineal ft. horizontal* Outside Air: harman home heating and hearth & home If additional 4" Pl vent fittings are required, the Technologies recommend attaching outside air in overall length must be reduced by:... -
Page 22: Vent Configurations
For this reason and the fact that the Accentra Insert operates with a positive vent pressure, we specify that the joints also be sealed with silicone. - Page 23 See Page 22. for information This method provides excellent venting with 100% on the optional Harman outside air which is the most efficient operation of this Adjustable Stainless Steel unit. This method also provides natural draft in the event Intake Extension.
- Page 24 See page 14, Fig. 27 & 29. With a sealed plate. (Not 100% outside air kit the outside air can be installed in a Harman product.) the same manner as the flue pipe. Stainless Steel 3" Flex Outside Air Inlet 12"...
- Page 25 14 must also be followed. Fig. 53 Note: If the harman Accentra Insert is installed into a factory built wood burning fireplace, this label (harman part # 3-90-00675) muST be attached to the altered fireplace. This label is included in the manufactured fireplace installation kit.
- Page 26 Accentra Insert zero Clearance Cabinet Sample mantel System Harman Zero Clearance cabinet (top flue only) Part #1-00-674070 Insert Body Insert Wing & Mounting Frame See your dealer for part details and installation instructions. Fig. 55 be sure to use approved...
- Page 27 venting H. A vent must not be installed within 3 feet (90 cm) requirements for Terminating the venting above a gas meter/regulator assembly when wArNINg: venting terminals must not be recessed measured from the horizontal center-line of the into a wall or siding. regulator.
-
Page 28: Maintenance
If the stove’s glass is cracked or broken, you must replace it before operating your stove. Remove pieces carefully. Replace glass only with Harman replacement glass; do not use substitutes. Carefully remove damaged glass, gasket material, and hold down clips (set aside). - Page 29 maintenance - burn Pot burn Pot Cleaning and maintenance Whenever adding fuel, take the opportunity to clean the burn pot.(weekly at minimum) • Scrape the top holed surface and sides of the burn pot down to auger tube.(Fig 58) It is not necessary to completely remove all material from the burn pot.
- Page 30 maintenance - Cleaning monthly Cleaning- continued: There is a 2" square exhaust tube on each side (lower left and right corners) of the firebox. They can only be seen with the cast heat exchanger covers removed. Cleaning the heat Exchanger tubes Using the cleaning brush provided, clean these tubes after every 1 ton of pellets are used.
- Page 31 maintenance - Cleaning Feeder Chamber This chamber may get a buildup of fines from the feeder mechanism movement. This area should be checked and cleaned at least once a year. To remove the feeder cover: • Remove the 5/16" wing nut. •...
- Page 32 motor & Component locations 3-90-00674R20_08/12...
-
Page 33: Trouble-Shooting
Fuel blocked. 3. The air chamber under the burnpot may be filled The Accentra is approved for burning any grade of with fines and small bits of ash. pelletized bio-mass fuel. It is also approved for burning 4. The holes in the burnpot may be getting filled with shelled corn in a mixture with wood pellets, up to 50%. -
Page 34: Specifications
Specifications weight 450 lbs. blower 180 cfm hopper Capacity 57 lbs. (24" hopper #1-90-00674) Fuel wood Pellets Outside Air Size 3 inches Fuse rating 6 amp bTu range 0 to 42,000 Feed rate .75 lbs./hr. on minimum(on maintenance) 5 lbs./ hr. on maximum vent Size 4 inch Pellet vent Pipe, standard, 3 inch Pellet vent Pipe, option... -
Page 35: Wiring Diagram
Accentra Insert wiring diagram DISTRIBUTION BLOWER 3-90-00674R20_08/12... -
Page 36: Warranty
Hearth & Home Technologies Inc. LIMITED LIFETIME WARRANTY Hearth & Home Technologies Inc., on behalf of its hearth brands (”HHT”), extends the following warranty for HHT gas, wood, pellet, coal and electric hearth appliances that are purchased from an HHT authorized dealer. WARRANTY COVERAGE: HHT warrants to the original owner of the HHT appliance at the site of installation, and to any transferee taking ownership of the appliance at the site of installation within two years following the date of original purchase, that the HHT appliance... - Page 37 WARRANTY CONDITIONS: • This warranty only covers HHT appliances that are purchased through an HHT authorized dealer or distributor. A list of HHT authorized dealers is available on the HHT branded websites. • This warranty is only valid while the HHT appliance remains at the site of original installation. •...
-
Page 38: Service Parts
Accentra (Insert) Service Parts beginning manufacturing date: N/A Pellet Insert Ending manufacturing date: Active 22” hopper: 20” hopper: 24” hopper: 1-90-00675-1 (Black) 1-90-00676-1 (Black) 1-90-00674-1 (Black) retired units 1-90-00674-2 (Charcoal) (june 2011) 1-90-00675-2 (Charcoal) (june 2011) 1-90-00676-2 (Charcoal) (june 2011) - Page 39 Accentra (Insert) Service Parts beginning manufacturing date: N/A Ending manufacturing date: Active IMPORTANT: THIS IS DATED INFORMATION. When requesting service or replacement Stocked parts for your appliance please provide model number and serial number. All parts listed in this manual may be ordered from an authorized dealer.
- Page 40 Accentra (Insert) Service Parts beginning manufacturing date: N/A Ending manufacturing date: Active IMPORTANT: THIS IS DATED INFORMATION. When requesting service or replacement Stocked parts for your appliance please provide model number and serial number. All parts listed in this manual may be ordered from an authorized dealer.
- Page 41 Accentra (Insert) Service Parts beginning manufacturing date: N/A Ending manufacturing date: Active Pre Serial Number 008240096 Feeder Assembly 37.2 37.3 37.1 37.4 37.5 37.6 37.12 37.11 37.7 37.8 37.9 37.10 IMPORTANT: THIS IS DATED INFORMATION. When requesting service or replacement Stocked parts for your appliance please provide model number and serial number.
- Page 42 Accentra (Insert) Service Parts beginning manufacturing date: N/A Ending manufacturing date: Active Post Serial Number 008240096 Feeder Assembly 38.1 38.12 38.15 38.16 38.14 38.2 38.13 38.11 38.3 38.10 38.9 38.4 38.5 38.8 38.7 38.6 IMPORTANT: THIS IS DATED INFORMATION. When requesting service or replacement Stocked parts for your appliance please provide model number and serial number.
- Page 43 Accentra (Insert) Service Parts beginning manufacturing date: N/A Ending manufacturing date: Active IMPORTANT: THIS IS DATED INFORMATION. When requesting service or replacement Stocked parts for your appliance please provide model number and serial number. All parts listed in this manual may be ordered from an authorized dealer.
-
Page 44: Power Failures / Back-Up
Contact your dealer if you have questions about UPS compatibility with your appliance. harman Surefire 512h battery back-up The 512H connects to a 12 volt deep cycle battery that will run your appliance for up to eight (8) hours. It includes a trickle charge feature that keeps your battery charged when power is available. -
Page 45: Fuel Specifications
Fuel Specification details Fuel and Fuel Storage pellet fuel could turn back into sawdust which does not Pellet fuel quality can fluctuate from manufacturer to flow properly through the feed system. manufacturer, and even from bag to bag. Size Hearth & Home Technologies recommends using only •... -
Page 46: Corn / Pellet Mixture
Addendum for Burning Corn and Pellet Fuel Mixture Harman pellet burning, free-standing stoves and inserts have been tested to ASTM E1509 for burning shelled corn in a mixture with wood pellets. The listing approves up to a 50% corn and 50% pellet mixture. Different mixtures of corn will have distinctively different burn characteristics depending upon moisture content and variety. - Page 47 Service & maintenance log Date Of Service Performed By Description Of Service 3-90-00674R20_08/12...
- Page 48 At Harman, we build each product to a standard, not a price. This powerful heating appliance boasts uncompromising attention to detail and helps preserve our planet by using environmentally responsible fuels. (Signature of Boxer) Your premium quality hearth product designed and assembled by the experienced and skilled members at Harman in Halifax, PA, USA.
Need help?
Do you have a question about the Accentra and is the answer not in the manual?
Questions and answers