Table of Contents
Advertisement
Owners &
Installation
LISTINGS AND CODE APPROVALS
These gas appliances have been
tested in accordance with AG 103,
NZS 5262 and have been certified by
the Australian Gas Association for
installation and operation as
described in these Installation and
Operating Instructions.
Your unit should be serviced
annually by an authorised service
person.
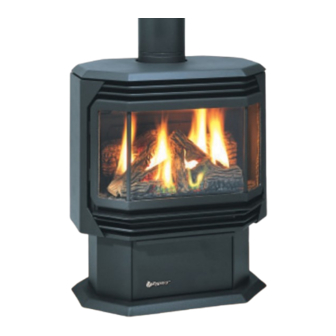
Freestanding Gas Stove
Geneva
PLEASE KEEP THESE INSTRUCTIONS
FOR FUTURE REFERENCE
WARNING:
Improper installation, adjustment, altera-
tion, service or maintenance can cause
injury or property damage. Refer to this
manual. For assistance or additional infor-
mation consult an authorized installer, serv-
ice agency or the gas supplier.
FOR YOUR SAFETY
Do not store or use gasoline or other flamma-
ble vapours and liquids in the vicinity of this
or any other appliance.
Installation and service must be performed
by an authorized installer, service agency or
the gas supplier.
Australia
New Zealand
P.O. Box 533
1-37 Mt
Braeside, Victoria
3195
P.O. Box 14349
Auckland 6.
918-082b
Models: F39-NG
FOR YOUR SAFETY
What to do if you smell gas:
Do not try to light any appli-
ance
Do not touch any electrical
switch: do not use any
phone in your building.
Immediately call your gas
supplier from a neighbour's
phone. Follow the gas sup-
plier's instructions.
If you cannot reach your
gas supplier, call the fire
department.
Wellington Hwy.Panmure,
F39-LPG
01/20/04
Advertisement
Table of Contents

Subscribe to Our Youtube Channel
Related Manuals for Masport Geneva F39-NG


Summary of Contents for Masport Geneva F39-NG
- Page 1 Owners & Installation Freestanding Gas Stove Models: F39-NG Geneva F39-LPG PLEASE KEEP THESE INSTRUCTIONS FOR FUTURE REFERENCE WARNING: FOR YOUR SAFETY Improper installation, adjustment, altera- What to do if you smell gas: tion, service or maintenance can cause Do not try to light any appli- injury or property damage.
- Page 2 Products International Ltd. The Masport Gas Series of hand crafted appliances has been designed to provide you with all the warmth and charm of a woodstove, at the flick of a switch. The models F39-NG, and F39-LPG of this series has been approved by AGA for both safety and efficiency. As it also bears our own mark, it promises to provide you with economy, comfort and security for many trouble free years to follow.
-
Page 3: Table Of Contents
General Safety Information ..........5 Installation Checklist ............6 Maintenance Clearances to Combustibles ........... 6 Locating Your Masport Gas Fire ........6 Maintenance Instructions ..........19 Combustion and Ventilation Air ........6 General Flue Maintenance ..........19 Louvre Installation ............7 Gold Plated Doors ............ -
Page 4: Safety Labels
This is a copy of the label that accompanies contents here for your review. The data plat is NOTE: Masport units are constantly being im- each MASPORT F39 Room Sealed Freestand- located on the inside of the drop down pedestal proved. -
Page 5: Installation
SPECIFICATIONS STAY AWAY TO AVOID BURNS OR CLOTHING IGNITION. 1) The appliance shall be installed in accord- Fuels: F39-NG is approved for use with NG. ance with the manufacturer's installation instructions,local gas fitting regulations, mu- YOUNG CHILDREN SHOULD BE F39-LPG is approved for use with liq- nicipal building codes, water supply regu- uefied petroleum gases (LPG). -
Page 6: Installation Checklist
(rate noted on label) after burning The combustion air from this appliance is drawn appliance for 15 minutes. from outside the building through the outer flue. Extra provision for combustion air inside the room is not required. Masport F39 Room Sealed Freestanding Gas Fire... -
Page 7: Louvre Installation
Dura-Flue Room Sealed System Model DV-GS side stove panel using 2 screws per with the F39-NG, and F39-LPG. The warranty fluing systems, in combination with the Masport side. will be voided and serious fire, health or other... -
Page 8: Exterior Flue Termination Locations
(IV)A flue terminal of this type shall not be located under a roofed area unless the roofed area is fully open on at least two sides and a free flow of air at the appliance is achieved. Masport F39 Room Sealed Freestanding Gas Fire... -
Page 9: Fluing Arrangements - Horizontal Terminations: All Systems
To set the Flue restriction as indicated in the diagram, simply loosen the screws and push the flue restrictor plate to the correct position. Tighten the screws. Flue Restrictor setting at Flue Restrictor setting at 31 Mj/h 40 Mj/h Masport F39 Room Sealed Freestanding Gas Fire... -
Page 10: Gas Connection
(clockwise) with a 1/8" from the piping system by closing flat screwdriver. Note: Screw should be its individual manual shut-off valve snug, but do not over tighten. during the testing. Masport F39 Room Sealed Freestanding Gas Fire... -
Page 11: System Data Chart
The factory setting should be sufficient for most installa- Manifold Pressure tions. .89 kPa 2.55kPa Electrical: 240 V. 1.13A 60Hz. Circulation: Variable speed fan, 125/75 CFM. Log Set: Ceramic fiber, 7 per set. Masport F39 Room Sealed Freestanding Gas Fire... -
Page 12: Conversion From Ng To Lpg
14) Check inlet and outlet pressures. 6) Pull off the pilot cap to expose the pilot 15) Check operation of flame control. orifice. 16) Check for proper flame appearance and glow on logs. Masport F39 Room Sealed Freestanding Gas Fire... -
Page 13: Conversion To Lower Btu
2 screws. 13) Check operation of flame control. Check for proper flame appearance and glow on logs. Embers Embers Position the Log Bracket Restrictor between the Rear Log Bracket and the burner. Masport F39 Room Sealed Freestanding Gas Fire... - Page 14 6) Place Front Left Log C)02-44 onto the 2 front pins as shown. 10) Place the notch in Center Log F)02-47 over B)02-56 E)02-45 Log E)02-45 and across the cutout on Log C)02-44 A)02-65. C)02-44 F)02-47 A)02-65 E)02-45 Notch Cutout Masport F39 Room Sealed Freestanding Gas Fire...
-
Page 15: Front Door Installation
CONTROL THERMOSTAT INSTALLATION (packaged separately) Use the Masport Remote Control Kit approved A wall thermostat may be installed if desired. for this unit. Use of other systems may void your Connect the wires as per the wiring diagrams. 1) Open the two side panels. -
Page 16: Wiring Diagram
This appliance is equipped with a three pronged (grounding) plug for your protection against shock hazard and should be plugged directly into a properly grounded three-prong receptacle. Do not cut or remove the grounding prong from this plug. Masport F39 Room Sealed Freestanding Gas Fire... -
Page 17: Operating Instructions
4) Turn ON the flame switch. move. Use a non-abrasive cleaner and NEVER clean the glass while it is hot. Masport F39 Room Sealed Freestanding Gas Fire... -
Page 18: Copy Of Lighting Plate Instructions
Blower: exactly. D) Do not use this appliance if any part has been under Masport gas appliances use high tech blow- B) BEFORE LIGHTING smell all around the appliance water. Immediately call a qualified service techni- area for gas. Be sure to smell next to the floor cian to inspect the appliance and to replace any part ers to push heated air farther into the room. -
Page 19: Maintenance
Top View of pilot flame Clean any fingerprints off before turning the PLIANCE. unit on. If the door starts to discolour, check the gasket seal and replace if nec- essary. Masport F39 Room Sealed Freestanding Gas Fire... -
Page 20: Log Replacement
GLASS REPLACEMENT Installing Glass: Your Masport stove is supplied with high tem- perature, 5 mm Neoceram ceramic glass that 1) Install both center will withstand the highest heat that your unit will and side glass produce. -
Page 21: Fan Maintenance
This appliance is equipped with a three pronged (grounding) plug for your protection against shock hazard and should be plugged directly into a properly grounded three-prong receptacle. Do not cut or remove the grounding prong from this plug. Masport F39 Room Sealed Freestanding Gas Fire... -
Page 22: Removing Valve
Masport high temperature paint. Note: Use a magnetic type screwdriver if possible. 8) Remove all 18 screws holding the burner tray assembly in place. Masport F39 Room Sealed Freestanding Gas Fire... -
Page 23: Replacement Parts List
30) 730-044 Rear Panel 31) 630-021 Fan Access Panel 32) 730-028 Firebox Baffle 33) 630-520 False Top Assy 36) 936-194 Gasket - Starter Collar/Air Passage 37) 936-197 Gasket - Flue Collar/ Starter Collar Masport F39 Room Sealed Freestanding Gas Fire... - Page 24 Left Top Log 94) 902-232 Center Log 95) 902-236 Middle Right Log 96) 902-230 Middle Left Log 97) 902-229 Front Right Log 98) 902-228 Front Left Log *Not available as a replacement part. Masport F39 Room Sealed Freestanding Gas Fire...
-
Page 25: F39 Door Assemblies
106) 940-323/P Side Glass 107) 936-243 560087 Glass Gasket 108) 940-322/P Centre Glass 111) * Door Frame Fibre Paper 112) 750-015 Door Glass Extrusion 208) 940-325/P Wrap Glass *Not available as a replacement part. Masport F39 Room Sealed Freestanding Gas Fire... - Page 26 _ _ _ _ _ _ _ _ _ _ _ _ _ _ _ _ _ _ _ _ _ _ _ _ _ _ _ _ _ _ _ _ _ _ _ _ _ _ _ _ _ _ _ _ _ _ _ _ _ _ _ _ _ _ _ _ _ _ _ _ _ _ _ _ _ _ _ _ _ _ _ _ _ _ _ _ _ _ _ _ _ _ _ _ _ ____________________________________________________________ __________________________________________________________ ____________________________________________________________ _______________________________________________________ _____________________________________________________ __________________________________________________________ _________________________________________________________ _________________________________________________________ ______________________________________________________ ______________________________________________________ _______________________________________________________________ ___________________________________________________________ __________________________________________________________ ____________________________________________________________ ____________________________________________________________ ____________________________________________________________ _____________________________________________________________ __________________________________________________________ __________________________________________________________ _____________________________________________________ ________________________________________________________ _________________________________________________________ _________________________________________________________ Masport F39 Room Sealed Freestanding Gas Fire...
-
Page 27: Warranty
WARRANTY THE MASPORT EXPRESS WARRANTY All new Masport Gas appliances are warranted, subject to the This Express Warranty Does Not Cover: following conditions, to be free from defects in material or 1. Defects, malfunctions or failures caused by incorrect workmanship under normal use. The Express Warranty on all... - Page 28 Printed in Canada © Copyright 2004, FPI Fireplace Products International Ltd. All rights reserved.
Need help?
Do you have a question about the Geneva F39-NG and is the answer not in the manual?
Questions and answers