
Related Manuals for Masport PITTSBURGH


Summary of Contents for Masport PITTSBURGH
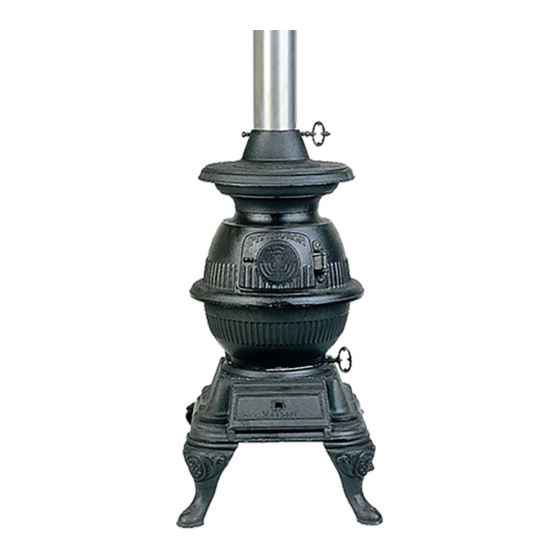
- Page 1 PITTSBURGH & KLONDIKE POT - BELLY STOVES INSTALLATION AND OPERATING INSTRUCTIONS...
-
Page 2: Table Of Contents
MANTEL-SHELF SHIELDING…............6 3. OPERATING INSTRUCTIONS ..............7 BEFORE LIGHTING THE FIRST FIRE..........7 CURING THE PAINT................. 8 LIGHTING THE FIRE................. 8 CONTROLLING THE FIRE..............9 REFUELLING..................10 SAFETY .................... 10 MAINTENANCE................. 11 STOVE DIMENSIONS............... 11 4. MASPORT PRODUCT WARRANTY............11... -
Page 3: Introduction
The minimum clearances to unprotected heat sensitive walls at the side and rear of the various stoves are shown in the table below. Rear clearances are measured from the back face of the flue, while side clearances are measured from the ring around the middle of the belly on PITTSBURGH & KLONDIKE Remember, these minimum clearances may be significantly reduced by suitable heat shielding. -
Page 4: Wall Shielding
To find the reduced minimum distances, multiply the figures in Table 1 by the appropriate clearance factor. EXAMPLE: A PITTSBURGH has a normal minimum rear clearance of 850mm and a side clearance of 900mm. The reduced minimum clearances for type A shielding would be 850 x 0.4 (340mm) at the rear, and 900 x 0.4 (360mm) at the side. -
Page 5: Wall Shield Sizes
If the rearward extension of the hearth is not limited by a wall heat screen, it must extend back from the stove feet by 300mm for the PITTSBURGH and 415mm for the KLONDIKE. The hearth must extend forward from the feet of all models by 375mm. The hearth must extend at least 610mm each side of the stove centreline. -
Page 6: Flue Installation
FLUE INSTALLATION The stove must be installed using a Masport approved flue kit A9320- 1&2 (including a ceiling plate). Approved flue kits are supplied with detailed fitting instructions which, if followed, will ensure that the installation will meet the required safety standards for performance and durability. -
Page 7: Operating Instructions
3. OPERATING INSTRUCTIONS BEFORE LIGHTING THE FIRST FIRE If your flue is a bright stainless steel one, remove all fingerprints and other marks by polishing with a household metal polish. Do not use harsh abrasives such as steel wool. After several firings, the flue will develop an attractive copper-coloured ‘bloom’, but any fingerprint marks will show permanently on this bloom if not removed prior to lighting. -
Page 8: Curing The Paint
(whether it is hot or cold), and to open the top door of the PITTSBURGH and KLONDIKE. Place thin strips of kindling wood on top of the crumpled paper in criss-cross fashion. A small amount of slightly heavier kindling wood should be placed on top of the thin kindling to build a small pyramid. -
Page 9: Controlling The Fire
Do not place heat sensitive materials such as drying clothes or fuel supplies near to the stove as permanent damage or a fire may result. It is important that the minimum stove to- wall distances shown on page 4 are maintained at all times. CONTROLLING THE FIRE STEADIHEAT CONTROL. -
Page 10: Refuelling
best avoided by moving from a very hot setting to a low setting in several steps over five or ten minutes. Remember, a roaring fire wastes fuel, as more of the heat is lost up the flue. If only a moderate heat output is needed, it is more efficient to have a small intense firebed rather than a large smouldering one. -
Page 11: Maintenance
Some models have a fibreglass cord gasket on the ash door. If this is damaged and may leak, replace it with a genuine Masport spare part. Your tipping grate will eventually need replacing. The new one can be inserted into the grate handle from inside the stove. No dismantling of the stove is necessary. -
Page 12: Masport Product Warranty
* Where a Masport product is covered by a parts and labour warranty, the warranty covers both the repair of the defective part or the provision of a spare part to replace the defective part and the installation of that part. - Page 13 1; or the Masport product was not purchased in Australia or New Zealand as a brand new product. Consumer Guarantees Our goods come with guarantees that cannot be excluded under the Australian Consumer Law. You are entitled to a replacement or refund for a major failure and for compensation for any other reasonably foreseeable loss or damage.
- Page 14 Goods presented for repair may be replaced by refurbished goods of the same type rather than being repaired. Refurbished parts may be used to repair the goods. Masport products are designed and supplied for normal domestic use. We will not be liable to you under this warranty for business loss or damage of any kind whatsoever.
- Page 15 ✃...
Need help?
Do you have a question about the PITTSBURGH and is the answer not in the manual?
Questions and answers