
Related Manuals for Ross ASI-310


Summary of Contents for Ross ASI-310
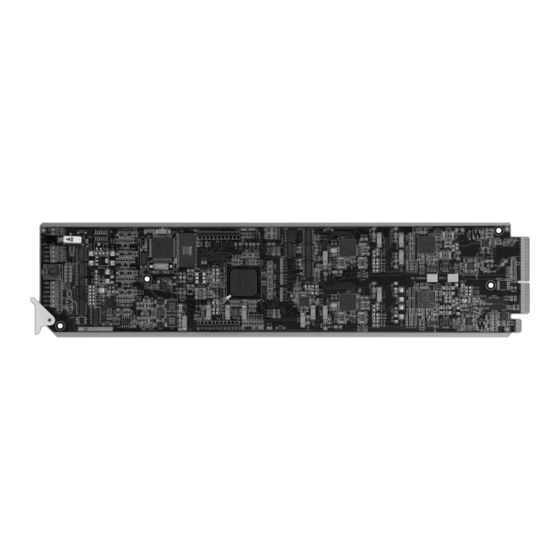
- Page 1 Ross Video Limited ASI-310 ASI-to-SMPTE 310 and SMPTE 310-to-ASI Converters User Manual...
- Page 2 The material in this manual is furnished for informational use only. It is subject to change without notice and should not be construed as commitment by Ross Video Limited. Ross Video Limited assumes no responsibility or liability for errors or inaccuracies that may appear in this manual.
-
Page 3: Important Safety Instructions
Important Regulatory and Safety Notices Before using this product and any associated equipment, refer to the “Important Safety Instructions” listed below to avoid personnel injury and to prevent product damage. Products may require specific equipment, and/or installation procedures to be carried out to satisfy certain regulatory compliance requirements. - Page 4 Notice — Changes or modifications to this equipment not expressly approved by Ross Video Limited could void the user’s authority to operate this equipment. CANADA This Class “A” digital apparatus complies with Canadian ICES-003.
- Page 5 The crossed-out wheeled bin symbol invites you to use these systems. If you need more information on the collection, reuse, and recycling systems, please contact your local or regional waste administration. You can also contact Ross Video for more information on the environmental performances of our products.
- Page 6 Company Address Ross Video Limited Ross Video Incorporated 8 John Street P.O. Box 880 Iroquois, Ontario Ogdensburg, New York Canada, K0E 1K0 USA 13669-0880 General Business Office: (+1) 613 • 652 • 4886 Fax: (+1) 613 • 652 • 4425 Technical Support: (+1) 613 •...
-
Page 7: Table Of Contents
Connections Overview ..................2-6 Software Upgrades....................... 2-9 User Controls Card Overview ........................3-2 Control and Monitoring ....................... 3-3 Status and Selection LEDs on the ASI-310............3-3 Configuration On-screen Display Settings....................4-2 ASI-to-310 Converter Settings .................... 4-3 310-to-ASI Converter Settings .................... 4-4 GPI/O Settings ........................ - Page 8 OSD Switch Overview ..................5-2 OSD Layout and Navigation ....................5-3 Using the Menus ........................5-4 Specifications Technical Specifications ...................... 6-2 Service Information Troubleshooting Checklist ....................7-2 Reset Button......................7-2 Warranty and Repair Policy ....................7-3 ii • Contents ASI-310 User Manual (Iss. 03)
-
Page 9: Introduction
Congratulations on choosing an openGear ASI-310 ASI to SMPTE 310 and SMPTE 310 to ASI Converters. Your ASI-310 is part of a full line of Digital Products within the openGear Terminal Equipment family of products, backed by Ross Video’s experience in engineering and design expertise since 1974. -
Page 10: Overview
± 2.8ppm. • For applications requiring even tighter frequency tolerance, or to ensure frequency coherence with house sync, the user can provide a 310 input and set the ASI-310 to lock its output bit rate to it. •... -
Page 11: Functional Block Diagram
Functional Block Diagram This section provides a functional block diagram that outlines the workflow of the ASI-310. 310 OUT EQUALIZE/ CONVERT RE-STAMP ASI IN SERIALIZE DESERIALIZE ASI-310 310 MON OUT GPI/Os TC/VCXO CONVERT 310 IN SERIALIZE ASI/OSD OUT 310-ASI Figure 1.1 Simplified Block Diagram — ASI-310 ASI-310 User Manual (Iss. -
Page 12: User Interfaces
For More Information... • on the required rear modules, refer to the section “Installing the ASI-310” on page 2-4 • on the card-edge controls, refer to the chapter “User Controls” on page 3-1. -
Page 13: Documentation Terms And Conventions
• “DashBoard” refers to the DashBoard Control System™. • “Frame” refers to DFR-8300 series frame that houses the ASI-310, as well as any openGear frames. • “GPI/O” means General Purpose Input-Output. This term is commonly used in the broadcast industry to refer to DC signals used by one device to control another. - Page 14 1–6 • Introduction ASI-310 User Manual (Iss. 03)
-
Page 15: Installation
Installation In This Chapter This chapter provides instructions for installing the ASI-310, installing the card into the DFR-8300 series frame, cabling details, and updating the card software. The following topics are discussed: • Before You Begin • Quick Start •... -
Page 16: Before You Begin
Unpacking Unpack each ASI-310 you received from the shipping container and ensure that all items are included. If any items are missing or damaged, contact your sales representative or Ross Video directly. -
Page 17: Quick Start
Quick Start Assuming you have an openGear frame, an ASI-310 card and a suitable rear module, the following steps will get you started with ASI-to-310 conversion: 1. Connect the frame to your LAN. Refer to the DFR-8300 Series User Manual and the MFC-8300 Series User Manual for details. -
Page 18: Installing The Asi-310
DFR-8321 series frames — The MDL-R20 Full Rear Module is required. Installing a Rear Module If the Rear Module is installed, proceed to the section “Installing the ASI-310” on page 2-5. Use the following procedure to install a Rear Module in your DFR-8300 series frame: 1. -
Page 19: Installing The Asi-310
Cards with many heat-producing components should be arranged to avoid areas of excess heat build-up, particularly in frames using convectional cooling. 2. Hold the ASI-310 by the edges and carefully align the card-edges with the slots in the frame. -
Page 20: Cabling For The Asi-310
310 output. The input signal is internally terminated in 75ohms when the ASI-310 is installed. When the ASI-310 is removed from the rear module, this input is terminated in the equipment connected to the 310 Out BNC. - Page 21 ASI-310 is removed from its slot, the rear module bypasses BNC 1 to BNC 3 directly. 310 Monitor — BNC 2 BNC 2 carries an inverted copy of the 310 output. When the ASI-310 card is removed from its slot, there is no output from this BNC.
- Page 22 Refer to Figure 2.4 for pinouts on the MDL-R10 and Figure 2.5 for pinouts on the MDL-R20. Figure 2.4 GPI/O Pinouts for the MDL-R10 Figure 2.5 GPI Pinouts for the MDL-R20 2–8 • Installation ASI-310 User Manual (Iss. 03)
-
Page 23: Software Upgrades
Software Upgrades This section provides instructions for upgrading the software for your ASI-310 using the DashBoard Control System™. Use the following procedure to upgrade the software on a ASI-310: 1. Contact Ross Technical Support for the latest software version file. - Page 24 2–10 • Installation ASI-310 User Manual (Iss. 03)
-
Page 25: User Controls
User Controls In This Chapter This chapter provides a general overview of the user controls available on the ASI-310. The following topics are discussed: • Card Overview • Control and Monitoring ASI-310 User Manual (Iss. 03) User Controls • 3–1... -
Page 26: Card Overview
ASI output is not in active use. 2. Menu Switch (SW2) The recommended user interface for the ASI-310 is DashBoard, running on a computer connected to the openGear frame through an Ethernet connection. If your frame does not have the LAN option, or you do not have access to a computer with DashBoard, you can use the on-screen display (OSD) in conjunction with the SW2. -
Page 27: Control And Monitoring
Control and Monitoring This section summarizes the LEDs on the ASI-310 card-edge. Refer to Figure 3.2 for the location of the LEDs. POWER LED (DS1) OSD LED (DS2) OSD Switch (SW1) DS3 LED DS4 LED ASI IN LED (DS5) ASI/OSD OUT LED (DS6) - Page 28 Rear Module When lit red, this LED indicates that the rear module connected to (DS7) the ASI-310 is not suitable for use with the ASI-310. Operation will not be correct. Green When lit green, this LED indicates the video is supported by the card.
-
Page 29: Configuration
Configuration In This Chapter This chapter explains how to use the user interface to set up the ASI-310. This discussion is based on the use of DashBoard through a network connection. The order of sections in this chapter follows the workflow required to setup the ASI-310 for operation. It is recommended that you proceed through the following sections in order to achieve the best possible understanding of the product. -
Page 30: On-Screen Display Settings
On-screen Display Settings If you are using the on-screen display feature of the ASI-310, you must configure the display options in the Settings tab in DashBoard. To configure the on-screen display settings: 1. Launch the DashBoard client on your computer. -
Page 31: Asi-To-310 Converter Settings
310 Output Clock to Free-running. If you set it to Lock to 310 Input, the converter would effectively lock its 310 clock to itself, which would produce unspecified and possibly non-compliant output signals. ASI-310 User Manual (Iss. 03) Configuration • 4–3... -
Page 32: 310-To-Asi Converter Settings
188-byte payload to achieve the desired total packet length. 3. Use the 310 Input Bit Rate to set the 310 input data rate. This must be set to the correct value. 4–4 • Configuration ASI-310 User Manual (Iss. 03) -
Page 33: Gpi/O Settings
The default is High, but it can be set to Low if needed to meet the interface requirements of other equipment. 4. To apply the new settings: • Click Accept. • Click Yes. ASI-310 User Manual (Iss. 03) Configuration • 4–5... -
Page 34: String Settings
String Settings The Edit Strings tab allows you to assign a name to this ASI-310 card, to distinguish it in DashBoard from other cards of the same type. It also lets you assign descriptive names to the GPI/O outputs. To configure a string: 1. -
Page 35: Alarm Settings
1. Select the Alarms Settings tab. Alarms Settings Tab 2. Select the Unsupported Rear Module box to report when the ASI-310 does not work properly with the installed rear module; for example, it may be missing connectors that are essential for the ASI-310's operation. -
Page 36: Monitoring
Monitoring This section provides an explanation of the status tabs available when using DashBoard to monitor the ASI-310. For a more complete description of DashBoard and its capabilities, refer to the DashBoard User Manual. Product Tab The Product tab displays read-only information that is useful in discussing the operation of the card with Ross Video’s Technical Support staff. -
Page 37: Gpio Status Tab
Alarm Counters tab provides a record of the number and types of errors that have occurred over time. You can clear these counters by clicking the Alarm Counters Reset button located on the Settings tab. ASI-310 User Manual (Iss. 03) Configuration • 4–9... - Page 38 4–10 • Configuration ASI-310 User Manual (Iss. 03)
-
Page 39: Using The On-Screen Menus
This chapter explains how to use the Menu switch (SW2) functions available on the On-screen Display (OSD) of the ASI-310. It does not describe each available menu; for information on these, refer to the chapter “Configuration” on page 4-1. The purpose of this chapter is to explain how to navigate the menus and access the available functions and settings. -
Page 40: On-Screen Display Overview
“Card Overview” on page 3-2. OSD Switch Overview The Menu switch is used to navigate the ASI-310 menu system and configure item parameters. This switch is a five-direction, square, finger joystick. In In... -
Page 41: Osd Layout And Navigation
OSD Layout and Navigation When the ASI-310’s front OSD switch is in the normal “in” position, the OSD is off and its output jack is the output from the 310-to-ASI converter. To use the OSD, move it to the “out”... -
Page 42: Using The Menus
10. To switch to a different menu: press the Menu switch Up or Down repeatedly until the selection bar moves to the title. Press the Menu switch In. Return to step 3. 5–4 • Using the On-Screen Menus ASI-310 User Manual (Iss. 03) -
Page 43: Specifications
Specifications In This Chapter This chapter provides the technical specification information for the ASI-310. Note that technical specifications are subject to change without notice. The following topics are discussed: • Technical Specifications ASI-310 User Manual (Iss. 03) Specifications • 6–1... -
Page 44: Technical Specifications
Technical Specifications This section provides technical specifications for the ASI-310. Table 6.1 ASI-310 Technical Specifications Category Parameter Specification Number of Inputs 1 input: DVB-ASI (EN 50083-9) Signal Standards Accommodated 1 input: SMPTE 310 Transport Stream Inputs Impedance 75ohm terminating Equalization... -
Page 45: Service Information
Service Information In This Chapter This chapter contains the following sections: • Troubleshooting Checklist • Warranty and Repair Policy ASI-310 User Manual (Iss. 03) Service Information • 7–1... -
Page 46: Troubleshooting Checklist
Reset Button In the unlikely event of a complete card failure, you may be instructed by a Ross Technical Support specialist to perform a complete software reload on the ASI-310. -
Page 47: Warranty And Repair Policy
FIVE (5) years from the date of shipment from our factory. In the event that your ASI-310 proves to be defective in any way during this warranty period, Ross Video Limited reserves the right to repair or replace this piece of equipment with a unit of equal or superior performance characteristics. - Page 48 P.O. Box 880, Ross Video Incorporated Ogdensburg, New York, USA 13669-0880 Visit Us Please visit us at our website for: • Company information • Related products and full product lines • On-line catalog • News • Testimonials Ross Part Number: ASI310DR-004-03...
Need help?
Do you have a question about the ASI-310 and is the answer not in the manual?
Questions and answers